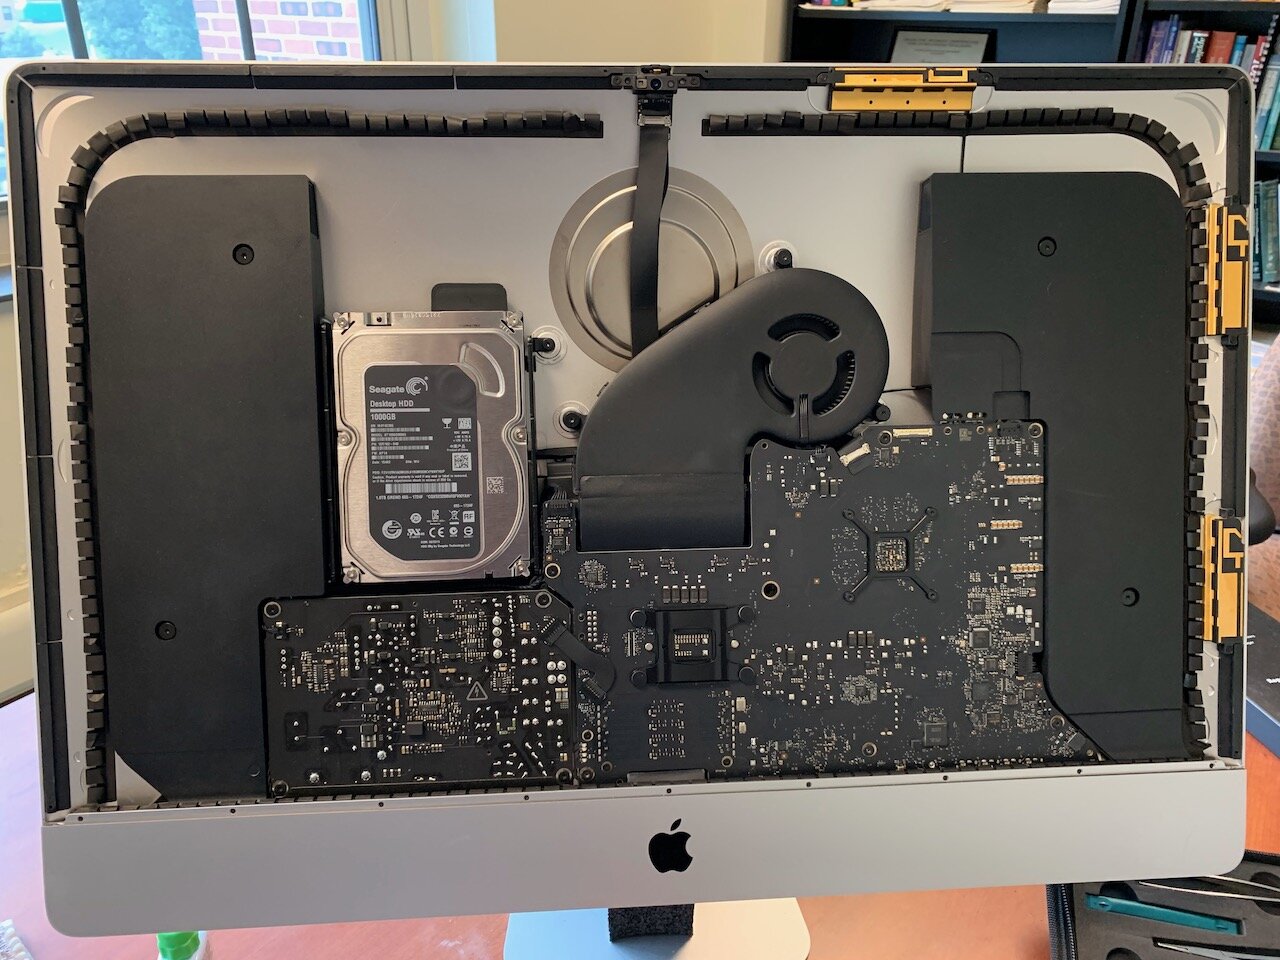
Late 2013 iMac 14,2 with screen removed.
Emboldened by my success upgrading my 5th generation iPod and frustrated by the slowness of one of my iMac’s I decided to see what end user upgrades are available for post-2012 iMacs. Officially not much can be upgraded internally. The 27-inch iMac has a RAM hatch on the back which an end user can open to install up to 32GB of RAM (or more in more recent iMacs). I felt like the performance bottleneck in my Late 2013 iMac14,2 was the 1TB spinning mechanical hard disk. It seemed to take far too long to login and to start applications compared to my Late 2014 Retina 5K iMac15,1 with a 512GB SSD (more on that later). My first thought was that a thunderbolt-connected external drive enclosure with 4 SSDs in RAID 0 for speed or RAID 5 for speed an safety would help. Four-bay thunderbolt enclosures are expensive and the iMac14,2 only has thunderbolt 1 support. Even the iMac15,1 only has thunderbolt 2 support. I resisted as long as I could, but eventually I saw no way around cutting open the iMac14,2 and installing an NVMe blade SSD. Since I was going to be opening up the iMac14,2 I figured I might as well perform any other upgrades that could squeeze some more speed and life out of the computer. This meant upgrading the RAM (very easy) and upgrading the CPU (more challenging). For anyone who may be considering doing this type of upgrade themselves, I will give a list of online resources and the specifics of some of my experiences. There were a few surprises along the way.
My starting point for information on this type of upgrade/modification of iMacs was the topic “A list of successful iMac 27" (2012-2019) SSD upgrades” hosted in the forums on the MacRumors website. There I learned that it was possible to install an NVMe blade SSD (from a variety of manufacturers) though I would need a special adapter as the connectors on Apple’s iMac motherboard and Apple blade drive are a proprietary design (the page linked describes the adapter as being for a MacBook, but it also works in an iMac). These adapters are small enough to be mailed in a padded envelope, so try not to lose it once it arrives. If you are adding an Apple-branded blade drive to your iMac, you will not need the adapter. I decided to go with a 1TB DATARAM NVMe blade drive, thinking this would exactly replace the 1TB HDD that was the performance damper. The iMac14,2 already had 16GB of RAM, but I decided to upgrade it to the maximum of 32GB with this kit. Finally the base iMac14,2 came with an Intel 3.2 GHz Core i5 (I5-4570) Processor and the fastest CPU that was compatible with the iMac14,2 was the Intel Core i7 4771 (I7-4771) Processor. This would still be a 4-core processor, but now with a base clock of 3.5 GHz and with hyperthreading. I did buy a used one, since at the time, the prices of new ones were higher than I wanted to pay. Finally, in addition to the NVMe drive, the RAM, and the CPU there are a few other items people should have if they are planning to open up a post-2012 iMac.
Foam service wedge (not absolutely necessary, but you’ll probably be glad you have it).
Cleaner for removing thermal paste.
New thermal paste (if replacing the CPU).
Heat sink for NMVe drive (not absolutely necessary, but a good idea).
General servicing kit for iMac (contains most of the tools needed to open the iMac and remove the various components).
As a warm-up for people who have never worked on an iMac, upgraders should install the new RAM (which is very easy and does not require opening the iMac) following the instructions in the guide from Apple.
Two good resources for step-by-step instructions on opening an iMac are iFixit’s guide for replacing the CPU (the guide for replacing/installing the NVMe drive outlines nearly the same steps) and OWC’s video. One important disassembly step mentioned in the video at approximately 3:36, but absent from the guide (it would come right after step 24) is the removal of the nine small (really small!) screws holding a small metal strip in place behind the bottom of the screen. The small metal strip either blocks dust from being sucked in through the bottom of the iMac or is an RF shield. I found that when it was left in place, I could not remove the right speaker of the iMac. One other thing to be careful of is unplugging the four AirPort/Bluetooth antennas. The connectors are small and fragile. Pull them up perpendicularly from the logic board. Also the tool needed to remove the 20.8 mm T25 spacer screw mentioned in step 51 was not included in iMac servicing kit. I was able to find it at my local hardware store.

iMac15,1 with the Retina 5K screen removed.

Antenna connectors for AirPort/Bluetooth module on logic board.
The first time (notice I said the first time) I opened the iMac it took about three hours to remove the various components, remove and clean the old CPU, apply thermal paste and install the new CPU, and install the adapter and NVMe drive. The image below shows the NVMe drive with the adapter and heat sink installed.

NVMe drive with heat sink and adapter.
If you look closely, you can see that the retaining screw (upper right-hand side of the image) is tilted at a 45-degree angle. I noticed it at the time, but thought it was due to extra length of the drive provided by the adapter. I did not realize it was due to the fact that I had not seated the adapter and drive all the way in. After reassembling the iMac and discovering that the iMac booted but could not see the NVMe drive and then taking it apart again, I realized that the drive is not seated until it makes an audible and tactile click. Then everything was fine. I decided to leave the 1TB hard disk in place and followed these instructions to create a 2TB fusion drive. The end result was a very noticeably more responsive iMac14,2. I feel like I will be able to happily use it for a few more years.
Since the iMac14,2 turned out well, I decided to see what I could do for my Retina 5K iMac15,1. It already had the top CPU (4.0GHz Intel Core i7-4790K) and 32GB of RAM, so any upgrade would be limited to replacing the 512GB SSD with something larger. I could amortize the cost of the tools needed to dis/reassemble the iMac, so all I needed was a SATA SSD. I settled on a 2TB Mercury Electra 6G from OWC, thinking all I would need to do is open the iMac, unplug the 512GB stock SSD, plug in the new SSD, and restore the system from my most recent Time Machine backup. Off I went thinking this would be a 30-minute upgrade. Opening the iMac went smoothly, but right away I saw something unexpected, there was no SATA SSD in the drive bay, just empty space. I had checked the Apple Menu -> About This Mac -> System Report -> NVMExpress and saw no devices listed prior to opening the iMac15,1. Based on this information I had thought the iMac15,1 must contain a 512GB SATA SSD, when in reality it contained a 512GB Apple proprietary blade drive. Furthermore, since there was no SATA SSD, there was also no SATA cable for connecting a drive to data and power. One quick decision later and I was having shipped to me the proper cable, another adapter, and a 1TB Crucial NVMe blade drive. The NVMe blade drive would hold the OS, applications, and other supporting data with room to spare and the 2TB SATA SSD would house my home folder with room for years of new files. After installing everything, I did try to create a 3TB all SSD Fusion drive, but it did not work. Some people claim it will, but it seems that unless one of the two drives in the Fusion setup is substantially slower than the other, the Fusion process does not work.
So now I have two upgraded iMacs with lots is RAM, storage, and maxed out CPUs. I plan on using them for several more years. The next challenge I would like to take on is upgrading an iMac Pro, taking the base model all the way from an 8-core XEON CPU to the 18-core XEON and the RAM up to 512GB. Currently this project a way out of my budget, but perhaps in a few years.