Camera and wheel unpacking
A few days ago I have received one of the first QHY163M cameras for test and review. This is the one http://www.qhyccd.com/QHY163.html . That is a direct competitor to ASI1600 camera. Differences are as follows: QHY163 has two stage cooling that allows to reach temperature drop 40*C below ambient (I have checked and it is true). It also has built in 128MB memory buffer and heated chamber front window.
Camera has come in the plastic case:


After installing drivers from QHY webpage all has been detected without any problem (Lenovo T420s laptop with Windows 10). Camera is working well controller with EZCAP and MaxIm DL 6.13. When cooling is switched on the sensor reaches temperature drop about 30*C within a minute, and within another minute it reaches maximum drop of 40*C. Cooling fan works pretty quiet (it makes less noise than for example the one in Atik383 camera), and the camera case becomes little warm after some time due to the heat collected from the sensor and from the front window.


Linearity, gain and noise test
I have measured camera linearity and it looks very good (gain=0, offset=40):

Basically up to 60000 ADU plot is perfectly linear.
Then using method described for example here http://www.phy.cuhk.edu.hk/djwang/teachlab/projects/CCD/CCD%20Camera%20Gain%20Measurement.pdf I have measured real camera gain and the value is g=0.26e/ADU.
Having this it was pretty straightforward to calculate full well depth that is 17100 electrons assuming the response is linear till the max ADU. But the plot drops at the end, so for further calculations I assumed the pixel depth is 18000 electrons, and it gave following calculated results:

First column is gain set in the camera driver settings. Second column is measured signal for 1s exposure. Then third columns is real gain in dB, and in the next column real gain in electrons / ADU. Then we have camera read noise, saturation and dynamic range both in EV and dB. Last row is Atik383 values for comparison.
Read noise is pretty impressive in my opinion.
QHY163M camera first light
First lights have been made during star party in Zatom, Poland. I used SCT8″ with Alan Gee Mark II telecompressor and CG5GT mount without guiding. I have shot 5 seconds exposures, and camera settings were: gain=20, offset=100, sensor temperature -25*C.


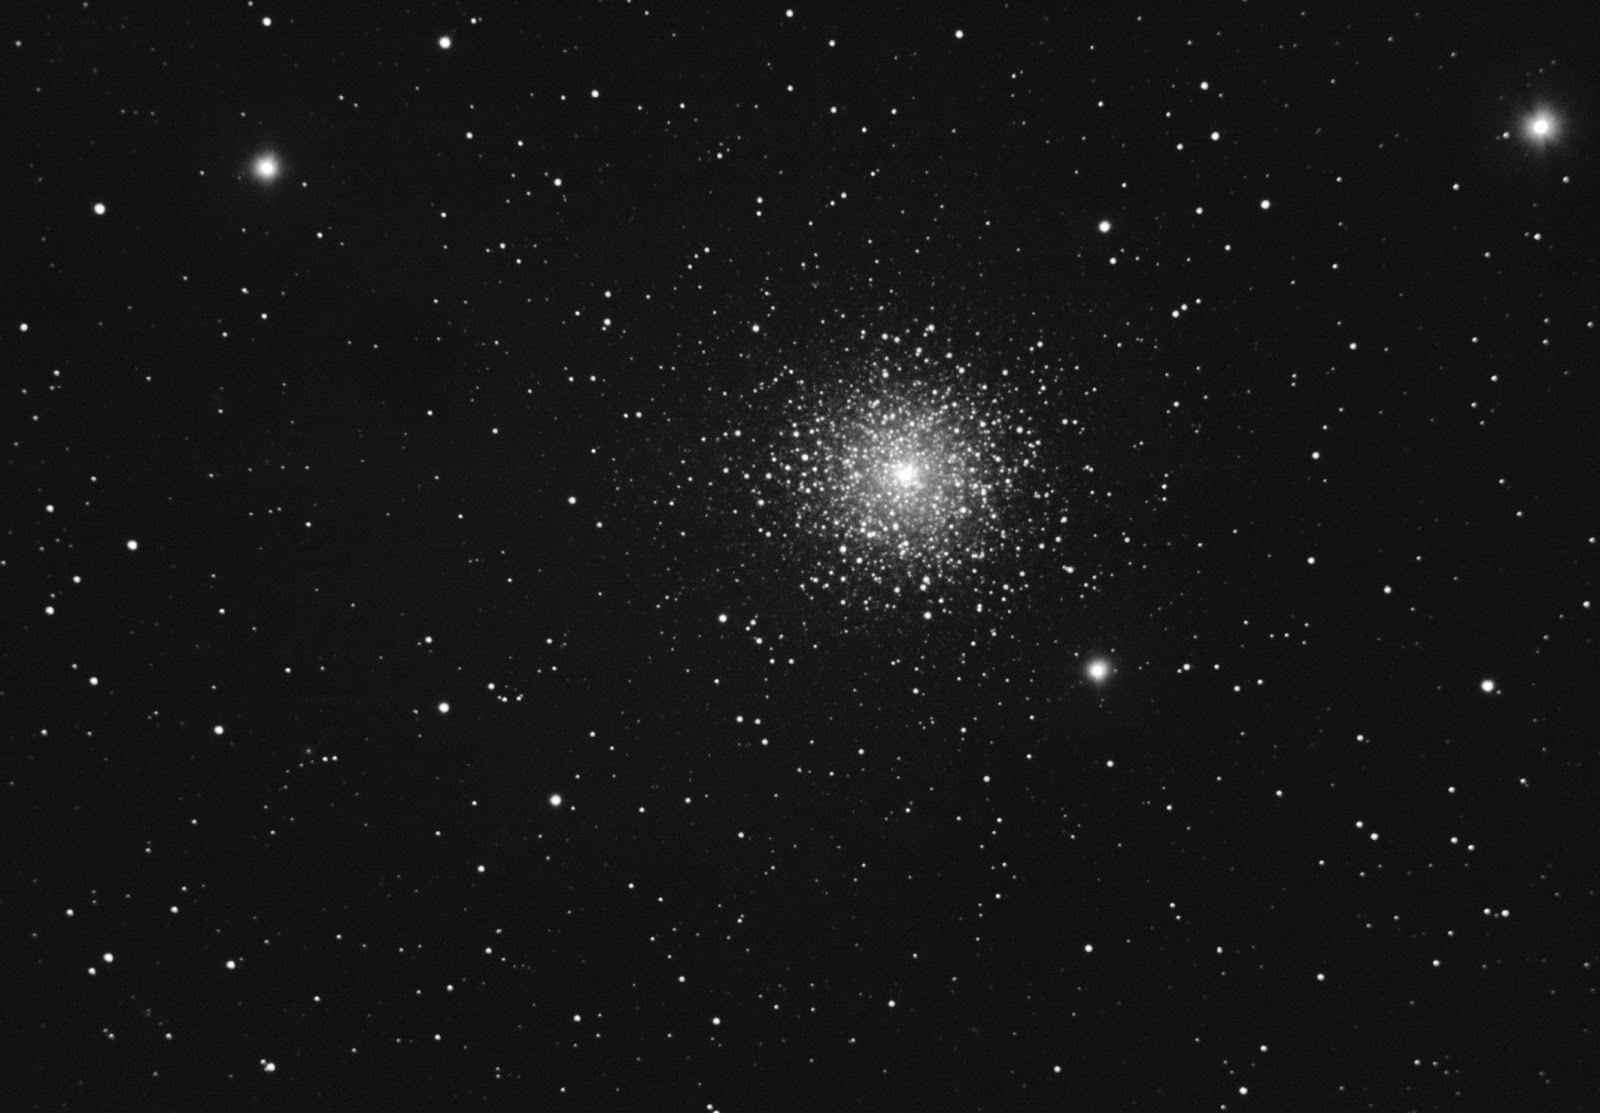
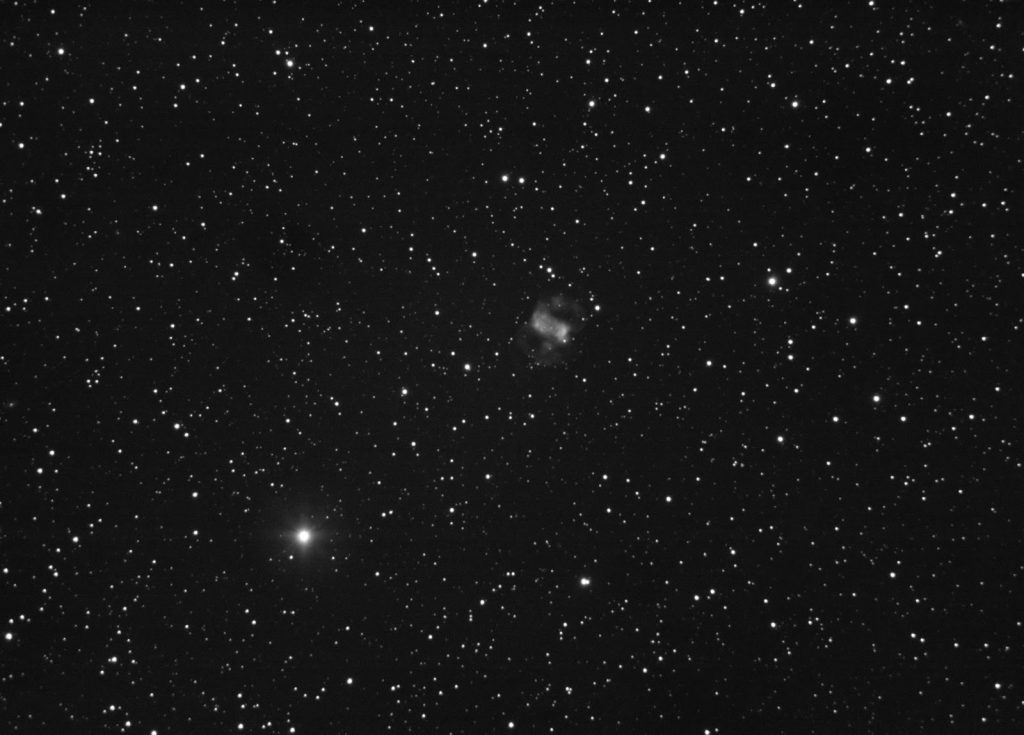
I am pretty happy with this first results of QHY163M test and review. Now time for long exposures.
Clear skies!


Very interesting, thank you very much. I have a question about the reported table. It tells the gain value, but not the offset. Since the offset adjust is important to increase the bias level to the correct value I wonder if you raised it when raising the gain.
Thank you in advance and best regards
Mauro
Hello Mauro,
Yes, you are totally right. I needed to adjust offset setting for every gain to have bias frame histogram separated from the left side. But for day to day picturing I use only two gain settings – for long exposure I have GAIN=0 OFFSET=40, and for shorter I use unity gain setting GAIN=12 OFFSET=64. These settings works well.
From testing I only remember that for GAIN=40 and more I needed to set OFFSET to maximum value 255, but so high gains are reserved for planetary imaging I think.
Cheers,
Lucas
Dear Lucas,
another question: in the second column you state that there is the measured ADU level for 1 second of exposure. Is it the mean ADU level reached and measured onto a dark frame or a master dark frame? How is it possible that you have a value over 65536 for gain=50? I can justify this only if you have a multiple stack of dark frame.
Can you explain this, please?
Thanks and best regards
Mauro
Hi Mauro,
This 1s exposure is a flat frame – I exposed white illuminated wall, then made a small crop of the frame center and measured average signal in ADU (these flat frames were calibrated each time with master dark and master bias). Actually I made a few flat frames for each settings and then averaged result.
And you are right for gain=50 result – I made here shorthand and have not explained it. For this specific setting I made 0.1s exposures, averaged them, and then multiplied result by 10, so it is extrapolated to 1s exposure time. 1s exposure was oversaturated for this setting.
Cheers,
Lucas
Hi,
Very interesting review. I’m considering getting one of these cameras over the asi1600mm.
Is it possible to thread a filter directly to the camera? (like a 1.25 Halpha filter) and use it like that for mono only.
I know the Asi version allows that from the box.
Thank you,
Tudor
Hello Tudor,
In QHY163M there is no direct way to attach 1.25 filter to the camera 🙁 I agree it would be pretty convenient. What you need is a low profile adapter with T2 male thread outside and 1.25 filter thread inside. It can be screwed into the camera 2″ dovetail nosepiece (there is T2 thread inside) and you can place a filter inside. Something like this http://www.teleskop-express.de/shop/product_info.php/info/p7514_Baader-continuous-male-T2-thread-with-1-25–Filterthread.html . But this is not available out of the box.
Cheers,
Lucas
Hello Lucas,
thank you for this review, it decided me to bought the same camera …
The camera works well, but I noticed a strange pattern (like Bayer matrix pattern) in my master flats,
I wondering if you observed the same thing ?
Thanks.
Pascal
Hi Pascal,
I assume you have mono version of camera? I haven’t noticed such thing at my flat frames. You ma try another driver version (maybe older one), try different USB cable or USB port, or play with settings and check if gain, offset and USB traffic affect this flat frames pattern. Can you share somewhere your flat frame, so I could download and check it?
Lucas
Hi Lucas,
thank you for your answer, I have the last drivers version, my camera is marked as mono camera, my gain is 100, offset 40, USB traffic 0, usb cable are very good (never had problem with them), contacted QHY but answer was evasive, they said ‘it is the sensor pixel grid’, I did not know that there was special pixel grid for a mono sensor … the behaviour is not like if it was a colour sensor but more like if pixels had a gain pattern, because their relative intensity follow more or less the same pattern whatever the filter used (we talk about flats only), a real colour sensor would show differences following the filter.
I tried to post a link to download a master flat sample, but it seems that it is not possible I have also some other screenshots if you are interested, (easier by private e-mail may be)
Have a good evening.
Pascal
Hello Lucas,
I’m trying to graduate from a Canon T3i DSLR to a dedicated camera like the QHY 163C. After all your testing, do you still recommend this camera over newer ones ? I intend to use it on a Skywatcher 200-800 f4 Quattro astrograph. Any suggestions or recommendations from you will be more than welcome.
I thank you in advance for your prompt reply.
Respectfully,
Henri-Julien Chartrand
Montreal, Quebec, Canada
Hi Henri-Julien,
I was interested in QHY163C just to have color version of QHY163M that I already had. QHY163C itself currently is an average CMOS camera. QHY183C is more sensitive and less noisy, but it has smaller sensor and smaller pixels. If field of view with 800mm focal length will be ok for you, then you may take a look into 183C. There are larger sensors (like QHY294 or QHY274 or their ASI equivalents) that performs similar to QHY163C in terms of sensitivity and noise. But larger sensor for f/4 newtonian raises potential problems with collimations, bending and tilts. ON the other hand I have also seen good quality full frame images made with f/4 newtonian and Baader coma corrector. So it is possible, but definitely requires some patience and experience. Smaller sensors (like QHY183C) will be easier to master with f/4 newtonian.
Clear skies,
Lucas