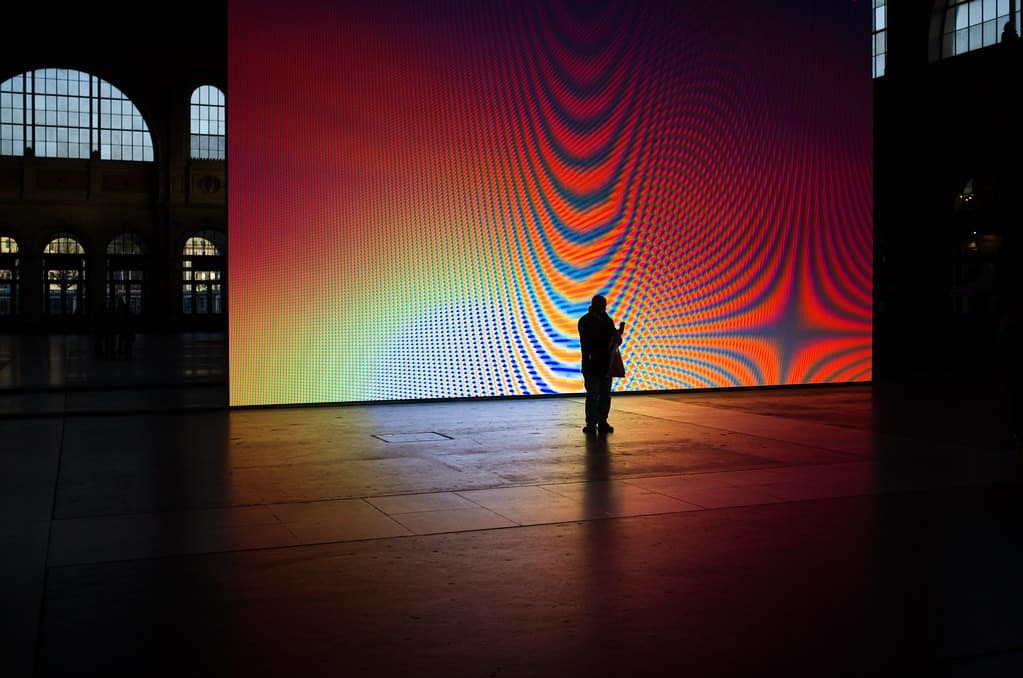

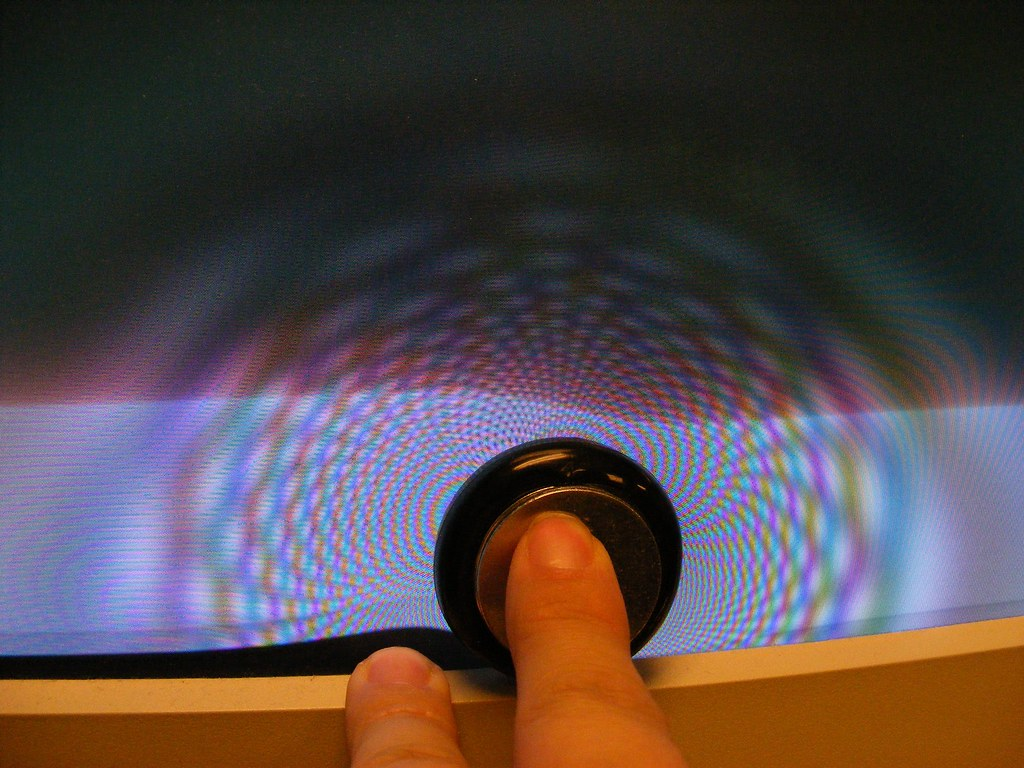
Moiré (also written moire, and pronounced more-ay) is a type of error that occurs in cameras where subjects with repetitive elements (dots, lines, etc.) exceed the camera sensor’s overall resolution. This produces a strange pattern in the picture. Some people describe moiré as looking like oil on water, or a rainbow, although it’s not always colored.
You can create a similar effect by layering any similar patterns.
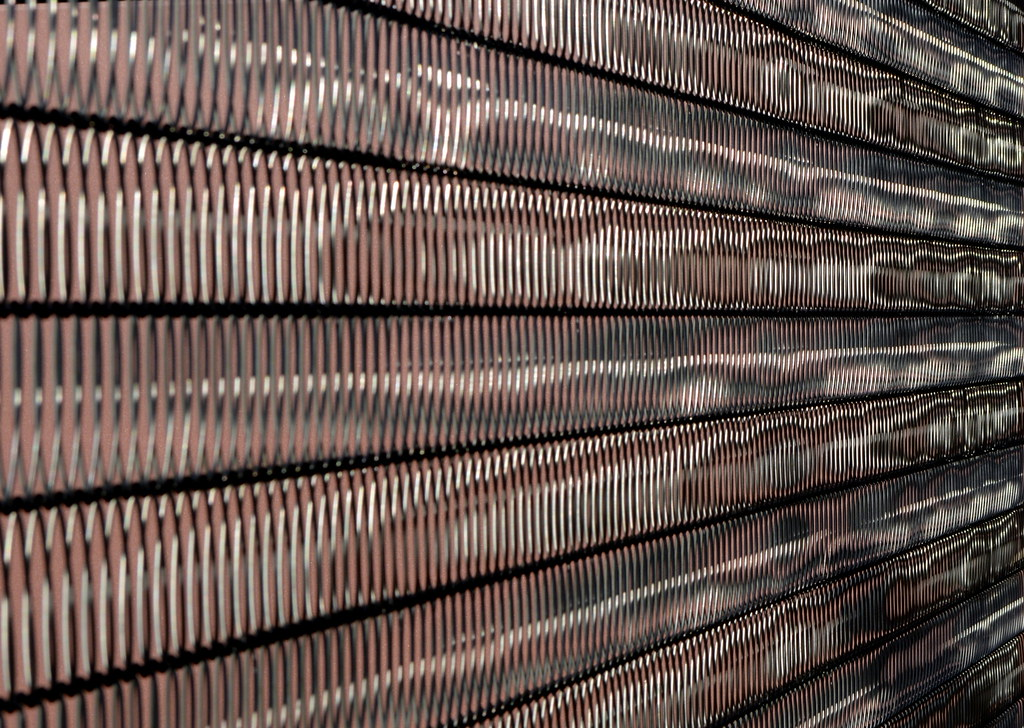
Roger Gilbertson / Moiré Pattern at Gardham Gap / CC BY-SA 2.0
How Is Moiré Formed?
Moiré forms when two patterns overlay one on top of the other. The first pattern is the camera sensor, which is functionally a grid oriented with one end facing up towards the top of the camera. The second pattern is on the subject in the image, such as precise lines on cloth.
This effect can confuse the camera when it adds the color information but isn’t sure where, exactly, to put it in the lines it sees. The result is the moiré pattern. The more the type of pattern messes with the camera sensor, the more likely moire is.
Why Do Modern Cameras Still Create a Moiré Effect?
Modern cameras create moiré effects because photography technology isn’t at the level to bypass moiré without extra steps. The easiest way to remove moiré is by using the blur effect on an optical low-pass filter, but this reduces overall image quality, and most photographers don’t like that type of thing.
Even high-quality cameras, such as Nikon, can create moire if you don’t filter over the image. In short, this effect is less about the type of camera you have and more about which bit of the world you’re taking a picture of.
Objects Which Create Moiré Patterns
Any objects with repeating patterns can create moiré if you try to take images showing your subject’s fine detail. Moiré is particularly common on cloth, where the weave creates a natural grid pattern that can confuse camera filters.
The Effect of Optical Low-Pass Filter
An optical low pass filter, sometimes known as an anti aliasing filter, stops high-frequency visual information by passing the light through special plates. This filter gets rid of noise in the image, and removing it at the camera level is generally easier than removing it in post processing.
How to Avoid Moiré
There are several ways to avoid having moire in your images. It’s always better to remove it when taking the picture because eliminating moire later involves a lot more work.
Zoom in to See If You Captured a Moiré Pattern
Zooming in is an easy way to spot and deal with moiré patterns. Most cameras can show any moire in your image if you zoom in after taking a picture, so a quick look at the camera screen can let you know if you must retake the image or not.
Shoot Close to Your Model to Create a Bigger Distance Between the Lines
Avoiding moire patterns is also easy if you disrupt the patterns causing it. If you move closer to your subject, there’s more space between its lines and, therefore, more room for your camera to understand and apply colors. Moving closer can also help you capture the fine detail of your subjects.
Zoom modes are an excellent alternative for moving closer to your model. These are especially useful when dealing with particularly fine subjects that you don’t want to scare or disturb. Alternatively, simply avoid taking pictures of the type of subject that causes moire.
Use a Large or Small Aperture to Fix the Moiré Problem
Changing the aperture is a way to fix moire in your photography, but it’s not the best option. It’s a poor choice because altering the aperture too much causes diffraction, which is essentially an effect that lowers your image’s resolution. Photography is usually about getting the highest-quality image possible, but this is a good backup choice if nothing else works.
In most cases, f/11 is sufficient for eliminating moire.
Move the Focus to a Different Area
Changing your focus can also eliminate moire in your photography. This causes your camera to pay less attention to the troublesome patterns, though it can also disrupt the rest of your image. As with changing the aperture, this should be a backup option for your photography instead of the first technique you try.
Change the Angle of the Camera
Slight changes in camera angles can completely remove the effect of moire. This works because changing the angle also changes the patterns that cause moire, although it’s not suitable in all cases.
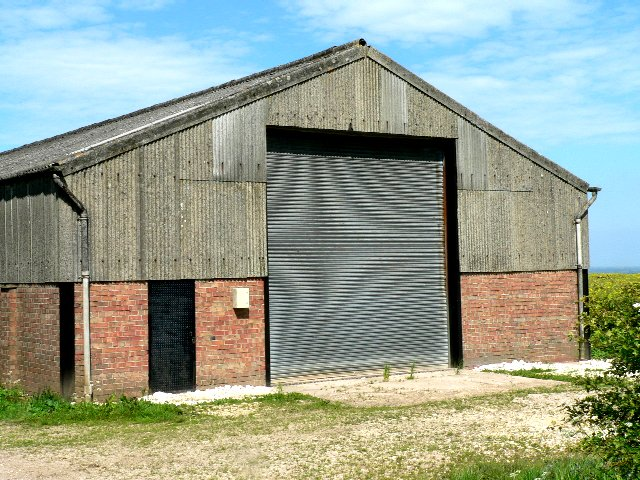
“Moiré” by XoMEoX is licensed under CC BY 2.0
How to Remove Moiré Using Lightroom
Lightroom is one of the easiest and most accessible ways to eliminate moire in post processing.
Reduce Moiré in Lightroom with the Adjustment Brush
Go to the Adjustment Brush in Lightroom, then slide the Moire control up to 100. Make the brush size bigger if needed. This can’t completely eliminate the effects of moire, but it will at least reduce the impact.
How to Remove Moiré Using Photoshop
If you can’t avoid moire, removing it in Photoshop is the most effective way to get rid of it.
Removing Moire in Photoshop Using the Moire Filter in ACR
To do this, open Photoshop, pull up the image, then open up the Camera Raw Filter. This pops up a control function where you can adjust the image similar to how you’ll do it in Lightroom. This has a similar result, too, though Photoshop typically produces slightly better final images.
Using Color Modes and Channels to Remove Moire in Photoshop
Alternatively, you can use Photoshop’s color modes to help get rid of moire. This is a bit trickier, but it works well on any type of photo that the less-involved steps can’t help with.
Step One: Take Away the Rainbow Pattern
First, select the bit of the image that contains the rainbow, oily patterns. The Magnetic Lasso Tool can help with this, as can Quick Mask Mode. You may need to do a bit of experimentation to get the area correct.
Next, utilize the Eyedropper tool to choose a proper color in the area you selected, avoiding the moire. After that, create a new layer in your image, and fill it (Shift+F5) with the foreground color. With the color selection, this helps get rid of the unwanted rainbow pattern, but it leaves the odd lines behind. That’s what step two is for.
Step Two: Repair the Luminosity Channel
After removing the type of rainbow coloring you saw earlier, it’s time to repair the wavy images.
Create a new layer in the same area as before, and as before, set the Mode to Color. Then go to fill the image again. Instead of duplicating the color, select “White” under the Use menu for the Contents.
After that, edit the hue and the saturation. This takes a bit of practice to get right, but you should be able to eliminate each bit of the patterns. When you save this afterward, you shouldn’t see a single bit of the problem remaining.
Moiré FAQ
Here are some common questions that people have about moiré.
“I want Moiré!” by mikemol is licensed under CC BY 2.0
What Is Moire in a Photo?
Moire is a type of visual error that occurs when cameras don’t know how to color images.
What Causes Moiré in Video?
Just like with cameras, moiré in video happens when patterns in the image confuse the visual sensors recording things. The result is a rainbow-like, oily pattern.
What Causes Moire in Photography?
Several things can cause moire in photography, but the most common culprit is detailed patterns confusing the sensors.
How Do I Get Rid of Moire?
The easiest way to remove any type of moire is moving a bit and taking another photo. Techniques could involve getting closer, using a zoom function, or changing your angle a bit.
What Is Color Moiré in Photography?
Color moiré is the visual effect described above, where confusion about colors leads to cameras placing the wrong colors in a bit of your image. Such problems are more common with lower-quality cameras but can still occur on high-quality cameras.
How Do You Fix Moire in Lightroom?
You can fix this issue in Lightroom by using the Adjustment Brush. Lightroom does not completely fix the problem but can reduce the worst effects and help you prepare for further editing.
Conclusion
Moiré can be annoying, but it’s easy to deal with as long as you know what you’re doing. You can even create it intentionally if you want to use it in an image, though you may need to adjust the settings on your camera. The critical thing to keep in mind is that patterns, in reality, can affect photographs, and managing this is part of becoming an expert photographer.
![Personal Branding Photography Basics [Complete Guide]](https://colesclassroom.com/wp-content/uploads/2019/06/adorable-adult-beautiful-774095-768x512.jpg)