


In this Moroccan tile pattern tutorial, you'll learn the step-by-step process of how to make a pattern in Illustrator. We will be making a blue Moroccan pattern swatch using Adobe Illustrator.
Geometric-shaped Moroccan patterns are commonly found in Islamic art. Their basic construction is founded on circles and lines. However complicated an Islamic pattern may seem to you, it is always based on a grid and a series of geometric shapes and lines. Circles are the primary basis of all Islamic patterns; they are the key element to support the other parts of complex Islamic patterns.
You'll discover how a simple composition can transform basic lines into a fabulous, complicated geometry and an Illustrator Islamic pattern. The craftsmanship of making geometric patterns takes a great deal of experimenting, imagination, time, and effort to create, and the possibilities are endless.


Today we'll learn how to draw blue Moroccan patterns in Illustrator, using basic tools and shapes. For more inspiration and resources, check out Envato Elements, where you'll find a wide variety of Islamic patterns and Illustrator patterns to help you with how to create a pattern in Illustrator. You'll also find a broader collection of line patterns and more!
And if you prefer video tutorials, you'll love the Envato Tuts+ YouTube channel! Find amazing video tutorials to learn new skills, like this new video by Andrei Marius on how to make Moroccan tile patterns in Illustrator:

What You'll Learn in This Moroccan Design Pattern Tutorial
- How to set up the Illustrator Islamic pattern file
- How to construct the foundation of the Illustrator pattern
- How to design the Illustrator pattern line work
- How to create the Islamic Illustrator pattern swatch
1. How to Set Up the Illustrator Islamic Pattern File


Step 1
Let's kick off our "how to create Moroccan tile patterns in Illustrator" project by opening a New Document (File > New or Command-N) with these settings:
- Number of Artboards: 1
- Width: 600 px
- Height: 600 px
- Units: Pixels
In the Advanced tab, use the following settings:
- Colour Mode: CMYK
- Raster Effects: High (300ppi)
- Preview Mode: Default
Tip: If you want a larger Islamic pattern Illustrator design, increase the artboard size.


Step 2
Let's prepare our workspace. We need the Layers panel (Window > Layers) to lay out our construction lines in order.
Also, open the Stroke panel (Window > Stroke) and turn on the Smart Guides (Command-U).
2. How to Construct the Foundation of the Moroccan Illustrator Pattern
Step 1
To create any geometric Islamic illustrator pattern, you need to create the underlying tiling pattern first. This is what will help us later to build the geometric illustrator pattern swatches.
Important to note: When drawing, always make sure you draw from the center of the artboard. The Smart Guides will guide you.
To start creating the Islamic pattern illustrator design, we need to draw a circle and divide it into 12 parts.
Go to the Layers panel and rename 'Layer 1' to '12 DIVISIONS'.
Select the Ellipse Tool (L). Apply a light blue stroke color, and with a 1 pt Stroke Weight, draw a 463.62 x 463.62 circle.
Then take the Line Segment Tool (\), hold down the Shift-Alt keys, and draw a horizontal line about 777 px long.
We will now rotate this line, so select the Rotate Tool (R). Tap once on the artboard to open the Rotate dialog box, and set:
- Angle: 30º
- Select Copy to make a 30º angle copy of the line segment
Command-D to Transform Again the lines. Repeat four more times.


Step 2
Lock the '12 DIVISIONS' layer and tap the Create New Layer icon. Name the new layer 'HEXAGONS'. We will need to create two six-sided polygons to meet the 12 intersecting points.
Select the Polygon Tool from the toolbar.
Apply a light orange Stroke color, with a 1 pt Stroke Weight. Tap once on the artboard to open the Polygon dialog box, and set:
- Radius: 231.83 px
- Sides: 6
- OK
Take the Rotate Tool (R), tap once on the artboard to open the Rotate dialog box, and set:
- Angle: 30º
- Select Copy


Step 3
Lock the 'HEXAGONS' layer and Create New Layer. Name the new layer 'SQUARES'.
Take the Line Segment Tool (\). Apply a red stroke color, with a 1 pt Stroke Weight.
Draw line segments connecting 0º to 90º, 90º to 180º, 180º to 270º, and 270º back to 0º. Select All (Command-A) and then Group (Command-G).
Then make two more copies of the line segment-square shape, by using the Rotate Tool (R) to rotate the selection at a 30º Angle, and create a Copy.
In order to repeat the action, use the Command-D shortcut to Transform Again.


Step 4
Next, we will repeat another set of smaller squares touching the inner polygon points.
Lock the 'SQUARES' layer and Create New Layer. Name the new layer 'SQUARES 2'.
Take the Line Segment Tool (\). Apply a yellow stroke color, with a 1 pt Stroke Weight. Draw line segments connecting 0º to 90º, 90º to 180º, 180º to 270º, and 270º back to 0º. Select All (Command-A).
Then we need to make two more copies of the square shape. Use the Rotate Tool (R) and rotate the selection at a 30º Angle, and select Copy.
Then repeat the action using the Transform Again shortcut (Command-D).


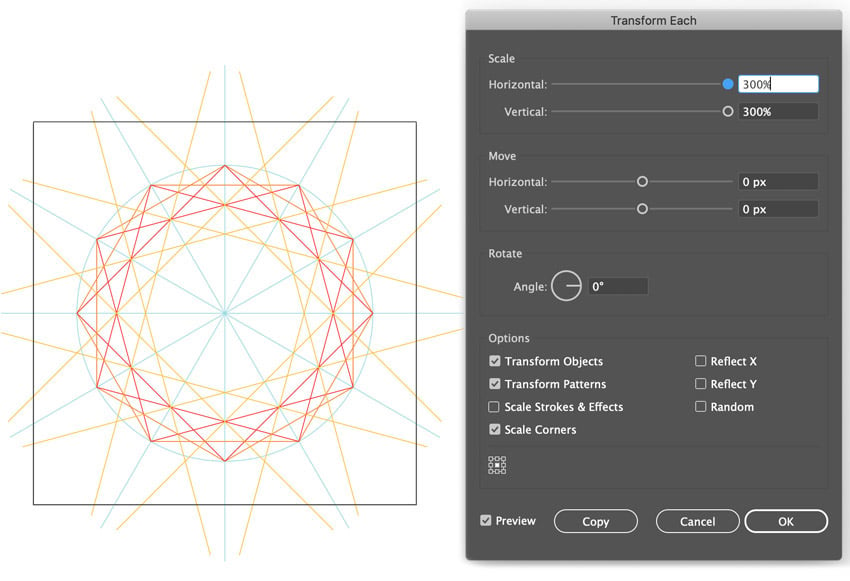
Step 5
The Islamic Illustrator pattern is slowly starting to appear.
Now we need to extend the sides of the segment square we created. So let's Select All (Command-G). Object > Transform > Transform Each, and set Scale:
- Horizontal: 300%
- Vertical: 300%
- OK
Lock the 'SQUARES 2' layer and Create New Layer. Name the new layer 'SQUARES 3'.
View > Hide Artboard, as we obscure the artboard frame.

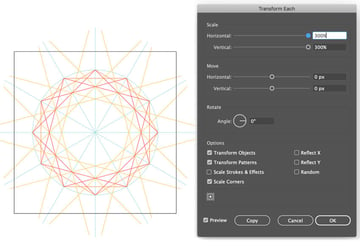
Step 6
Now we need to make a repeating pattern. We will redo the pattern above, following Steps 4 and 5, in order to make a repeating pattern with another set of square-transformed line segments.
Take the Line Segment Tool (\). Apply a light green stroke color, with a 1 pt Stroke Weight. Draw line segments connecting 0º to 90º, 90º to 180º, 180º to 270º, and 270º back to 0º. Select All (Command-A), to select all the line segments.
We need to make two more copies of the square shape by using the Rotate Tool (R).
Rotate the selection at a 30º Angle, and make a Copy. Transform Again (Command-D), to repeat the action. Select All (Command-G), to select all the line segments. Object > Transform > Transform Each, and set Scale:
- Horizontal: 300%
- Vertical: 300%
- OK


Step 7
Lock the 'SQUARES 3' layer. Create New Layer and name it 'PARALLEL LINES'.
Take the Line Segment Tool (\). Apply a medium blue stroke color, with a 1 pt Stroke Weight.
Now draw two vertical lines, about 646 px, passing through the four marked yellow points I have highlighted.
Select both parallel lines. Take the Rotate Tool (R) and Rotate the selection:
- Angle: 30º
- Select Copy
To repeat the action, Transform Again (Command-D) five more times, so it circles around.


Step 8
Lock the 'PARALLEL LINES' layer and Create New Layer. Name the new layer 'CIRCLES-60'.
Select the Ellipse Tool (L) and draw a circle, with the diameter equalling the distance between the top parallel lines. Draw another on the bottom point as well.
Select both circles. Then take the Rotate Tool (R) and Rotate the selection:
- Angle: 60º
- Select Copy
Repeat this action by using the Transform Again shortcut, Command-D.


Step 9
For the last part of the base lines construction of the Moroccan Illustrator pattern, Lock the 'CIRCLES-60' layer and Create New Layer. Name the new layer 'HEXAGON'.
Take the Polygon Tool. Apply a purple Stroke color and a 2 pt Stroke Weight. Then draw a hexagon shape which touches the base points of the 60º circles, as shown below.


3. How to Design the Moroccan Illustrator Pattern Line Work
Step 1
Lock the 'HEXAGON' layer and Create New Layer. Name the new layer 'LINEWORK'.
To make things easier for us, let's hide the following layers by selecting the Toggle Visibility icons in the Layers panel:
- HEXAGON
- CIRCLES-60
- SQUARES 3
- HEXAGONS
I have placed dot pointers on the intersecting lines for you to follow, in order to connect the correct dots to make the pattern in Illustrator.
Select a red Stroke color, and apply a 4 pt Stroke Weight.
View > Snap to Point, so our pen can snap to the points precisely.
Then take the Pen Tool (P) and connect the dots as shown.


Step 2
Next, take the Reflect Tool (O). Set the blue center reference point at the center, as shown below; Option-Shift-Drag and release the selection, once the line segment is mirrored into position.


Step 3
On the Layers panel, turn on the Toggle Visibility for:
- HEXAGON
- CIRCLES-60
- SQUARES 3
- HEXAGONS
Select a black Stroke color, and apply a 4 pt Stroke Weight.
Use the Pen Tool (P) to connect the dots, as shown.


Step 4
Select All (Command-A), to select all the line segments of the Islamic pattern.
Then take the Rotate Tool (R) and set the blue reference point in the center of the artboard. Set the Rotate Angle at 60º and make a Copy.
Afterward, you should repeat the action Transform Again (Command-D) to duplicate the segments around.
Now you will begin to see the Moroccan Illustrator pattern appearing.


Step 5
Moving on, let's Toggle Visibility off for all the layers, except the 'LINEWORK' layer.
Now, we need to connect all the end anchor points to each other. Take the Direct Selection Tool (A), separately select each pair of end points, and Join (Command-J) to join them together.
Repeat this step for all the ends, until each point is joined with its neighboring point.
Note: If additional anchor points appear when joined, use the Delete Anchor Point Tool (-) to delete the extra anchor points.


4. How to Create the Islamic Illustrator Pattern Swatch
Step 1
Let's add color!
To move faster, upload the following Moroccan-inspired hex colors to the Swatches panel (Window > Swatches):
- Mocha
#af9984 - Aqua-Blue
#6ebbcd - Sky Blue
#49a3c1 - Blue-Grey
#91b1bd - Blue1
#156088 - Blue2
#3980a9 - Dark Blue 1
#124981 - Dark Blue 2
#212f61 - Light-Grey
#e1e5e4
Then Select All (Command-A), to select all the line segments.
Give the selected stroke segments a 7 pt Stroke Weight and Light-Grey Stroke color of #e1e5e4.


Step 2
Next, we need to color our shape gaps.
Select the Live Paint Bucket Tool (K) (hidden under the Shape Builder Tool (Shift-M)). Our selection will turn into a Live Paint Group.
Move the Live Paint Bucket Tool (K) over the Moroccan pattern. Then apply your color of choice to the highlighted gaps.


Step 3
Now let's learn how to make a repeating pattern in illustrator and create the Islamic Illustrator pattern swatch.
With our colored object selected, Object > Pattern > Make, to make our pattern.
In the Pattern Options menu, set the Name: Moroccan Pattern 1 and set the following options:
- Tile Type: Brick by Row
- Brick Offset: 1/2
- Check the boxes Size Tile to Art & Move Tile with Art
- H Spacing: -1px
- V Spacing: -70 px
- Copies: 3 x 3
- Click Done on top to exit the Pattern Mode
Now you know how to create a repeating pattern in Illustrator!


Step 4
The Islamic pattern swatch will appear automatically in the Swatches panel (Window > Swatches).
Once the Islamic pattern swatch is created, you can hide the shape we created by going to Object > Hide > Selection (Command-3).
Now let's try out our Moroccan design pattern swatch. Take the Rectangle Tool (M). Draw a 600 x 600 px square and apply any color Fill as a background.
Make a copy of the background square: Copy (Command-C) and Paste to Front (Command-F), and apply our Islamic pattern by clicking the Moroccan pattern swatch in the Swatches panel.
NOTE: You can always return to the Pattern Mode by clicking the Edit Pattern button and fixing the H & V Spacing if the layout looks off.
Take the time to experiment with the background or pattern colors, to make beautiful Moroccan pattern tiles. Now you know how to design patterns in Illustrator!


Mabrouk! Our Seamless Moroccan Tile Pattern Swatch Is Ready!
Great job! I hope you enjoyed this tutorial on how to make a pattern in Illustrator. We learned some new techniques for how to create repeating Moroccan pattern tiles in Illustrator. Feel free to use the tips and tricks in future projects!


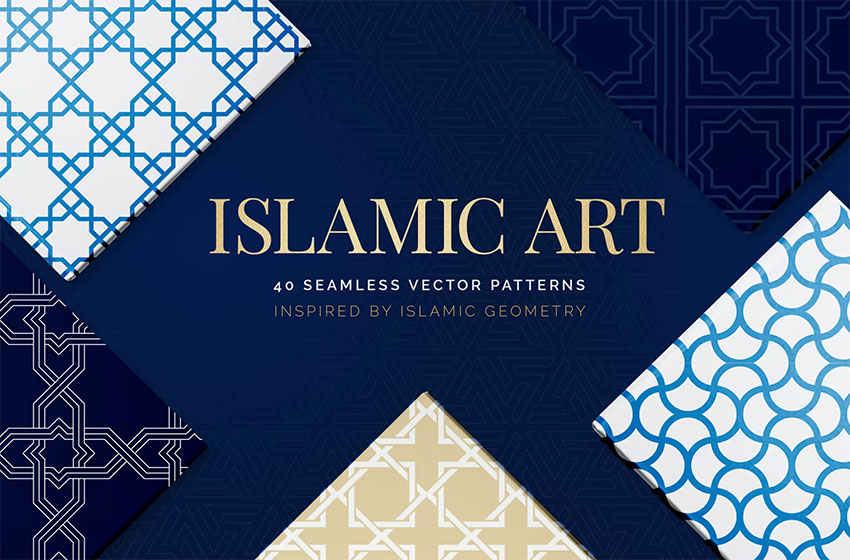
5 Top Moroccan Patterns and Resources From Envato Elements
Now you know how to draw Moroccan tile pattern designs from scratch in Illustrator. While these Moroccan patterns are stunning, sometimes you won't have time to make them yourself.
Here's where Envato Elements comes in handy. The subscription-based marketplace offers you unlimited downloads for a flat monthly fee. Find hundreds of Illustrator patterns, brushes, and add-ons to save time when creating Moroccan pattern tiles.
Or download Islamic texture vector graphics that are ready to use and look amazing. Here's a selection of the best—and make sure to slide through the gallery to see all the beautiful Islamic patterns included!
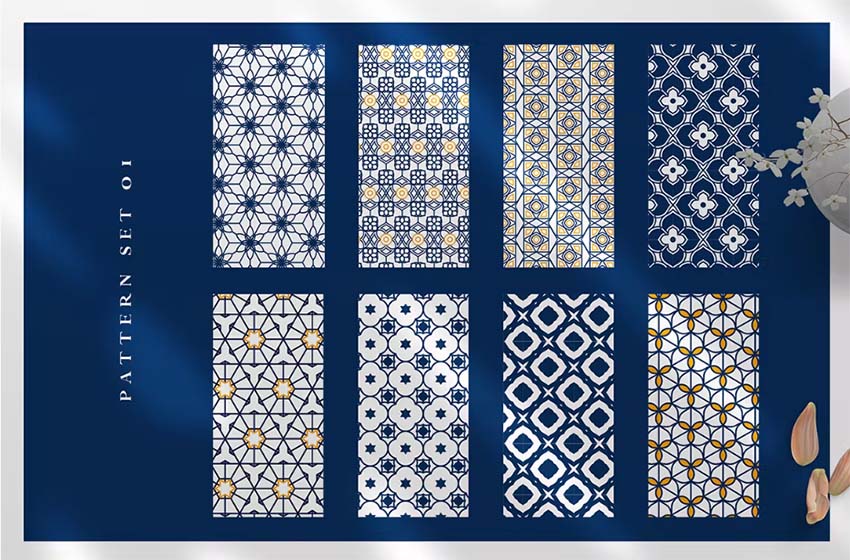
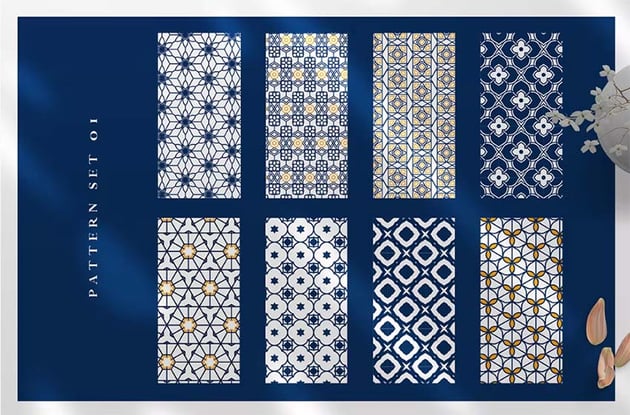
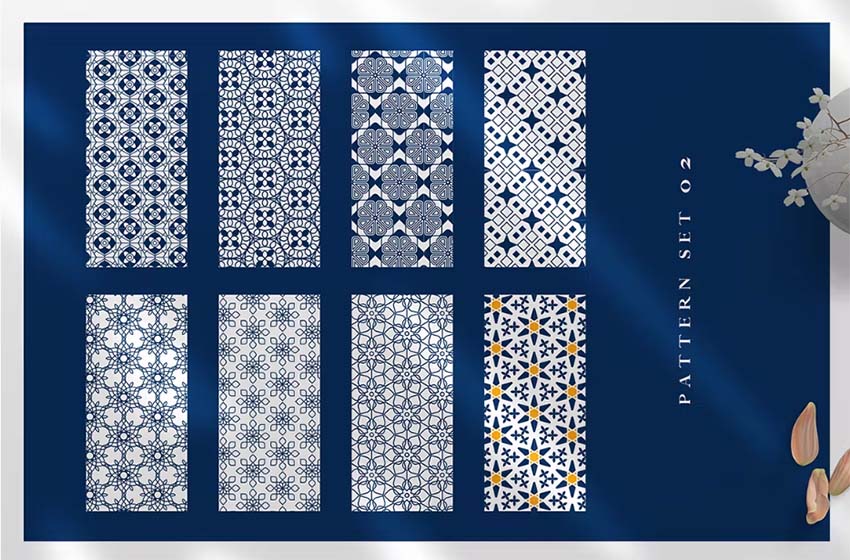
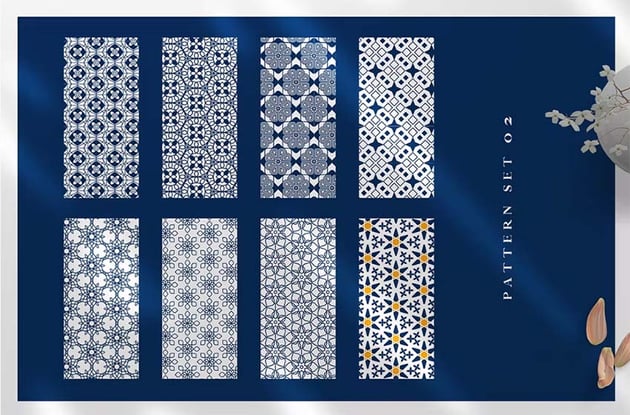
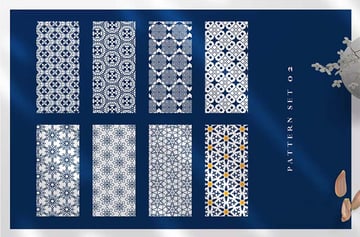
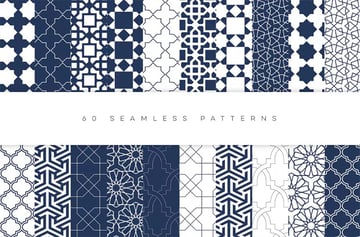
1. Islamic Art Patterns (AI, EPS, JPG, PNG)


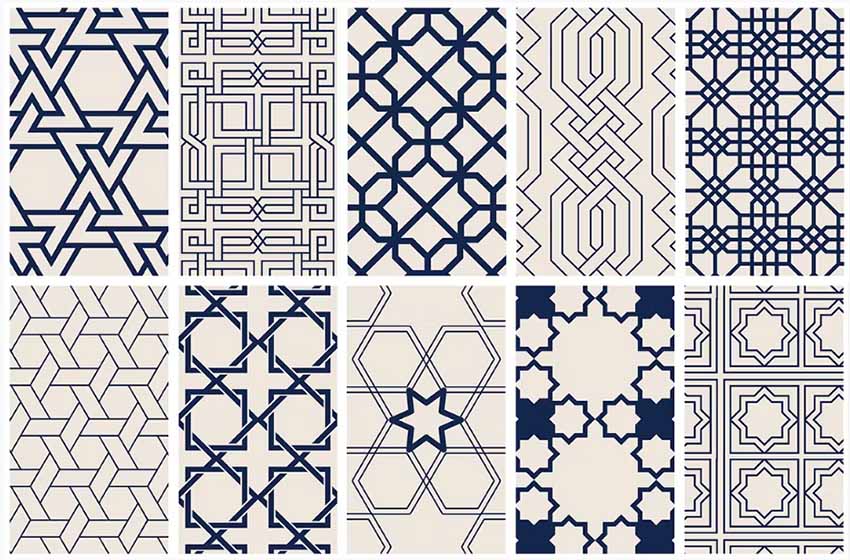
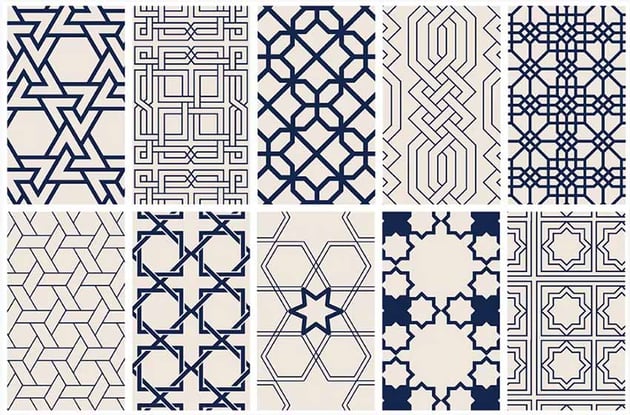
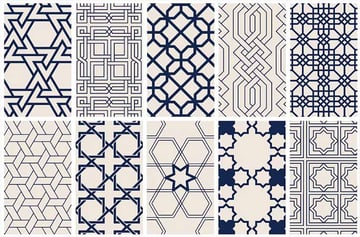


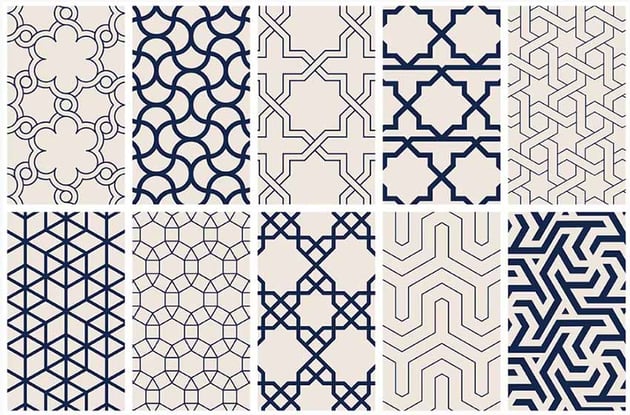
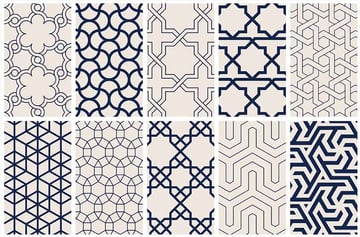
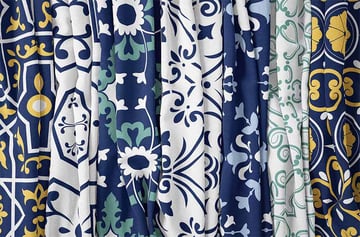
This kit of blue Moroccan patterns is one of the most beautiful you'll find on Envato Elements. It's a complete Islamic texture vector graphic pack. You'll get:
- 4 vector EPS files with 10 seamless patterns each (total of 40 seamless patterns)
- 4 vector AI files with 10 seamless patterns each
- 40 JPEG files (size 12 × 12 inches) at 300dpi (3600 x 3600 px)
- 40 transparent PNG files (size: 12 × 12 inches) at 300dpi (3600 x 3600 px)
- step-by-step instructions on how to work with the Moroccan patterns
2. Geometric Patterns Islamic Edition (AI, EPS, PSD, JPG, PNG)


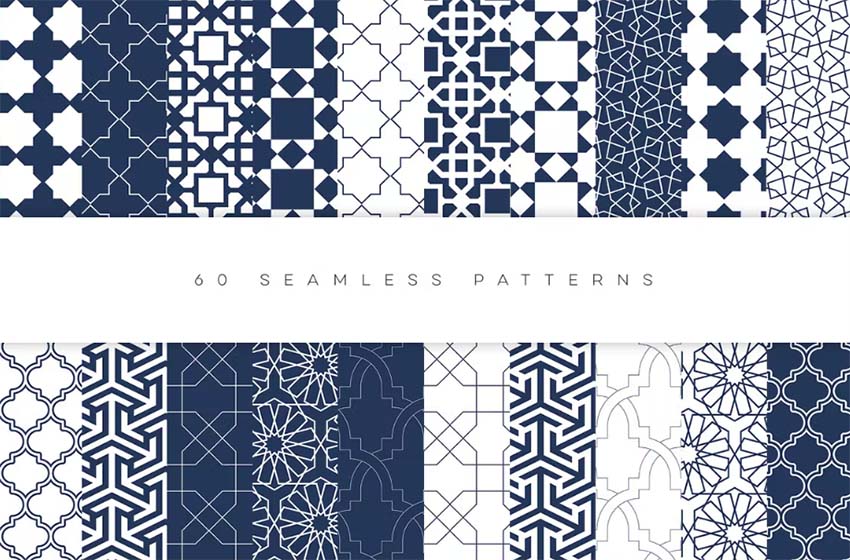


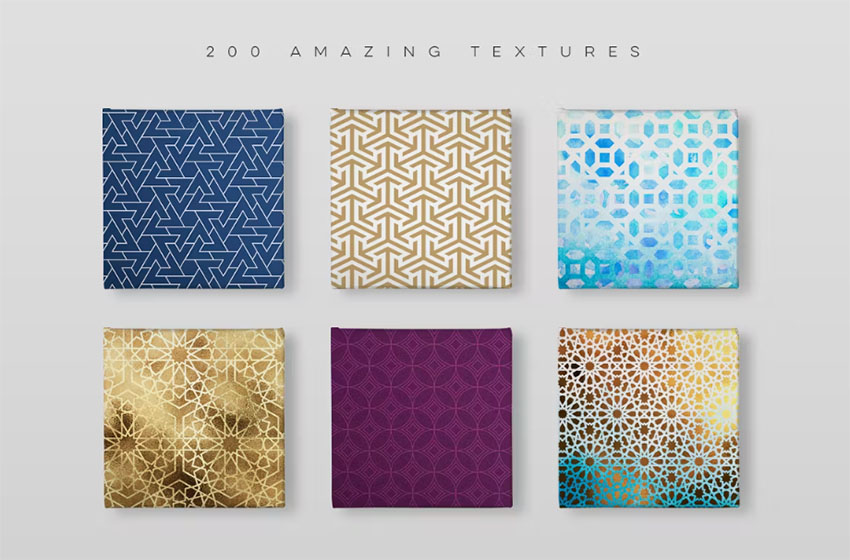


These Moroccan pattern tiles are another beautiful option that's ready to use in your projects! The pack of patterns in Illustrator also includes PSD files to work in Photoshop, so this is a great option. You'll get:
- 150 pre-made Moroccan pattern textures (4500x3500px, 300dpi)
- 32 Illustrator patterns
- 32 Photoshop pattern shapes
- 30 JPG seamless patterns
- 30 PNG seamless patterns
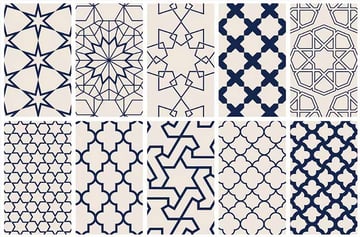
3. Moroccan Patterns and Ornaments (AI, EPS, PNG)
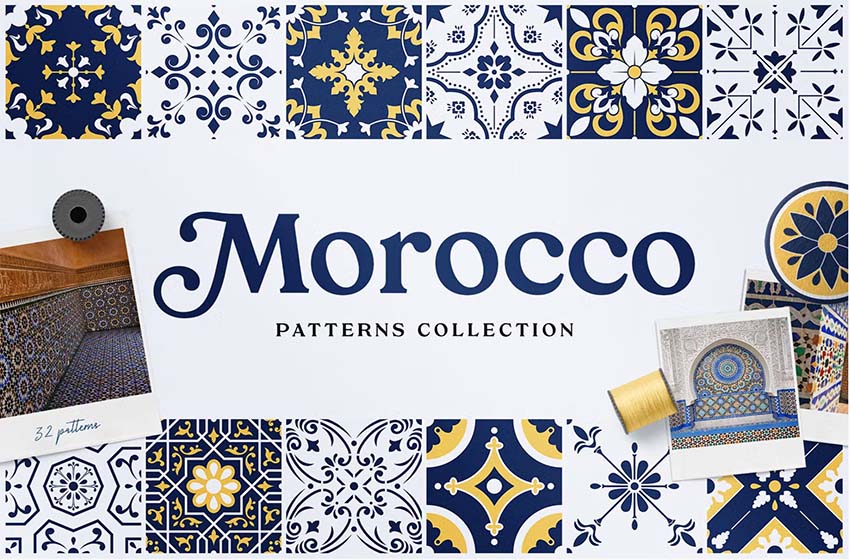


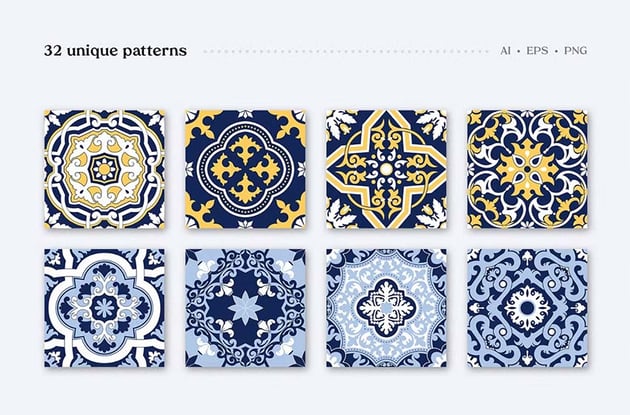


Get inspired by this amazing kit of patterns. If you're looking for Moroccan design patterns, take a look at the gallery! This Islamic art pattern pack comes with 32 patterns and 16 ornaments.
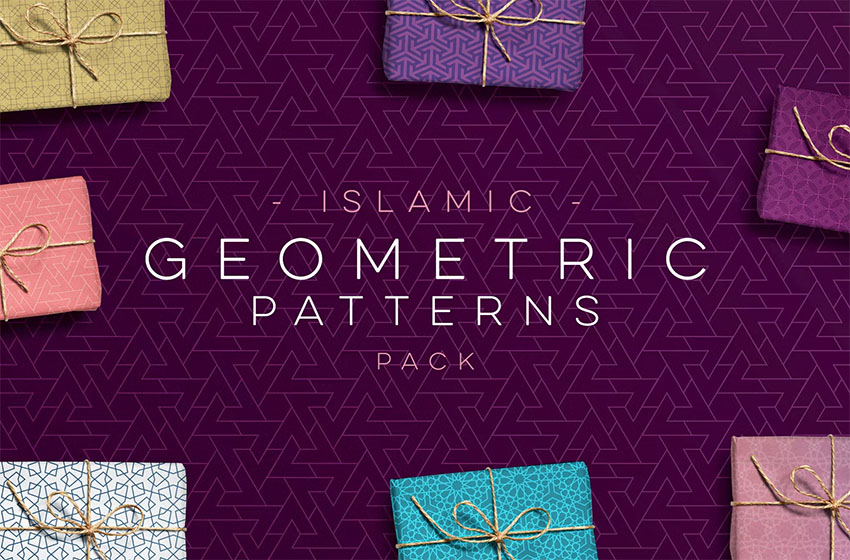
4. Iconic Ramadan Seamless Patterns (AI, EPS, JPG, PNG)

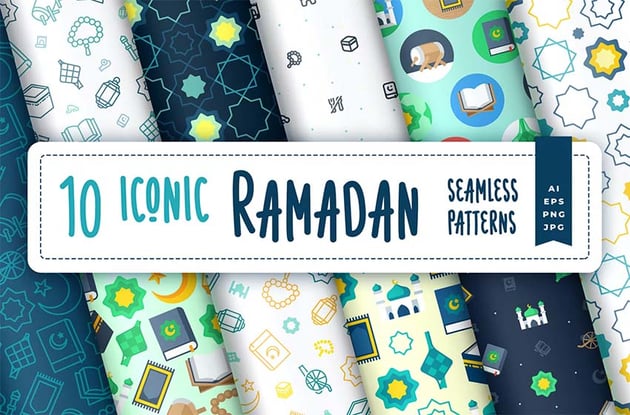


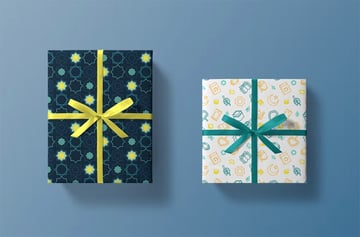

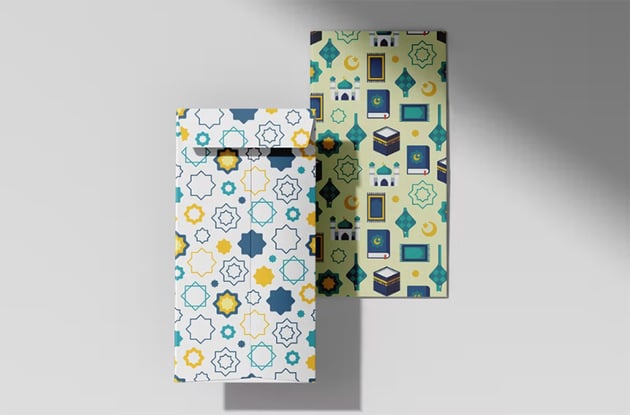

Looking for Moroccan design pattern for gift wrapping? This is the pack for you. These ten Islamic texture vector graphics work particularly well for gift wrapping paper, but you can use them for cards, tags, decor, and more.
5. Mosaic Maker: Brushes & Patterns (AI)

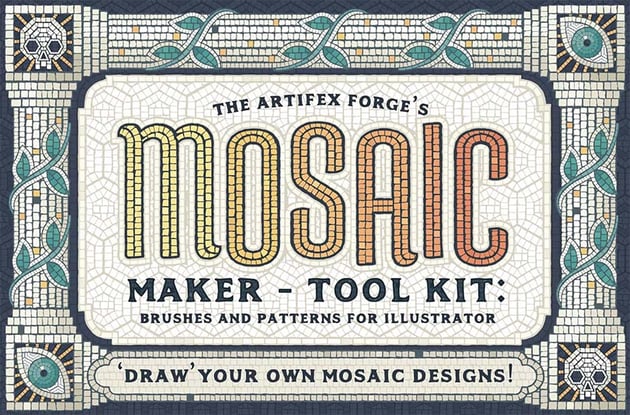

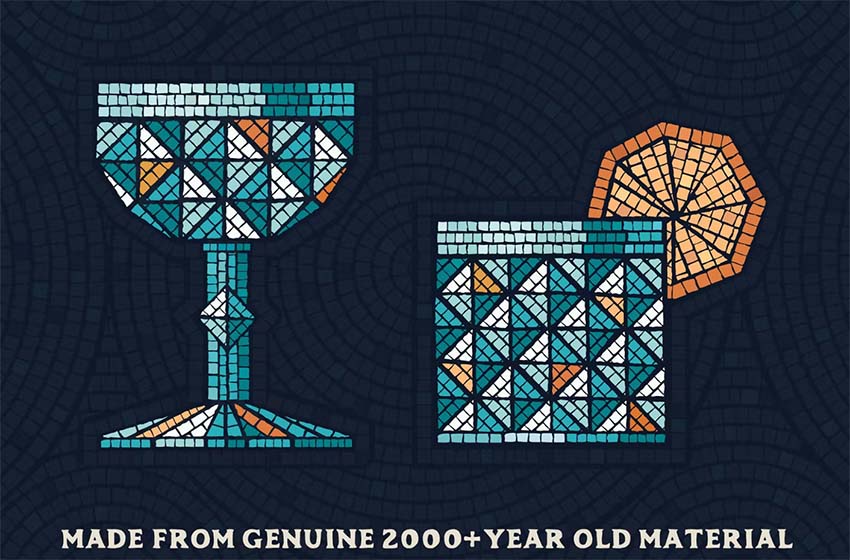


While different from Moroccan patterns, this is a really cool Illustrator pattern fill kit. It includes everything you need to recreate Roman mosaic designs:
- a variety of mosaic tile brushes, all sourced from genuine 1600+ year old material
- six authentic mosaic repeat patterns
- a quick reference guide
If you enjoyed this tutorial, why not check out more Illustrator pattern-making tutorials:
%20(2).jpg)
 How to Create a Tunisian-Inspired Motif in Adobe Illustrator
How to Create a Tunisian-Inspired Motif in Adobe Illustrator


 How to Weave a Bedouin Sadu Fabric Pattern Using Adobe Illustrator

 How to Design an "Eid Al-Fitr" Greeting Card in Adobe Illustrator

 How to Create a Jordan 'Hatta' Scarf Design With Adobe Illustrator

 How to Create Line Patterns in Adobe Illustrator


 How to Design a Retro 60s Flower Pattern

 How to Create a 70s Background in Illustrator


 How to Create a Monogram Pattern
Editorial Note: This post has been updated with contributions from Maria Villanueva. Maria is the Associate Editor of the Tuts+ Design channel.

