Making the switch to a dedicated astrophotography camera is expensive – but there are heaps of benefits, too. One of them is more sleep – I’ll explain how a little later on.
The ZWO ASI294MC-Pro is my first dedicated camera, and I’m definitely glad I made the jump. It’s a one shot colour camera, so similar to using a DSLR camera, but with less of the technical wizardry that DSLRs use as standard to balance colour and the like – you know, all those clever DSLR settings that we like to just switch off.
So basically this is like a DSLR but it comes with all the settings already turned off. I guess that’s benefit number one.
It’s also mirrorless, so doesn’t have the moving parts that DSLRs have (other than mirrorless ones, obviously). Benefit number two ticked off.
The Pro version can also be cooled. Which is pretty cool. And not only because I got to use that pun. Thermal noise is the enemy of long exposures and the thing that will create the most nastiness in your images. With the ASI294MC-Pro you can bring the sensor down to an astonishing 35 degrees below ambient temperature. That’s literally very cool. In both senses of the phrase.

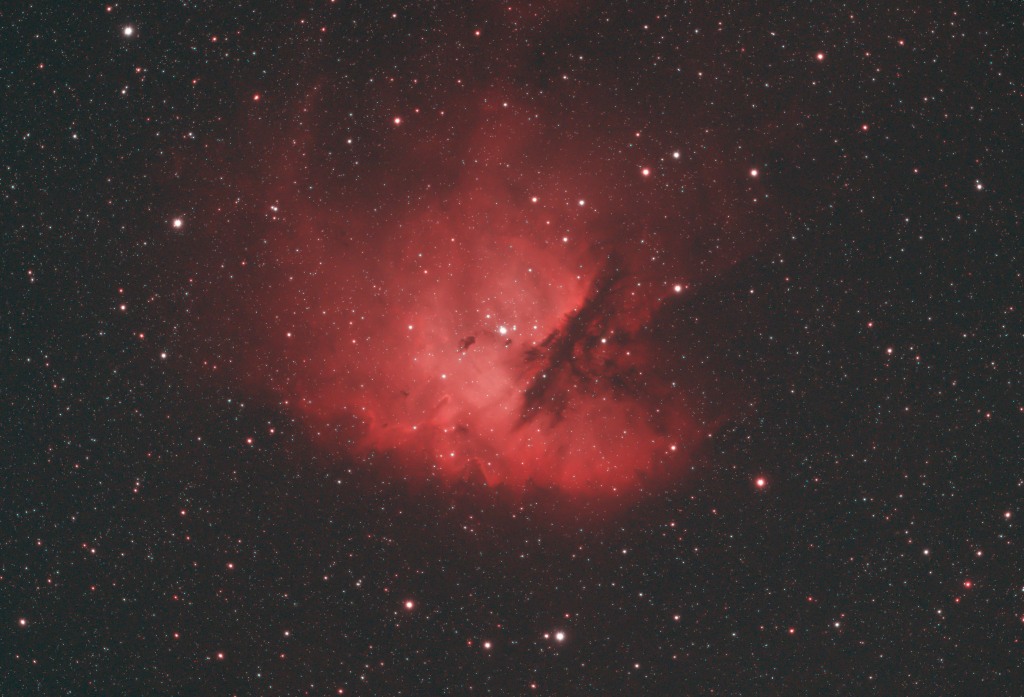
The images this camera produces are fantastic. My first image using this camera was the Pac-Man Nebula in the constellation Cassiopeia. I was also using the Optolong L-eNhance tri-band filter. I was stunned at the quality and just how clean the data was.
More sleep and Other Benefits
I’m not a fan of hanging about in the cold and dark after my imaging plan has finished to collect a load of dark frames that will match the light frame temperature (see my article on Dark Frames). This can lead me to not taking them at all. That’s a bad thing. But hey, I like my sleep.
Which leads me onto benefit number 3 – more sleep. Because I can manually cool the camera to a specific temperature, it doesn’t matter when I take any of my calibration frames. All I have to do is remember the temperature – even I can do that. So after a night of light frames, I simply head to bed and sleep soundly safe in the knowledge my darks will be done in the morning.
Benefit four is closely aligned to this. Once you find a temperature that works for your images. Say -10 or -15, you can easily create a dark library. So when the clouds are ruining your life, simply use that time to take as many dark frames as possible for varying lengths.
For example, if your go-to setting is -10, set the cooler, then take 50 dark frames at 30 seconds, then 50 at 45 seconds, then 50 at 60 seconds, then 90, then 120, then – well, you get the picture. Hey presto, you have now created a very EverydayAstro dark library.
So every time you image at -10 and at a time where you have a stock library, not only do you get to go to bed earlier, you also don’t even have to worry about taking dark frames the next morning. You can also do this for bias frames.
The colour of the camera makes no odds at all. But I do so love the ZWO red. Somehow makes it feel like you own the Ferrari of the camera world, and that makes you feel good inside. So that has to be benefit number five.
I’ll talk about the low read noise and good signal to noise ratio a little later – but just for the record, that’s definitely benefit number 6.
7 is the two additional USB out ports. The less cables I have running from my rig to my laptop, the better. So my guide cameras (ZWO ASI120MM) USB connection goes into the back, and my ZWO Electronic Automatic Focuser (EAF) will use the other port when it finally arrives [Update: it’s arrived and you can read my review here: ZWO Electronic Automatic Focuser]. That’s two less cables trailing all over the place and makes my cable management look just slightly better!
Technical Stuff

I’m not going to go through all 12 of these little pictures and what they mean – but there are some that deserve some time, and others that you need to know about for future reference.
Sony IMX294CJK Sensor
This camera was (is?) the first camera in the world to have this sensor fitted. And it’s quite some sensor. It’s a 4/3″ format sensor (four thirds of an inch) with a 23.2mm diagonal (19.1mm x 13.0mm). It has 11.71 million pixels, each on is 4.63um with pixel dimensions of 4144 x 2822 – and it’s capable of supporting 4k. You will need to remember or jot down the bits in bold. They are needed for many calculations.

Noise
The sweet spot for gain settings is 120. However I always bump that up by one to 121 – just to be safe. For some reason, I changed it (probably accidentally) to 126, and as you would expect it has had literally no effect on my images.
I have found the signal to noise ratio to be excellent with this camera producing the cleanest images I have ever taken. I am genuinely stunned at how much easier post processing has becomes since using this camera.
The read noise is incredibly low and, as you would expect with a cooled camera, so is the thermal noise.
Cooling
Cooling. It’s one of the key benefits of this camera – and cooled cameras in general – it’s not just the ASI294MC-Pro that’s cooled. Cooling just makes life easier. I’ve already covered the extra sleep part, but it also makes your images more consistent. Whereas with a DSLR or uncooled camera the temperatures vary throughout the night, the ASI294MC-Pro remains literally constant.
The lack of consistency in DSLRs and uncooled cameras also means that their dark frames are less effective, because they will be at different temperatures to the light frames. By keeping the temperature fixed, you are increasing your chances of noise being removed from your final stacked image.
One point of note – if you are cooling – remember to warm up before turning your camera off. Especially in warm weather. Suddenly going from -15 to +20 can cause ‘thermal shock’. We don’t need to know what that actually does, it’s enough to know that’s really bad for your sensor. Programmes such as N.I.N.A and APT have warm up routines as well as the cooling routines – so I would advise you to use them.
N.I.N.A has end of sequence settings, I use two of them – park scope to home position and warm camera. Super handy as when I go out to bring all the gear back inside, the scope is parked and the camera is warm. No waiting around and less time out of bed. Happy days.
Full Well Capacity
This is a bit technical, but it’s worth a mention because the ASI294MC-Pro performance in this area is pretty good.
Each pixel is a well. Think of that well as a bucket. When that bucket is full, that pixel is bright white. That is it’s max. Each photon of light that hit’s your pixel (or bucket) is like a cup full of water that you add to the bucket. In long images we pour a lot of cups of water into that bucket. Especially on bright stars.
So if all our buckets are full, we just have a pure white image (thats what happens if you try and do a 30 second exposure in broad daylight). So the bigger the bucket, the more cups of water you can take before you’re full. This means that none of your stars will get ‘clipped to white’, and this helps to stop star bloating.
In EverydayAstro terms, the ASI2947MC-Pro has really big buckets that can take a lot of cups of water. Compared to the ZWO ASI1600, it can take three times as many cups of water. Thats a lot of cups of water – or photons of light if we want to bring this back to something that sounds even remotely scientific.
The larger well capacity also has a positive effect on the signal to noise ratio, which is also a good thing. The better your signal to noise ratio, the cleaner your images will be.
What Comes With It?
Everything I needed to get imaging was in the box – bar one cable (see Extras Needed).
- ZWO ASI294MC-Pro camera
- Soft carry case
- M42 – M48 adapter
- M48 – T2 16.5mm extender
- T2 21mm extender
- T2 – 1.25″ nose piece adapter
- Dust cap
- 2m USB3 cable and shorter USB2 cables

Achieving focus
The ZWO website had everything I needed to understand and achieve focus. In the box was everything I needed to achieve focus – but you do need extra bits of kit to fully utilise the camera – see ‘Extras Needed’ section below. Very handy indeed, especially as I get very frustrated when I buy something and it’s missing a part that I didn’t realise I needed to order!

Extras Needed
Not everything you need comes with the camera. For a start, you need a power cable to make the cooler work. That doesn’t come with it. Personally I use a Lynx Astro dew controller as my power source. I can then plug this Lynx Astro cable into the power output of the dew controller and directly into my camera. Hey presto. You can see my wiring diagram for my set up on my Everyday Equipment page.
EverydayAstro Score – 9/10
I have found this camera easy to install and use. It’s quiet, quick to cool and warm, looks good and my images to date have been fantastic – which is what the camera is all about.
It’s a huge step up from my DSLR and it performs consistently well. These cameras are not cheap, are useless for anything other than astrophotography, but they certainly make things much easier and more Everyday.
