Ubuntu 22.04 LTS, codenamed Jammy Jellyfish, has been released a month ago. This step by step guide explains how to create a Ubuntu bootable USB drive and how to install Ubuntu 22.04 LTS desktop edition with screenshots.
Table of Contents
Download Ubuntu 22.04 LTS
Head over to the official Ubuntu download page and download the latest Ubuntu 22.04 LTS desktop edition.
The minimum requirement to install Ubuntu desktop on a PC or Laptop is Given below:
- 2 GHz dual-core processor or better,
- 4 GB memory,
- 25 GB of free Hard disk space,
- USB Bootable Medium,
- Internet Connection (Optional).
Create Ubuntu Bootable USB Medium
After downloading Ubuntu ISO, you need to create a bootable USB medium with the ISO file. There are many bootable USB creation tools available to create a bootable USB medium.
We have listed some of the tools to create bootable USB drive in Linux.
Commandline bootable USB creation tools:
- How To Create Multiboot USB Drives With Ventoy In Linux
- How To Create Bootable USB Drive Using dd Command
- Bootiso Lets You Safely Create Bootable USB Drive In Linux
Graphical bootable USB creation tools:
- Create Bootable USB Drive With Ventoy WebUI In Linux
- Create Bootable USB Drives And SD Cards With Etcher In Linux
- Popsicle – Create Multiple Bootable USB Drives At Once
- Create Bootable USB Drive With USBImager In Linux
- Kindd – A Graphical Frontend To dd Command
If you wish to install and test Ubuntu Linux on any hypervisor (Virtualbox, KVM, Vmware), just skip the media creation step and boot up the iso image.
For demonstration purpose, I will be installing Ubuntu virtual machine on Proxmox VE.
Install Ubuntu 22.04 Desktop Step By Step
Ubuntu is a beginner-friendly Linux distribution, so installing Ubuntu won't be a big deal. Just follow the steps given below carefully and you will be fine.
Step 1 - Boot Ubuntu ISO
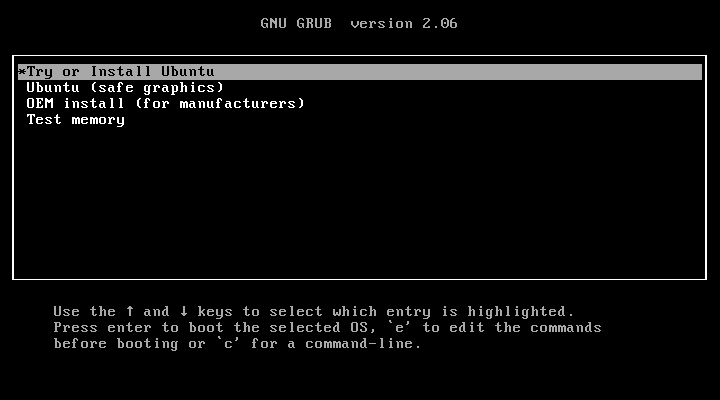
Boot your system with the newly created Ubuntu 22.04 bootable USB drive. You will see the following menu. By default, the first option is automatically selected to boot into the live system.
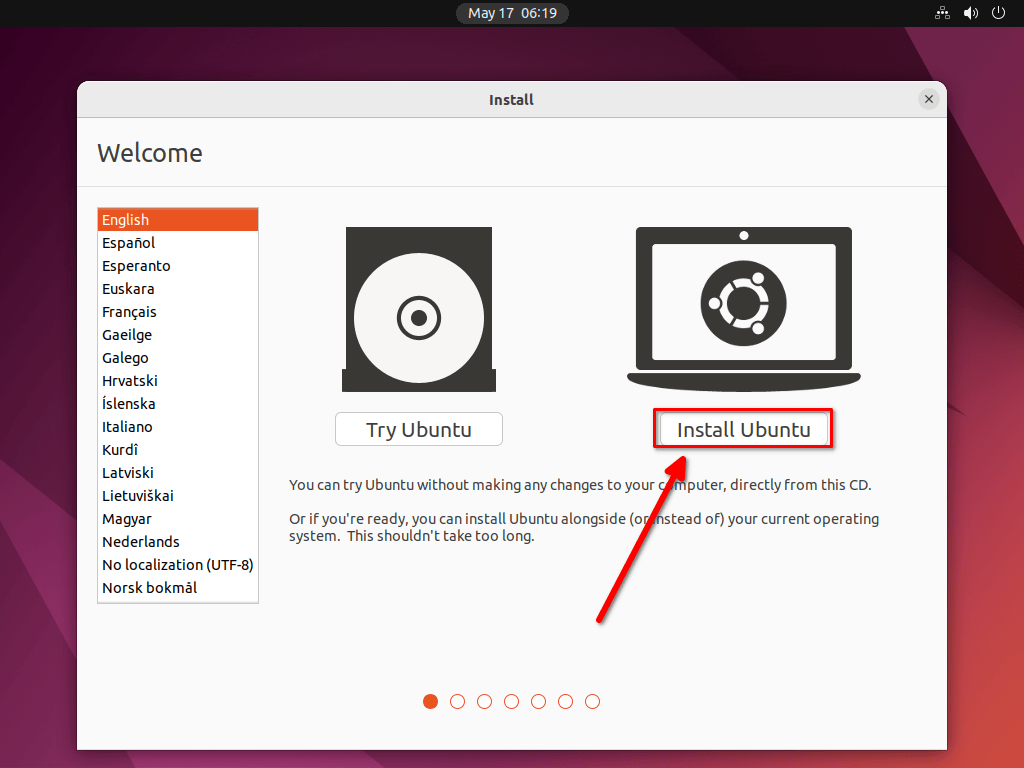
Now, you will be given two choices. You can either try the live Ubuntu version to see what's in there or start installing it right away by clicking on the "Install Ubuntu" button. I've decided to go with the second option i.e. Install Ubuntu.
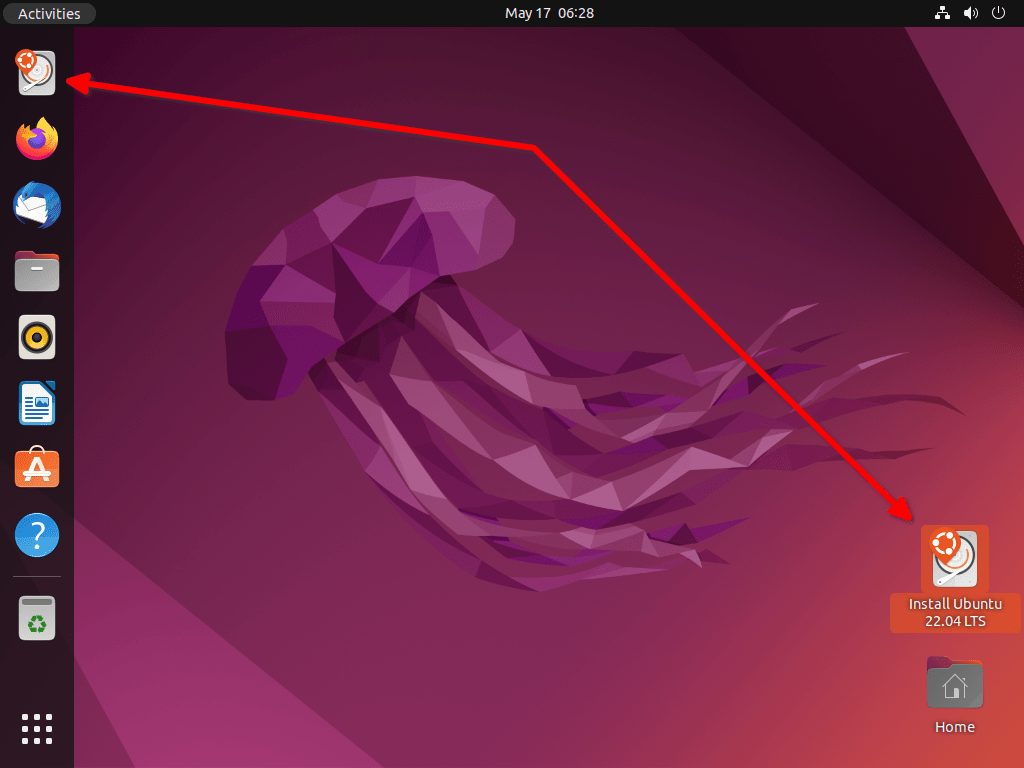
If you prefer to try the live Ubuntu without making any changes on your hard rive, you can choose the "Try Ubuntu" option. If you like the live OS and wanted to install the Ubuntu, double click the "Install Ubuntu 22.04 LTS" button on the desktop or the Ubuntu Dash.
Step 2 - Choose Installation Language
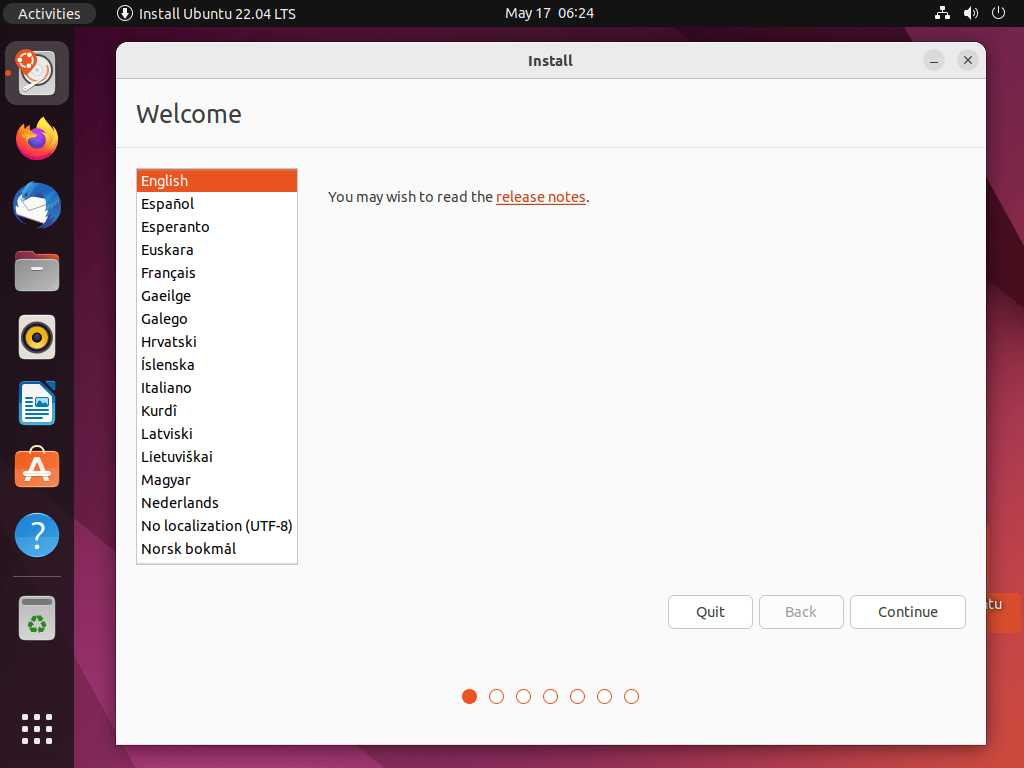
Choose your preferred install language that you want to use throughout the installation process.
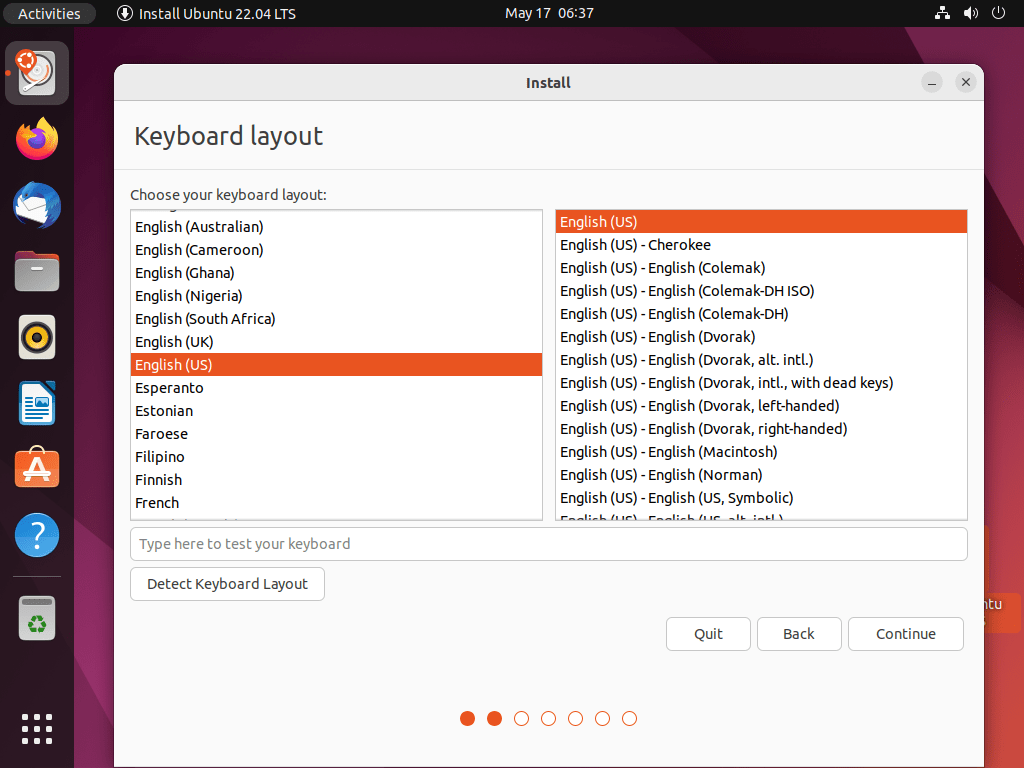
Step 3 - Choose Keyboard Layout
Choose your keyboard layout for your Ubuntu system. English (US) is the default layout.
Step 4 - Choose Updates and Other Software
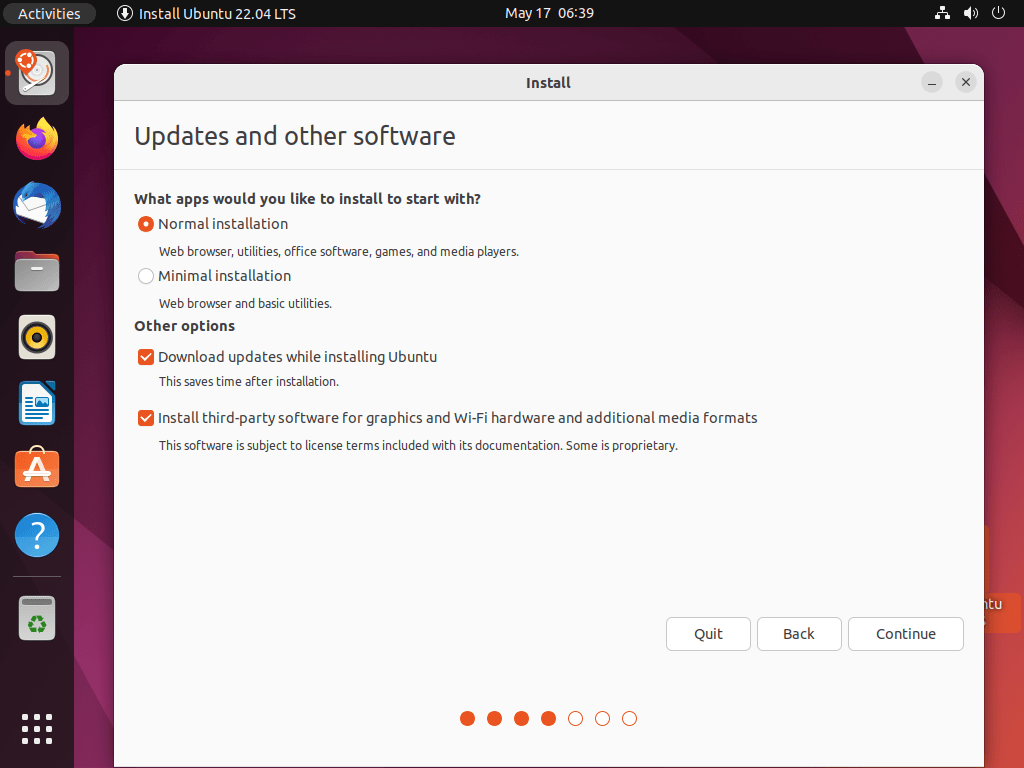
In this step, you can choose what apps would you like to install. There are two options.
- Normal installation. If you choose this, a full-fledged Ubuntu desktop will be installed with all essential software, web browser, office software, games and media players.
- Minimal installation. If you choose this option, only a minimal a web browser and small set of basic utilities will be installed.
You can also choose,
- to download and install updates while installing the Ubuntu 22.04,
- to install third party software for graphics and WiFi drivers and other medic codecs.
Step 5 - Choose Installation Type
In this step, you will have two choices.
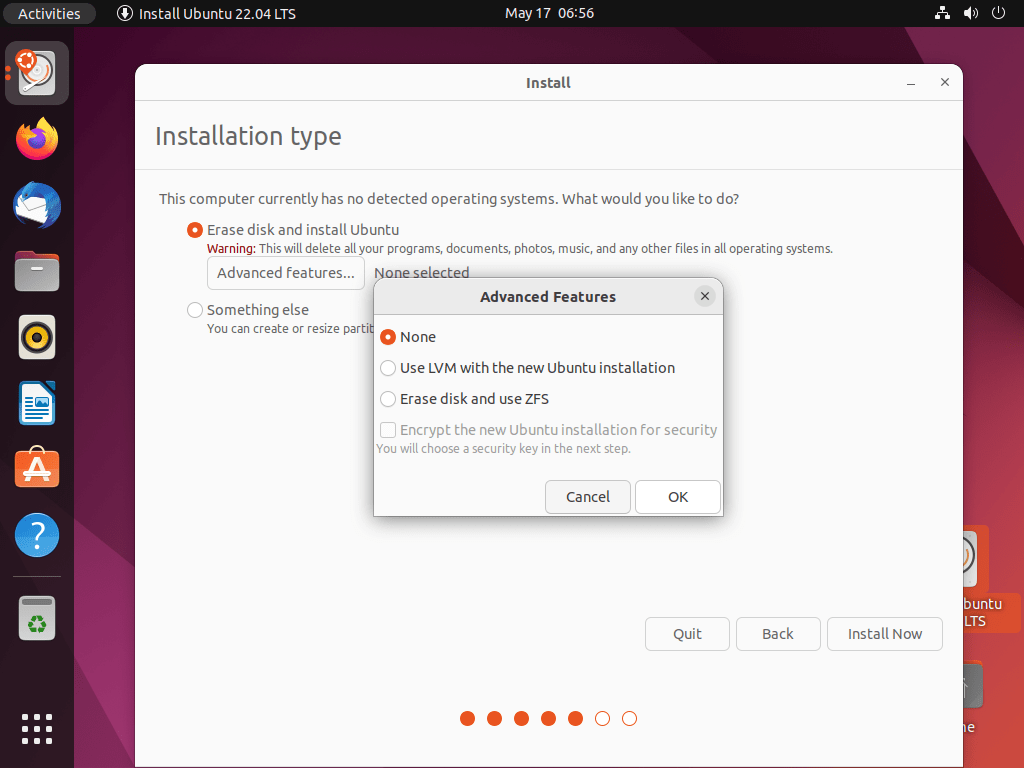
- Automatic partitioning method. This will erase the whole disk, automatically partition the disk and install the Ubuntu OS. This is opt for the beginners.
- Manually partition the disk and install Ubuntu. This is for intermediate and advanced users.
Step 5.1 - Automatic Partitioning
If you choose the first option, all programs and data in your hard disk will be deleted. This should be selected only when you don't have any important data or don't want any data on your hard drive.
if you're a beginner, it is recommended to go with the automatic partitioning method. The installer will automatically create required partitions for you. You don't need to manually create any partitions at all.
You can further choose additional options such as LVM, use ZFS filesystem and encrypt the new Ubuntu installation with a security key from the "Advanced Features" tab.
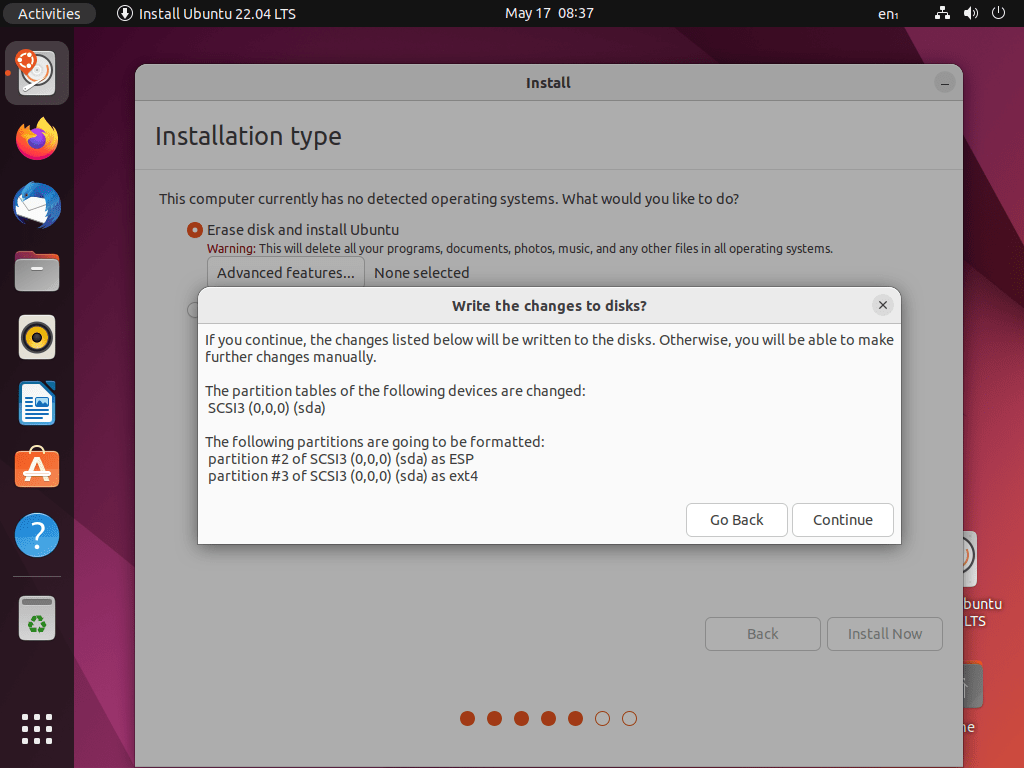
After choosing the features, click "Install Now" followed by the "Continue" button to write the partition changes in your disk and continue the installation.
Now skip to Step 6 and complete the rest of the steps.
Step 5.2 - Manual Partitioning Method
In this method, you can manually create multiple partitions of your desired size. This option is for advanced and intermediate users only.
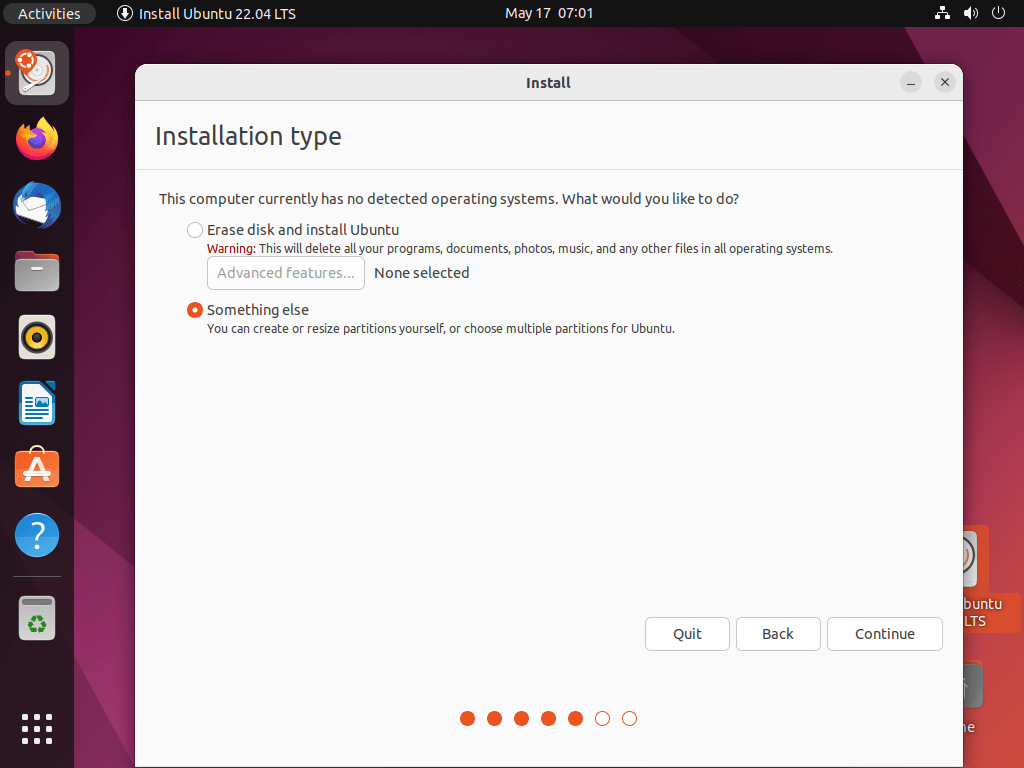
Choose the "Something else" option and click "Continue".
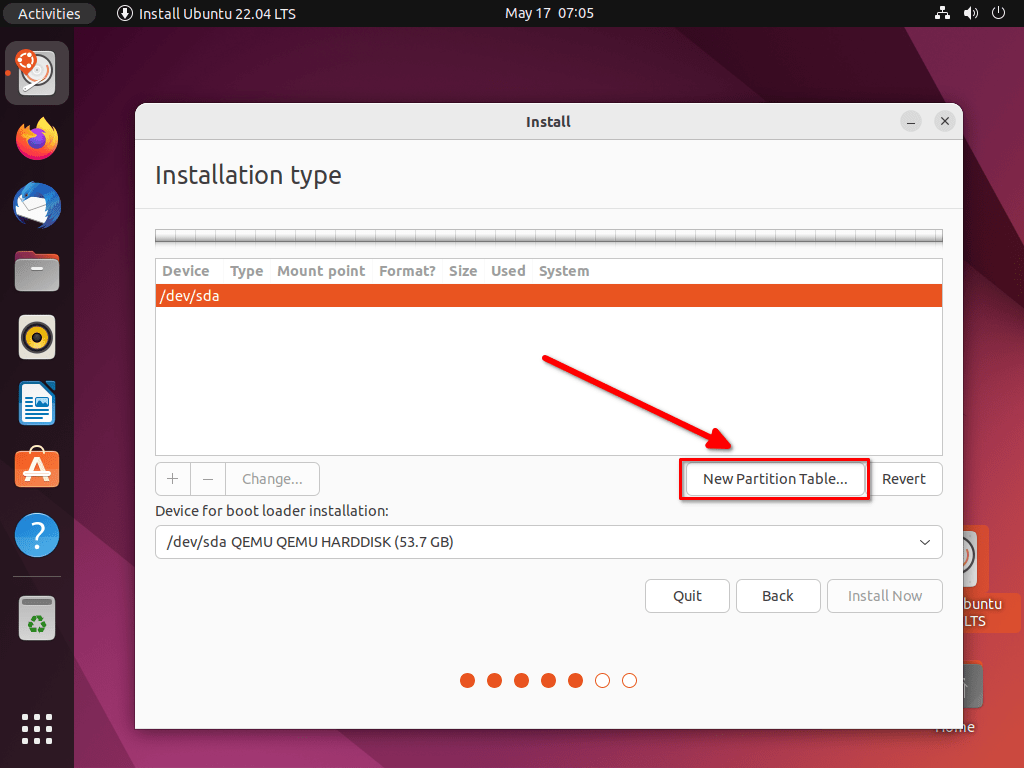
Click the "New Partition Table" button.
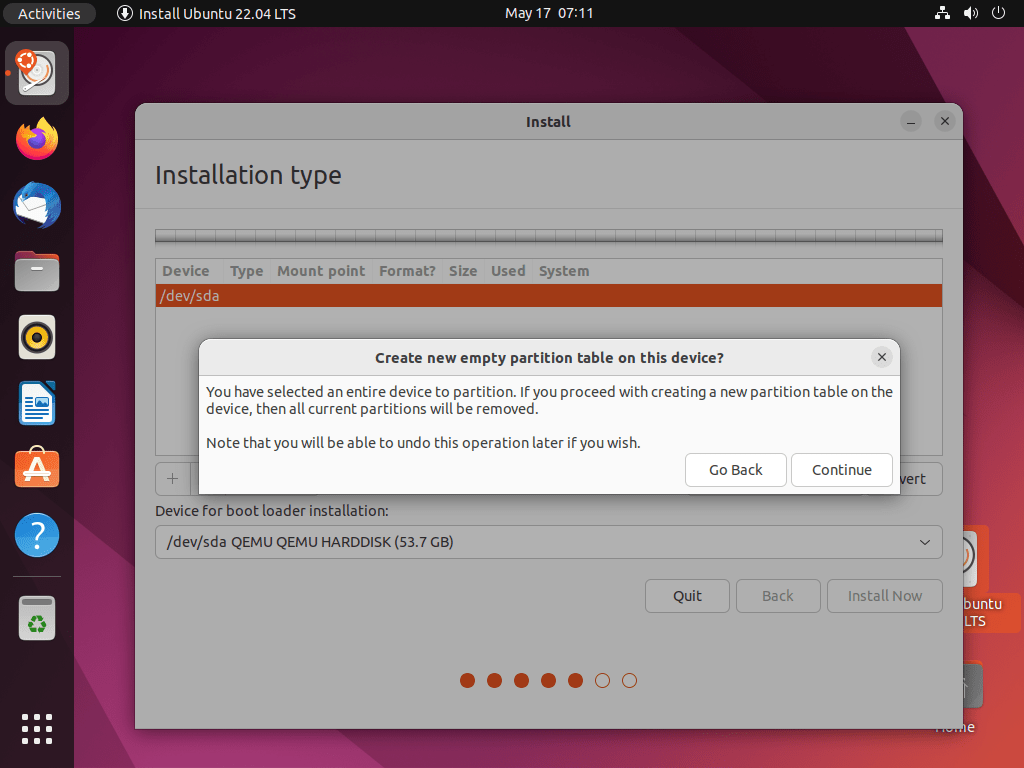
In this next wizard, click the "Continue" button to create a new empty partition table on the selected disk.
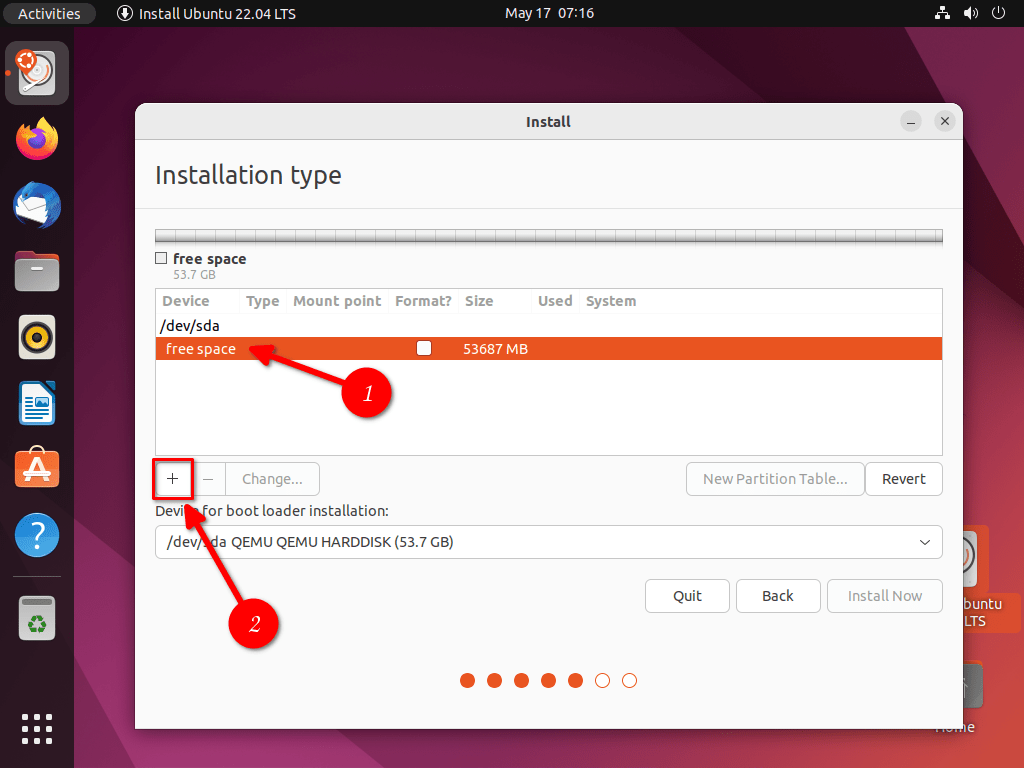
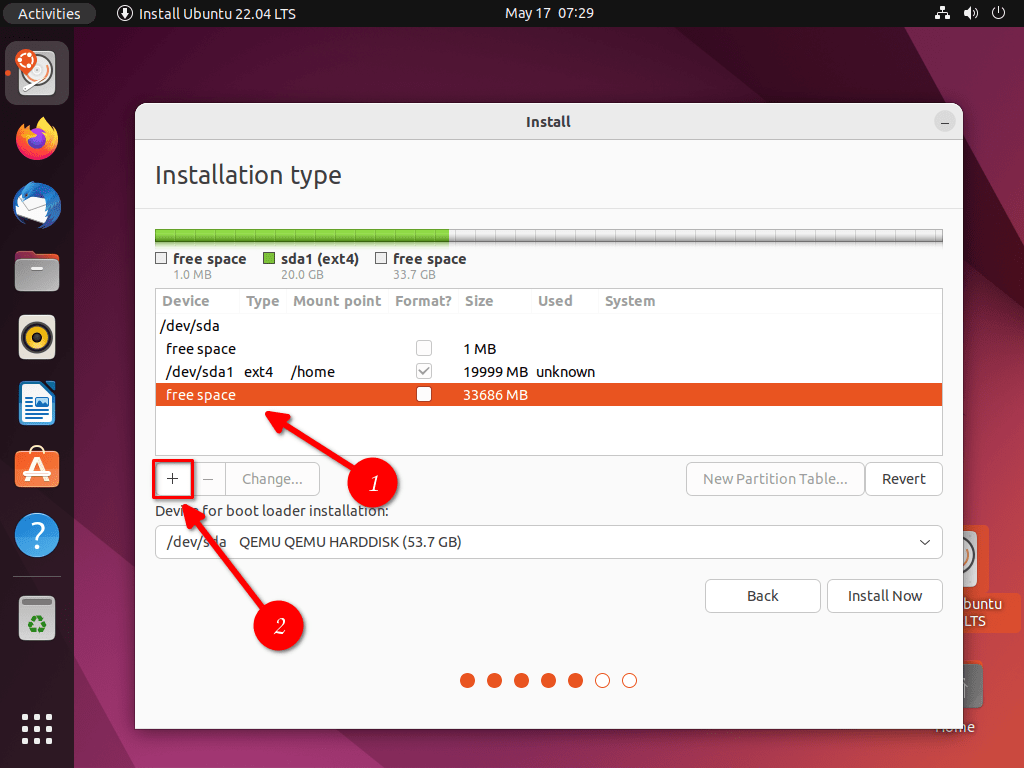
Select the free space and click the + (plus) sign to create a new partition.
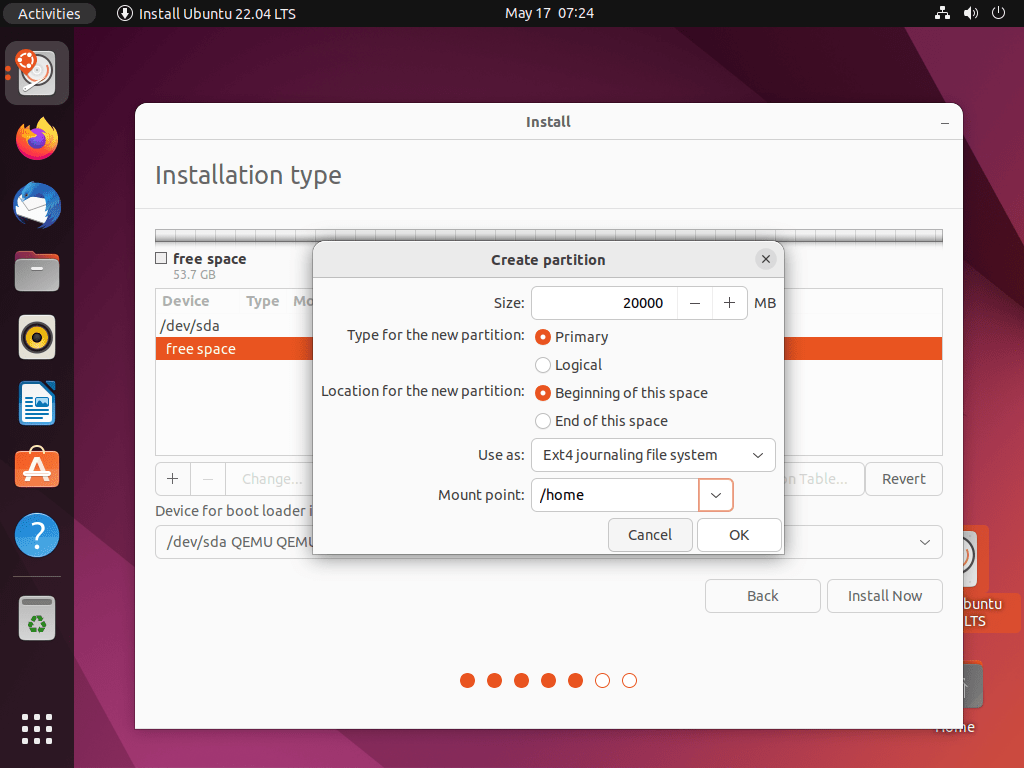
Enter the partition size, type of partition (i.e. primary or logical), filesystem type (E.g. EXT4), and the mount point (E.g. /home) and click OK.
Here I will be creating HOME partition:
You will see the newly created partition under the Device section. Again, choose the free space and click the + sigh to create another partition.
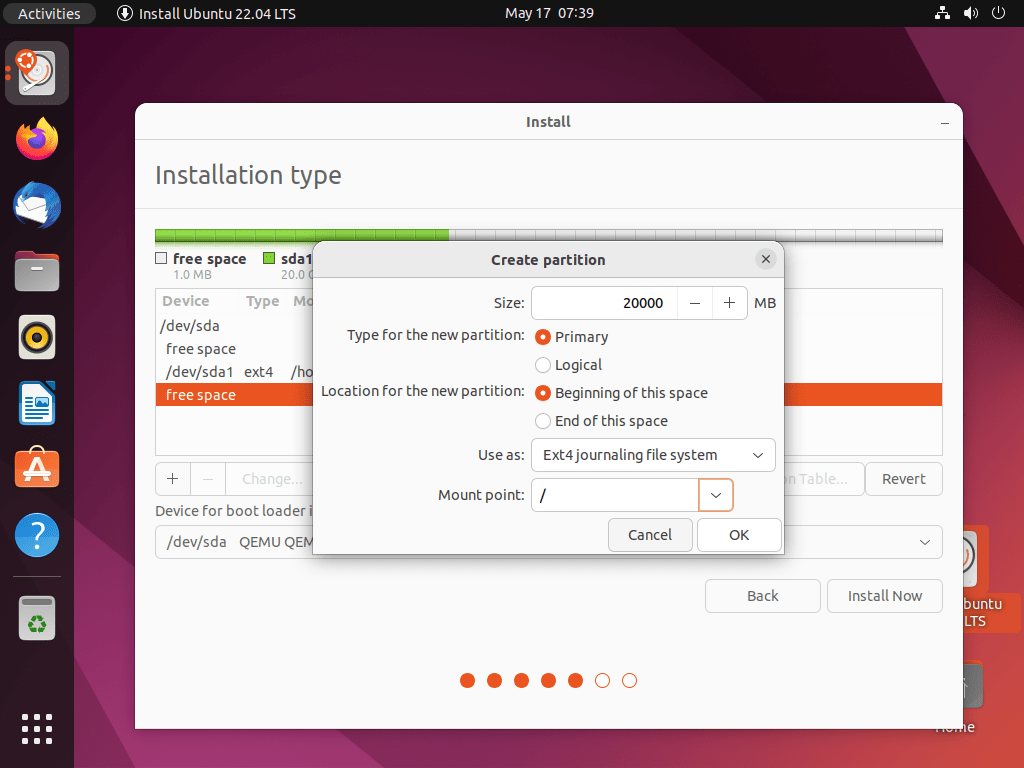
Enter the partition details and click OK. Here I am creating root (/) partition.
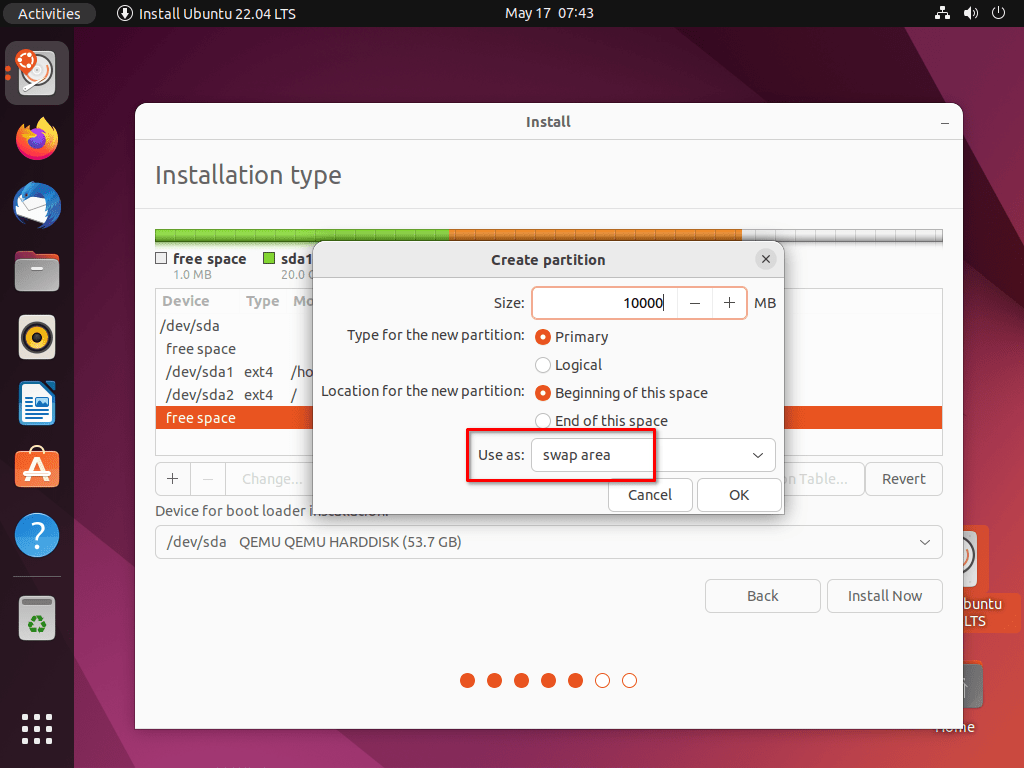
Next, we need to create a Swap partition. Just follow the same steps as shown above to create a Swap partition. The only minor difference is you need to choose swap option as filesystem as shown in the below screenshot. The size of the Swap partition should be the at least the size of your RAM.
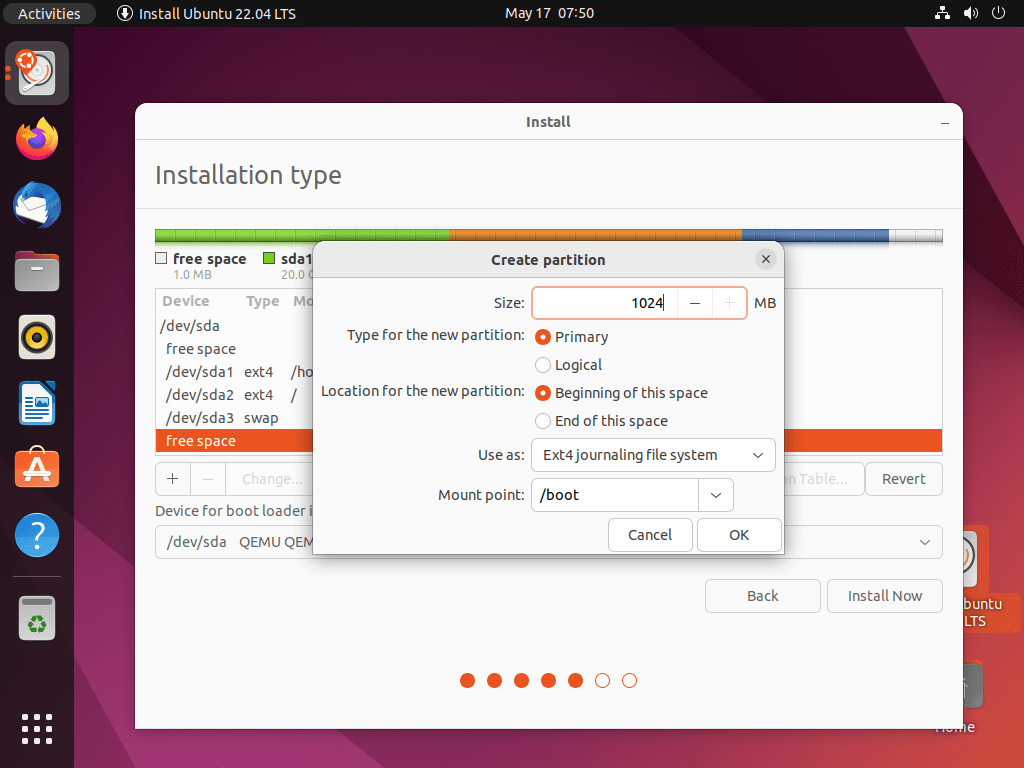
Next we need to create boot partition. Make sure you have selected /boot as mount point.
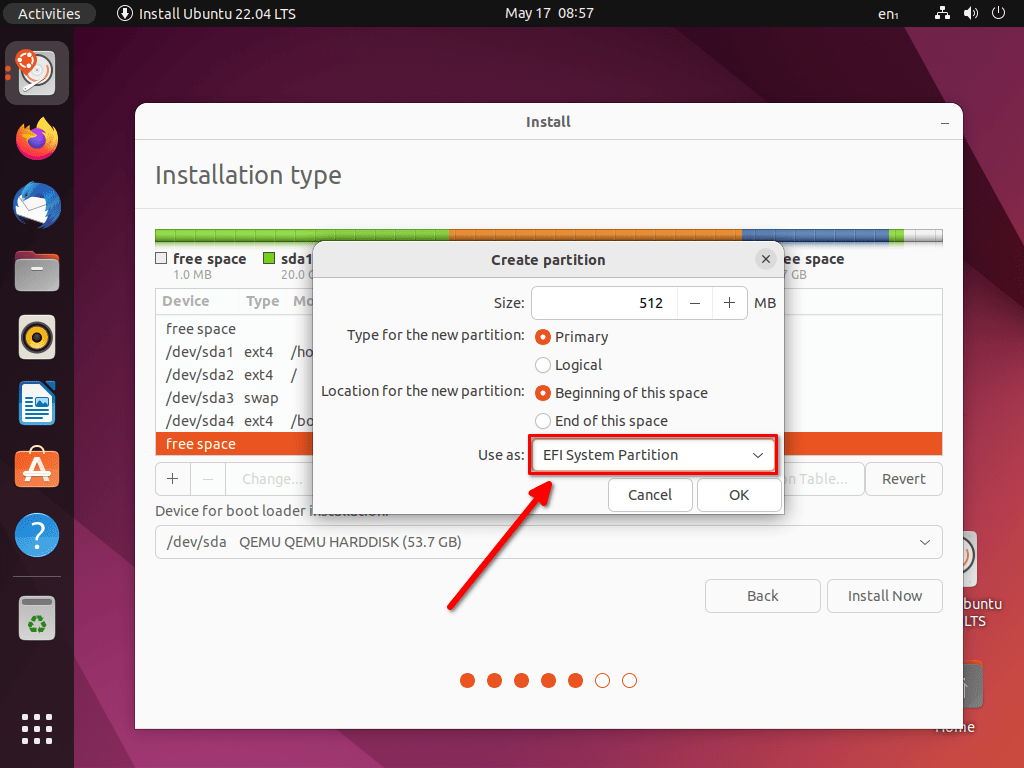
Note: If you want to install Ubuntu on a GPT disk (you can check it via the 'sudo parted -l' command), you will need either an EFI partition (if your BIOS is set up in EFI mode) or a BIOS-Boot partition (if your BIOS is set up in Legacy mode). EFI partition is also called as ESP.
Create an EFI partition as shown below. Please note that you should choose "EFI System Partition" as the filesystem type.
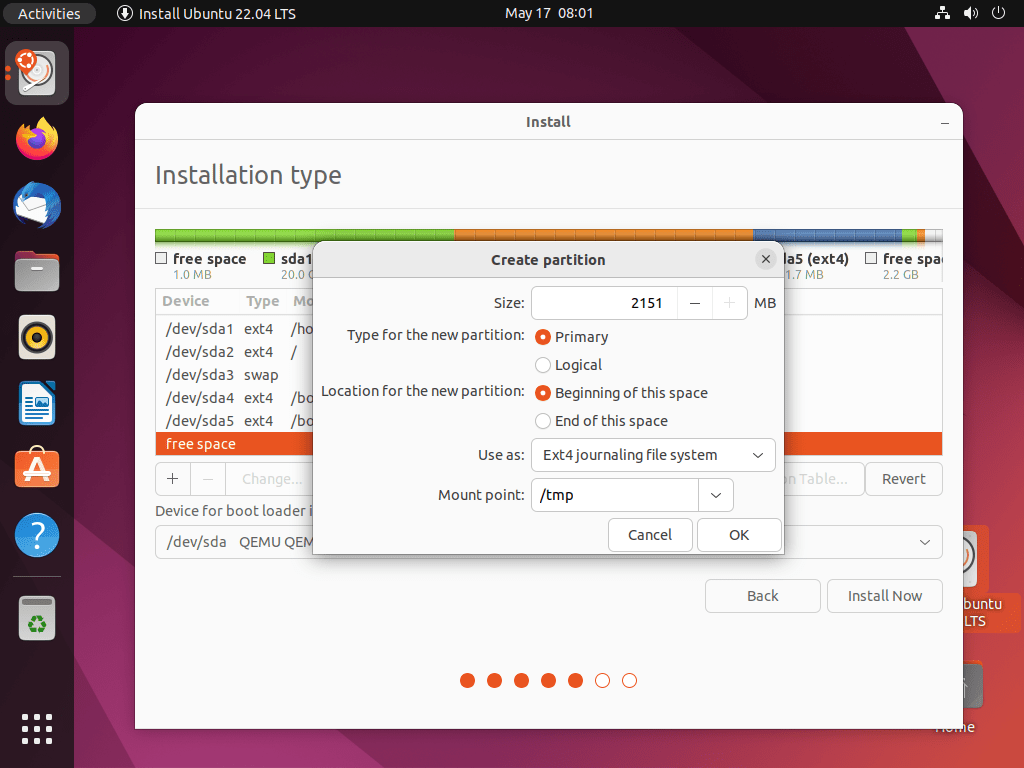
You can use the rest of disk space for other partitions such as /var, /srv, /tmp etc.
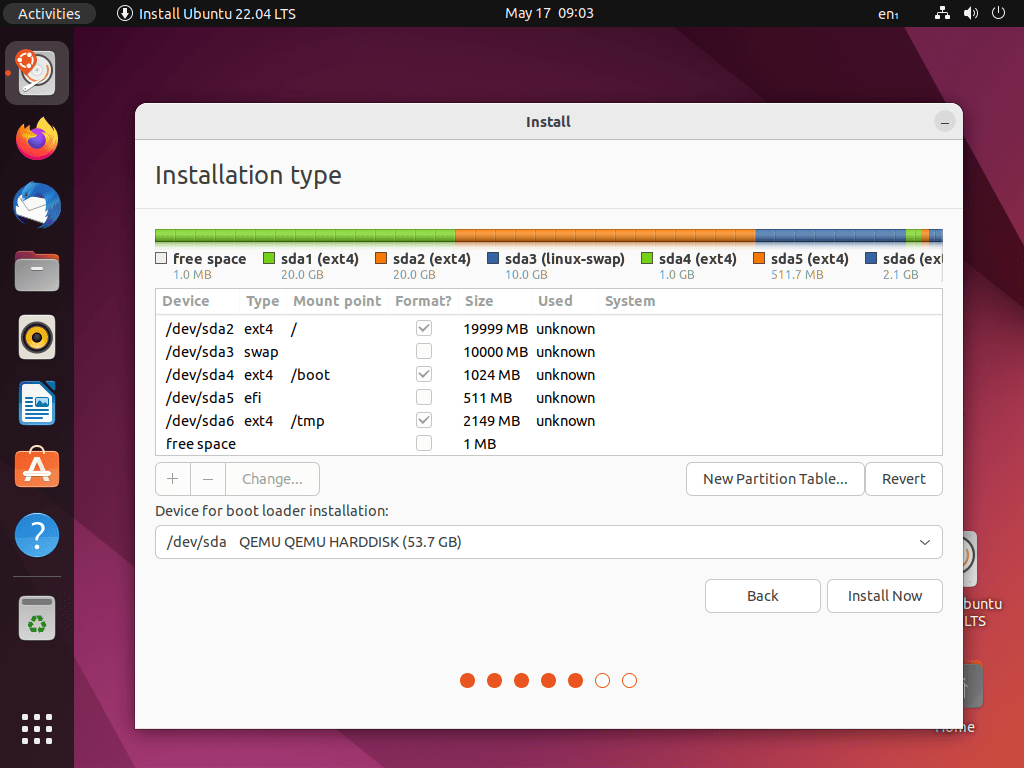
After creating all partitions, review them and see if it is OK for you. If you want to delete a partition, just choose it and click the - (minus) sign. You can modify the partition details by clicking on the "Change" button.
If you're OK with the current partitioning scheme, just click the "Install Now" button to continue.
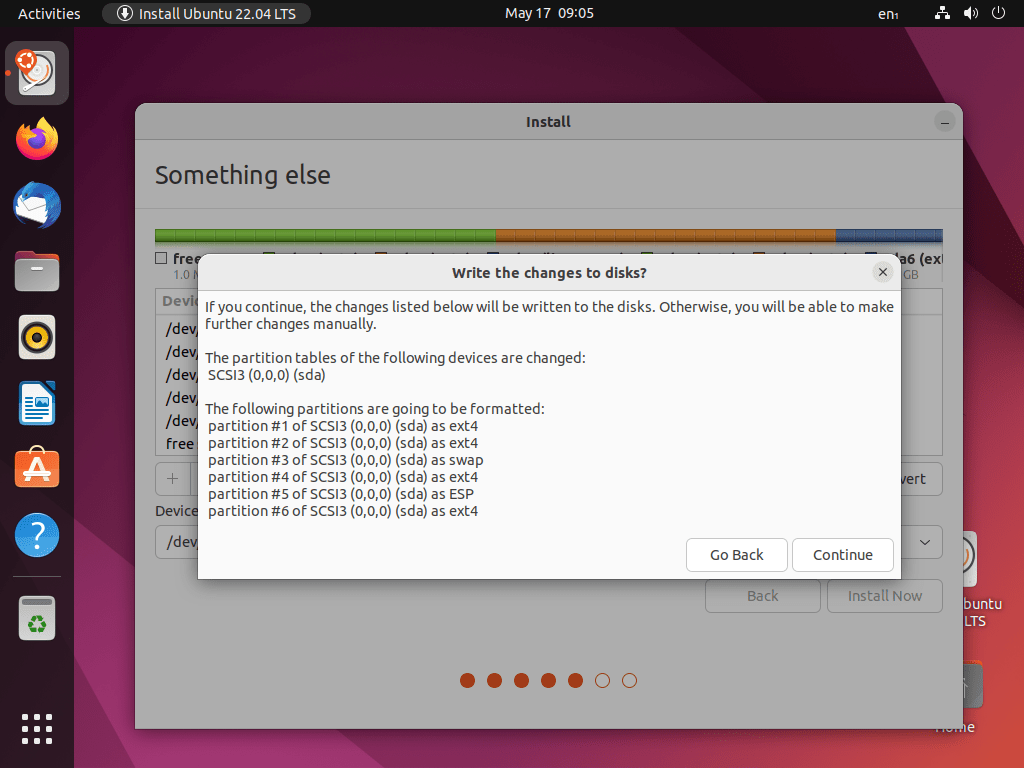
Click the "Continue" button to write the changes to the disk.
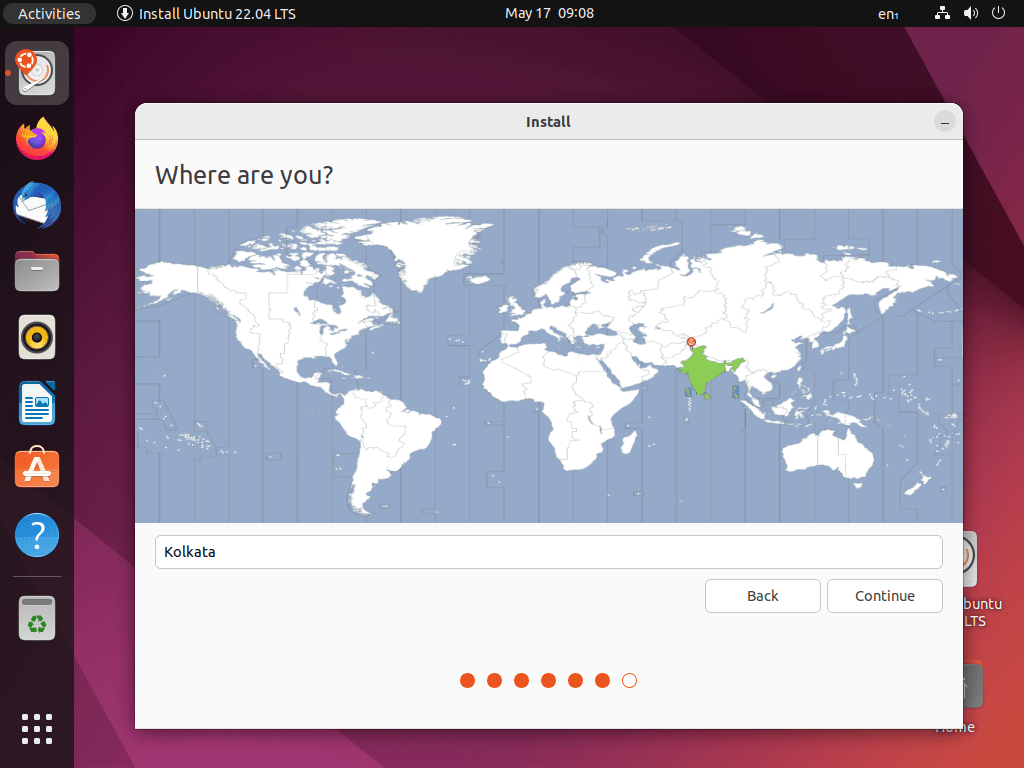
Step 6 - Choose Location
Choose where you live and click the "Continue" button.
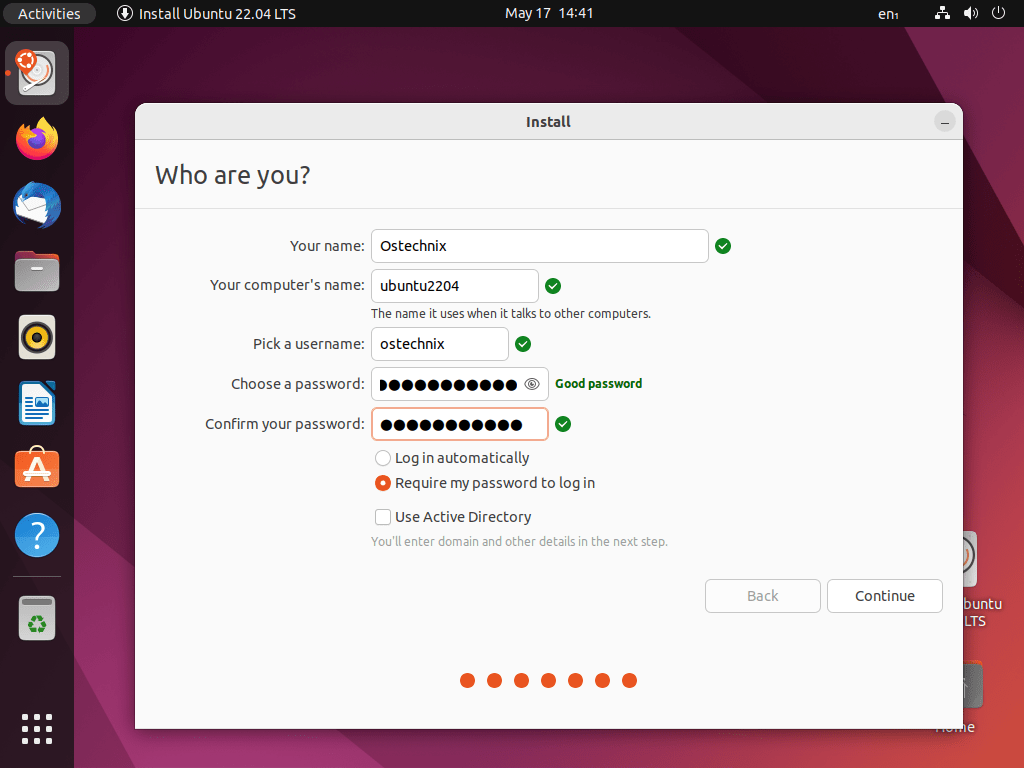
Step 7 - Enter Your Hostname and Username Details
Enter your system name, username and a strong password to the user.
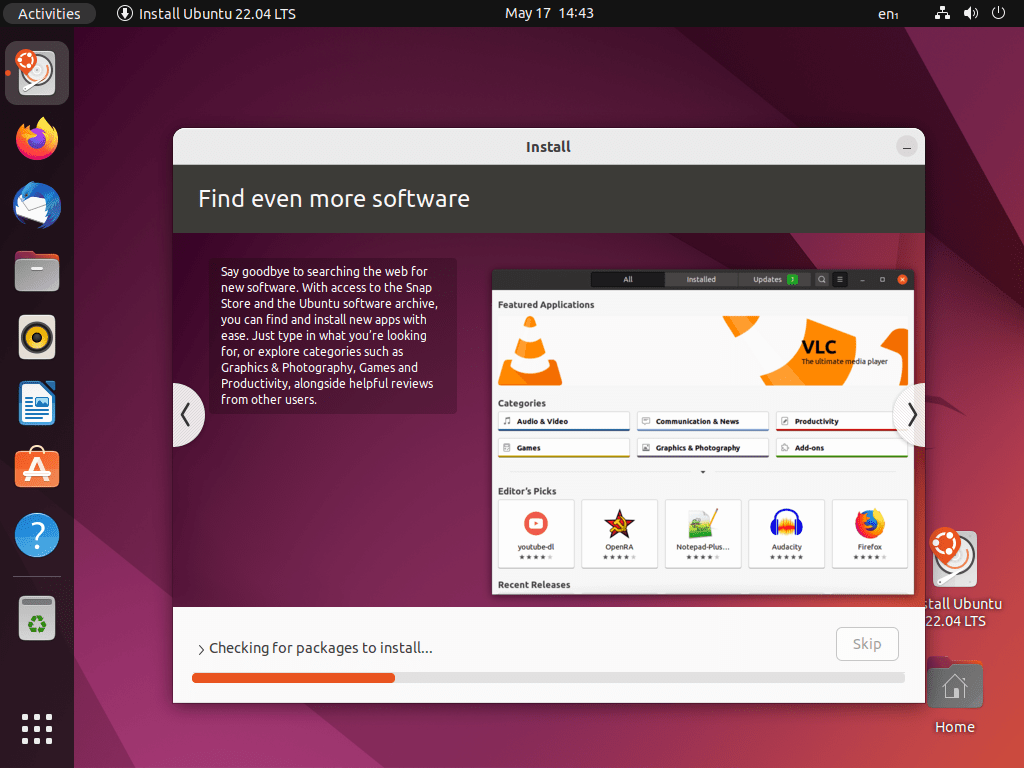
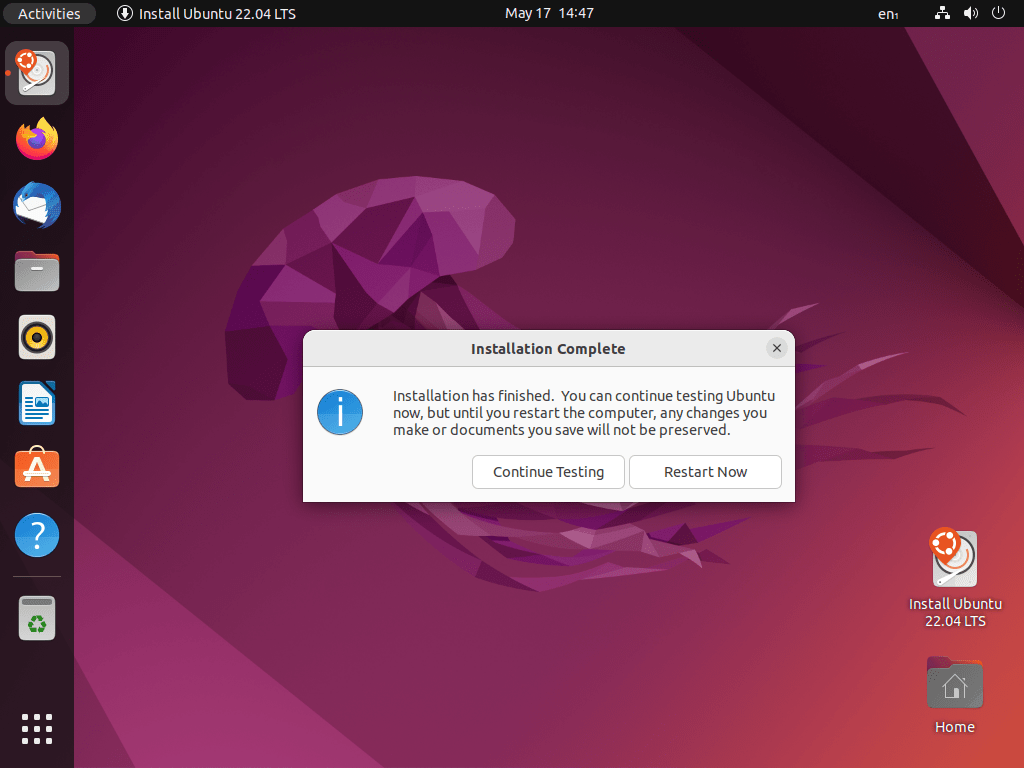
The Ubuntu 22.04 LTS desktop installation will begin now.
After installation is completed, remove the installation medium and reboot your system.
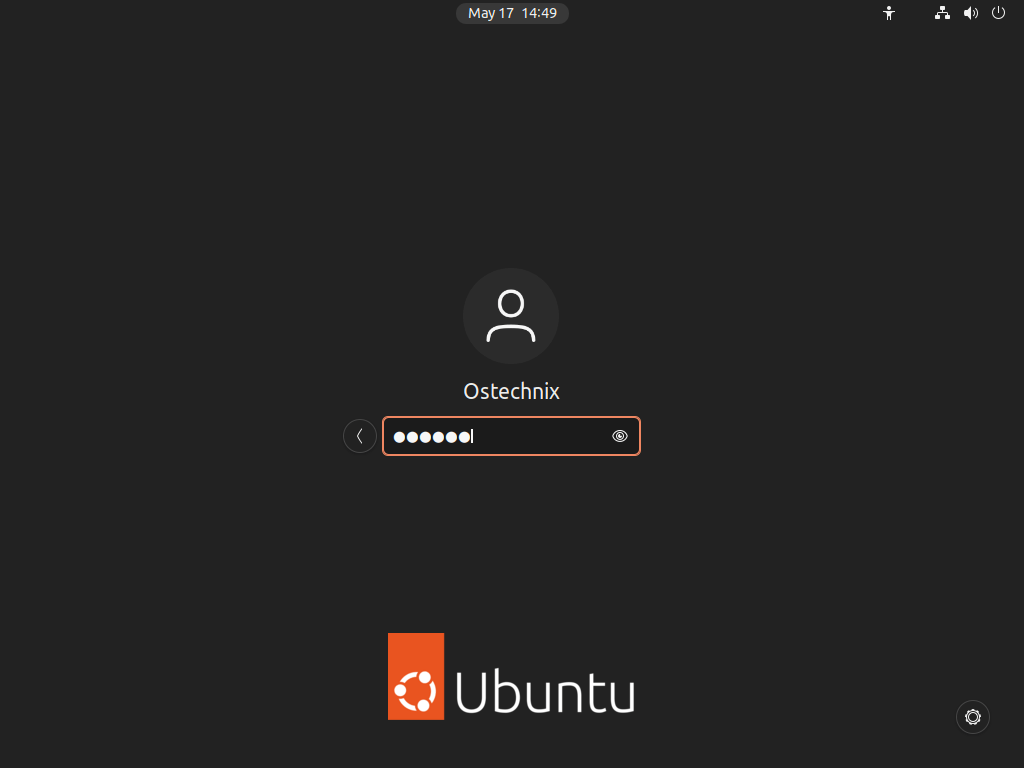
Step 8 - Login to Ubuntu 22.04 LTS Desktop
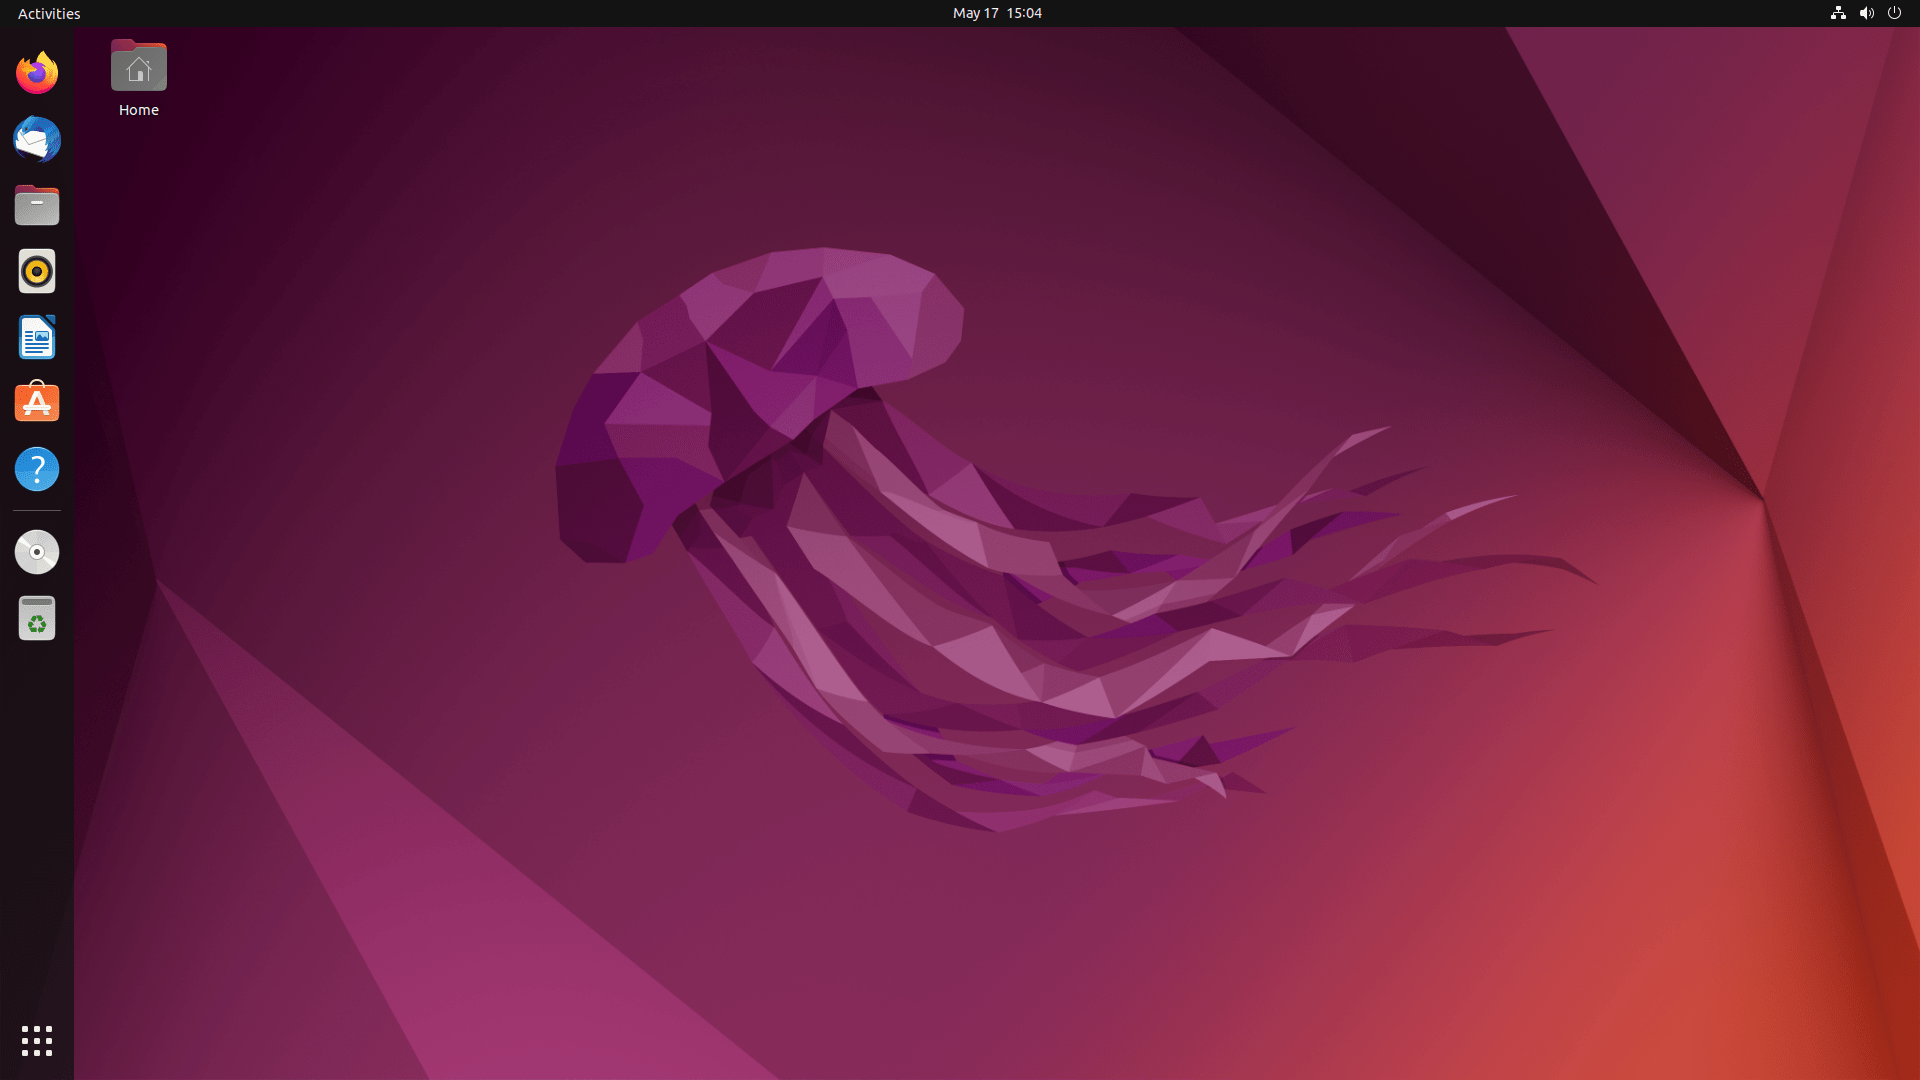
Login to the newly installed Ubuntu desktop.
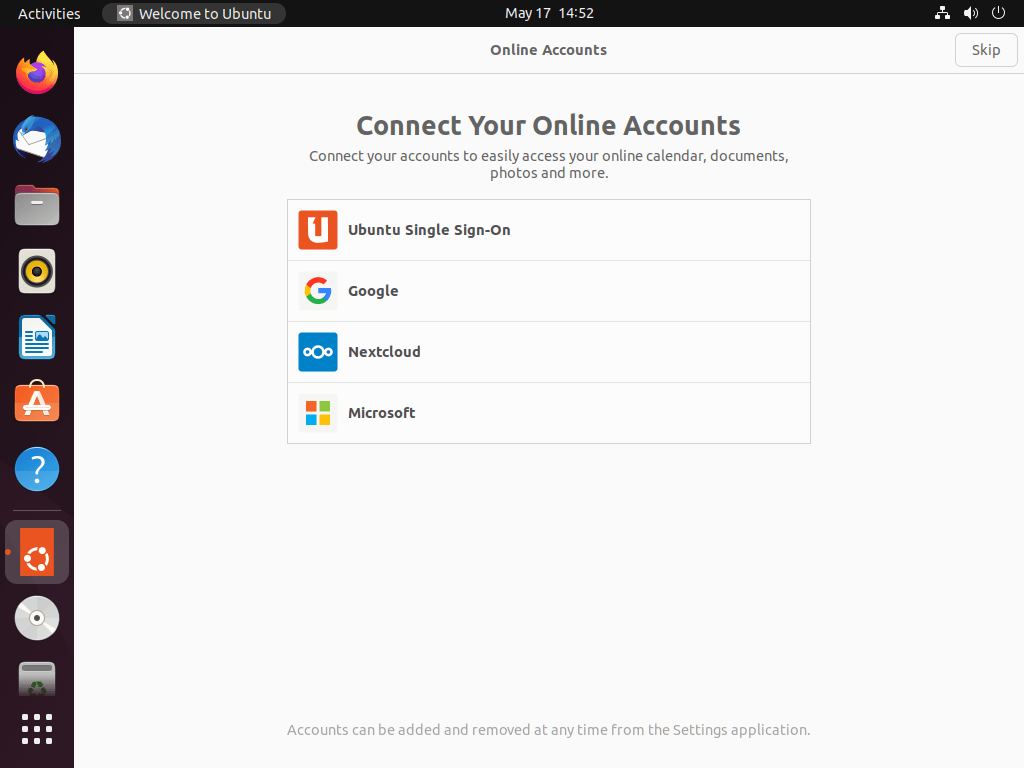
When you login for the first time, you will prompted to connect your online accounts. This is an optional step. You can safely skip it for now.
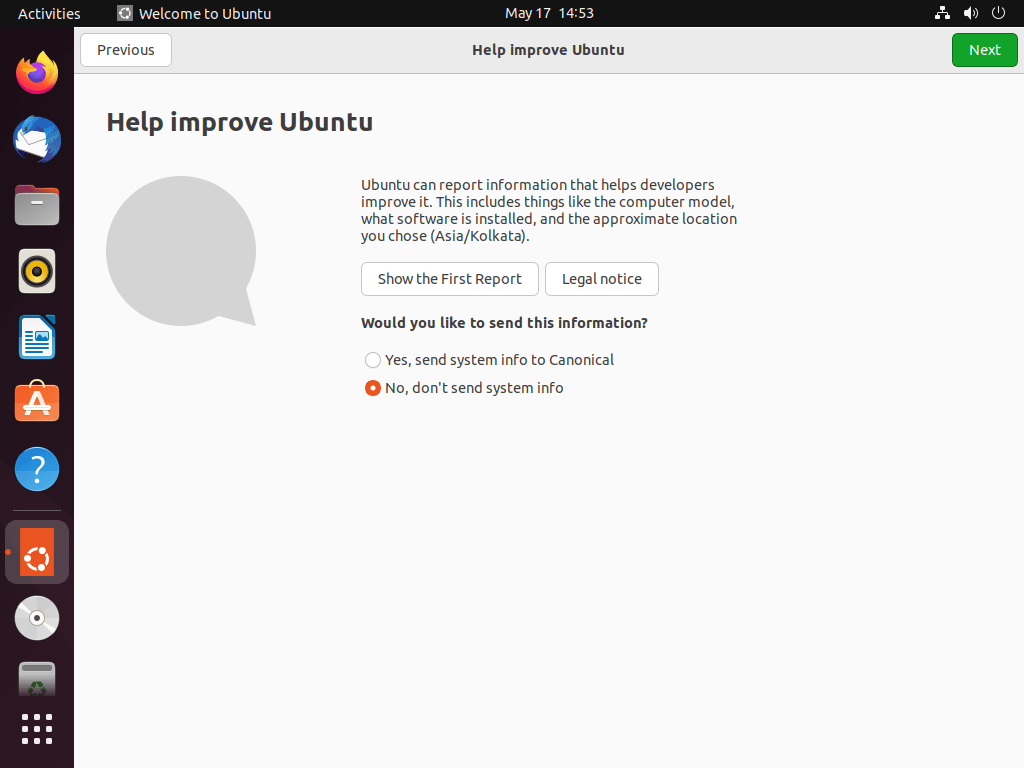
Next you can opt in or opt out for sharing information about your computer to the Ubuntu developers to improve Ubuntu. It is entirely up to your choice.
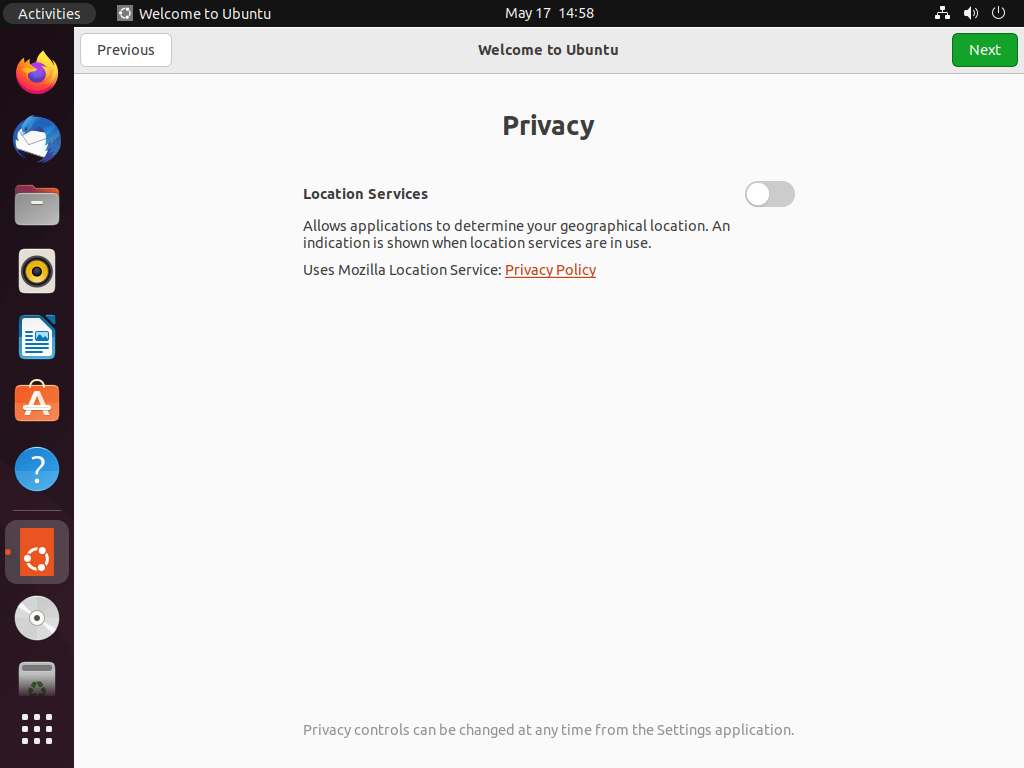
In this step, you can choose if you want to allow/deny the applications to determine your current geographical location.
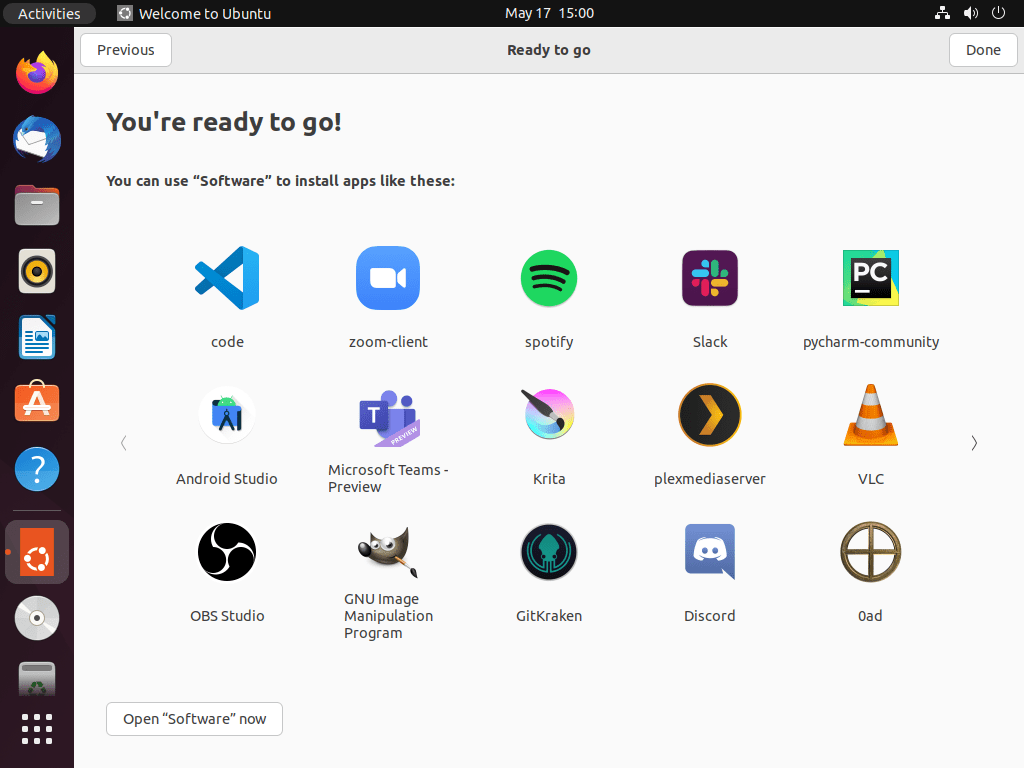
Congratulations! Ubuntu 22.04 LTS desktop edition has been successfully installed and setup in your system! You're good to go now!! click "Done" to close this wizard.
Start using Ubuntu 22.04 LTS desktop!
Conclusion
In this step by step tutorial, we learned how to download latest Ubuntu 22.04 LTS desktop version and how to create a Ubuntu bootable USB drive using the ISO and finally how to install Ubuntu 22.04 LTS desktop edition with screenshots.

2 comments
How did you create six primary partitions
The steps are clearly shown with screenshots in the article. Please read it carefully.