Randys Bench

A repository for projects past and present


1 Comment

Solar Spectrograph…hittin’ the home stretch

Now that Fall is upon us here in North America it’s time to do some thinking about projects to pursue during the long Winter months ahead.

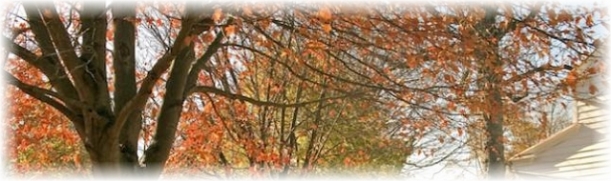
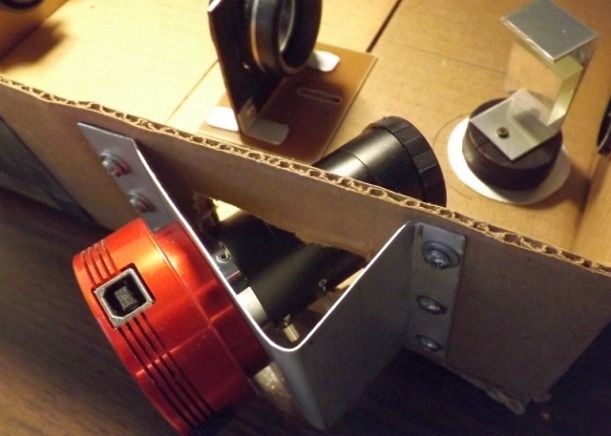
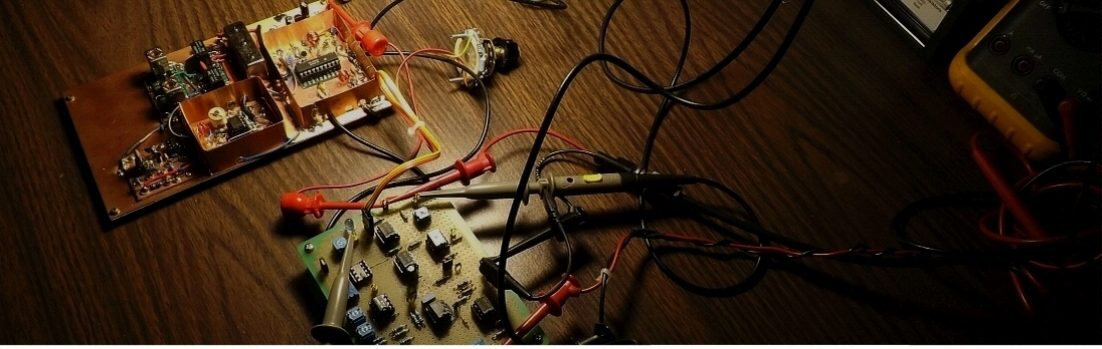
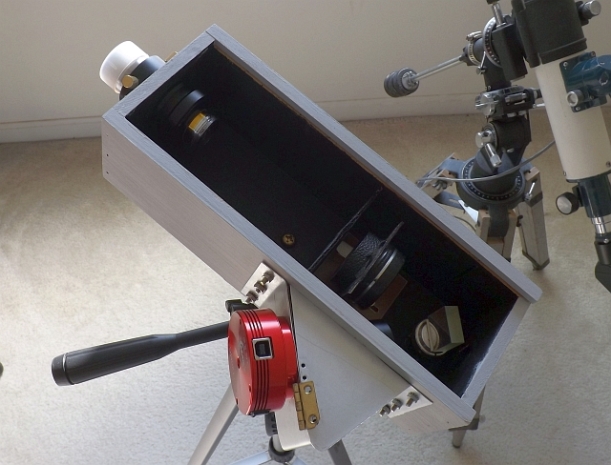
But first an update on the compact solar spectrograph (CSS)…finished up the painting, flat black for the interior and a rather unexciting gray for the exterior. Turned out pretty well on the hole…didn’t slop too much around. Finished the 1/4 -20 mounting hardware and got attached to a cheapy tripod bought off Amazon. Also, I added a light baffle between the entrance slit and the collimator lens to block any stray light from reaching the reflection grating directly (improves contrast). Just a black cardboard piece with a correctly sized hole fashioned in it. Here’s what it looks like today:

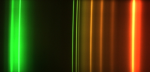
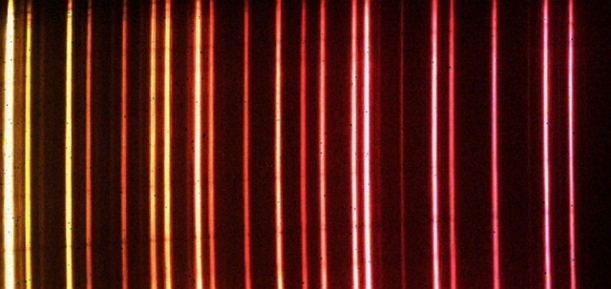
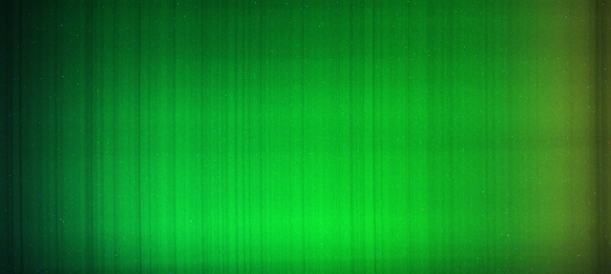
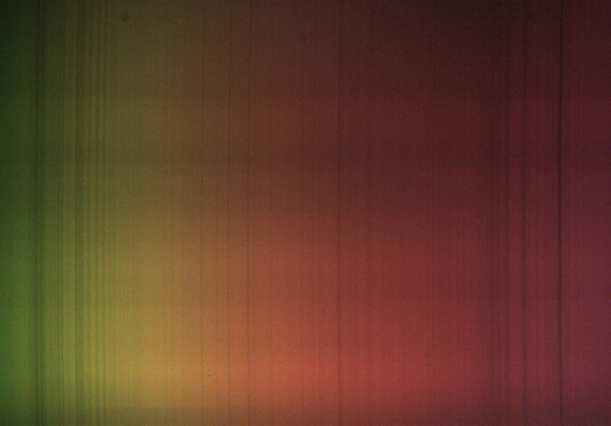
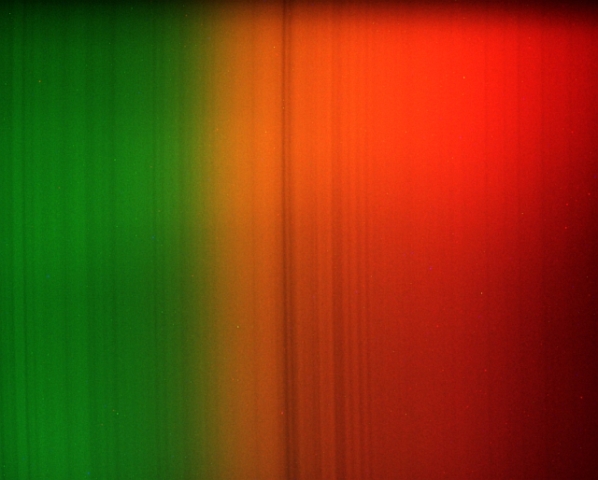
And a recent solar spectrogram…with a few dust spots which seem to have crept into the optics. On the right is the terrestrial Fraunhofer B diatomic oxygen band and the left Fraunhofer’s Hydrogen alpha C line.

So, at least for the moment this spectrograph came out as I expected and maybe a little better in regards to usability and performance. I have a few future hardware changes I’m considering, a resolution upgrade etc. but for now lacking necessary funds for this, I’m good.
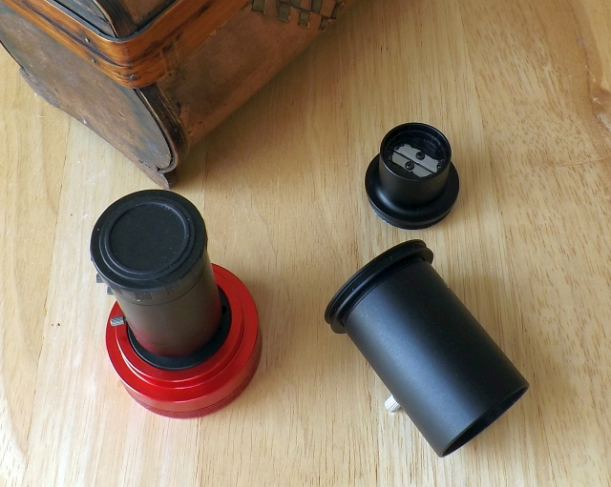
Actually I’ve already begun the next project and have made some progress. The project? No surprise it’s another spectrograph! This time however I’m striving for even lighter overall weight, increased portability and higher light throughput efficiency. The application will be for imaging stellar objects from stars to nebula using the 80mm refractor I recently added. The prototype (Lowres Compact Stellar Spectrograph) will use an inexpensive transmission grating of 500 l/mm I purchased off of Amazon a few weeks back.The body of the instrument is using an adapter designed for a Nikon DSLR/SLR Camera to 1.25″ telescope focuser. Removing the camera T-ring permits connecting a M42 .75 equipped ZWO camera.

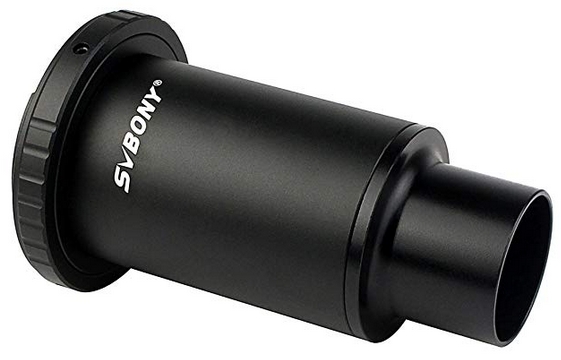
The 1.25″ barrel (also M42 .75 threaded) unscrews and is ideal for incorporating an entrance slit. In the demonstration version a sleeve slide- in with a set of razor blades.

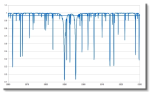
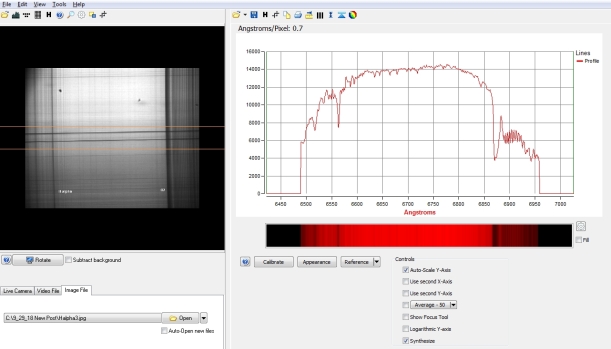
So it looks like for the foreseeable future spectroscopy and revisiting lunar imaging will continue during the time ahead. Besides putting together the LRCSS I’ve been looking at a different imaging/analysis program specifically designed for spectroscopy, that being RSpec from Tom Fields. There’s a 30 day evaluation version available for a good look see. Below shows RSpec’s interface with the above spectrogram loaded and it’s calibrated profile obtained with just a few clicks of the mouse…

Clear skies!


Compact Solar Spectrograph Update…

Today is a rather cold and rainy one, a rather nice change from the 90 deg+ weather we’ve been having as of late. But, a good day for a bit of bench fun.

I’m finally moving beyond the world of cardboard mockups into target enclosure territory. I managed a few more solar test spectra before winding down the preliminary design:

Sodium Double D line region

2nd Sodium Double D line region

Magnesium triplet

Atmospheric O2

With these results in place I feel pretty good about finalizing this design and begin the effort of placing the necessary components in a final configuration.

Below shows the configuration for assuring the slit is in the collimator’s focus. This uses a finder scope (partially pictured on the right), focused at infinity to observe the entrance slit. By moving the collimation lens the in-focus spot is obtained. The small drilled hole is then plugged that allows this calibration step.


Solar Spectrograph Plodding along…

I thought I’d take a moment out of a busy Summer season to provide a development update on the solar spectrograph project. I ended up going back to my original 35mm 150mm FL collimating lens I’d used previously on the original grating spectrograph built around 2003. The proposed lens for this function was rejected since it’s diameter was such as to not completely illuminate the selected reflective grating with collimated light. Sadly it is a fine quality achromatic lens that’s been looking for a home…I’m sure it’s time will come. Below is a photo of the current prototype, in cardboard of course…

Originally I was using a camera / grating angle of 90 deg but found this was too restrictive and produced aberrations at this sharp angle. So I fabricated an aluminum piece to provide an approx. 38 deg angle which is in line with classic spectrograph design practices. And it works alot better as well! At this time I’m using a fixed entrance slit arrangement using cheap razor blades which I manually adjust. Currently they are fixed with an opening of 2mil (~51 um) which provides enough illumination for testing. Recently I purchased a nice adjustable slit from SurplusShed. They rarely are stocked but I got a heads up reading a recent post on the Cloudy Nights forum which mentioned SurplusShed had received some limited stock…I had one on order within the hour and received it 2 days later.

To use this slit will involve extending the slit adjustment screw to extend further out for the enclosure I’ve selected. Speaking of that I ran across a nice softwood box of the right dimensions, rigidity and weight to accommodate the selected spectrograph components.

Once I conclude the necessary cardboard version testing I’ll begin making the needed cutouts (after a lot measurements x2) on the target box and start fitting the components. One thing that is of particular importance is the box weight. I plan on utilizing a new refractor I recently bought off of Amazon a month ago to ideally image the spectra of stellar objects. This will require a means of guiding to keep the object centered on the slit entrance for several minutes. this will be incorporated at some point in the future. Here’s a shot of the Meade 80mm refractor I purchased along with a few adapters and accessories:

So, that’s the current state so far of the project. With that here’s few spectra I captured a few days ago. The first are calibration lamps (Neon bulb and Compact fluorescent) as well as a few solar spectra shots.

Neon

Compact fluorescent bulb

Solar Spectrum Magnesium triplet to Sodium doublet

Solar Spectrum Sodium doublet to Hydrogen alpha region

Solar Spectrum Sodium doublet

Hydrogen beta to Magnesium triplet


Sky Wanderings II

I’ve had a few decently clear early morning skies recently that I tried to take advantage of with some success. The first was actually not so much early morning but near 11pm since sleeping that particular night was a struggle. Cygnus was high in the sky and shooting Deneb turned out to be my choice…I think this was a stack of 75 light frames coupled with 20 dark frames.

The next image was collected around 4am a few days later when M45 (the Pleiades) was up but still a bit low in the eastern sky. The seeing wasn’t great with some intermittent high clouds but we gave it a go nevertheless… This was a stack (DeepSkyStacker) of 140 light frames and 30 dark frames. Not the finest image but as the Summer rolls over into Fall things will improve I’m sure.

All for now…see you later

Randy


Sky Wanderings

I finally had some descent skies the morning of June 25th (early morning 3am) and was able to do some more testing with the ASI120MC camera and Sharpcap software. Although the Moon was out in the Southwest (92% illuminated) the seeing appeared pretty good for this time of year so I gave it a go…besides I was already up anyway! As a target I chose the area around the star Mirfak in the constellation of Perseus situated in the northeast. This area is also termed the Alpha Persei Association. This association covers about 5 degrees around Mirfak. The image below comprises 75 light frames of 5sec each stacked in DeepSkyStacker. Mirfak is the bright star in the upper center of the photo…

Here’s the area covered in the excellent Stellarium sky simulator:

Hopefully I’ll get some more clear skies this Summer for imaging…We’ll see