
Hydrogen is the most common element in the universe so it’s not surprising to find it in abundance in most of the nebulae we like to photograph. It becomes ionized when it’s exposed to high energy radiation from a nearby star and glows in a characteristic deep red color. As astro-imagers we can use a special band-pass filter that only allows that particular color to pass through to the camera’s sensor, frequently called narrowband imaging. (Note the term “nearby star” is relative – the star is usually still a long way off by our Earthly measurements.) The beauty of that arrangement is that a long exposure reveals just the detail in the gas cloud without the image becoming overwhelmed by starlight or other light sources. To some degree narrowband filters will even cut through moonlight and light pollution although nothing beats a dark sky.
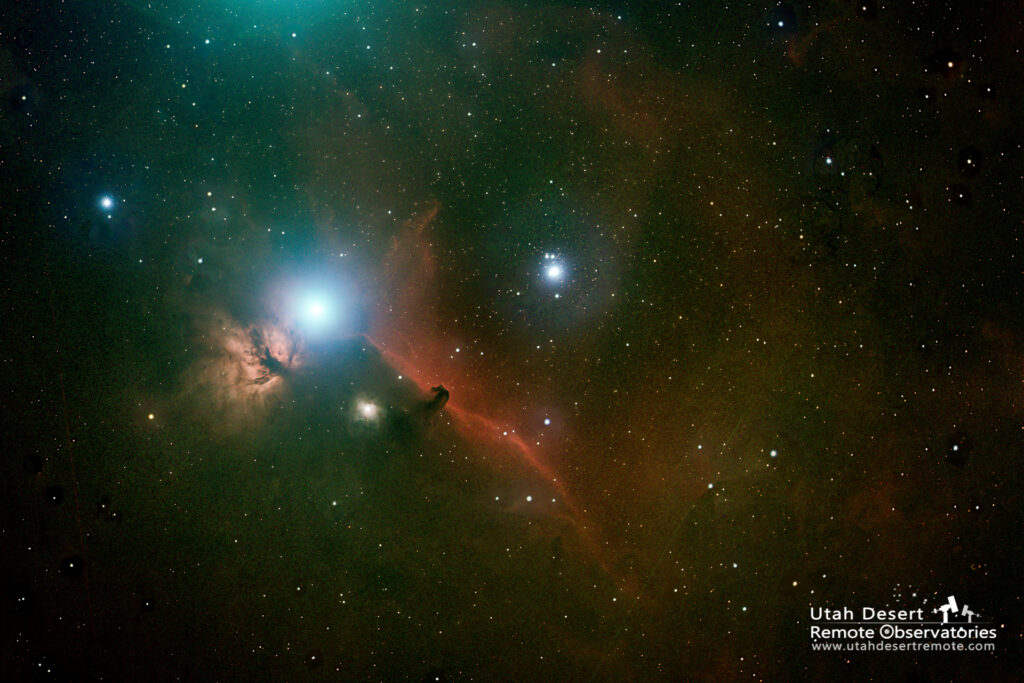
There are lots of ways to deal with color in astro images. One of the most popular is to show the object in natural using standard RGB imaging with either a one-shot color camera or using red, green and blue filters with a monochrome astronomy camera. While that presents an image grounded in reality it doesn’t communicate all of the available information about the object. Narrowband filters, on the other hand, do a great job of isolating the specific elements that are most common in nebulae such as hydrogen, oxygen and sulfur. While those images convey more information they tend to move farther away from natural color.
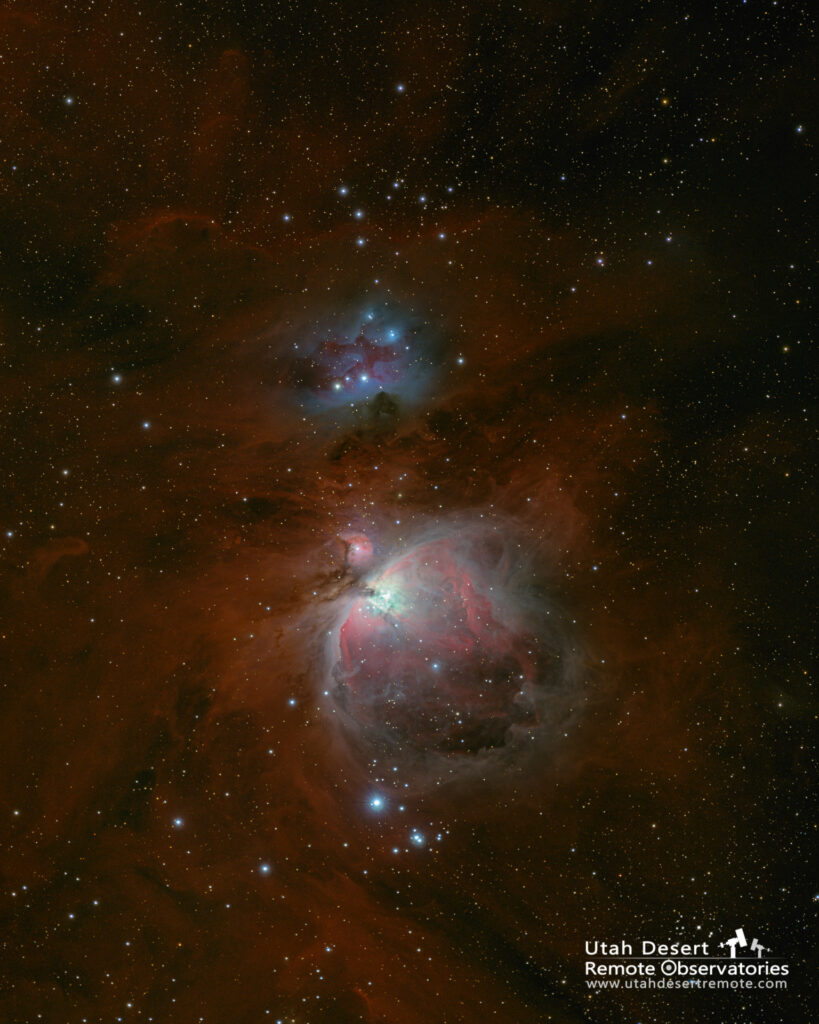
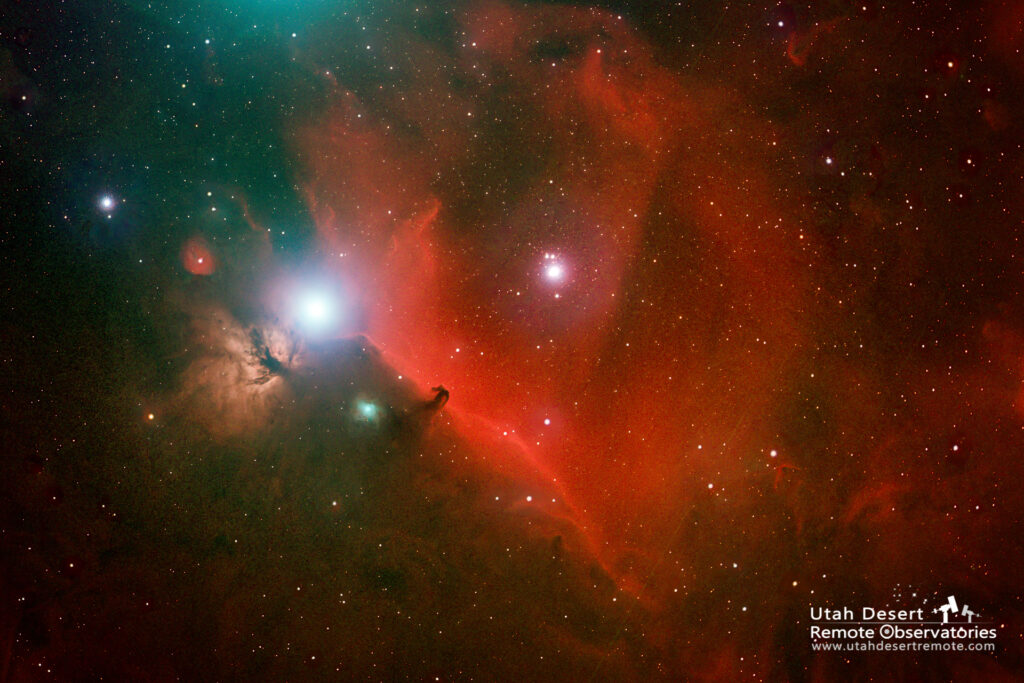
One solution is to combine a natural color RGB image with additional image data captured through a narrowband filter. The examples here show a very popular approach of adding red hydrogen data to a full color RGB image in an attempt to combine the best of both approaches. Hydrogen is very abundant in the universe and its deep red color adds both color and detail to many targets.

As mentioned earlier, natural RGB can be captured one of two ways; with a one-shot color camera or with RGB filters on a monochrome camera. I generally prefer using a monochrome camera for a couple reasons. First of all it will give you better results. A one-shot color camera uses a color filter array over the sensor so that each individual pixel has one of three colors in front of it. Software then has to interpolate the remaining two colors based on the values of adjacent pixels. Using colored filters on a monochrome camera uses every pixel with every color so more detail is captured.
As second big advantage is that you only need one camera. The imaging systems at Utah Desert Remote Observatories include a filter wheel that will automatically rotate the selected filter in front of the camera so you can freely switch between red, green, blue, hydrogen, oxygen and sulfur in a single session. That makes it easy and efficient to capture RGB data and narrowband data in the same session.
There are however two drawbacks to this approach. The biggest disadvantage is in processing time and complexity. It’s not particularly difficult to combine monochrome images to produce a color result – if you know how. Many people prefer the comfort of working with a color image. (Fortunately Utah Desert Remote Observatories also offers processing services so we can combine the individual red, green and blue datasets into a full color .TIFF file for you.)
The other possible drawback is imaging time. It’s tempting to think of the three color filter sets as additive sets that are duplicating imaging time. But 30 minutes of each red, green and blue for a total of 90 minutes is probably equal in image quality to 90 minutes of imaging with a one-shot color camera.
Once you have the files the actual mechanics of adding the Ha data will vary depending on what post-processing software you’re using. My background is as a photographer so I’m very comfortable and familiar with Photoshop. I nearly always begin by stacking the various filter sets in Deep Sky Stacker (DSS) and save the result as an intermediate .FITS file. That gives me one file for each of the filters used, usually red, green, blue and hydrogen. I then use FITS Liberator to do a preliminary stretch on each of the intermediate files that I can save as a .TIFF file that’s compatible with Photoshop. At that point I can load the files as layers in Photoshop. Note that FITS Liberator always outputs a grayscale image so the new image in Photoshop needs to have its mode switched from Grayscale to RGB.
The fun really starts in Photoshop. There are lots of ways to color map the individual grayscale images. I use what I firmly believe is the easiest way; I simply go to the blending options of each layer and turn off the unwanted color channels. For instance, on the layer that I want to represent the green color channel I turn off the red and blue channels. With just a few mouse clicks that converts the layer stack of grayscale images into a full color image.
You might choose one of two basic approaches. You can simply substitute the Ha data for the red data and create what might be called an HaGB image. A second approach is to add the Ha as a overlay to the the full color RGB image to create an HaRGB image. I generally take the second approach and put the Ha layer on top of the layer stack, turn off its green and blue channels and place that layer in the Lighten blending mode. That way the Ha data adds to the full color image but doesn’t simply replace the natural color.