Hiking the Alpamayo Basecamp Trek without a Guide

How much do you know about hiking in Peru?
When we arrived in Huaraz for the first time back in 2017, we knew next to nothing.
This small town in northern Peru has some of the best hiking in the world. On that trip, we hiked some of the most famous trails in the area: Laguna 69, Lake Chirrup, Santa Cruz, and the Huayhuash Circuit. These are all high altitude treks with beautiful lake and mountain views and varying levels of difficulty.
When we returned in 2019, we were determined to see more mountains and less people.
In came The Alpamayo Basecamp Trek. This 4-7 day hike gives you spectacular views of Alpamayo and the Cordillera Blanca and you’ll only see a few people each day.
Plus, it can easily be combined with the famous Santa Cruz trek to create the spectacular 8-12 day Alpamayo Circuit, with even more mountains (but admittedly more people too).
We hiked completely unsupported in June 2019. Here's everything you need to know to make the journey, especially for those intrepid souls that don't want (or can't afford!) a local guide.
Trek Overview
This trek is one of the premier hikes accessible from Huaraz in northern Peru. Set in the Cordillera Blanca range, it takes you between the villages of Hualcayan and Pampabamba along the backside of the impressive Alpamayo mastiff and its cohorts.
Generally completed in 4-7 days (there are lots of potential side trips), it can be easily combined with other hikes around the Cordillera Blanca, including the popular Santa Cruz Trek, to make the Alpamayo Circuit. This will take a minimum of 8 days and likely more in the range of 11.
However, things on the Basecamp side are much more tranquilo, with fewer people and just as many views. It's one of Peru's best hikes. It rivals (although in our book, does not beat) The Huayhuash Circuit.
Getting to and from the Trail
To/From Huaraz
Huaraz is the biggest city in the region of Ancash, followed by Caraz. Both are in striking distance of the Alpamayo Basecamp Trek.
You can fly into Huaraz from Lima (way too expensive for our blood) or get a bus from Lima (and some other major Peruvian cities) to either city for between 30 and 80 soles, depending on the level of luxury.
Directional Considerations
We chose to hike this trek in the reverse direction that most guided groups take. We started in the town of Hualcayan and hiked toward Pampabamba. It honestly doesn't much matter, though it's a big (but easy) climb the first day hiking from Hualcayan like we did. Choose whatever is easiest logistically for you.
To/From Caraz
Colectivos are constantly leaving from and to Huaraz from Jiron Caraz. These take about 2 hours depending on traffic and road work and cost 7 soles.
To/From Cashpampa
When you arrive in Caraz, walk to the market in town and ask for the combi to Cashapampa. These also cost 7 soles and take an hour, although here the drivers start trying to get shifty with tourist prices so hold your ground.
Same thing works in reverse.
to/From Hualcayan
We walked from Cashapampa to Hualcayan to start the trek. If you're interested in doing the whole circuit (including the Santa Cruz portion), you will start and finish from Cashapampa and/or Hualcayan.
We also heard tell that you can catch another colectivo from Caraz to the town of Santa Cruz for a couple soles. Then it's an 8 sole combi for Hualcayan. We didn't do this ourselves, but the locals insisted it was a real option.
Combis from Caraz to Hualcayan are nigh nonexistent, but may run very very occasionally. We're not taxi people, but a friend took one from Caraz to Hualcayan for 60 soles. Happy bargaining.
to/from Pampabamba
On the other end, busses leave daily from Pampabamba to Huaraz or Huaraz to Pampabamba for 30 soles. We've heard that they're a bit miserable and take upwards of 8 hours. Still, they're not a bad option.
If you make it to any towns close to Pampabamba (Jancabamba, towns east of Quishar, etc.), you should be able to get a colectivo easily into town, though prices and length will vary.
to/From Yanama and Vaqueria
We finished the trek at Yanama. This is not the normal (but a highly recommended!) end point. If you finish here or at Vaqueria, combis leave irregularly until early afternoon to Yungay. This takes 3 hours and costs 15 soles.
In reverse, they only leave from Yungay very early morning.
From Yungay there are regular collectives to Huaraz for 5 soles. These take about 1.5 hours.
Phew. That’s a lot of logistics. Here’s more:
Preparations
Altitude
If you've been reading at all about hiking aound Huaraz, you know you'll need to acclimatize to the altitude. We suggest spending one day resting in the city when you arrive followed by two or preferably three day hikes. It's then best to do a one or two night trip before attempting something longer like the Alpamayo Basecamp trek.
Following this formula, we had absolutely no trouble. If you suffer symptoms of altitude sickness like headache, sleepiness or trouble sleeping, or dizziness, get down to a lower elevation as quickly as possible. Severe symptoms can be dangerous and will only be relieved by going down. Be aware that you may need special travel insurance to hike this high as well (up to 5000m)!
gear
You'll need to be completely self sufficient for this hike.
It's a true backpacking trip and you'll need everything as such - a subject for a completely different post. But suffice to say you'll want all: food, cooking equipment, weather appropriate clothes, camping equipment, first aid, navigation etc.
The first time we visited Huaraz, we bought (and later sold) all our gear in the country. We ended up selling everything for only 150 soles less than we bought it for, so it turned out to be a great deal! However, we were constantly cold and our cheap tent broke half way through.
Now we always travel with a tent and the rest of our gear. Because we came to Peru from the US, we were even able to bring a bunch of yummy food!
If that’s not you, fear not! Everything from food to gas to camping equipment to maps can be bought in Huaraz. However, it will be more expensive and lower quality than what you can get from countries in Europe or the US.
On the other hand, if you're looking to sell old gear from home, the guide shops here are always looking for new (used) stuff, especially name brands. The import taxes are crazy, so you can sell your stuff personally for a great deal if you want to at the end of your trip.
Services
Back to the hike: there is no accommodation and few places to get food or help along the way.
water
Water, on the other hand, it plentiful. You'll need a way to purify though as there's lots of livestock.
experience
It's really not a hard hike, but we would not suggest it be the first backpacking trip you ever go on. You need to be relatively confident in backcountry terrain to be safe and happy. If you're set on giving it a go, ease in to things with other overnight hiking trips first. The Santa Cruz is probably the best in the region to get you going.
communication
There's no cell phone service on most of this trip. We carried a garmin satellite messenger/gps combo, which we used to think was a bit excessive, but really it's pretty cool. It lets you message friends and family that you're safe or call emergency services in case of SOS.
Tell someone locally and at home where you're going and when you'll be back, just in case.
maps
In terms of navigation, lots of topo maps are for sale in Huaraz, but they're fucking expensive (we're talking between 40 and 100 soles) and you need to honestly ask yourself: can you reallyyy read a topo map? Just asking.
Our suggestion would be to take a picture of a friend's - everyone at the hostels will have them. You could also print out some less detailed maps from online sources, though we found free versions difficult to locate for South America. Plenty of paid apps will do the trick though.
We can also not suggest the Pike's hiking and biking guide to The Cordilleras Blanca and Huayhuash enough. It has intuitive maps of this and many more treks as well and tons of information and tips. It’s really great.
Also do yourself a favor and download maps.me if you haven't already. The whole trek is marked on the map, and your phone will track you via satellite the whole way so you can tell if you're on track even offline. Bring a waterproof bag and a power bank or solar charger, though.
safety
We had no trouble with the locals along the way - everyone was very nice. We did have some unpleasant encounters with dogs though. Carry trekking poles and stay alert, especially near homesteads. God forbid - rabies shots are free in Huaraz.
cash
There are no ATMs after Caraz, so bring the money you'll need.
Costs
We love cost guides, but honestly the costs of this trip will vary widely depending on your situation. To give you an idea:
Transport
🚐
With colectives, you're looking at about 15 soles one way. If you catch a bus, 30 soles one way. Taxis will cost you significantly more.
Fees
💸
Ahh, the subject we've avoided thus far. Most of the hike is in the Parque Nacional Huscaran or PNH. Recently, tickets to the park went up stunningly. It now costs 30 soles for a day, 60 soles for 3 days, or 150 soles for one month. Because tickets are pricy and rather difficult to buy (the office in Huaraz is almost never open), we suggest waiting to buy one until someone forces you to. There are NO checkpoints along the Alpamayo Basecamp trek, we repeat NONE. However, you will almost certainly have to pay on the Santa Cruz. There are checkpoints just outside of Vaqueria and at the trailhead in Cashpampa, plus roving ticket checkers along the trek. There is also a checkpoint on the road between Chacas and Carhuaz. If your bus from Pampabamba crosses through here, you may be asked to pay. So basically, keep your money ready.
Food
🍔
Cooking fuel (butane/propane) in Huaraz is expensive, generally 20 soles for a small and 40 for a large. We did not look for other kinds of fuel in town, and are not confident anything special exists. Through a fluke of free checked bags, we brought our backpacking food from home. If you buy in town, head to the market for fruit, vegetables, nuts, candies, and the like. Pasta is very cheap and lightweight. So are oats. You won't be able to get any fancy dehydrated backpacking food here. Your food budget could vary wildly from 5 to 50 soles a day, depending on what you want to eat.
Gear
⛺️
Again, completely depends. We brought all our own stuff from home, so while this particular trip cost us nothing, we've invested nearly $500 each in our gear over the last year. Minimally, the guidebook will cost $20 and should be ordered before you get to Peru if at all possible. A map will be 30-100 soles if you want an official one. A janky set up for two could be purchased around the streets of Huaraz for 300-500 soles and you can sell it later. You can ask around gringo plaza for deals on rentals, but unless this is the only hike you'll do, it's not a good deal.
Our Itinerary
We tend to hike pretty fast. After a year on the road hiking almost constantly everywhere from Kyrgyzstan to New Zealand, we're well used to it.
That being said, Peru is coooold, and we never got out of the tent before first light (about 7:00 AM in June). We tried to arrive to camp between 3:30 PM and 5:30 PM as we never felt like hanging around outside after dark at 6:30 PM. Instead, we found we needed to be cosied up in our down bags by then.
Days involved several short water and photo breaks and a lunch break of up to an hour, but usually much less. Our timings do not include this longer break.
If you want less (or more) intense days, adjust accordingly.
Day 1 - Cashpampa (3000m) to Huishcash (4300m)

Distance: 20km
Climb: 1600m
Descent: 300m
Time: 7 hours
Navigation: moderate
Trail: easy
Cashapampa is the cheapest place to start the trek, with a few caveats.
The walk can be enjoyable, as the first part takes you from Cashpampa to Hualcayan through small villages and rolling foothills. However, we found it hot and tiring and would start from Hualcayan if we could do it over again.
Also, if your colectivo stops at Cashapampa center and doesn't continue on to the outskirts of town like ours did, you will pass a PNH checkpoint there.
If you do want to make the journey, take the Cashapampa colectivo from Caraz as far as you can (some continue all the way to the town of Huancarhuaz). You'll get out on a dusty dirt road that you can follow all the way to Hualcayan.
The hike drops significantly from Cashpampa before climbing again. There are many points where you can slide off the road and onto shortcuts, which will make your walk much faster. Most of these are marked on maps.me and there are plenty of local villagers to ask if you're confused. However, do keep an eye on the map to avoid wandering too far off track.
It should take you about three hours to reach Huaylcayan. We hitched a ride the last few kilometers, which is highly recommended if you can manage it.
By the way, although we looked for a menu del dia along the way, alas we found none. Make sure you carry enough food for the day and don't count on finding supplies along the way.
After passing through the small town center, you'll reach a park boundary sign and a place to camp. The town charges for this luxury, so continue along the trail a little farther toward a cement resivior. If you're tired, ask the campesinos if you can camp next to it and you shouldn't have to pay any fees.
The trail starts to climb from here, zigzagging its way up the steep but grassy hillside. It's a very clear and easy path to follow, and although you may be a bit winded by the end, it's not a hard hike. Most of it is in the sun, with small patches shaded by blissful patches of quenales trees. There's plenty of water along the way, so don't feel like you need to carry too much.
There are several camping options as well, the first of which is an hour up the trail. After that, it's about two more hours to the first official campsite marked by a single red post.
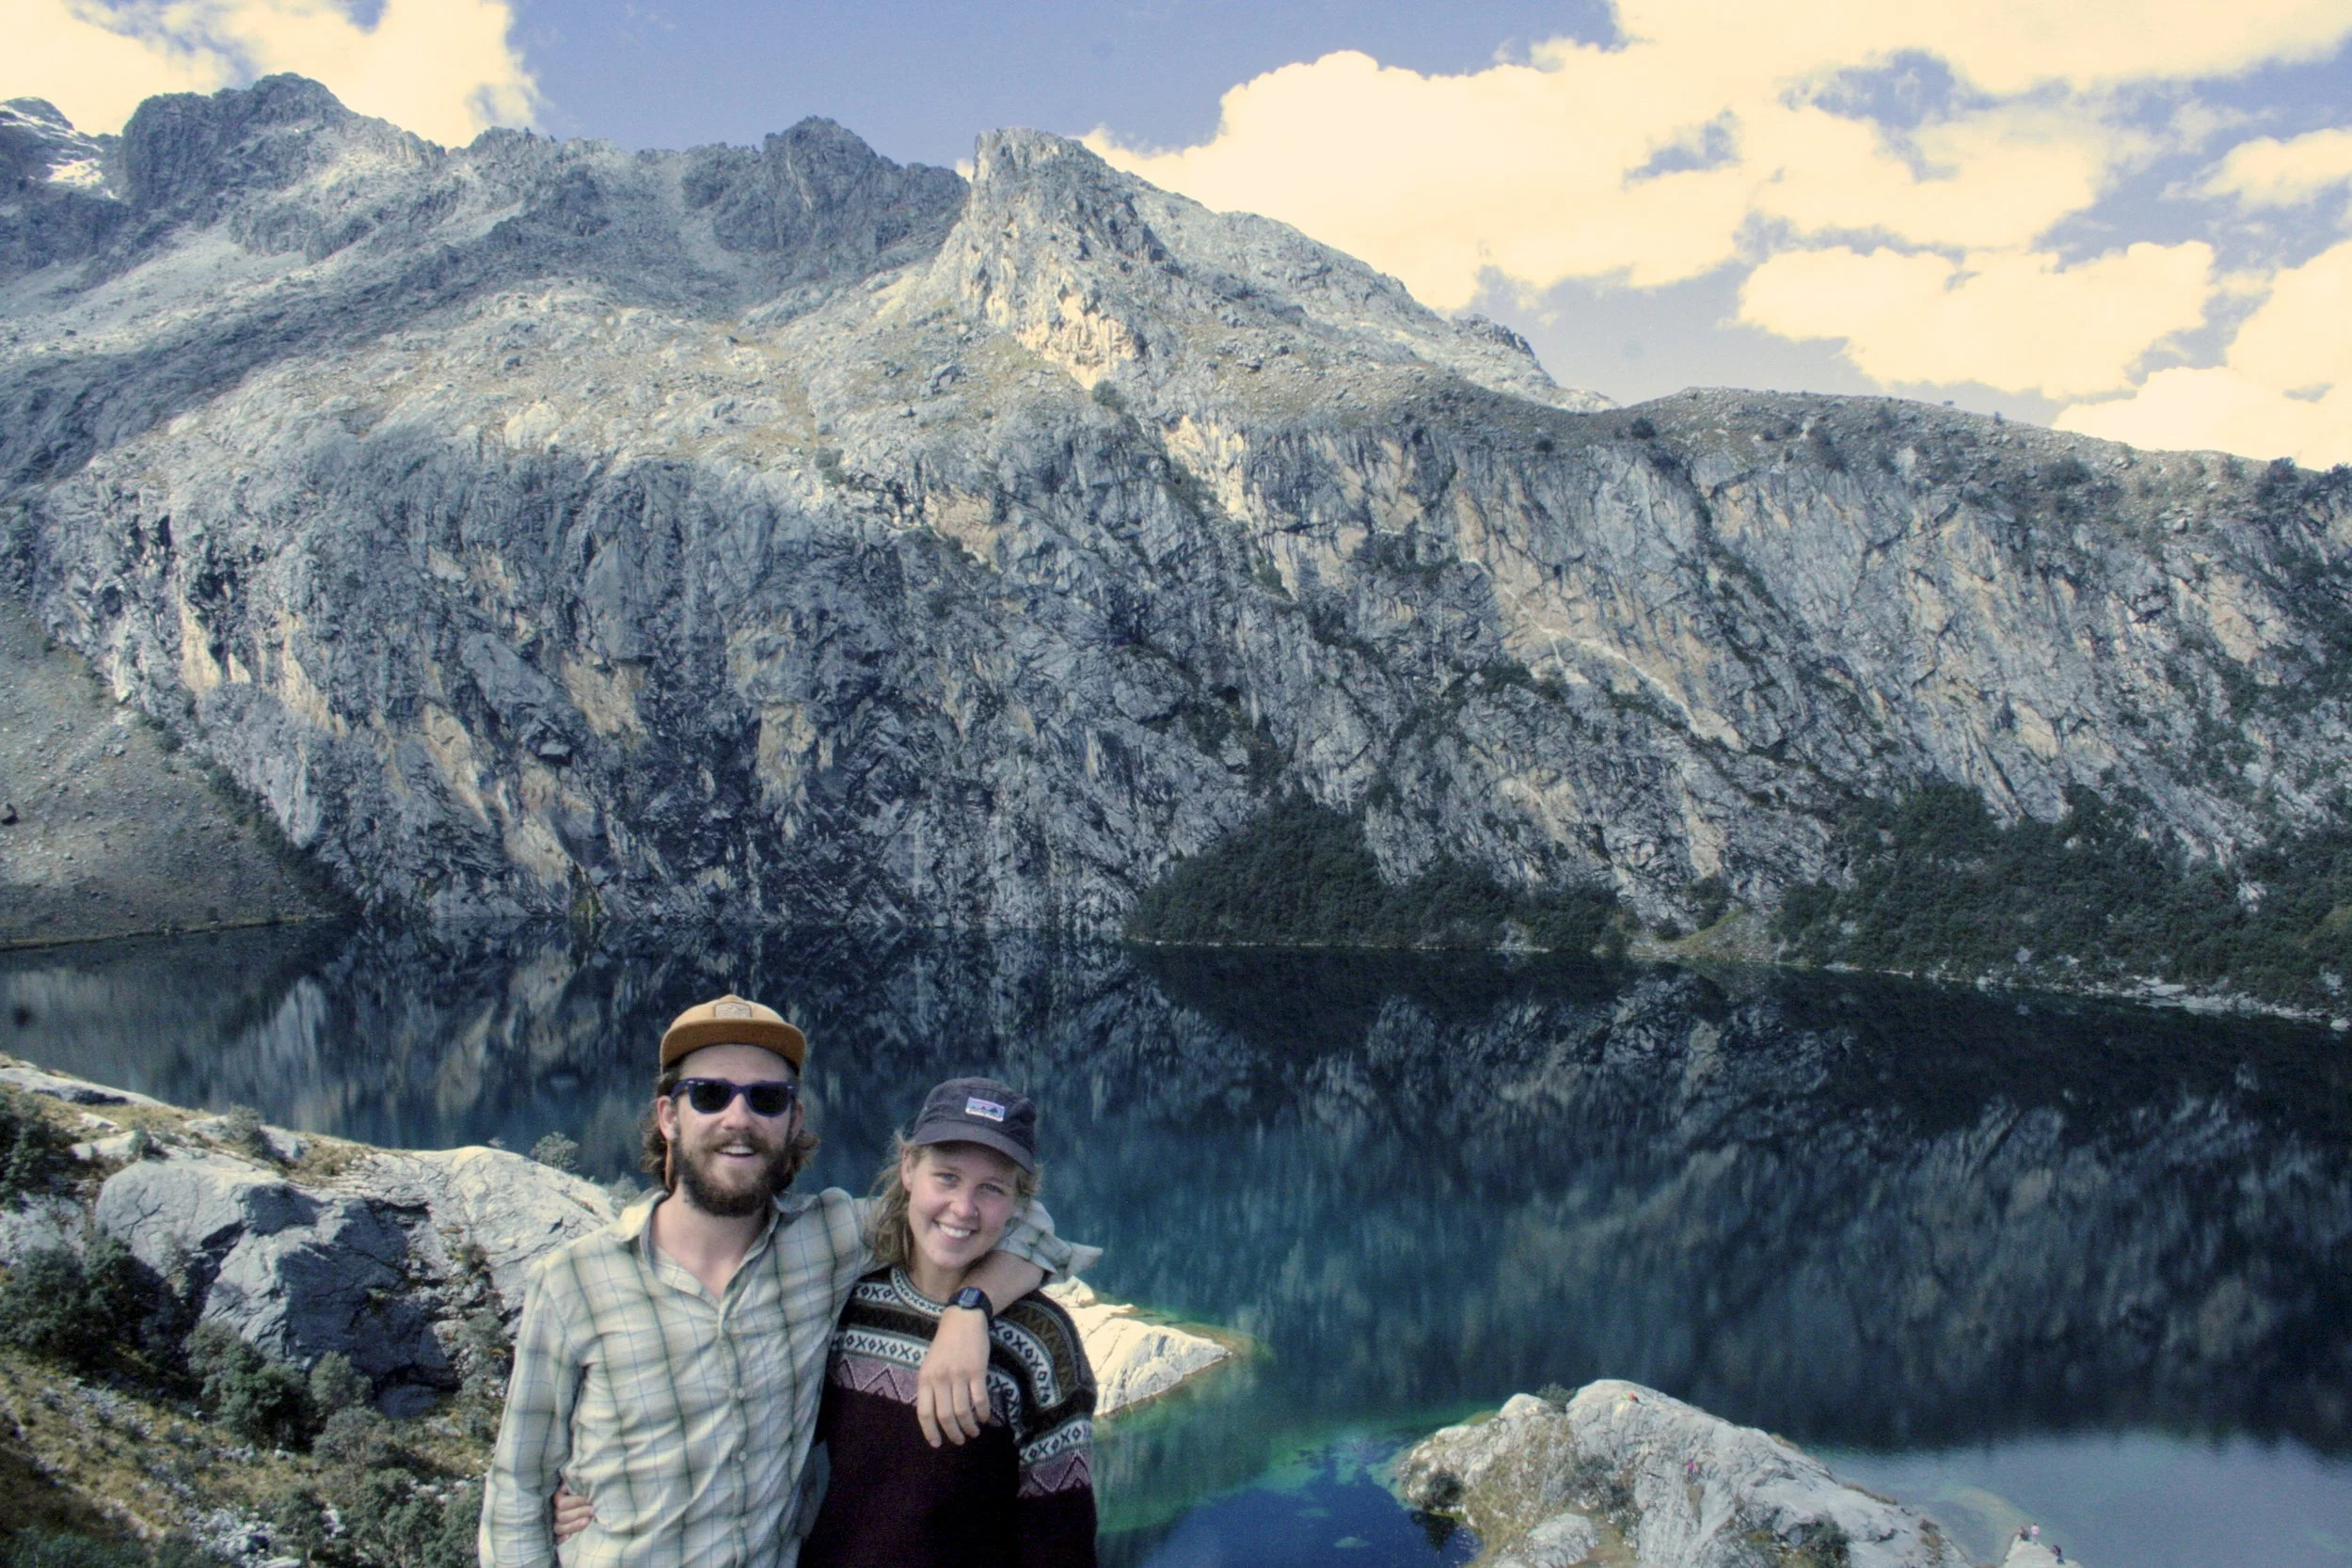
At this point, you'll have the option to take a small, faint trail off to the left toward Laguna Yanacocha. This pretty little lake sits directly below the Huishcash campsite, but isn't accessible from there as far as we could tell due to steep cliff sides.
We skipped this side trip in favor of many other pretty lakes later in the trip, and continued along the main trail toward camp. It took one more hour of a somewhat more gentle climb.
The campsite isn't great, as it's not super flat and overrun by cows. We camped a bit above it next to the small ruin of an old house. There were great views, though it was a 10 or 15 minute jaunt to get water from the main camp.
Day 2 - Huishcash (4350m) to Ruinapampa (4000m)

Distance: 12km
Climb: 700m
Descent: 1000m
Passes: Osuriri (4850m) and Ichicvientona (4750m)
Time: 6.5 hours
Navigation: easy
Trail: easy/moderate
Although this day might seem intimidating with two passes (the first one being the highest on the whole trip), they're actually quite doable, especially the second one. It's an enjoyable day with the first taste of the big mountains to come.
We chose to wake up early and walk without packs briefly up the side trail toward Laguna Yurracocha. The trail clearly splits off to the right about 15 minutes above camp. In 45 more minutes, you'll reach a lovely viewpoint of Nevada Santa Cruz, which is normally especially clear in the morning. It takes another 30 minutes to get back to camp, so the side trip will add about an hour onto your day if you decide to do it.
Optional Day Trip: If you have the time, and the weather is good, consider walking all the way to Laguna Yurracocha. It sits right below Santa Cruz, so offers some pretty incredible glacial views. The round trip takes about 6 hours, so it'll eat up most of a day if you decide to do it. The weather was not in our favor, so we skipped this trip.
Back at camp, the main trail climbs gently toward the pass. It skirts around the valley leading up to Laguna Cullicocha and the large dam there. Although it may be tempting to walk along the canal adjacent to the path, you can't follow it all the way to the dam, so stick to the path.
After the dam, water becomes scarce till close to the pass, so make sure to keep some on hand.
It takes about two hours up to this point. The path becomes faint as you pass some maintenance buildings, but follow it up to the right as it climbs over rocky ground above the left side of the lake.
There are great views and the good path climbs higher and higher above the lake, eventually bending left to the somewhat disappointing pass. High rock walls hide the views at the pass itself, but they're lovely approaching. It should take no more than two hours and maybe closer to one, as we spent time purifying water, enjoying the views, and preparing for a very short and very odd blizzard that obscured the trail.
Until this point, there aren't many camping options. At the pass, there are several flat options, but it would be quite high to set up camp.
It's an easy descent about an hour down to Osuriri camp, which is perfectly adequate but not spectacular.
Climb for less than an hour to the next pass, which feels more like a hill than a mountain.
Then it's all down to Ruinapampa. After about an hour of switchbacks, you'll reach a junction in the trial. You can head left toward some houses to check out small ruins. There are also a few camping options at the junction.
In theory, you might be able to ask a local family for help if you need it at this point (i.e. if you busted your knee and couldn't continue walking). There's no road access but you may be able to find a horse or donkey or at least a trail out to the main road. This won't be true for all days of the trek.
We skipped this and turned right. It's 30 min more of gentle downhill to Ruinapampa. There are a million flat spots to camp next to ruins, as the name would suggest. It's not the most spectacular camp, but it's much flatter with better access to water than Huishcash.
Day 3 - Ruinapampa (4000m) to Alpamayo Basecamp (4500m)

Distance: 9km
Climb: 550m
Time: 4.5 hours
Navigation: moderate
Trail: easy/moderate
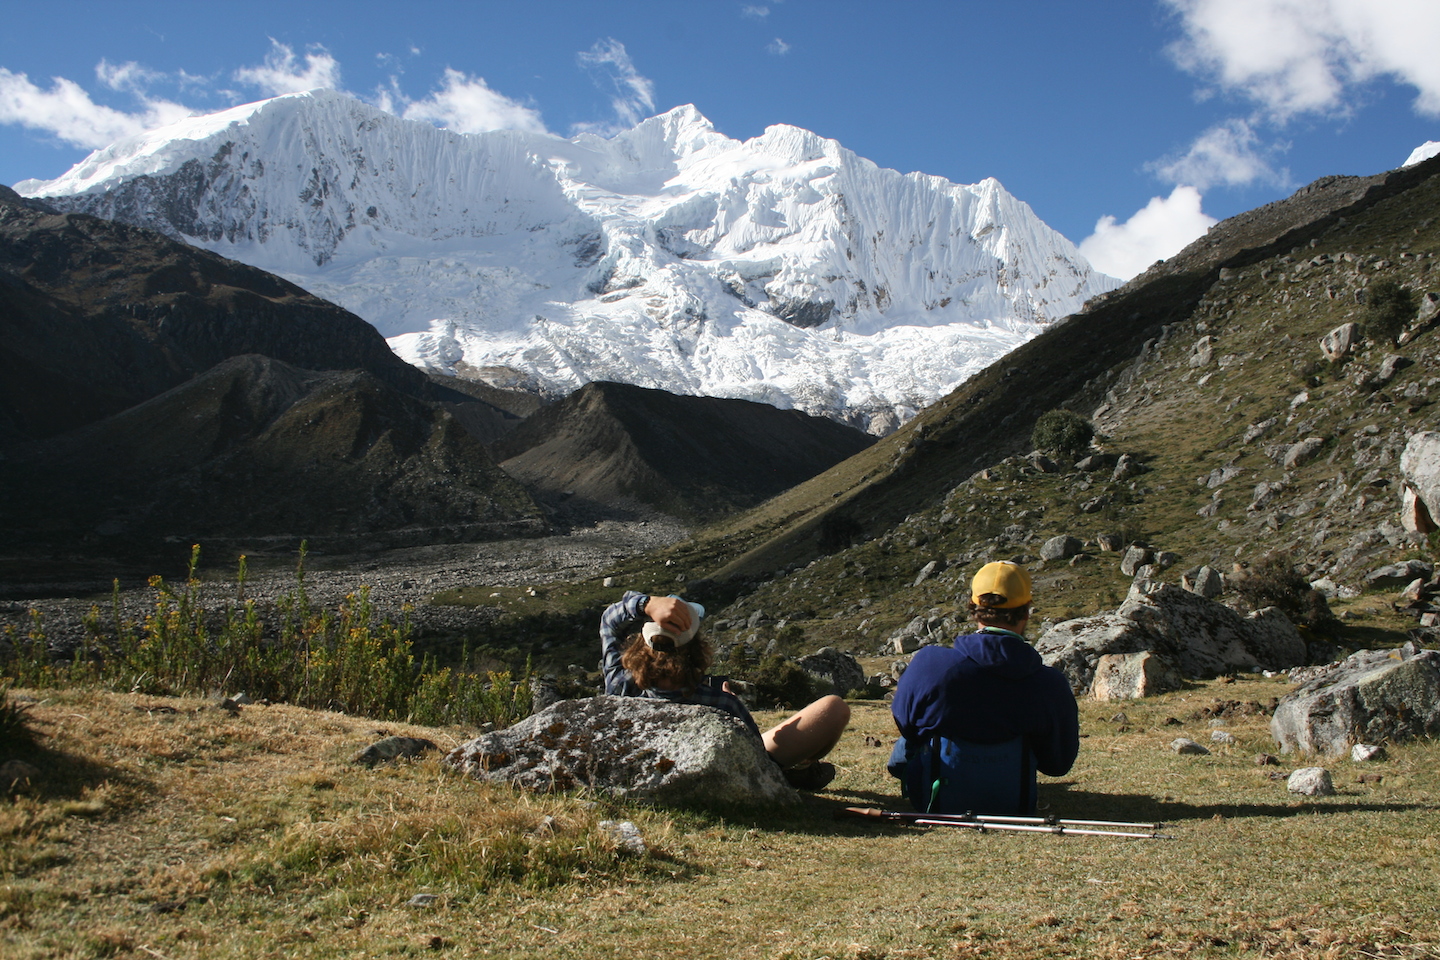
This easy day sees you walking up the valley toward the highlight of the trip: Alpamayo. This is the mountain with the perfect little pyramid peak. Honestly, there are many other mountains on this circuit that are just as stunning if not even more jaw dropping, but you've got to give the "prettiest mountain" its due time.
It's a gentle meander up the valley along the right side of the valley to start. Sometimes the path becomes faint in the pampa, but it's never too hard to find again and the gentle incline means that nothing is too much of a big deal.
After 2.5 hours you'll reach Jancarurish camp, right below Gara Gara pass (which comes tomorrow). It has pretty views and a good placement, but if the weather is good keep heading up toward Basecamp. This is the camp on the north side of the mountain, which will give you a completely different view from the camp accessible from the Santa Cruz trek.
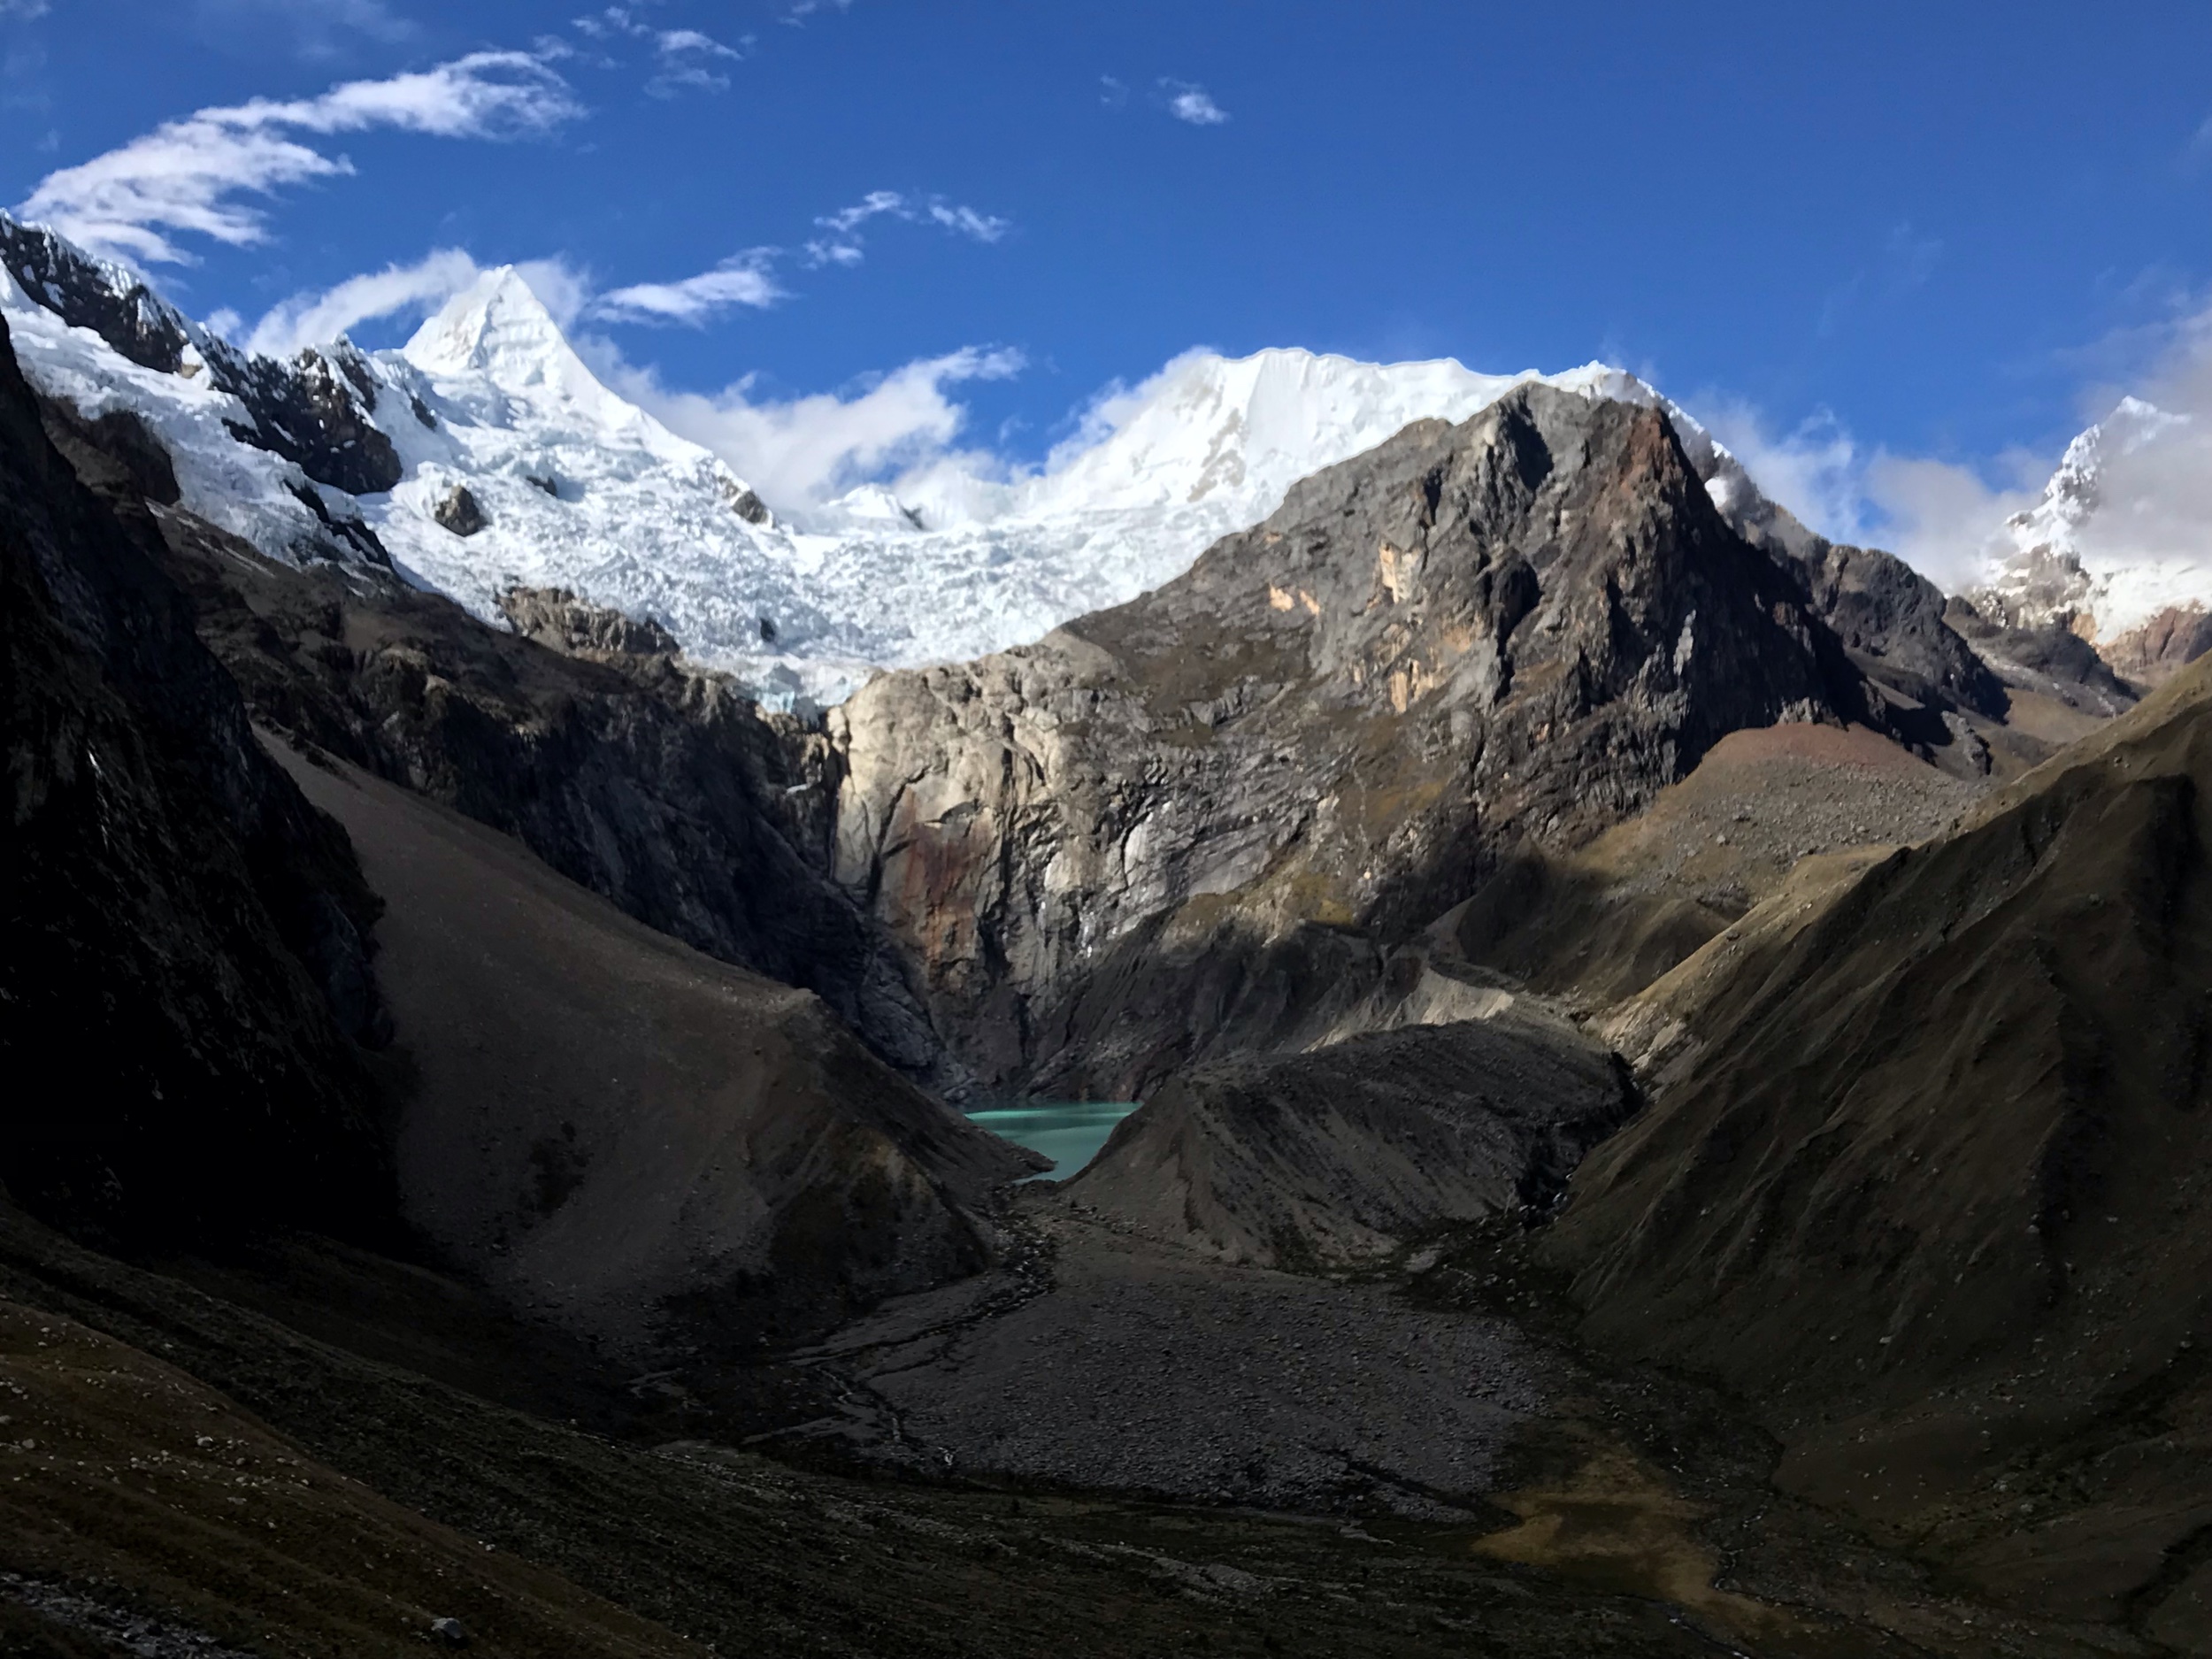
You'll turn right into the next valley, cross a small river on rocks, and head steeply up the moraine of Laguna Jancarurish. When you see a split in the path, head left up to the ridge of the moraine for good views. This takes just over an hour from Jancarurish camp.
After photos of the pearly blue lake, continue on the trail down the other side of the ridge and up switchbacks on a grassy hill. It's steep in places, but very manageable. Another hour after the lake and you'll reach Alpamayo Basecamp.
You'll camp pretty high, but the views and solitude are spectacular. Plus, it'll give you plenty of time to continue walking up the valley toward more lagunas and the other side of Santa Cruz if you wish. There are faint paths and the valley is pretty manageable even if you can't find them. Just walk toward the mountains!
Day 4 - Alpamayo Basecamp (4500m) - Laguna Safuna (4250m)
Distance: 15km
Climb: 800m
Descent: 1000m
Passes: Gara Gara (4800m) and Mesapata (4500m)
Time: 7 hours
Navigation: moderate
Trail: moderate/hard
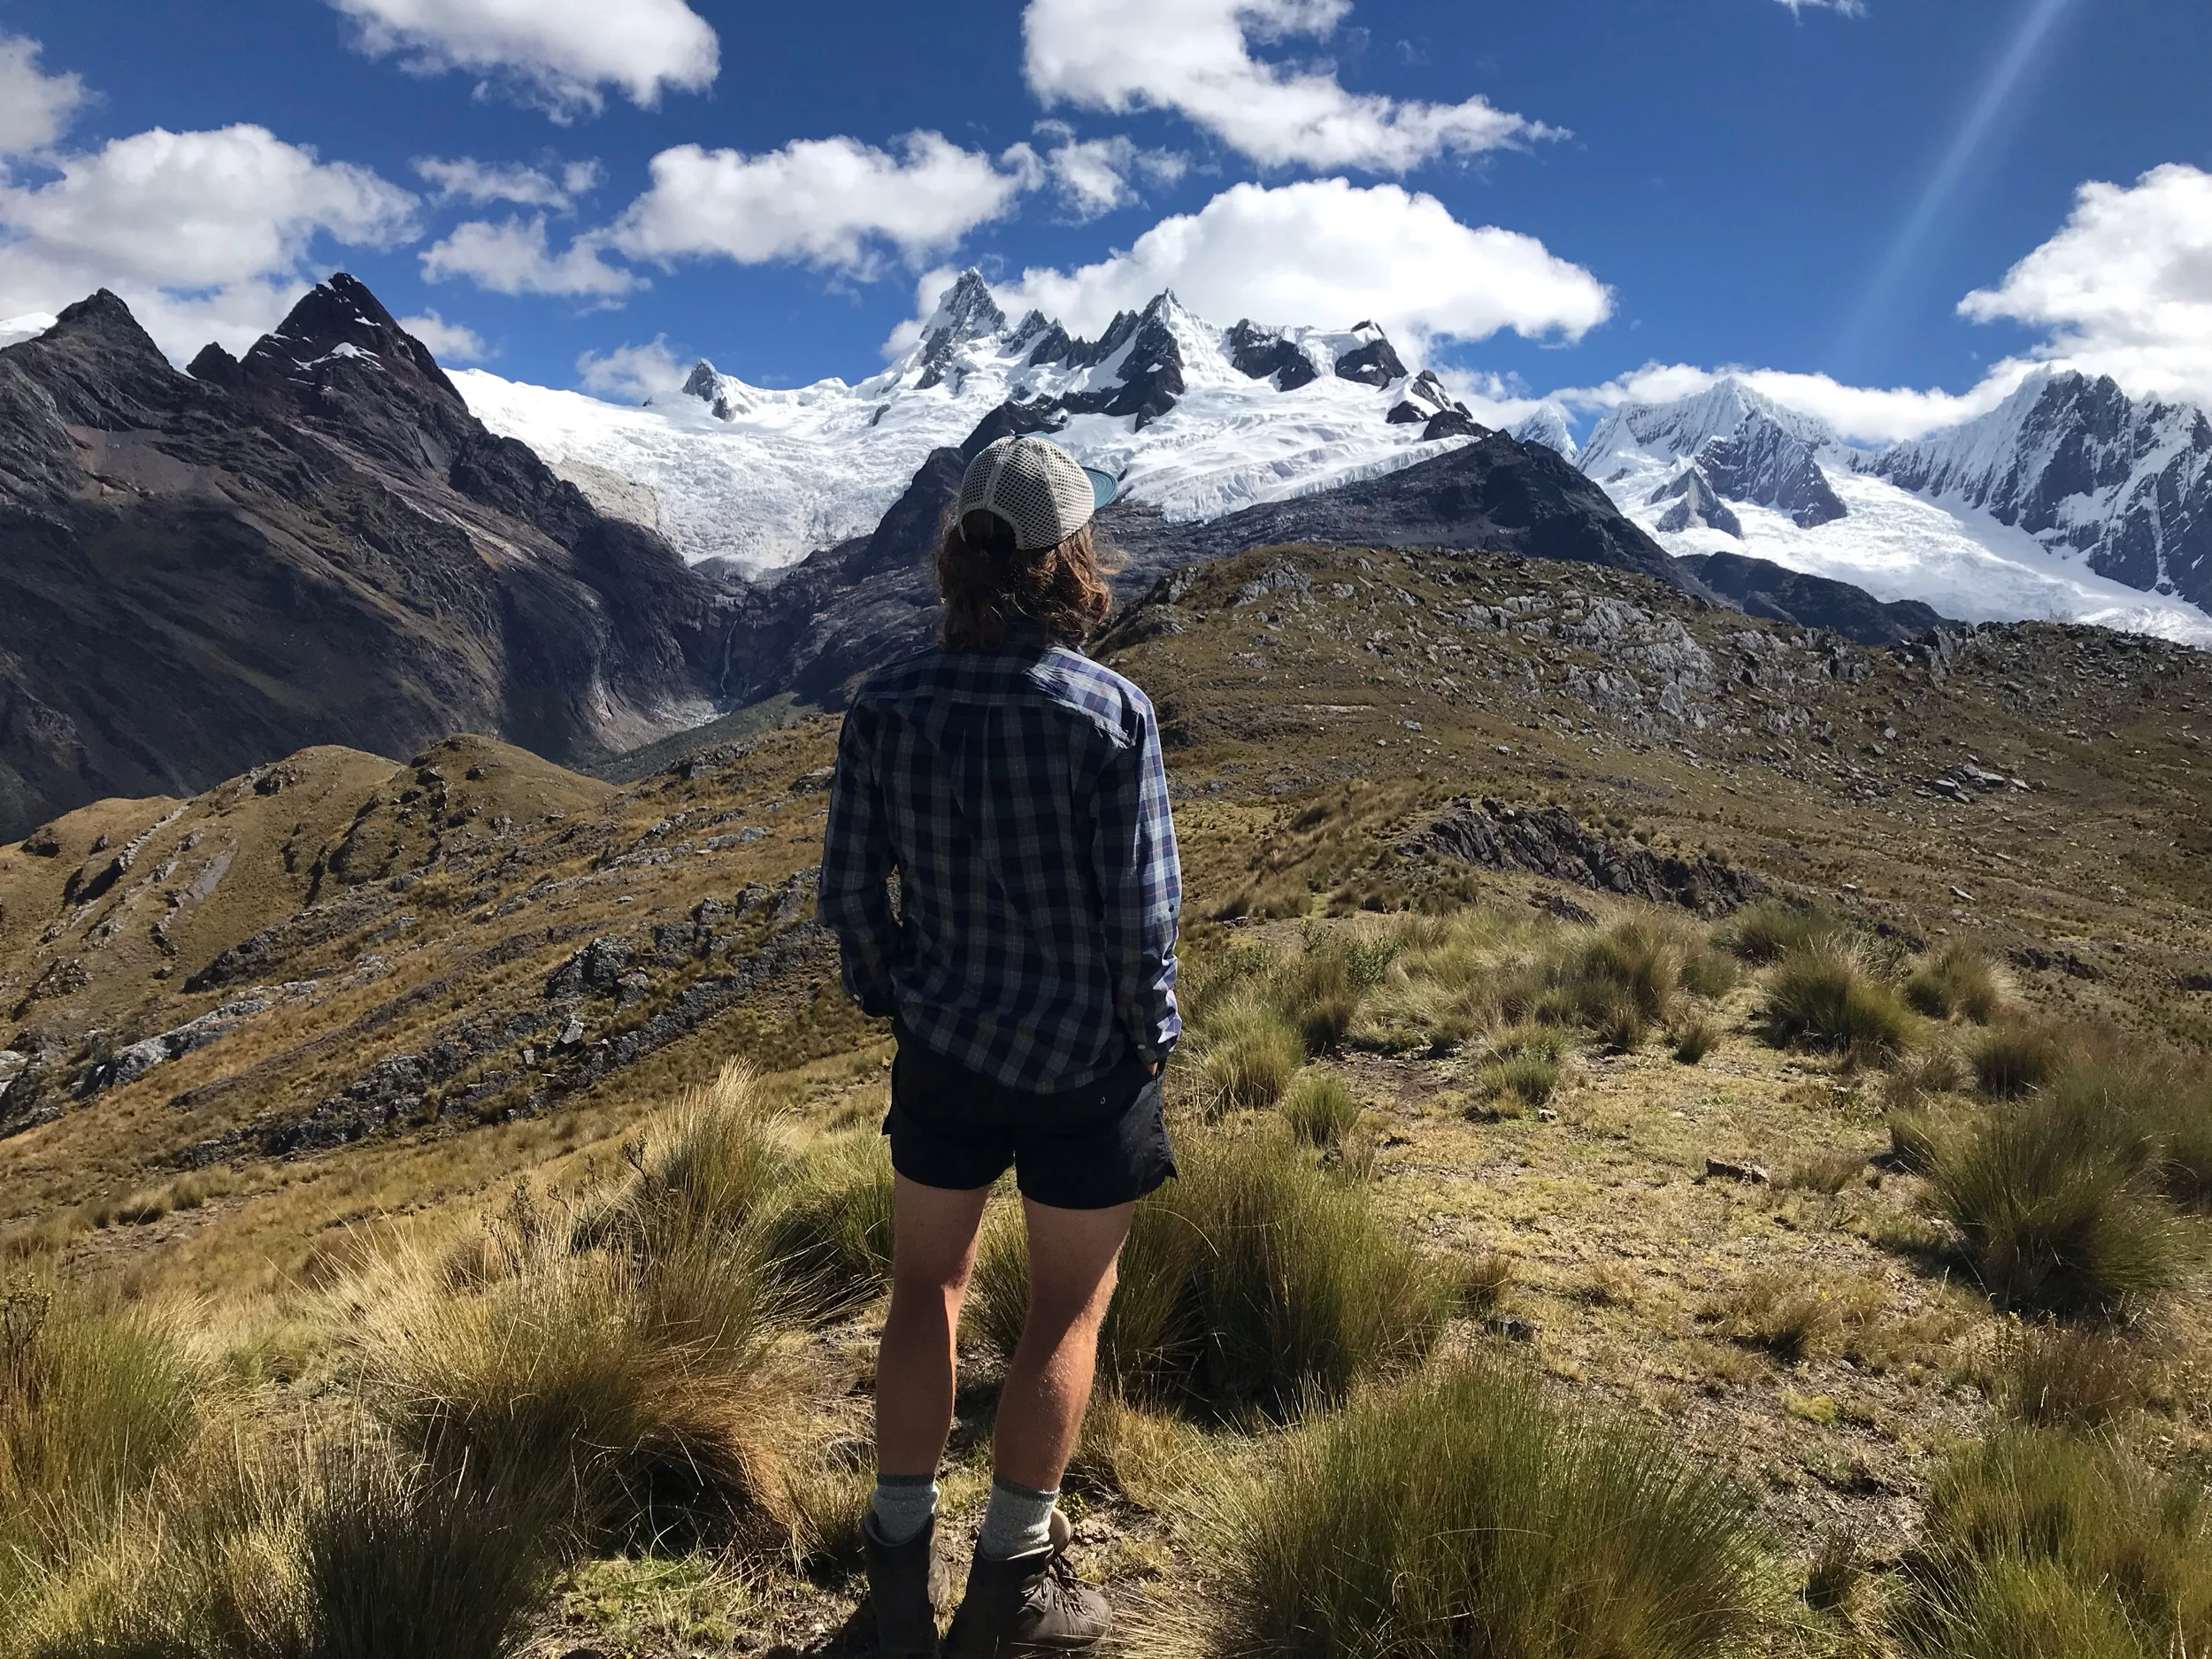
The big challenge of the day is Gara Gara pass, but with that comes the absolute best views of the trip. The vista of Alpamayo is the best you'll get. Toss in a few blue lakes and it rivals the possibly slightly more spectacular but also much more popular Huayhuash circuit.
It's a quick jaunt of an hour or so from Basecamp down the same track to Jancurish. Here you'll be able to see what you're up against: the intimidating looking high alpine Gara Gara.
Ford the river on rocks and locate the well trodden donkey trail heading up the left side of the valley toward the pass. You'll climb the grassy slop on gentle zags until you reach a plateau with good views behind you. We'll be honest, it's hard not to stop every five minutes to take pictures of the terrain at your back.
Keep climbing to the next plateau and some small lakes. There's water along the way until the very top where the trail turns to scree. We didn't see any ideal campsites, but it may be possible to pitch a tent on one of the plateaues next to the lakes. It would definitely provide a lovely backdrop to dinner.
Looking forward, the pass will be slightly right of center, so watch as the trail swings you across the valley. The path becomes steep and slippery in places. When we were there, it was also extremely windy, which made it a bit difficult to keep footing.
Still, it's not overly exposed and you'll be totally fine with decent footwork. Good boots and walking poles are very helpful.
At the top, take one last look at those great views behind, and embrace the new mountains in front of you. It took us 2.5 hours to reach the top.
It's a much more mellow descent to a lovely lake about 20 minutes below the pass, with sheltered rocks and opportunities for camping. We stopped here for a nice long lunch.
Just over one more hour will take you gently down the gorgeous valley, verdant and green. There are plenty of potential camp spots but beware much of the land is boggy.
Once you make it down past the rocky outcroppings to the valley floor, you'll stick mostly to the left side of the valley on a path that fades in and out. Cross the river to the right side at the end of the descent and prepare for the easiest pass of your life.
It's only just over 100m and about 30 minutes up Mesapata "pass." On the other side, follow a clear trail down until it fades into cattle tracks. It's a gentle slope so some off roading here isn't the end of the world if you get lost.
From the top of the pass, it's about an hour to the campsite near Laguna Safuna - start decending toward your right hand side to make the trip up the valley to the lake shorter. You'll be able to see it tucked into the mountains from the pass.
At the base of the valley you'll reach a 4x4 track that will make the walk easy. The river can be tricky to cross, though. Look for a place to hop it or suck it up and freeze your toes off in glacial water.
Optional day trip: If you want an easy but rewarding day, consider ending this day early and camping at the bottom of the pass. The next day, hike past Safuna to Llullacocha. Simply continue up the valley as far as you can go, swinging to the right at the very end to catch a glimpse of the lake (and a few others) surrounded by glaciers. It should take 4 or 5 hours round trip depending on how far you go.
There are plenty of other camp spots in the valley if you don't want to make the trip up. You could even walk another hour down the valley to your left on the 4x4 track to the small village (read: 3 houses) of Huillca.
You could in theory organize transport out of the valley as well, but it's by no means well serviced. You'd be more likely to catch a horse out to the nearest town than a collectivo from the looks of things.
Day 5 - Laguna Safuna (4250m) to Jancacuchu (3600m)

Distance: 17km
Climb: 700m
Descent: 1400m
Pass: Yanacon (4600m)
Time: 7 hours
Navigation: moderate/hard
Trail: moderate/hard
Despite there being only one relatively low pass this day, we found it to be one of the hardest. The navigation is quite tricky, the pass steep, and the descent knee crushing.
On the plus side, good views abound from the top of Yanacon and you're reaching the finale!
Head down the valley to Huillca on the 4x4 track for about an hour and a half.
Cross the bridge and then cross the wide pampa diagonally across the path of least resistance. You're heading for the far right corner, where there's a small house built in the middle of the path.
Pass on the right side of the house, keeping the small river to your left. You'll see a lovely waterfall in a side valley on your far left as you pass the house.
The trail crosses the river a few times until you reach a wide pampa, where it all but disappears. You'll be hugging the left side of the valley at this point all the way up to the path. Navigation can be tricky, so make sure to have a map or the track on maps.me.
Look for the trail starting to climb up a small ridge on the left hand side of the valley, up and away from the pampa before it ends completely. Once you find it, you'll be able to follow a good donkey trail on switchbacks.
There's a pretty camp spot about half way up the path, if you're interested, though there wasn't a ton of water when we were there. If not, keep climbing on the clear path until it turns to scree.
Remember, the donkeys can do this. Nothing too crazy, just a bit vertigo inducing as you climb up. You're aiming for the left of a little rocky protuberance. As you get closer, you'll see there was a rock wall built to the right of it to prevent you from going on the wrong side.
Another huge, lovely mountain will come into view before you inevitably have to desend to escape the wind. It took us 3 hours to reach the pass from Huillca.
There's a short, exposed section immediately on the other side that could be tricky in bad weather. It only lasts for about 5 minutes, so grit your teeth and dig in your heels.
Shortly after, there's a nice flat spot to rest. You'll follow a good path down the right side of the valley for another 30 minutes to a pampa.
Here, the trail disappears and we got more than slightly lost. We would suggest sticking to the right side of the valley and avoiding Laguna Sactaycocha if you're short on time.
There seem to be multiple possible paths through this section, so none are particularly clear or easy to locate. If you lose the path, continue bushwacking, but try to keep pushing toward the right side of the valley. You'll need to make it over there to avoid a large rocky drop off (on maps.me, aim for where the three visible trails converge). It took us an hour to find the trail again at this point.
Finally, the trail becomes much clearer. You'll drop steeply down, following along the river. There are several places to camp, but we suggest dropping all the way down (about 1 more hour) to the valley floor.
Houses will come into view over a large pampa and there's a fabulous glacier view. Good camping exists just before the town of Jancocucho in the terraced land of old ruins, just above a large glacial river.
Day 6 - Jancacuchu (3600m) to Quishar (3900m)

Distance: 13km
Climb: 850m
Descent: 550m
Pass: Tupatupa (4400m)
Time: 4.5 hours
Navigation: moderate
Trail: easy
This is a really lovely day, and also an addition on to the traditional Alpamayo Basecamp Trek.
Jancacuchu is the first town on a road en route to Jancapampa and then Pampabamba. You can easily walk a few kms until you find a colectivo to make like a baby and head out.
However, we would highly suggest adding the walk to Quishar. The pass is gradual and easy. We meandered up the big climb easily in 3 hours.
This leg is also the first step to linking the Alpamayo Basecamp trek with the Santa Cruz trek to create the Alpamayo Circuit. As we had already done the Santa Cruz, and were looking for something a bit off the beaten path, we didn't choose to link them. However, many guidebooks and blogs describe the endeavor.
Leaving camp, you'll cross the big pampa heading for the obvious town. There are a few earthen bridges, so look for those to cross the steam if you don't want to get wet.
You'll reach the road and walk for about a km. Before reaching Jancapampa you'll turn right on a small path marked on maps.me, about 30 minutes after camp. The trail is clear, meeting and crossing a small river and joining another path before making it's way up through consecutive valleys.
2.5 hours of walking more brought us to the pass, just a normal looking hill with great, expansive views. Spend a few moments here at least exploring the ridge top.
The trail drops to a lake, where you could camp. Continue dropping on lower and lower plateaus until you reach the valley floor.
There are several trail options, but we found it easy to stick to a clear path on the left side of the river all the way to the outskirts of Quishar, where there's good camping (1.5 hours).
Day 7 - Quishar (3900m) to Yanama (3400m)

Distance: appx 15km
Climb: appx 900m
Descent: appx 1400m
Pass: Yanagrahirca (4300m)
Time: 7 hours
Navigation: moderate
Trail: moderate
There are some very cool things about this day. It gives you the opportunity to interact with lots of local villagers. You also get the chance to explore a lively commonly used trail that's not on a lot of gringos' maps. Plus at the end, there's easy transport back to Huaraz, no PNH checkpoint, and the opportunity to connect more treks,
Unfortunately, it comes with some downsides. It involves a lot of guesswork to follow the trail, which isn't on maps.me or easy to find gps coordinates for. There are also lots of local dogs and the descent down to the river before Yanama is mind numbing oh long.
We recommend it, but be aware before beginning!
If we had to do it again and were exhausted, we might follow the road out of Quishar, past some old ruins, and head for the main highway until we met a colectivo.
But, we didn't. And for those of you who may be interested, this is how it went:
Approaching Quishar, you'll be able to see a large slash above the town heading diagonally up to the right. This is your goal.
Walk into town and ask the locals for "el Camino al Yanagrahirca para Yanama." Once you find the trail, there's no way to get off it. It's massive, a downright highway and will take you up and over the pass in no time (1 hour from Quishar and 2 from camping before the town).
Follow it clearly down for about an hour on the other side. When other side trails begin to encroach, bear left of the ridge visible ahead.
Ask campesinos directions if necessary, but again it's pretty obvious until you reach a small bog with a grove of trees. Cut sharp right around the bog and again sharp left back on the path.
The trail will begin to ebb and flow, but you’ll eventually link up with a well marked path into the proper village of Amapampa about 2 hours after the pass. The trail is marked on some topo maps, but honestly there's nothing much to do but ask locals for directions. With even a bit of Spanish you should be fine.
In Amapampa it's 3 hours to either Colcabamba or Yanama. We chose Yanama, and started heading left on the road out of town. It's pretty much six of one for either of these towns (you can get transport from either), but Colcabamba might be a slightly easier walk. We can't vouch for sure.
If you choose Yanama, walk along the road for 1 km. Ask for the trail to Yanama and you'll be rewarded with a wide trail all the way down to the river. It's a very popular route for villagers, so you'll have plenty of people to ask with questions. If you keep an eye on Yanama in the distance, it should be obious which way to go even when turn offs appear. Be warned: it's a gnarly, 2 hour descent.
At the bottom of the very steep gorge, cross the earthen bridge to the other side and begin climbing. One hour on a good, wide, popular path will bring you to Yanama and civilization.
You can either pick from one of the few accommodations in town or camp on the outskirts.
We chose to link up with one final day on the lovely Quebrada Ulta trek. More info about that later.
That’s it!
our thoughts
We’d definitely recommend this trek if you’re comfortable with multi day backpacking. There are so very many great options in this town - just figure out your budget, time, and comfort level and pick at least one!!
Got any more questions for us? We'd love to help, just shoot us a comment below.