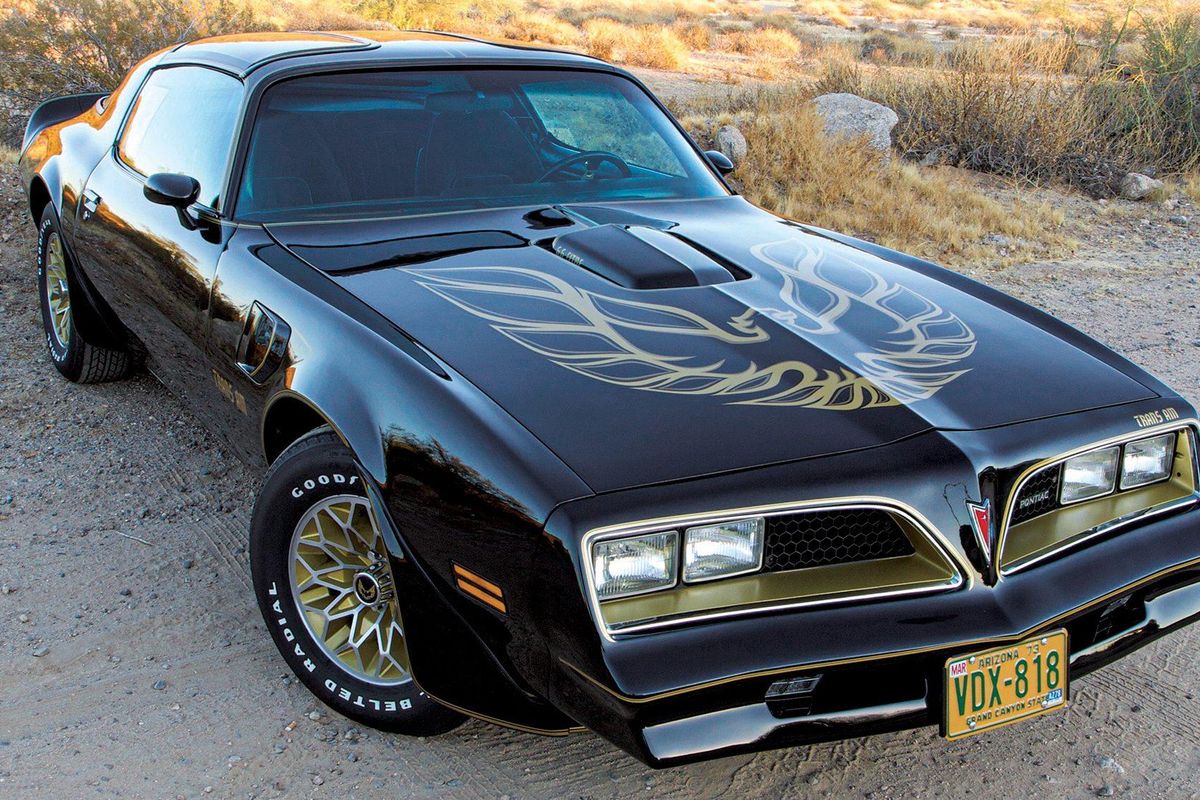
A decrepit "Bandit" 1977 Pontiac Firebird Trans Am proves no car is too far gone if you want it bad enough
A deceptively deteriorated driver turns into a full-scale restoration - Part I
02/11/2021
"Love the one you're with," is a tough directive for a car enthusiast. It seems like no matter what vehicle you start with, it's always in worse shape than you imagined starting out. The temptation to get rid of a project car and begin with something nicer is immense, so it's refreshing when something the average hobbyist might consider beyond economical restoration is given a new lease on life.
Consider our feature car here. When it rolled across the auction block at one of the major Scottsdale, Arizona, sales, it was what you'd probably call a 20-footer. Something that might make you go, "Ooh, a 'Bandit' Trans Am!" Get closer, though, and start picking away at the details, and that "ooh" might have turned to "oh."
Still, that initial impression was correct about something: This is a real Y82, the black-and-gold Special Edition that looks like the ones driven by Burt Reynolds in the hit 1977 film Smokey and the Bandit. That's what attracted owner John Prenzno of Paradise Valley, Arizona, when he saw it at auction nearly four years ago. Having owned a brand-new one just after high school, the pull of nostalgia was strong and John bought it, warts and all. As you might have guessed, the warts were extensive. That much was evident from even a casual inspection. The first problem made itself known even without taking a look, when a leaky fuel line caused it to run out of gas before it could be driven away from the auction site.
John took the car straight to Ward Gappa at Quality Muscle Car Restorations LLC, in Scottsdale. QMCR made a temporary fix to the fuel line (extensive rust demanded complete replacement) and gave the car a thorough going-over so John would know exactly what he was up against to get his Trans Am up to snuff.
The list of the bad was daunting: The factory air conditioning, heater, and defroster systems; horns; and brake lights were all nonfunctional. The brake warning light in the dash remained stubbornly illuminated— likely because the rear brake lines had rusted away, and their stumps had been blocked off.
Corrosion had also claimed the parking-brake cable, which disappeared at the driver's-side inner rocker panel. Crude, obvious patches on the underside of the floorpans hid rust damage. Further rust had mauled the passenger's side of the front subframe, and it had been cobbled back together with a steel reinforcement plate. Even a replacement exhaust system, fitted by some previous owner, had been lost to the tinworm.
 Looks can be deceiving. On the day restoration began, the shiny paint and well-applied graphics made this old Bandit look like it could be a driver in a couple weekends. Sadly, underneath was a horror show of rust damage.
Up top, things were nearly as bad as with the chassis. Immediately noticeable were the missing door-glass guides. The car had driven across the auction block with the windows down—a necessity since the driver's door could not be shut with the window closed. The paint, which Ward describes as "reasonably straight" and having "decent shine," was applied over body panels that showed very obvious signs of filler in the lower parts of the front fenders, doors, and quarters. The fender flares and spoilers were all cracked and damaged.
Inside, the car's somewhat rough life was still more in evidence. The original velour upholstery, while present, was heavily worn at the edges and had suffered from cigarette burns on both front seats. The air conditioning vents were cracked and broken, numerous mystery wires hung under the dash, and aftermarket sound-system components had been fitted, though they were not working.
In keeping with the findings in other areas, more damage and decay lurked under the Trans Am's hood and in the trunk. All metal surfaces had been covered with a coat of black spray paint, none too carefully applied. The control arm bushings were destroyed, and the original air-conditioning compressor had gone missing along with its brackets; a newer, aftermarket unit had been partially installed. All soft parts, including the rubber hoses, were well beyond safe reuse. Someone had fitted a rebuilt original wiper-motor assembly, but the windshield washer components were missing entirely. The battery cables and tray were "in very poor condition." The shaker scoop was incorrect, and besides that was also worn and broken; even the space-saver spare and jack components had disappeared from the trunk.
Perhaps the brightest spot was the drivetrain. The engine, transmission, and power steering, though leaky, worked as expected. The factory-installed radiator, carburetor, distributor, power brake booster, and brake master cylinder were present and functional, despite a layer of rust and dirt. Further good news was that QMCR was able to verify the Pontiac's authenticity. "The car's VIN tag, cowl tag, engine, and transmission were original," Ward says, "and there was no evidence that they had been tampered with. The vehicle was a real Y82 Special Edition T/A with its original drivetrain."
Other good news was that the correct factory wheels were still attached to the car and undamaged—albeit shod in the wrong size tires and painted an incorrect shade of gold. The glass and exterior trim were also found to be in acceptable "driver" condition. The dash pad was also uncracked and reusable.
When QMCR reported this litany of faults to John, he did not _ inch. Instead, he instructed them to forge ahead with making the car operational. To achieve that goal, initial efforts were focused on rebuilding the cooling system, the engine and transmission, the brakes and "all things brake related," and the power steering system and front suspension. Repair efforts would revive the factory air-conditioning, horns, power windows, all lights, and the parking-brake system.
Unfortunately, when disassembly started to address these issues, new areas of hidden decay were uncovered. It was at this point that many of us would have thrown in the towel, but when you've found "the one," things are different, and the pull of this original Y82 Trans Am was irresistible.
"The subframe assembly and the body's complete floorpan, beginning at the bottom edge of the firewall, inside the car all the way to the rear bumper bracket, was rusty," Ward reveals. How rusty? "To the point no solid metal could be found to attach the new brake proportioning valve and lines, the new fuel and vapor lines, or the parking-brake cable components."
The QMCR crew also discovered that the car had undergone multiple panel replacements in the past. GM part number tags were discovered on both front fenders, both quarter panels, and the driver's door assembly. Other parts had come from a white donor car, including the passenger's-side door and the trunk lid. Non-original wires under the dash also proved to be evidence of a larger issue: "Media debris had accumulated from prior paint jobs," Ward said, "and an earlier electrical _ re in the A/C harness had badly damaged the under-dash components."
Faced with these additional revelations, John revised his directive to Ward and company. Now, they were to repair all damaged metal components in a correct, thorough, and safe manner. Instead of restoring to a "driver" level of quality, John wanted the Pontiac brought up to what Ward describes as "a high original-restored standard," which would also result in a vehicle that was fully functional and road ready. A beautiful car is nothing without a solid undercarriage. On an early F-body like this, the basis for the front suspension is the subframe. A rust-free, original 1978 Firebird subframe assembly was purchased at Desert Valley Auto Parts, in Phoenix. Before installation, it was stripped and powder coated to the correct satin-black finish. All the associated body mounts were replaced with the best-quality service-replacement components available.
The control arms were deemed too rusty, and were replaced with used components also purchased from Desert Valley. New Monroe gas shocks were refinished in gray to resemble assembly-line Delco shocks. The factory-fitted coil springs and anti-sway bar were stripped and powder coated to reflect the correct finishes. All rubber bushings and ball joints were replaced, and the anti-sway bar components were swapped for reproduction pieces that fit and look like the originals.
To be sure the car goes where it's pointed, the steering system was treated to equally extensive rehabilitation. The original power steering box assembly was rebuilt by Benchworks Power Steering Systems in South Scottsdale. Worn-out tie-rod ends, sleeves, idler arm, and all rubber bushings were replaced, and the remaining original components like the center link and Pitman arm were stripped, cleaned, and refinished to appear as new.
The ability to stop is as critical as steering. To ensure they were up to the task, the front disc brakes and all related components were given a thorough going over. The original front rotors were machined by Arizona Clutch & Brake Supply in South Phoenix. The factory front brake calipers were rebuilt and new seal kits installed, along with zinc-plated reproduction rotor shields. The balance of the brake system, including lines, hoses, and the proportioning valve, was replaced or restored to the correct finish.
A similar process was followed out back. Essentially unused leaf springs, removed in 1978 from a then-new Trans Am that received a "Macho T/A" conversion by Mecham Pontiac in Glendale (see HMM #181), were fitted up as replacements for the rust-damaged originals. Refinished Monroe shocks were installed as well. A used rear antisway bar was sourced from an online auction to replace the deteriorated original, and everything else in the rear suspension was stripped, cleaned, and refinished to its as-installed appearance.
As if to demonstrate just what a labor of love restoring this particular Trans Am was proving to be, perhaps the crowning touch was the matter of the rear axle. Not only had rust claimed all the external parts relating to the parking brakes, but the housing itself proved to be beyond repair. Return to these pages next month, as we wrap up restoration of the undercarriage, then detail the dramatic efforts taken to save the body shell, along with the engine, interior, and endless further details that can make or break a restoration.
 1. One of the first hints of trouble was the misaligned driver's door window. The door could not be shut with the window up, because the tracks were missing. Ultimately, new tracks were installed along with new glass and rebuilt lift motors.
![]() 2. A more thorough inspection of the Trans Am's underside revealed extensive rust issues. Perhaps most notable was where the body mount hole on the front subframe had blown out. A crude repair, using a small plate, held everything together.
2. A more thorough inspection of the Trans Am's underside revealed extensive rust issues. Perhaps most notable was where the body mount hole on the front subframe had blown out. A crude repair, using a small plate, held everything together.
 3. When it drove across the auction block, the Pontiac relied upon just its front brakes. The rear lines had rusted through, and were bypassed to keep the car mobile. Ultimately, the whole rear axle assembly would prove beyond redemption.
 4. In keeping with the damage to the fuel and brake lines, the body had suffered in both obvious and not-so-obvious ways. Among the easy-to-spot deterioration: Crude patches on the underside of the floorpans covered extensive rust damage.
 5. Once the project got rolling, further corrosion kept showing up. Had this been a less-desirable car or a less-devoted owner, it might have been the end of the road, but the decision was made to see the project through.
 6. Media residue from a previous repaint was everywhere inside the dashboard. This is the air conditioning control, full of sand. This mess, plus the destruction wrought by an electrical fire, meant that the whole area would require rewiring.
 7. A replacement subframe was cleaned up and treated to powder coating. While the finishes on the underside of the car will all look factory authentic, there was no hesitation to substitute modern materials for their historical counterparts.
 8. Replacement A-arms joined remaining original components, like the center link and Pitman arm. Everything was stripped, cleaned, and refinished to look new. Benchwork Power Steering Systems in South Scottsdale rebuilt the original steering box.
 9. Modern Monroe gas shocks were painted gray to better stand in for factory Delco units. Those springs were taken out of a brand-new Trans Am back in 1978 (see text). Note the new gas tank, topped with restored 1977-vintage emissions gear.

Selecting this, a racing hopeful had to lay out a not-insubstantial $1,818.45 ($18,110 in today’s money) atop the $4,038 (circa $40,210) MSRP of a 1963 Corvette coupe that was also optioned with the L84 fuel-injected 360-hp V-8 ($430.40, or $4,285), four-speed manual transmission ($188.30, or $1,875), and Positraction limited-slip differential ($43.05, or $429). Later in the year, Chevrolet lowered the Z06 package cost to $1,293.56 ($12,880) by making the initially included cast-aluminum knock-off wheels and 36.5-gallon fuel tank —RPO P48 and N03—into standalone options. Even in its most basic form, a Z06-equipped 1963 Sting Ray was an expensive car.
And it has always been one, especially from the mid-2000s when retail book values shot up exponentially. Classic.com has been tracking the values of many variants of Chevy’s sports car for the past five years, and non-Z06-equipped 1963 models now sell at auction for an average sum just under $160,000. The Z06 variant is a special case, and although the website currently considers the ’63 Corvette Z06 to be a declining market benchmark at $510,165, it has hardly reached bargain-basement status—the current average public-sale price as of press time is $531,154. Thirteen Z06s have sold at auction since August 2019, with the least expensive being a coupe that changed hands via Mecum in Houston for $235,000 in April 2023, and the priciest being a sub-5,400-mile original that commanded $1,242,500 (the pre-sale estimate was $750,000-$900,000) at Gooding & Company’s Amelia Island event in March 2022. These figures handily outstrip current retail book values that range between $219,000 and $447,500.


A better situation is to reduce the inlet fuel pressure and work at improving flow into the float bowl which means there now is more fuel to feed the engine. For this discussion, we will assume that you have a performance electric fuel pump and a pressure regulator installed on the vehicle. For this first scenario, let’s assume a dead head style regulator with no return to the fuel tank. We will address a return style in a moment.
Setting fuel pressure requires that the engine be running. This will allow a small amount of fuel to enter the float bowl. If you set the pressure with the engine off, the pressure will tend to creep up which will require setting it lower than required. So with the engine running, set the pressure at 4.5 to 5 psi maximum and leave the engine running to ensure the pressure does not creep.
Next, you will want to monitor the fuel pressure under high load. This is why you will see externally mounted fuel pressure gauges on drag cars so the driver/tuner can monitor fuel pressure in high gear to make sure there is sufficient pressure under high load. This may require adjustments to ensure that the system maintains that 4.5 to 5 psi pressure.
Next, we can address a return style fuel delivery system. This is a better system because excess fuel will be returned to the tank rather than dead-heading against the regulator. Again, start the engine and set the pressure with the engine running. Most likely, this style system will maintain the pressure and volume required under high load. This assumes, of course, the pump and delivery lines are large enough to deliver the volume and pressure.
For high-speed tuning, a smart move is to data log the pressure at high demand. What is important is sufficient fuel pressure - say, 4 psi – in high gear at wide-open-throttle (WOT) when the load is the greatest.

ZEX sells this very nice liquid filled bypass pressure gauge package but you could make your own with a quality pressure gauge and a handful of AN fittings. This kit is designed to set fuel pressure for nitrous systems but you can use it to check carburetor fuel pressure as well.

Here we’ve set up the system to bypass a small amount of fuel to the gas can while setting the pressure on the regulator. The gauge reads 6 psi which we will lower to 4 to 4.5 psi for inlet pressure to the carburetor.

Cowl-mounted fuel pressure gauges allow the driver to safely monitor fuel pressure while running down the track.


