How to Install Roof Shingles on a Dormer
Table of Contents
- Types of Roof Dormers
- How to Shingle an Eyebrow Dormer
- How to Shingle a Shed Dormer
- How to Shingle a Hipped Dormer
- How to Shingle a Barrel Dormer
- How to Shingle a Dormer Addition
- How to Shingle a Dormer
- The Importance of Proper Installation for Roof Dormers
- Infographic: How to Install Roof Shingles on a Dormer
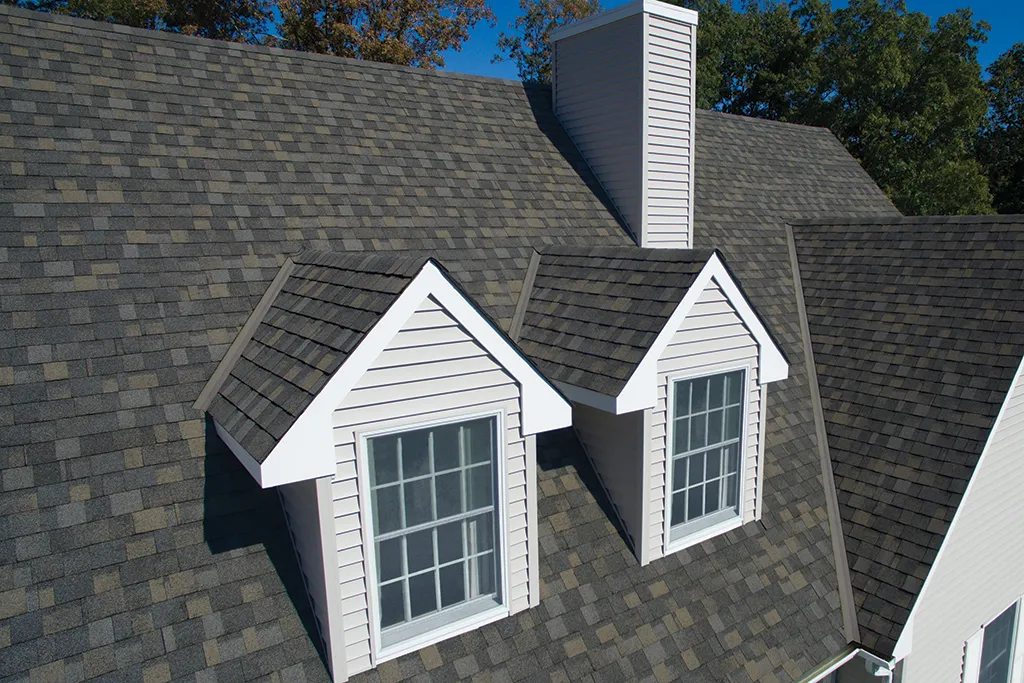
A dormer is the part of a roof that projects out vertically from the rest of the roof. Most dormers have windows, although false dormers may not have functional windows. Architects frequently add dormers to roofs to add beauty and architectural style. Dormers also add space and light to the inside of the home.
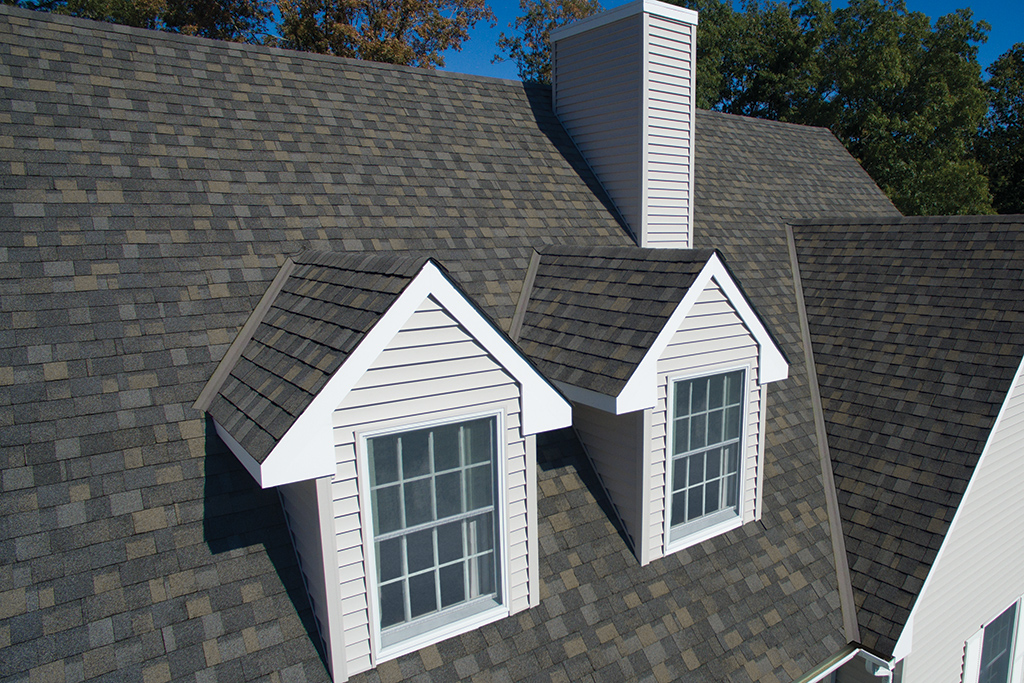
There are different types of roof dormers. Each can add a distinct flair to your home. However, installing shingles on a dormer is a challenge. Partly, this is because the dormer connects to the roof in two different ways. There are dormer walls and a dormer roof.
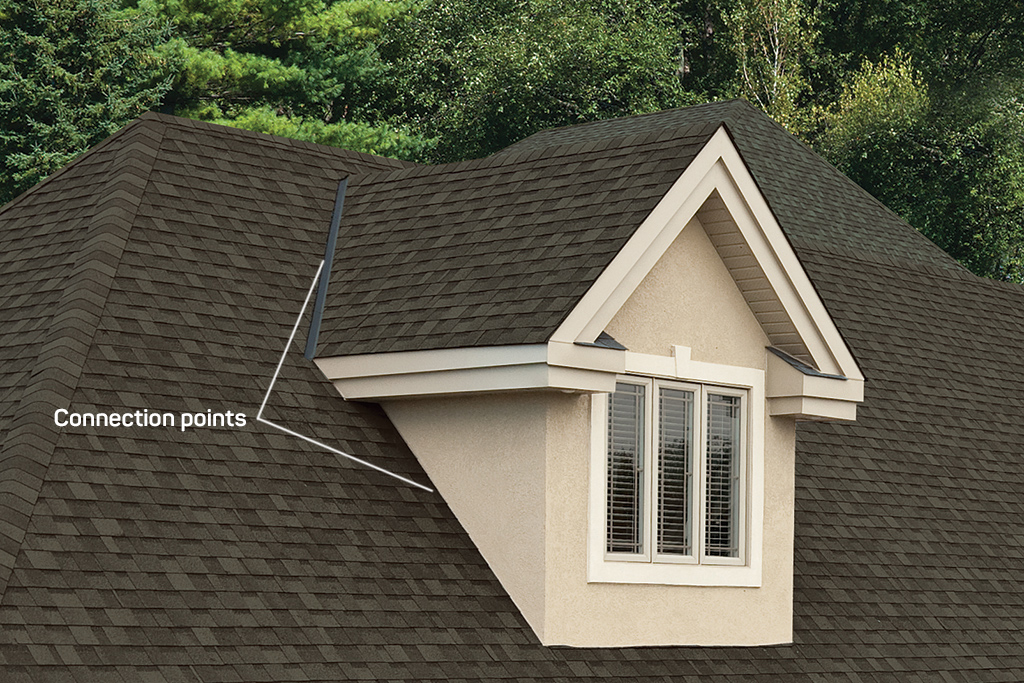
Each connection point needs to be treated differently during the installation. Of course, as dormers are roof projections, they need to be installed with ice and water protector and flashing to prevent leaks.
Another challenge of dormer installation is that the dormer cuts off the shingle rows. If the shingles on one side of the dormer are installed at a slightly larger exposure than on the other, they may not perfectly line up when they connect above the dormer. Therefore, it’s prudent to install each course of shingles alongside the dormer with precisely the right exposure.
In this complete guide, we’ll explain how to install roof dormers and everything else you need to know about this useful roof feature.
Types of Roof Dormers
Not all types of roof dormers have walls. Further, some niche types of roof dormers have additional features, such as hips, which need special treatment. Your first step to install a dormer is to identify which type of dormer you’re dealing with. Here’s an explanation of each dormer type.
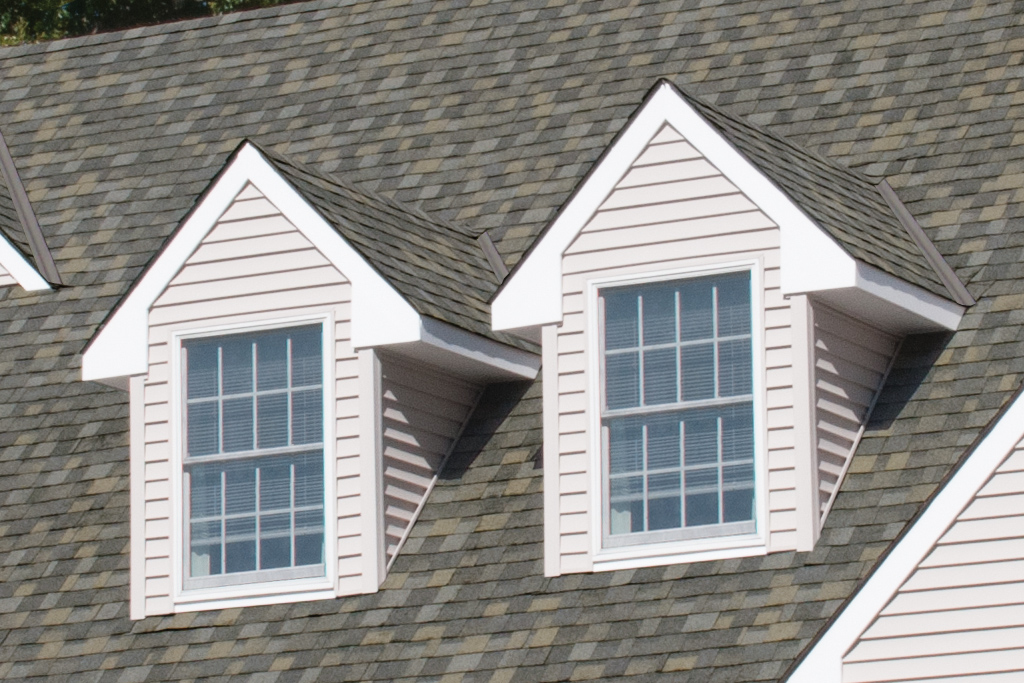
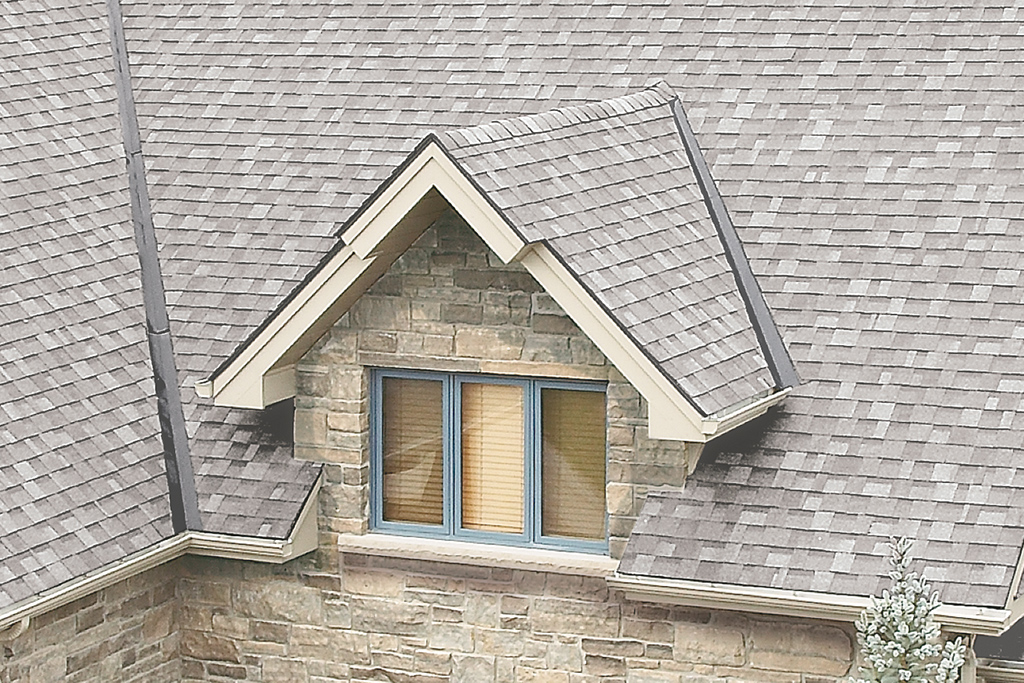
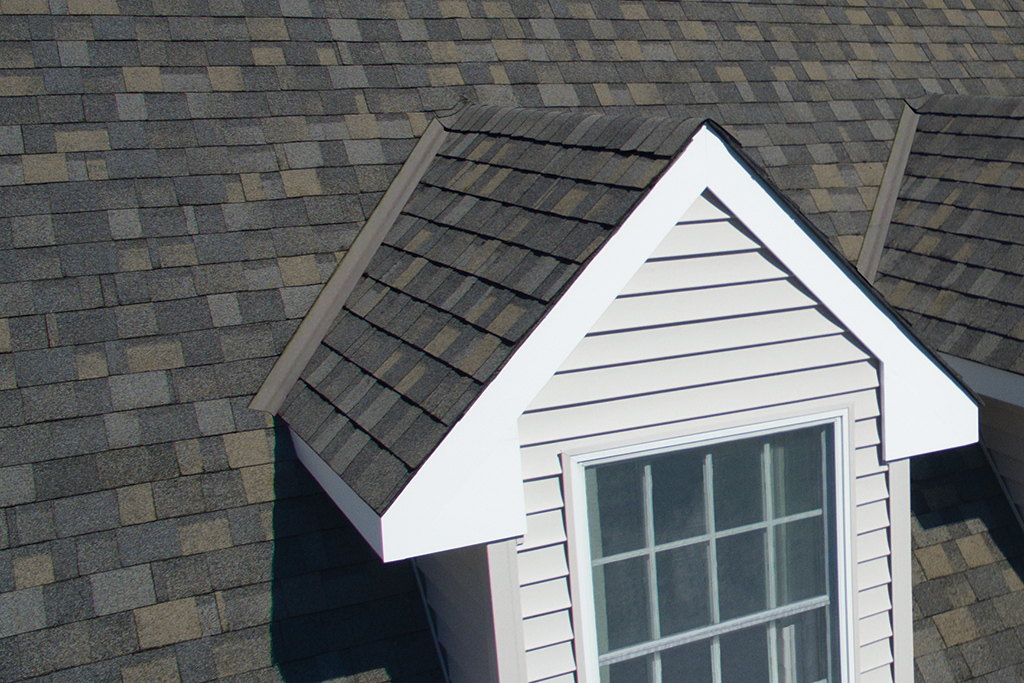
1. Gable Dormer
This is the most common type of dormer that you’ll find on many modern homes. The dormer has two walls and the familiar triangle face of a gable. It has two valleys where it connects to the roof. Valleys are parts of the roof where the two planes dip as they join.
2. Hipped Dormer
A hipped dormer looks like it has an impressive hat on. Instead of the single ridge on a gable dormer, the hipped dormer has hips projecting out from a peak. A hip is a part of the roof where the two planes rise as they join.
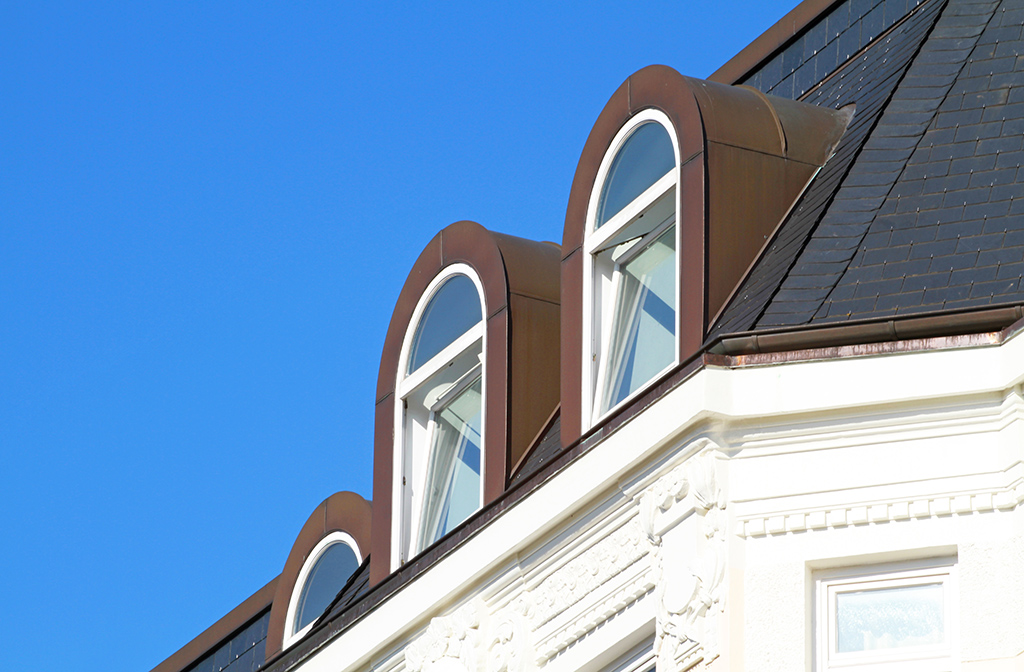
3. Barrel Dormer
A barrel dormer has a rounded top as if half of a barrel has been perched on top of it. They have a unique look as they are rare on modern homes. Barrel dormers are also more challenging to connect to the rest of the roof than other dormer types.
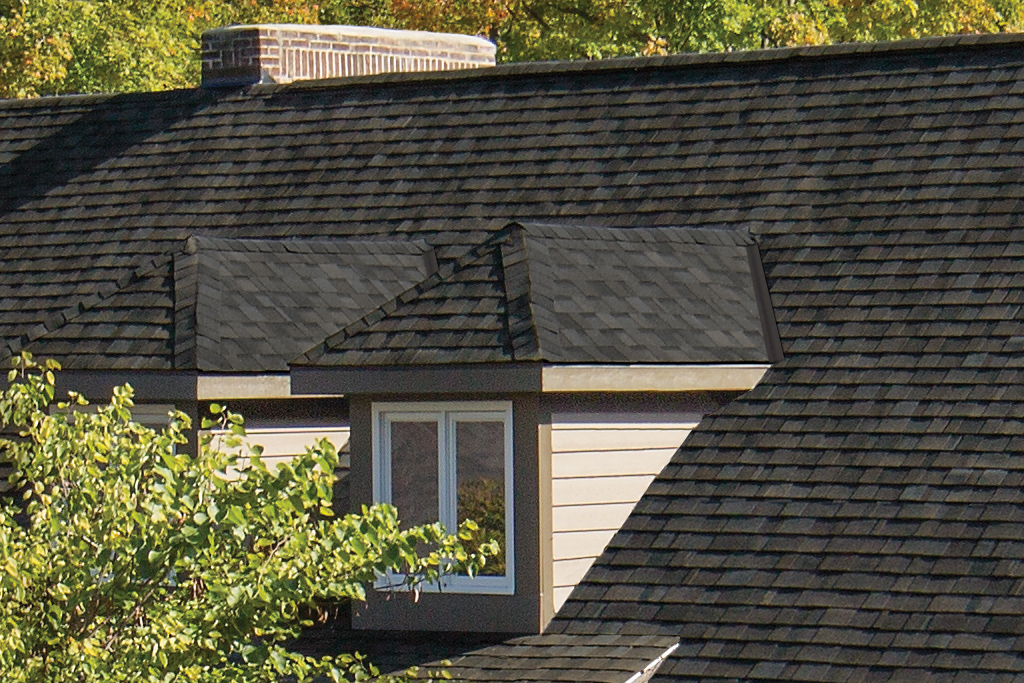
4. Shed Dormer
This is another popular style of dormer for modern homes. A shed dormer has a single roof plane. This plane has a slightly lower pitch than the rest of the roof. The top of a shed dormer can join the roof at the very top (the ridge), or it can join a little further down the roof.
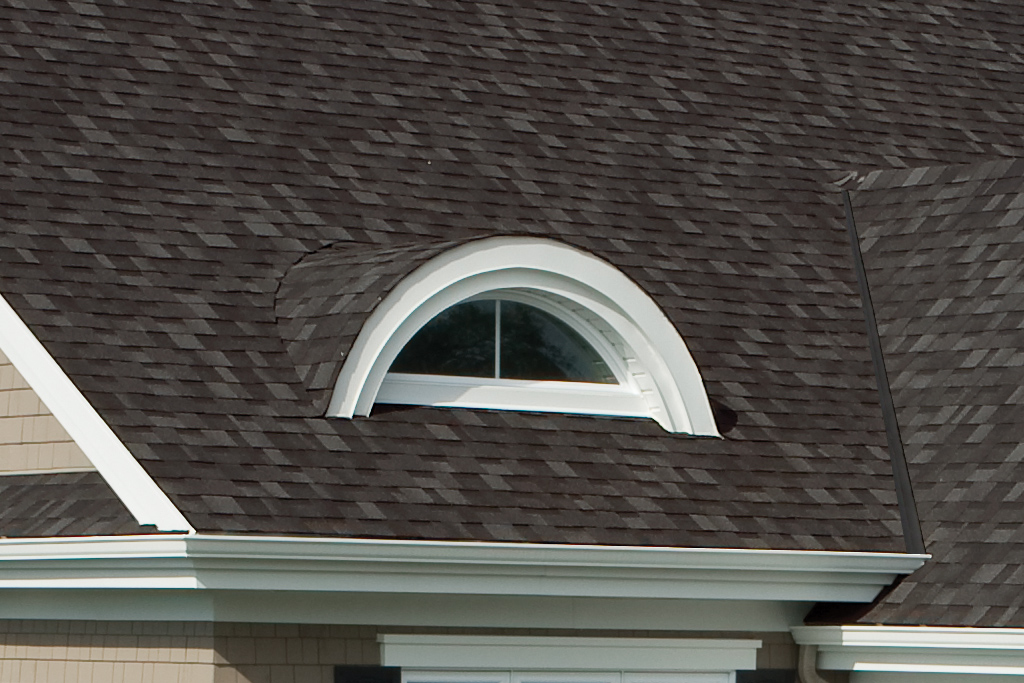
5. Eyebrow Dormer
This dormer is unique as it does not have walls. Instead, it seems to have the curve of an eyebrow. The shingles above the dormer weave into the shingles on the main roof surface at every point. The entire dormer looks like a bump on the roof.
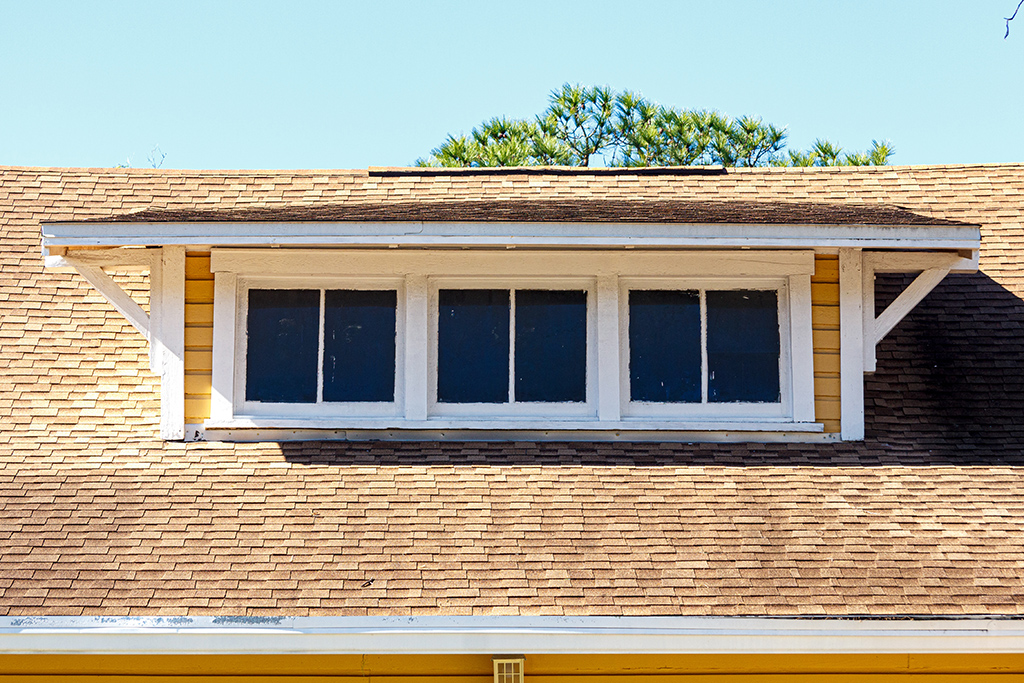
6. Recessed Dormer
Most of the other dormer types, including shed, gable and barrel dormers, can be recessed. Recessed dormers are set back into the roof instead of sitting directly on top of the roof. The window of the dormer is, therefore, deeper inside the room.
How to Shingle an Eyebrow Dormer
Eyebrow dormers are unique. Unlike all other dormers, they do not have a wall where they meet the roof face. Instead, they are essentially bumps in the roof face. Roofers install these dormers as they install the rest of the roof. When the shingle row gets to the dormer, they keep going and maintain the regular, straight row of shingles. If the eyebrow curves dramatically, this is best done with thinner, more flexible traditional shingles over laminate shingles. The whole roof would need to be installed with the same shingles, so that is something that would need to be considered.
Also, eyebrow dormer slopes approach zero near their center. Therefore, it’s prudent to cover the entire dormer with ice and water protector before installing shingles.
How to Shingle a Shed Dormer
A shed dormer does not have valleys where it meets the roof. Instead, a shed dormer may join at the roof ridge, in which case roofers can install the ridge as normal. Or the shed dormer may meet the roof face before the ridge. If yours does, your roofer should install ice and water protector along the junction between the roof and dormer, and then install shingles as normal.
Shed dormers still need flashing installed up and around the walls, as detailed above for gable dormers.
How to Shingle a Hipped Dormer
A hipped dormer is installed identically to a gable dormer until you reach the hips. Your roofers’ last step should be to place hip and ridge shingles along the dormer’s hips.
How to Shingle a Barrel Dormer
Barrell dormers are a little more challenging to connect to the main roof plane than other dormer types. The rounded shape means that typical straight flashing won’t work.
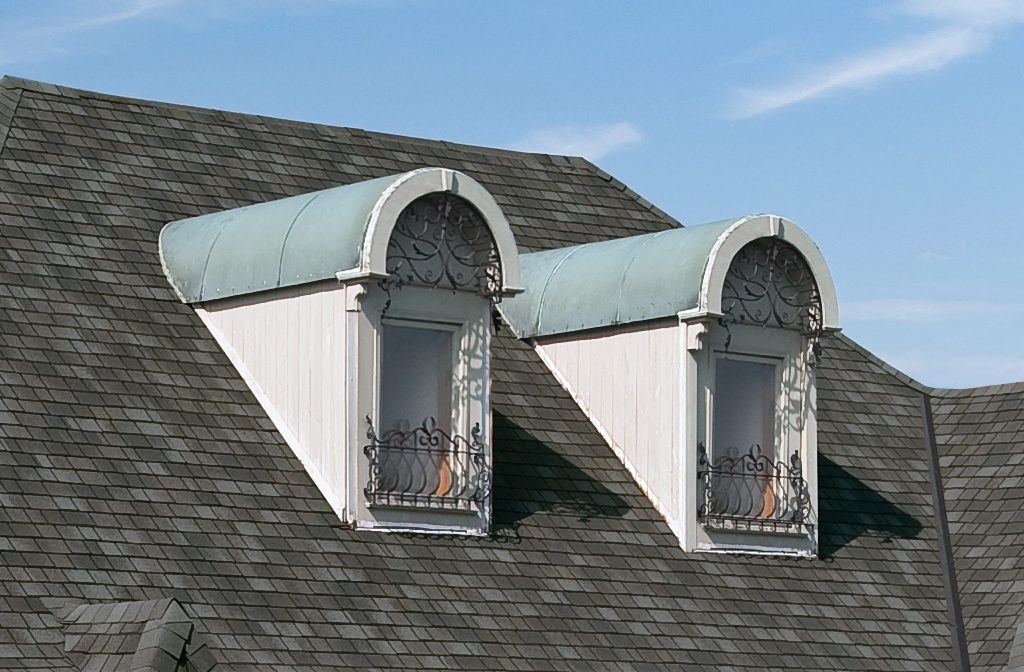
It’s not ideal to try to cut and form rounded flashing by hand, either. Instead, we suggest that roofers buy a rounded piece of flashing specifically intended for barrel dormers. Frequently, these pieces are made of copper, as you typically only see barrel dormers on the roofs of luxurious or historic homes.
How to Shingle a Dormer Addition
If you’re adding a dormer as an addition to your home, the process for installing it is a bit more complicated than installing a dormer with a new roof. Unfortunately, there is no way to add a dormer without removing all of the shingles near it. Your roofers will need to remove enough shingles so that they can place the dormer, plus new ice and water protector all around the dormer.
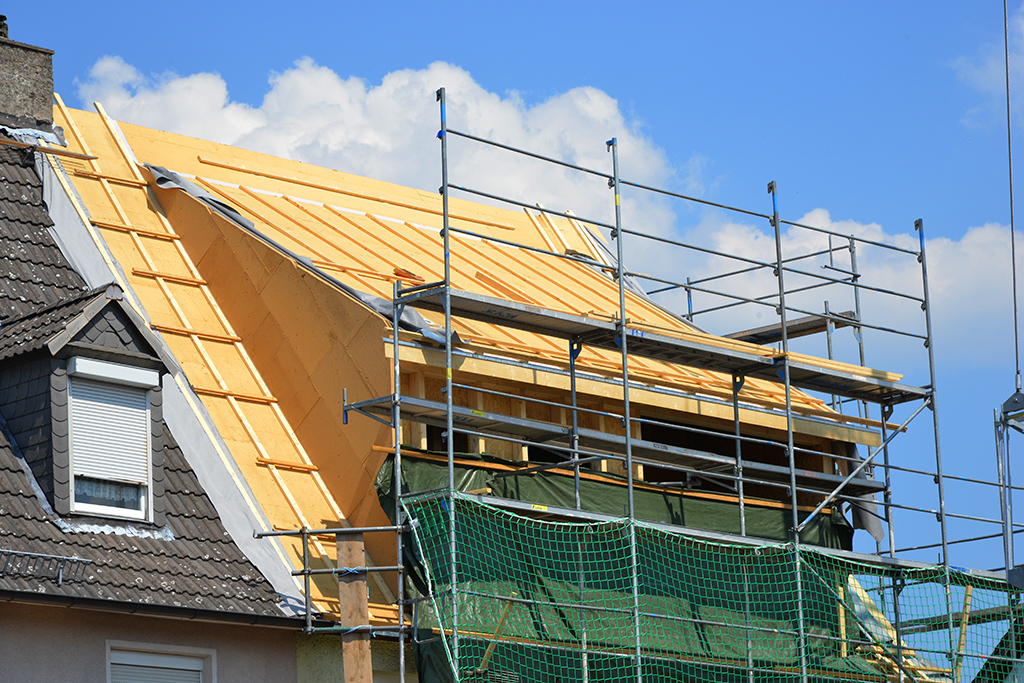
However, the roofers don’t need to remove all of the shingles from the roof. They can leave a large gap and fill it in as they install the dormer as described above.
If your new dormer has valleys where it connects with the main roof plane, you’ll want to match those valleys with those that are already on your roof (if it has valleys). First, your roofers will discover what type of roof valley you have, then install your dormer valleys to match.
How to Shingle a Dormer
Disclaimer: Only licensed roofing professionals should install shingles on a dormer. These instructions are solely intended to inform homeowners about what to expect from their roofer. When selecting a roofer, please ensure that the roofer has experience installing shingles on the type of dormers that your home has.
These are the basic steps to shingle a gable dormer. Later, we’ll tell you which adjustments you need to make for the other types of dormers.
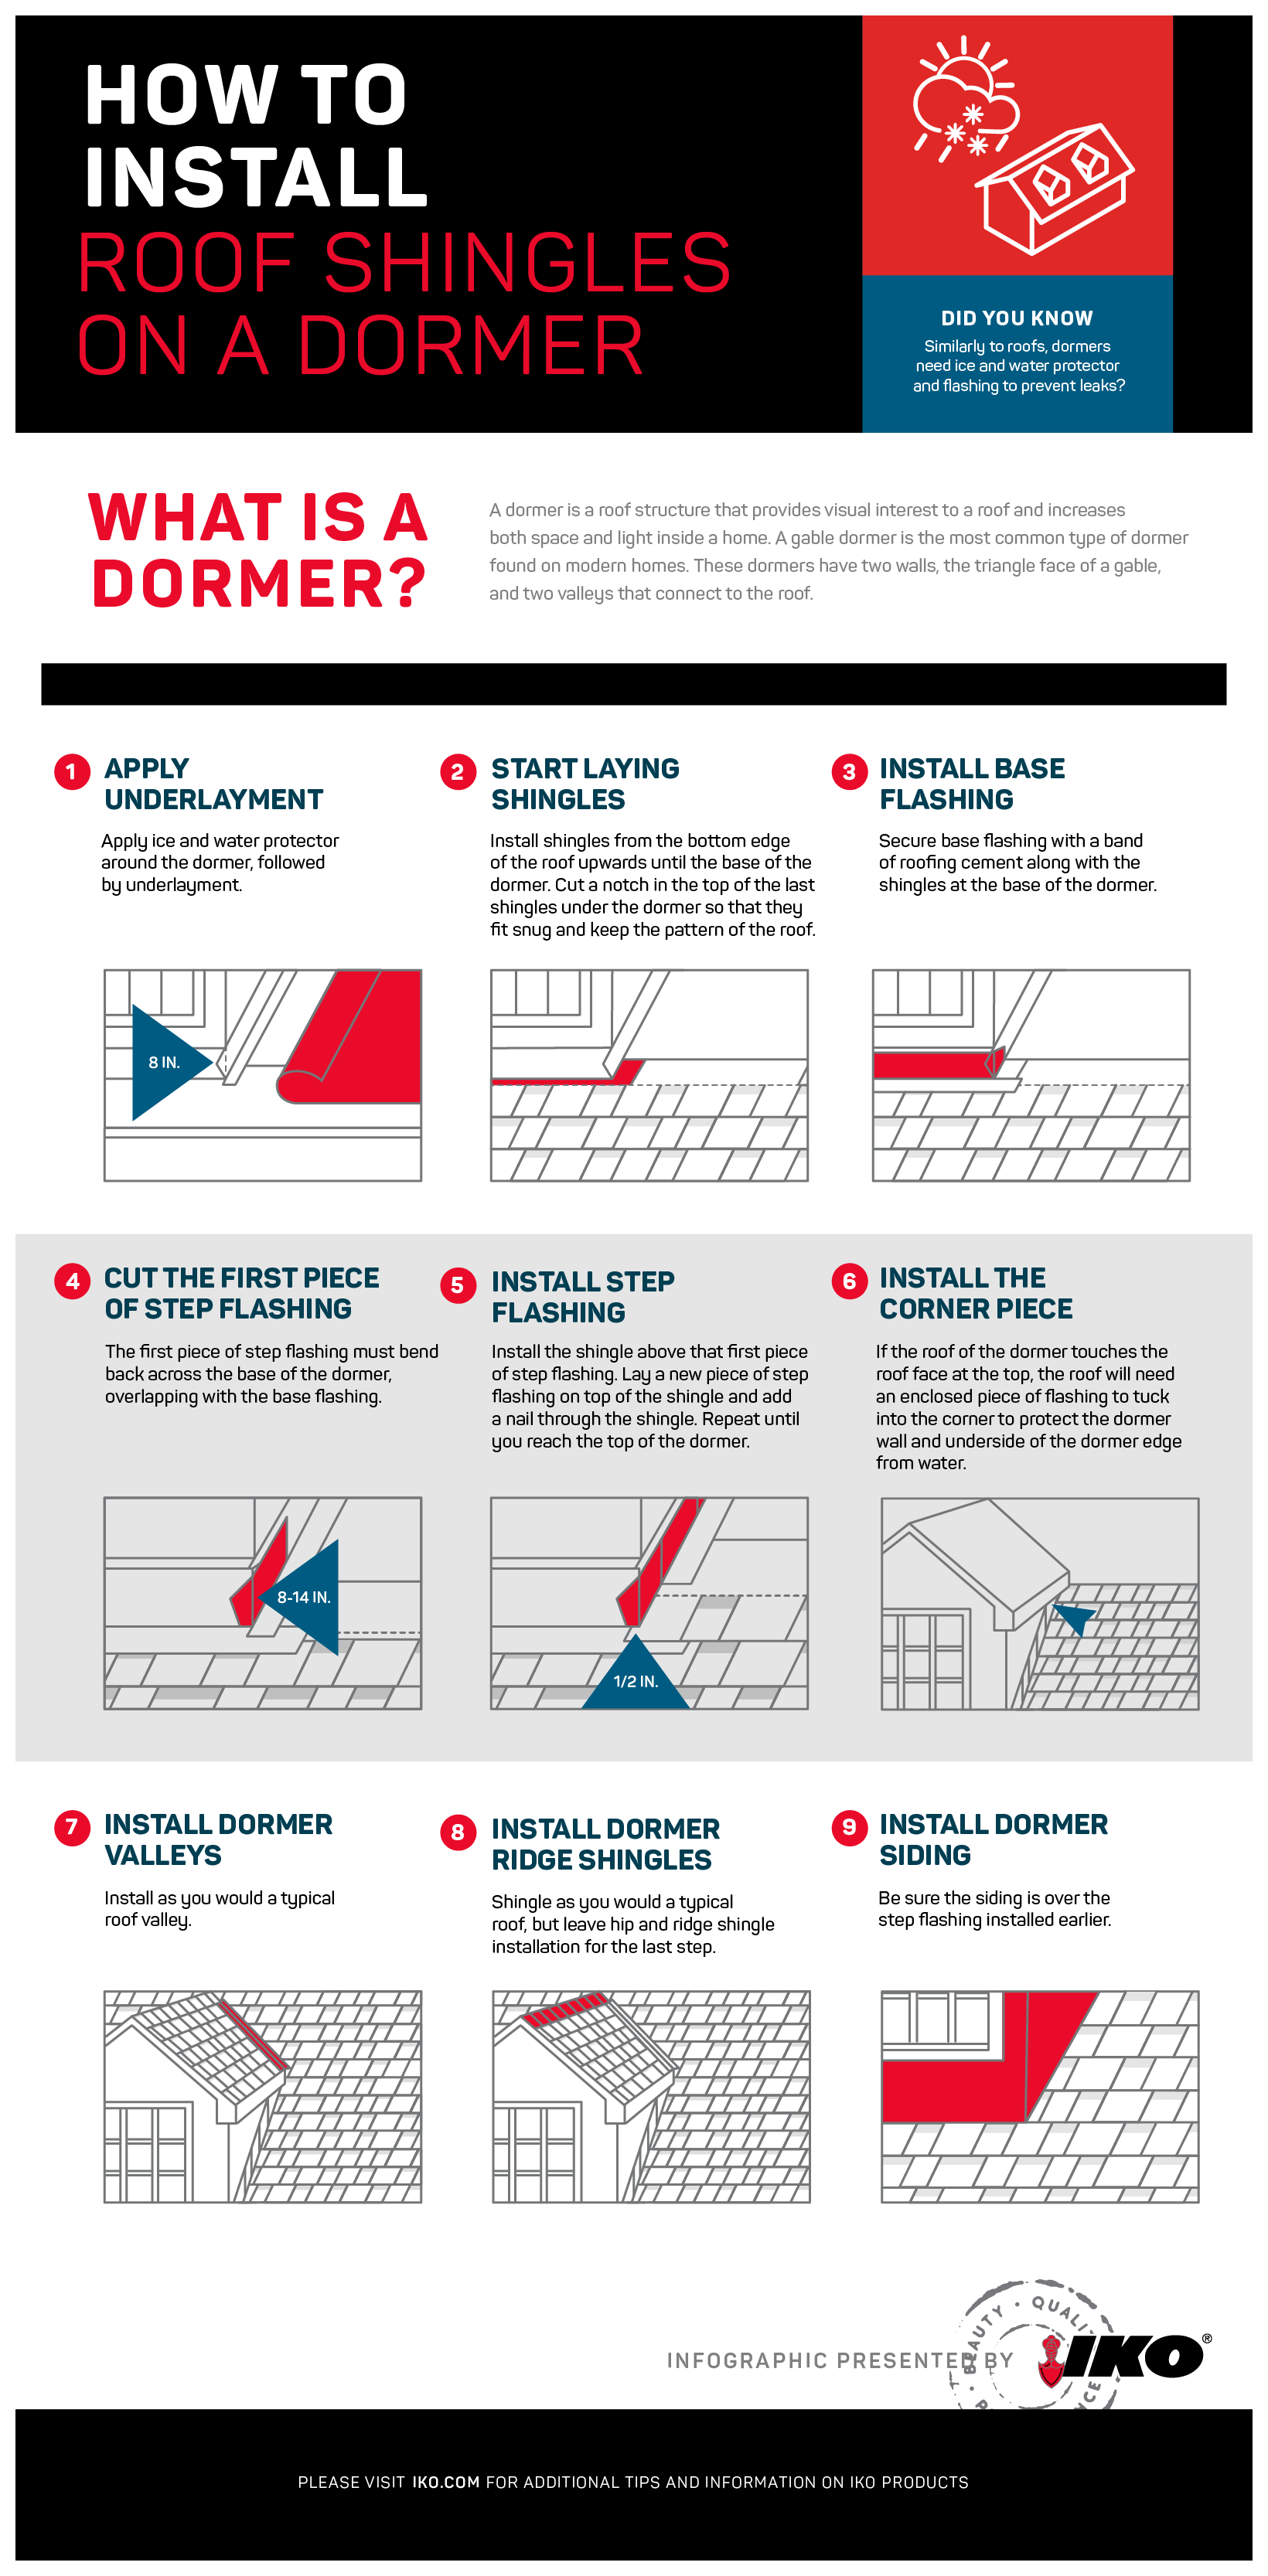
1. Apply Underlayment
As part of installing a typical roof, the roofer will lay down ice and water protector and then synthetic or felt underlayment.
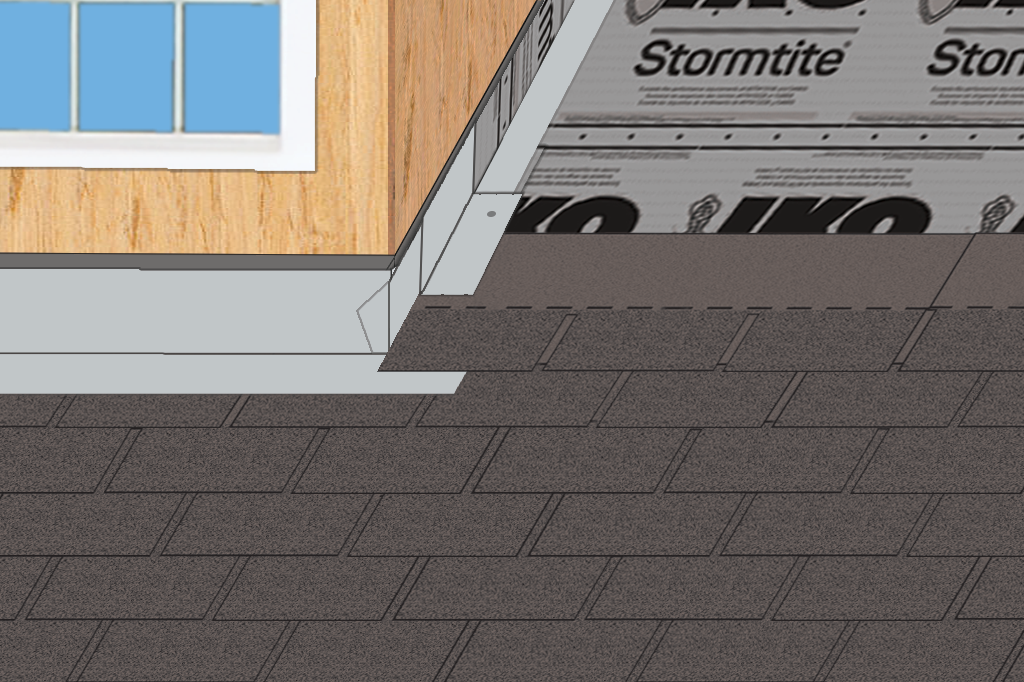
Before the roofers place the felt underlayment on the roof, they will apply ice and water protector around the dormer at the base, along the walls and in the two valleys at the top of the dormer. The roofers should always place ice and water protector beneath dormer flashing and dormer siding. Your roofers should not install dormer siding until they’re done installing the shingles.
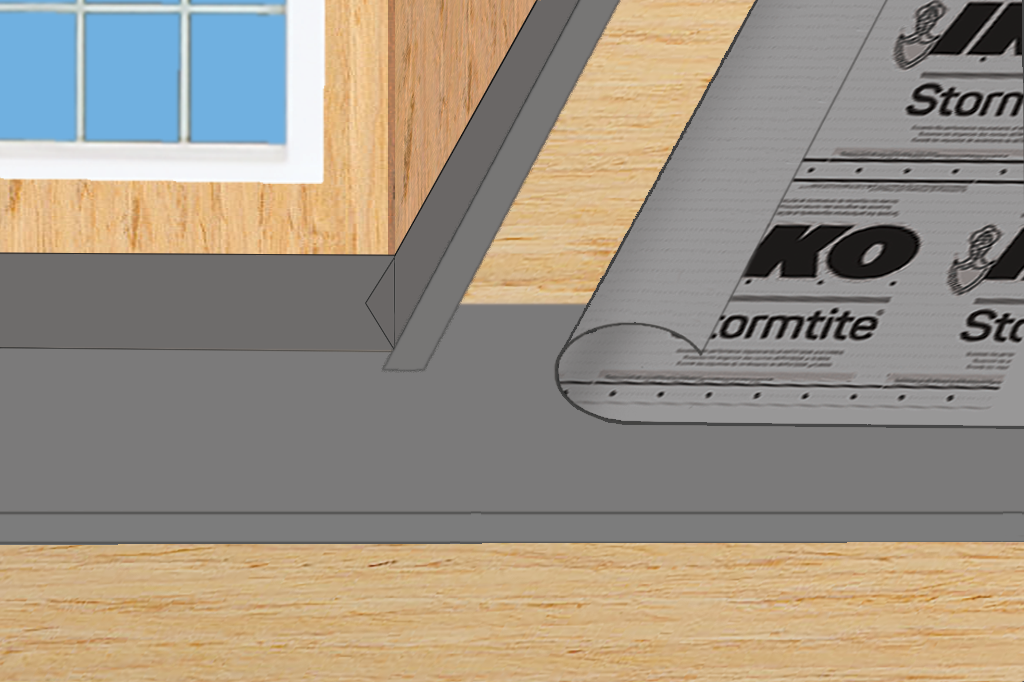
When the roofers lay the ice and water protector along your dormer, it should climb up the base and sides of the dormer at least 8 inches. It should extend higher than your flashing will. To get a tight seal, the roofers will need to trim your ice and water protector so that the side layers wrap around the front of the dormer.
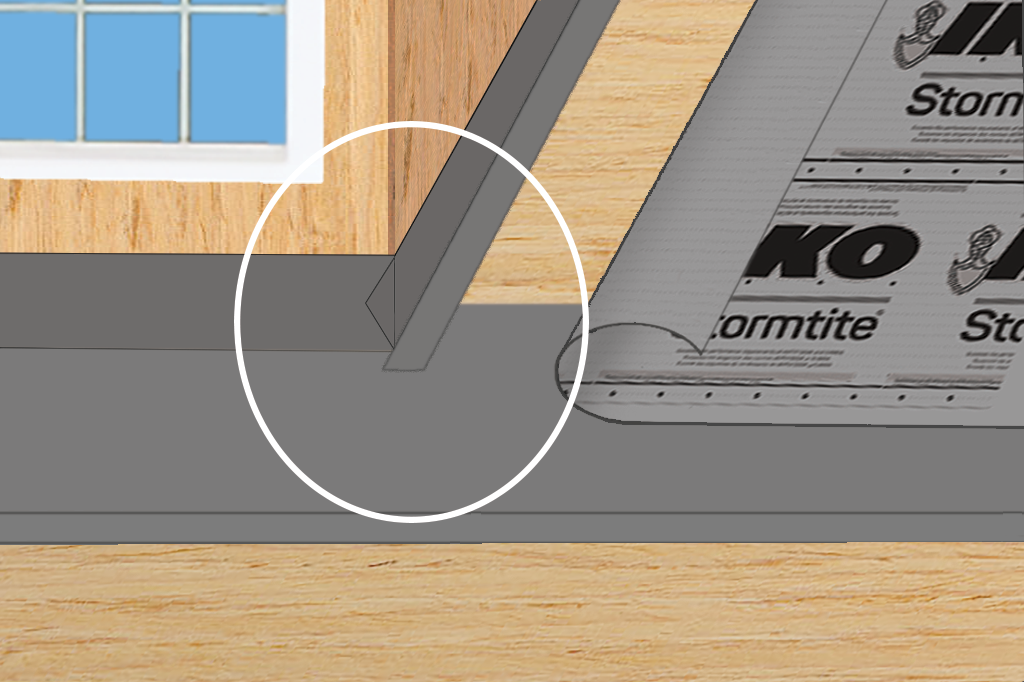
Additionally, as your roofers install synthetic underlayment across the rest of the roof, they will roll it up the dormer as high as your metal flashing will be.
2. Start Laying Shingles
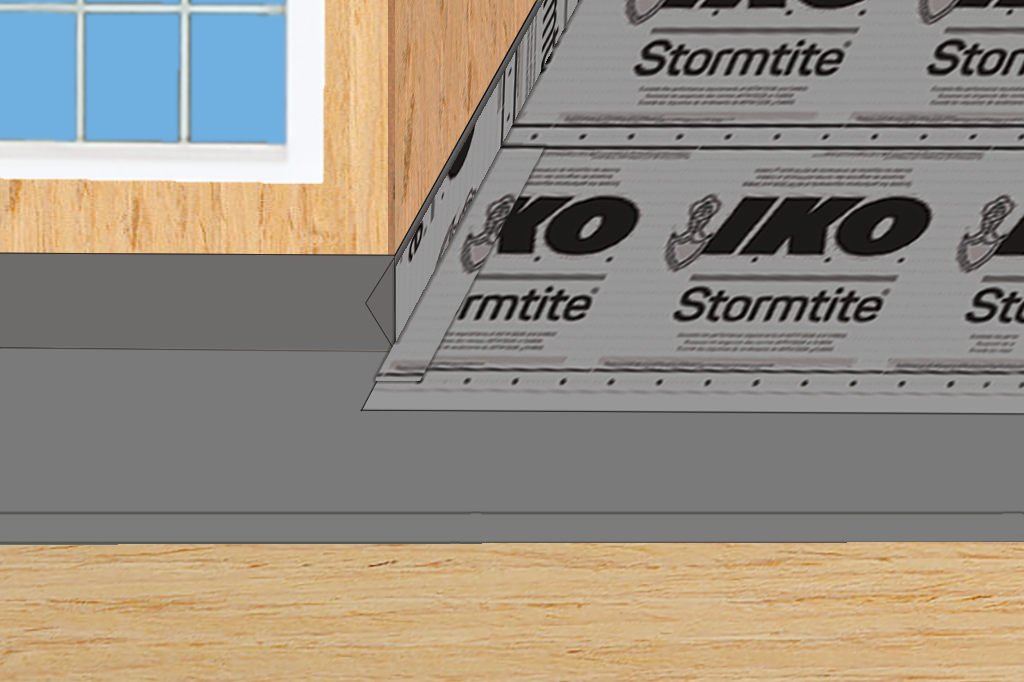
Roofers will start installing shingles as usual from the bottom edge of the roof upwards. When they reach the base of the dormer, they will install shingles beneath it as usual.
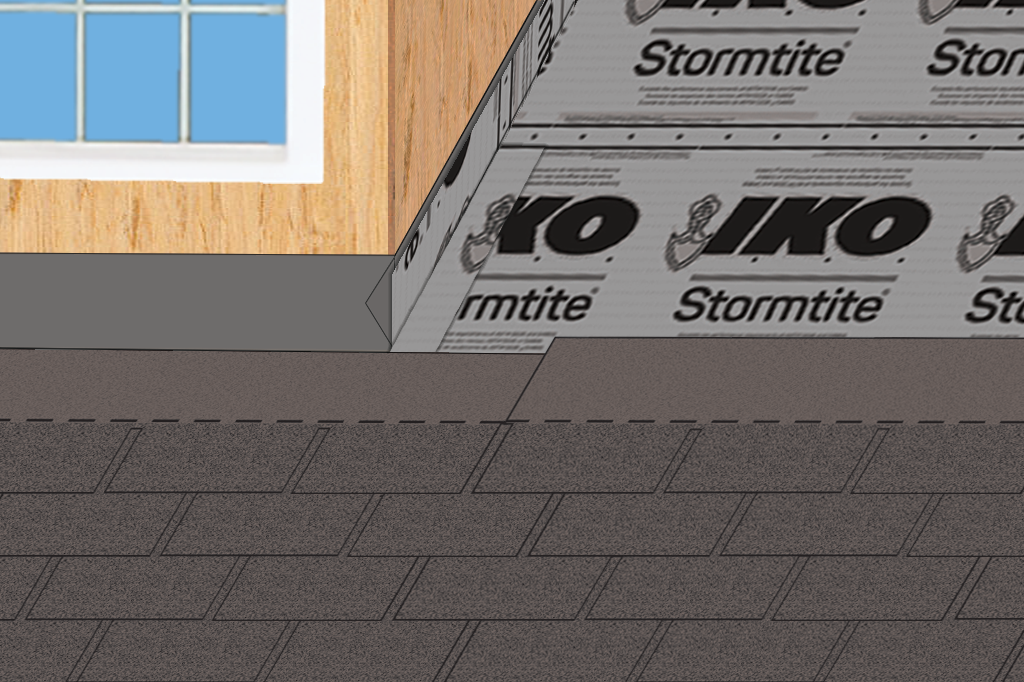
The top of the last shingles that fit under the dormer snugly needs to be covered to keep the pattern of the roof. So, roofers will cut or “notch” your shingles so they fit.
3. Install Base Flashing
Once the roofers have added shingles right up to the base of the dormer, it’s time to install base flashing. They may cut base flashing from sheets of galvanized steel flashing (or another acceptable flashing material), or they may be able to buy an appropriately sized piece from a supplier.
Your base flashing should have two corner pieces that fold back along the side wall of the dormer, to help protect the corner.
To install the base flashing, the roofers will lay a band of roofing cement along with the shingles at the base of the dormer. Then, they will press the flashing into place. It is important to ensure it is as tight as possible against the dormer.
4. Cut the First Piece of Step Flashing
Dormers also need step flashing. This technique involves layering flashing with shingles as the roofers move up the wall. This method creates “steps” that guide water down the roof safely. Step flashing needs to extend 8 to 14 inches up the wall above the shingles, so the roofers must choose or cut tall pieces.
The first piece of step flashing is unique. It must bend back across the base of the dormer, overlapping with the base flashing. To create this piece of flashing, roofers will take your typical piece of step flashing (which is bent at 90 degrees) and cut it into shape. In one technique, their first cut is made straight across the bend and up a few inches.
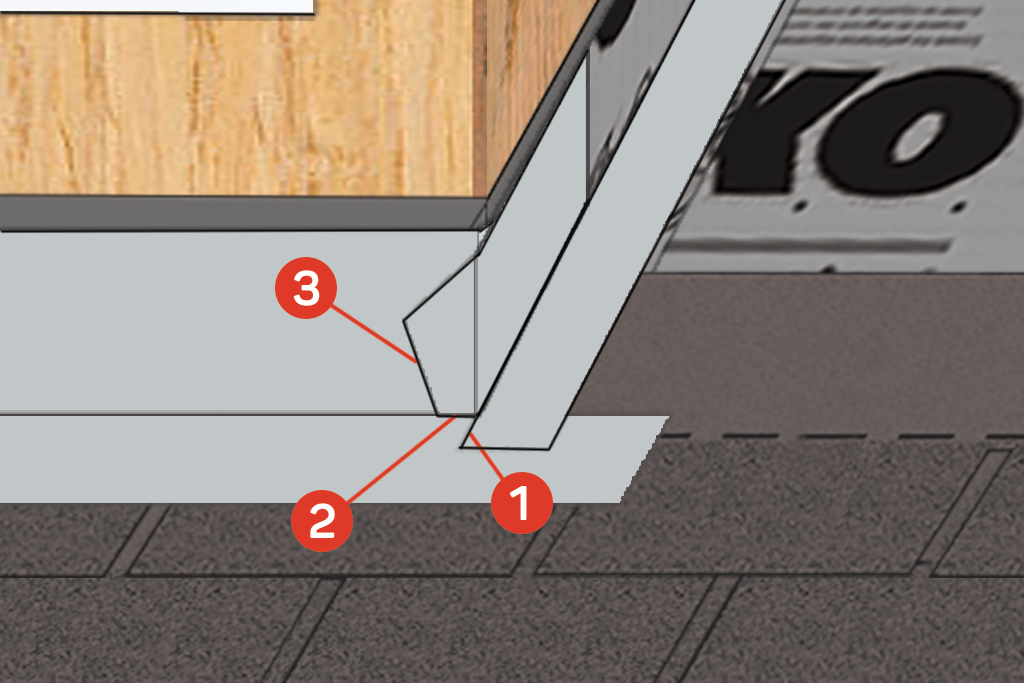
Then they place their second cut at a 45-degree angle to the first. Roofers will then cut from the end of their first cut back towards themselves. For neatness, roofers may choose to make a third cut to remove some of the excess flashing. Now the roofers must place your corner piece against the dormer and bend it into shape.
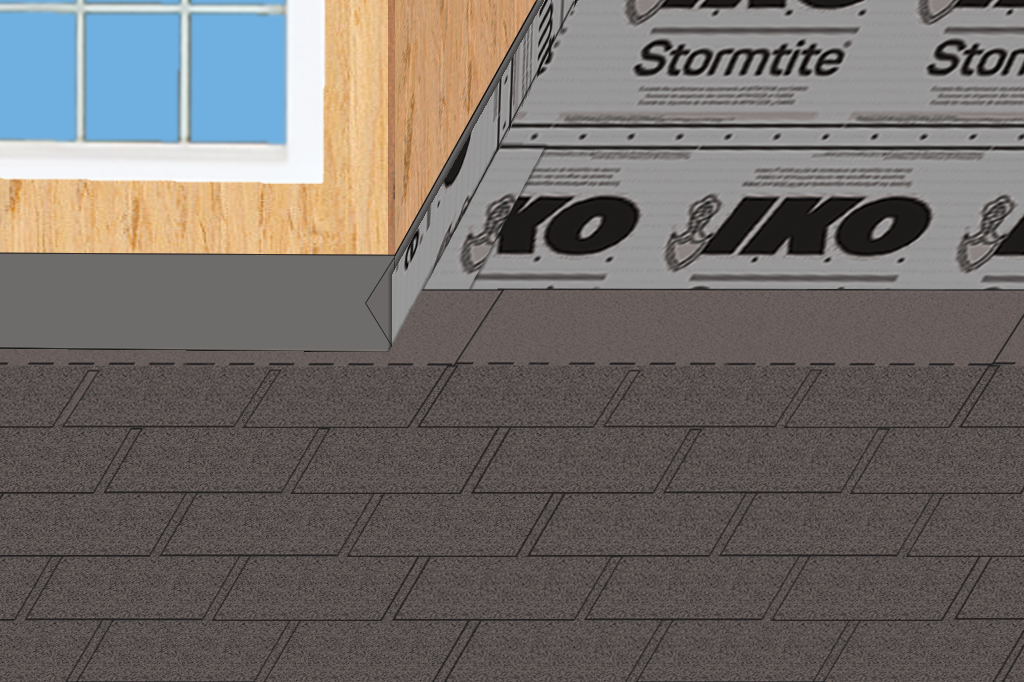
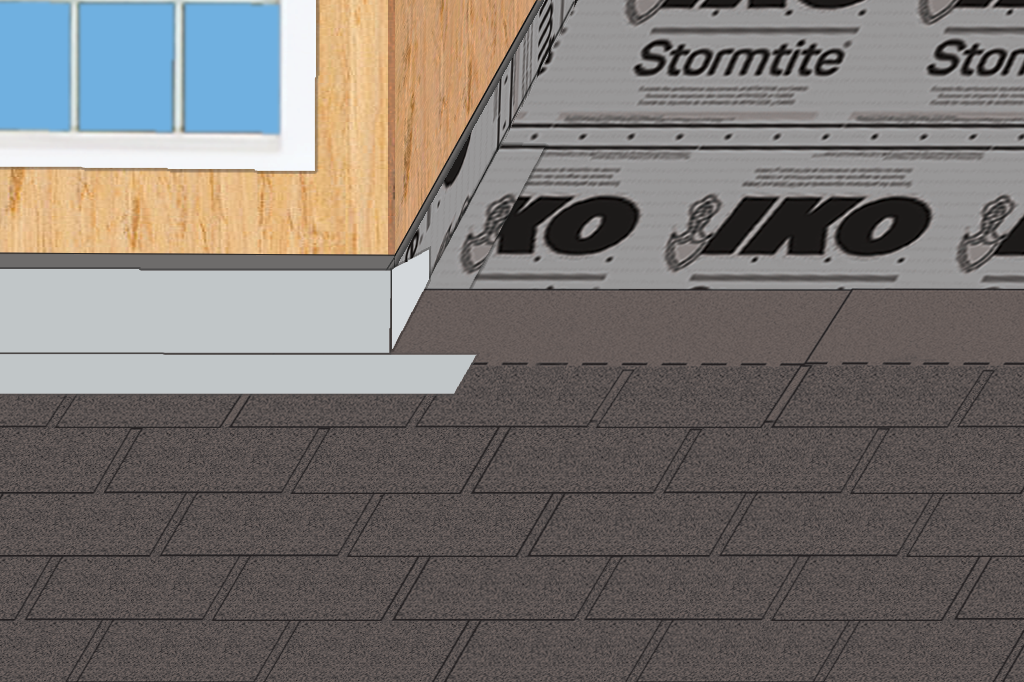
5. Install Step Flashing
Your roofers will secure the first piece of step flashing with a single nail driven through the shingle beneath it. Experienced roofers will know not to nail directly in the corner of the dormer or too high on the flashing. Also, they will not add a second nail, especially not on the dormer wall. Nailing two flashing surfaces may create warping problems.
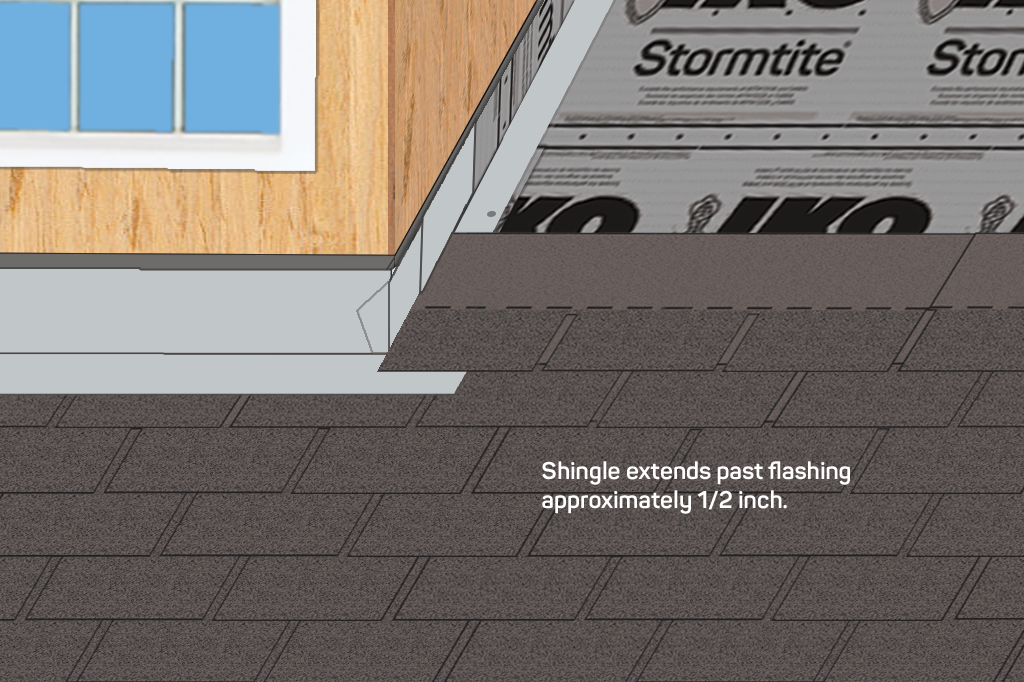
Now, your roofing team will shingle a row along your roof up to the dormer. When they get to the dormer, roofers will install the shingle above that first piece of step flashing. This shingle should extend beyond the step flashing by roughly a half-inch, though it may be more if they are installing shingles with a large exposure. Roofers should be sure to follow the shingle’s exposure exactly, so that the shingle rows on the left and right will line up perfectly when you reach the top of the dormer.
Next, roofers will lay a new piece of step flashing on top of the shingle. The roofer will hold the flashing firmly against the dormer wall and add a single nail, through the shingle.
The roofing team will repeat these last two steps until they reach the top of the dormer.
6. Install the Corner Piece
On many gable dormers, the roof of the dormer will touch the roof face at the top. If yours does, the roofer will need to create or buy an enclosed piece of flashing and tuck it into the corner. This protects the dormer wall and the underside of the dormer edge from water.
First, your roofers will lay the final shingle beneath the dormer (trimming some off the top if necessary) and place the corner piece on top, and back into the corner. It should fit the corner perfectly.
7. Install Dormer Valleys
How do you shingle the top of the dormer to the roof? In the case of gable dormers, there will be two valleys where the dormer meets the rest of the roof. The process of installing these valleys is the same as the process of installing a typical roof valley. IKO strongly recommends roofers install open metal valleys.
8. Install Ridge Shingles
As part of installing the valleys, the roofers will fill in both sides of the dormer’s roof with shingles. However, on gable dormers, there is a short ridge. How do you shingle a dormer ridge? You shingle it the same way you shingle a typical roof ridge. Your roofers will simply install hip and ridge shingles as their last step.
9. Install Dormer Siding
Once the roof is complete, the roofers will move on to installing the siding on your dormers. They will follow the manufacturer’s directions and be sure the siding is over the step flashing they installed earlier. Once that is done, your dormer is complete.
The Importance of Proper Installation for Roof Dormers
As a roof projection, a dormer is an especially vulnerable area of the roof. Proper care during installation is necessary to protect the dormer and to make it look as lovely as you imagine.
While it may take a bit of work, a dormer is a valuable addition to any roof. It adds visual interest to the roof and increases both space and light inside the home. If you’re considering building a dormer addition, reach out to a professional roofer through IKO’s Contractor Locator.
Bookmark This Infographic: How to Install Roof Shingles on a Dormer
Looking for an easy-to-read how-to? Right-click and save the infographic below for future reference.