Advertisement
Quick Links
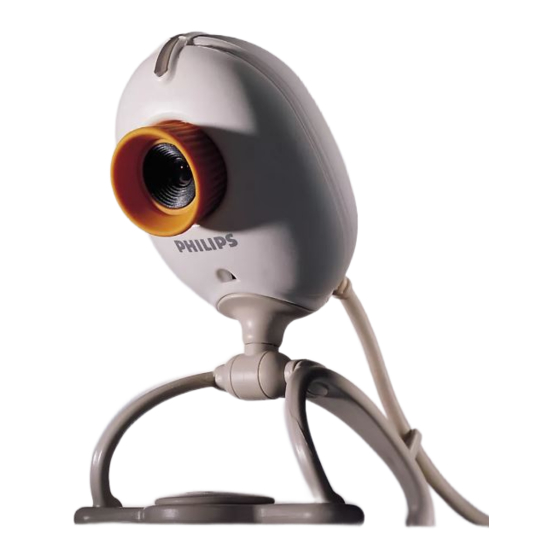
Brilliant images and blazing colours. That's what you get with the Philips USB PC Camera. Forget about installing grabber cards and
separate power supplies. You don't need them. Power is supplied direct to the camera through the USB cable and the camera returns
video straight to your PC!
This USB PC Camera has several unique features:
The universal camera base supports both free-standing and hanging use (for laptops), with perch included for stable footing
on top of your monitor. It also features a 1/4" UNC screw thread for tripod mounting
Full Auto mode automatically optimizes your camera settings for you
Option for high frame rates, up to 30 fps
Full Plug & Play use of the USB port
Video images in CIF resolution of 352x288 pixels, ideally suited for communication over the Internet
Detailed still images in resolutions of up to 640x480 pixels
Several top-of-the-line software packages included on CD-ROM, so you can start using the camera straightaway
Congratulations on purchasing the Philips USB PC Camera. This new digital camera is the most advanced means of recording high
quality movies or still pictures quickly and easily on your PC or laptop computer. After installation, the new camera can be used for all
sorts of applications, such as:
Internet clips etc.
with all applications that use the TWAIN interface to acquire an image.
Amazing gaming interaction using your camera as a game controller.
edited using image or video editing programs.
The next sections of this manual give a step-by-step description of the installation process and explain how to use the USB PC
Camera.
Create your own video presentations, video mail, product demonstrations, training videos,
Show yourself on the web. Be out there for everybody to enjoy...
Use images in presentations, create postcards, or send them via e-mail or on diskette. The camera works
Use the camera for network video conferencing or Internet video conferencing.
After recording the images you want with the Philips USB PC Camera, the images can be easily
Advertisement

Related Manuals for Philips PCVC720K/40


Summary of Contents for Philips PCVC720K/40
- Page 1 Brilliant images and blazing colours. That’s what you get with the Philips USB PC Camera. Forget about installing grabber cards and separate power supplies. You don’t need them. Power is supplied direct to the camera through the USB cable and the camera returns...
- Page 2 The Philips USB PC Camera; Base to support the camera on (including monitor perch); A CD-ROM containing the Philips installation software, application software packages and electronic software manuals; Quick Install Guide. Contact your supplier immediately if any item is missing.
- Page 3 Put the camera on top of the monitor, or on a table or desk... (Ensure that the supporting surface is free of grease and dirt.) * = Sticky tape Remove backing from one side of the adhesive tape, and fix under the disc.
- Page 4 In order to maximize the video performance offered by your camera, we have included a Philips installation program on CD-ROM. Please follow these directions for the camera installation exactly, and make sure that you have your Windows CD-ROM to hand.
- Page 5 - One VLounge icon on your desktop. - Installed applications, as selected by the user during this installation procedure. You are now ready to start working with your Philips USB Camera. Go to the central camera application fun! USB port at the appropriate time.
- Page 6 VLounge is the central application for easy access to your Philips USB PC Camera and all video applications installed during setup, together with access to one application of your choice. You can start VLounge using the Windows QuickLaunch menu on your taskbar, through the program group ’Philips ToUcam Camera’, or by double-clicking the VLounge icon...
- Page 7 More info: Click ’Help’ within the application for help or go to: Your own IUHH SpotLife account will be created during installation or when uploading your first images to SpotLife. Click the ’WebCam’ tab to send camera pictures to your SpotLife account periodically. Adjust the preview image if necessary, then click the Start button to start uploading your live webcam pictures.
- Page 8 Similarly, click the ’Live Webcast’ tab to broadcast your PC Camera images and audio ’live’ over the World Wide Web. Or create your own ’Web Album’ of stored videos and pictures for people to view at their convenience. NOTE: You can make your shows public, for anyone to see, or choose to create a password so that only friends and family can view them.
- Page 9 First, click ’TWAIN Acquire’ in the File menu at the top left of your screen. Next, click ’Select Source...’ in this menu and select the Philips USB PC Camera as your TWAIN source. Once you’ve set your capture options, click the Acquire button Finally, point your camera at the object or person you want to capture and click on the Capture button in the View Finder window or press the Snapshot button on top of the camera to capture the image displayed in the View Finder.
- Page 10 More info: Click ’?’ within the application for assistance or go to: The Philips USB PC Camera not only works with the video applications included on CD-ROM with this camera, but with any video application that uses DirectX or Video for Windows or the TWAIN interface.
- Page 11 Right-click the ’Personal Video’ button in Vlounge to open the Application configuration menu. Click the ’Details’ button to access the Application details menu in which you can specify the full program name including its extension (path not required). Fill out the other options as required by your application.
- Page 12 This opens the HTML manual file in your HTML browser. Use the ’Video On’ button to start showing the live camera image on your screen (instead of the stationary Philips logo). If it is not possible to show a live camera preview, the preview window will display a snowy Philips logo indicating errors in ’receiving’ images from your camera.
- Page 13 This bar automatically shows you hints and tips for the various functions of VLounge whenever you move your cursor over the relevant button. Please pay careful attention to this text, since it may contain valuable information as to why specific functions are not available at certain times.
- Page 14 The camera properties can be changed from within an application, or independently by clicking the VProperty icon which can be found in the right hand part of the Windows taskbar at the bottom of your screen. Most applications can show a ’live preview’ video image on your monitor.
- Page 15 In Auto mode the camera automatically controls the different colour components in the picture to obtain the most natural colour reproduction. This setting is the preferred setting for normal use. Deselect the Auto mode and use the ’Red’ and ’Blue’ sliders to set a white balance manually. The range of your Auto mode control will be influenced by your Environment setting (Indoor / FL / Outdoor).
- Page 16 Applications that don’t show this extra tab will offer video source switching under a different menu item within the application itself. NOTE: If you have two or more Philips USB cameras connected to your computer, these cameras can only be used one at a time.
- Page 17 The Philips USB PC Camera is TWAIN-compatible (like a scanner), so you can use the camera as an input device for any application software that uses TWAIN as a data source (e.g. photo editing software). In TWAIN-compatible applications you will see the Philips USB PC Camera listed as an available TWAIN data source among your other TWAIN sources (e.g.
- Page 18 If two or more Philips cameras of the same type are connected to your computer, only one of these cameras can be used at any one time.
- Page 19 A: If you unplug the camera while it is providing a video stream to an application on your computer, the computer may crash. Always close applications that use video from the camera before unplugging your Philips USB PC Camera to avoid problems.
- Page 20 property page. This property page is accessible from within the application you are using. Select the correct Mains frequency, 50 Hz or 60 Hz. A: This can happen when the selected data stream format could not be processed due to a missing codec. Re-install the camera driver software to install the missing codec.
- Page 21 CMOS 352 (H) x 288 (V) 640 (H) x 480 (V) < 10 lux F2.6 Frame rate in frames/sec [fps] Up to 30 Up to 30 Up to 30 Up to 30 2.0 m by Philips...
- Page 22 Storage Power Supplied via the USB cable Power compliance General USB specifications 1.1 for power requirements Two modes for power supply: by Philips by Smith Micro by Microsoft by Ulead by SpotLife by Reality Fusion -10 to 55°C -35 to 70°C Suspend: max.
- Page 23 Keep the camera away from heat sources, lights, and direct sunlight. Never point the lens of your camera at the sun. All brand names and trademarks acknowledged. Copyright © 2000 Philips Electronics N.V. All data subject to change without notice.
- Page 24 One of the Windows multimedia settings is the recording device setting. This setting determines which audio hardware is being used to provide audio signals to audio applications. This setting is accessible through: the Windows ’Start’ menu, Settings, Control Panel, MultiMedia, Audio tab. In the recording section, your microphone should be selected as the input source. The Microsoft standard file format for combined video and sound files on the PC.
- Page 25 A collection of images that combine to form motion - or moving - pictures (also known as movies or video clips).