Table of Contents
Advertisement
Quick Links
MINI COMPONENT SYSTEM
OPERATION MANUAL
Thank you for purchasing this SHARP product.
To obtain the best performance from this product, please read
this manual carefully.
It will guide you in operating your SHARP product.
CONTENTS
SPECIAL NOTES .............................................................. 1-2
ACCESSORIES .................................................................... 2
PRECAUTIONS .................................................................... 3
NAMES OF CONTROLS AND INDICATORS ................... 4-6
PREPARATION FOR USE .............................................. 7-10
SETTING THE CLOCK ...................................................... 11
SOUND CONTROL ....................................................... 12-13
COMPACT DISC OPERATION ..................................... 14-16
RADIO OPERATION ..................................................... 17-18
Downloaded from:
http://www.usersmanualguide.com/
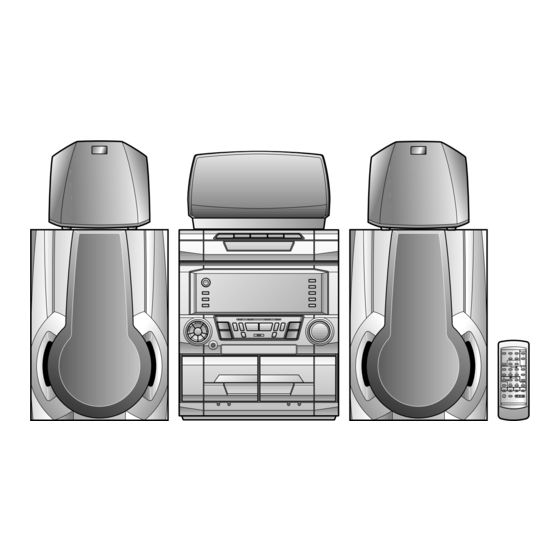
CD-DP2500H Mini Component System consisting of CD-
DP2500H (main unit), CP-DP2500H (front speakers),
GBOXS0038AWM1 (centre speaker) and GBOXS0039AWM1
(surround speakers).
Page
RDS (Radio Data System) OPERATION ..................... 19-27
CASSETTE OPERATION ................................................... 27
RECORDING ................................................................. 28-29
HOW TO USE THE BUILT-IN TIMER ............................ 30-31
USING EXTERNAL UNITS ............................................ 31-32
RESETTING THE MICROCOMPUTER .............................. 32
TRANSPORTING THE UNIT .............................................. 32
MAINTENANCE ................................................................. 33
SPECIFICATIONS .............................................................. 33
TERMS OF GUARANTEE ................................... Back cover
MODEL
CD-DP2500H
Page
Advertisement
Table of Contents

Related Manuals for Sharp CD-DP2500H


Summary of Contents for Sharp CD-DP2500H
-
Page 1: Table Of Contents
CD-DP2500H Mini Component System consisting of CD- To obtain the best performance from this product, please read DP2500H (main unit), CP-DP2500H (front speakers), this manual carefully. GBOXS0038AWM1 (centre speaker) and GBOXS0039AWM1 It will guide you in operating your SHARP product. (surround speakers). CONTENTS Page Page SPECIAL NOTES .............. -
Page 2: Special Notes
SPECIAL NOTES NOTE FOR USERS IN THE U.K. The mains lead of this product is fitted with a non-rewireable Ensure that neither the brown nor the blue wire is connected (moulded) plug incorporating a 3A fuse. Should the fuse need to the earth terminal in your three pin plug. -
Page 3: Accessories
(Continued) Recording and playback of any material may require con- CAUTION sent, which SHARP is unable to give. Please refer par- Use of controls, adjustments or performance of procedures other ticularly to the provisions of the Copyright Act 1956, the... -
Page 4: Precautions
Cover the tab holes with adhesive tape to erase or record of accident causing damage. SHARP will not be held respon- again. sible for any damage resulting from use of this unit with a volt- TAPE 1: Playback only. -
Page 5: Names Of Controls And Indicators
NAMES OF CONTROLS AND INDICATORS Front panel . (CD) Disc Tray . (CD) Disc Skip Button . (CD) Disc Number Select Buttons . (CD) Open/Close Button . Extra Bass Indicator . Spectrum Analyzer/Volume Level Indicator . (CD) Disc Number Indicators . - Page 6 (Continued) Rear panel . AC Power Lead . CD Digital Output Socket . FM 75 Ohms Aerial Socket . AM Loop Aerial Socket . Video/Auxiliary (Audio Signal) Input Sockets . Front Speaker Terminals . Center Speaker Terminals . Surround Speaker Terminals Front speaker .
- Page 7 (Continued) Remote control . Remote Control Transmitter LED . Surround Level Buttons . Centre Level Buttons . Dolby Pro Logic Button . Test Tone Button . Balance Control Buttons Tuner control section . Preset Up/Down Buttons CD control section . Memory Button .
-
Page 8: Preparation For Use
PREPARATION FOR USE Unplug the AC power lead from the AC socket before connecting or disconnecting any component. Speaker connection Connect the speaker wires to the SPEAKER terminals as shown. Black Front speakers Connect the black wire to the minus (–) terminal, and the White red wire to the plus (+) terminal. - Page 9 (Continued) To mount the surround speakers on the wall 32 mm The design of the surround speakers allows them to be hung (1-1/4") on the wall. Be sure to use the type and size of screw that is shown to the left.
- Page 10 (Continued) Aerial connection Supplied FM aerial Connect the FM aerial wire to the FM 75 OHMS socket and position the FM aerial wire in the direction where the strongest signal can be received. Supplied AM loop aerial Connect the AM loop aerial wire to the AM LOOP socket. Posi- tion the AM loop aerial for optimum reception.
- Page 11 (Continued) Demo mode (Main unit operation) When the AC power lead is first connected, the unit will enter the demonstration mode. To cancel the demonstration mode: When the unit is in the stand-by mode (demonstration mode), press the X-BASS/DEMO button. The demonstration mode will be cancelled and the unit will be in the low power consumption mode.
-
Page 12: Setting The Clock
SETTING THE CLOCK In this example, the clock is set for the 24-hour (0:00) system. (Main unit operation) Press the ON/STAND-BY button to enter the stand-by mode. Press the CLOCK button. Within 5 seconds, press the MEMORY/SET button. Press the TUNING/TIME (X or W) button to select the time display mode. -
Page 13: Sound Control
SOUND CONTROL Volume (Main unit) (Remote control) (Main unit operation) When the VOLUME control is turned clockwise, the volume will increase. When it is turned anti-clockwise, the volume will decrease. (Remote control operation) Press the VOLUME button to increase the volume and the VOLUME button to decrease the volume. - Page 14 (Continued) Dolby Pro Logic Surround mode Centre speaker Video and DVD software programmes carrying the trademark are recordings that contain the Front Front same Dolby Surround data as used in movie theatres. speaker speaker The Dolby Pro Logic Surround mode uses Dolby Surround data (Left) (Right) to bring the full presence experienced in a movie theatre into...
-
Page 15: Compact Disc Operation
COMPACT DISC OPERATION CD playback Press the ON/STAND-BY button to turn the power on. 12 cm (5") Press the CD button. Press the OPEN/CLOSE button to open the disc tray. 8 cm (3") Place the CD(s) on the disc tray, label side up. CDs can be placed on any open position on the disc tray. - Page 16 (Continued) Cue and review Load a disc and begin playback. Hold down the 2 ( 2 4 ) button for audible fast for- ward, and hold down the 3 ( 5 3 ) button for audible fast reverse. Normal playback will resume when the 2 ( 2 4 ) or 3 ( 5 3 ) button is released.
- Page 17 (Continued) APMS (Automatic Programmable Music Selector) Selected disc number You can playback the tracks on the CDs in the disc 1 - 3 posi- tions in any order desired. By specifying the disc numbers from 1 to 3, and the track numbers from 1 to 99, you can choose up to 32 selections for playback in the order you like.
-
Page 18: Radio Operation
RADIO OPERATION Tuning (Main unit operation) Press the ON/STAND-BY button to turn the power on. Press the TUNER (BAND) button. Press the TUNER (BAND) button to select the desired fre- quency band. (FM ST, FM or AM) Press the TUNING/TIME (X or W) button to tune into the desired station. - Page 19 (Continued) Preset tuning (Main unit operation) You can store up to 40 stations in memory (40 stations consist- ing of any combination of FM and AM stations you like) and recall them at the push of a button. To enter stations into memory: Perform steps 1 - 6 in the “Tuning”...
-
Page 20: Rds (Radio Data System) Operation
Information Provided by RDS stations are now providing. It allows these FM stations to send With the CD-DP2500H, you can display three types of RDS additional signals along with their regular programme signals. service. To show them in the display, press the DISPLAY MODE For example, the stations send their station names, and infor- button. - Page 21 (Continued) Descriptions of the PTY (Programme Type) codes, TP (Traffic Programme) and TA (Traffic Announcement) With the CD-DP2500H, you can search for and receive the following PTY, TP and TA signals. NEWS: FINANCE: Short accounts of facts, events and publicly Stock Market reports, commerce, trading etc.
- Page 22 (Continued) ASPM (Auto Station Program Memory) (Main unit operation) It is recommended that you store stations in memory using ASPM. (This memory can be used for PTY searches, station select and EON switching.) When the ASPM button is pressed, whilst tuned to the FM band, the RDS (Radio Data System) function will automatically search for new RDS stations.
- Page 23 (Continued) To specify station names and select stations (Main unit operation) manually (station select) You can receive a desired station by specifying the station name (BBC R1, BBC R2, etc.) from among the stations that have been stored in memory. (ASPM is convenient for storing stations in memory.) Before starting this operation, you must store one or more sta- tion names in memory.
- Page 24 (Continued) To recall stations that have been stored in (Main unit operation) memory (PTY search) You can search for desired stations by specifying the programme type (news, sports, traffic programme, etc..see page 20) from among the stations that have been stored in memory.
- Page 25 (Continued) To manually recall the stations stored in (Main unit operation) memory Press the PRESET (X or W) button. Each time the button is pressed, the channel number will change. After the channel number has been displayed for 2 sec- onds, the frequency for that channel will appear for 2 sec- onds, and then the station name will appear.
- Page 26 (Continued) EON-PTY (Main unit operation) Tune in the desired RDS station (when a station name is being displayed). Press the EON button when “EON” appears. “PTY TI” and “SELECT” will appear alternately for about 6 seconds. Whilst they are being displayed, select the desired programme type using the PRESET (X or W) button.
- Page 27 (Continued) EON-TI (Main unit operation) Tune in the desired RDS station (when a station name is being displayed). Press the EON button when “EON” appears. “PTY TI” and “SELECT” will appear alternately for about 6 seconds. Whilst they are being displayed, select the TI (Traffic Infor- mation) using the PRESET (X or W) button.
-
Page 28: Cassette Operation
(Continued) In the following cases, the EON stand-by mode will be can- If you want to cancel the reception of an ON (other network) celled. station which was tuned in by the EON system and return to When the unit is set in the stand-by mode the original station you were receiving, press the EON but- When the unit is switched to another band in the EON stand- ton. -
Page 29: Recording
RECORDING When recording important selections, be sure to make a Metal and CrO tapes should not be used for recording or preliminary test to ensure that the desired material is being dubbing. properly recorded. The volume and sound quality can be adjusted with no ef- fect on the recorded signals (Variable Sound Monitor). - Page 30 (Continued) Recording from the built-in radio Tune in to the desired station. (See pages 17-18.) Load a cassette into the TAPE 2 cassette compartment. Press the REC PAUSE ( 6) button. “REC” will flash. Press the 0/R (TAPE 2 0) button. “REC”...
-
Page 31: How To Use The Built-In Timer
HOW TO USE THE BUILT-IN TIMER Before setting the timer, make sure that the clock setting is Timer playback correct. (Page 11) Press the ON/STAND-BY button to turn the power on. (Main unit operation) Press the CD, TUNER (BAND), TAPE (1 V 2) or VIDEO/ AUX (1 V 2) button to select the desired function, and then adjust the sound volume using the VOLUME control. -
Page 32: Using External Units
(Continued) Sleep operation (Main unit operation) The radio, compact disc and cassette deck can all be turned off automatically. Play back the desired sound source. Press the TIMER/SLEEP button repeatedly until “SLEEP” is displayed. To change the sleep time: Whilst the sleep time is displayed, press the TUNING/TIME (X or W) button to adjust the time. -
Page 33: Resetting The Microcomputer
(Continued) Headphones Before plugging in or unplugging the headphones, make sure the volume level is reduced. Be sure your headphones have a 3.5 mm (1/8") diameter plug and are between 16 ohms and 50 ohms impedance. The recommended impedance is 32 ohms. When headphones are connected, the speakers are dis- connected automatically. -
Page 34: Maintenance
SPECIFICATIONS As part of our policy of continuous improvement, SHARP reserves the right to make design and specification changes for product improvement without prior notice. The performance specification figures indicated are nominal values of production units. There may be some deviations from these values in individual units. - Page 35 MEMO Downloaded from: http://www.usersmanualguide.com/...
-
Page 36: Terms Of Guarantee
3. To benefit from this guarantee, any fault which occurs must be notified to Sharp, or its appointed Service Facility within one year from the date this product was purchased. Proof of purchase must be provided. - Page 37 This file has been downloaded from: www.UsersManualGuide.com User Manual and User Guide for many equipments like mobile phones, photo cameras, monther board, monitors, software, tv, dvd, and othes.. Manual users, user manuals, user guide manual, owners manual, instruction manual, manual owner, manual owner's, manual guide, manual operation, operating manual, user's manual, operating instructions, manual operators, manual operator, manual product, documentation manual, user maintenance, brochure, user reference, pdf manual Downloaded from:...