Speaker placement - JBL.com
Speaker placement - JBL.com
Speaker placement - JBL.com

You also want an ePaper? Increase the reach of your titles
YUMPU automatically turns print PDFs into web optimized ePapers that Google loves.
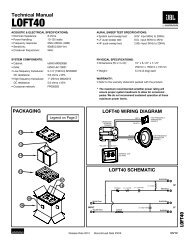
SPEAKER PLACEMENT<br />
Proper <strong>placement</strong> of the<br />
speakers is an important step<br />
in obtaining the most realistic<br />
soundstage possible. These<br />
re<strong>com</strong>mendations are for the<br />
optimum <strong>placement</strong> of the<br />
loudspeakers. Use these<br />
<strong>placement</strong> re<strong>com</strong>mendations<br />
as a guide. Slight variations<br />
will not diminish your listening<br />
pleasure.<br />
All of the Northridge E Series<br />
loudspeakers referred to in<br />
this guide are video-shielded<br />
and can safely be placed<br />
near a television.<br />
MODELS: E60, E80, E90, E100<br />
MODELS: E30, E50<br />
As front speakers<br />
As surround speakers<br />
5 – 6 ft.<br />
(1.5m–1.8m)<br />
MODEL: EC35<br />
0 – 2 ft.<br />
(0–0.6m)<br />
The EC35 center channel<br />
loudspeaker is designed to<br />
<strong>com</strong>plement all of the<br />
Northridge E Series loudspeakers.<br />
It is the ideal way<br />
to re-create the cinematic<br />
experience in your home.<br />
NORTHRIDGE E SERIES<br />
E30, E50, E60, E80, E90,<br />
E100, EC35<br />
®<br />
OWNER’S GUIDE
SPEAKER CONNECTIONS<br />
MODELS: E30,<br />
E50, E60, E80,<br />
E90, E100<br />
RIGHT<br />
– +<br />
– +<br />
RIGHT<br />
– +<br />
LEFT<br />
MODEL: EC35<br />
CENTER<br />
– +<br />
– +<br />
CENTER<br />
Receiver<br />
<strong>Speaker</strong> Outputs<br />
LEFT<br />
– +<br />
Receiver’s <strong>Speaker</strong> Outputs<br />
<strong>Speaker</strong>s and electronics terminals<br />
have corresponding (+)<br />
and (–) terminals. It is important<br />
to connect both speakers<br />
identically: (+) on the speaker<br />
to (+) on the amplifier and (–)<br />
on the speaker to (–) on the<br />
amplifier. Wiring “out of<br />
phase” results in thin sound,<br />
weak bass and poor imaging.<br />
To use the binding-post<br />
speaker terminals, unscrew<br />
the colored collar until the<br />
pass-through hole in the center<br />
post is visible. Insert the<br />
bare end of the wire through<br />
this hole; then screw the collar<br />
down until the connection<br />
is tight.<br />
The hole in the center of each<br />
collar is intended for use with<br />
banana-type connectors. To<br />
<strong>com</strong>ply with European CE certification,<br />
these holes are<br />
blocked with plastic inserts at<br />
the point of manufacture. To<br />
use banana-type connectors<br />
requires the removal of the<br />
inserts. Do not remove these<br />
inserts if you are using the<br />
product in an area covered by<br />
the European CE certification.<br />
BI-WIRING<br />
The bi-wire connection<br />
method requires one amplifier<br />
and two sets of speaker wires.<br />
By removing the shorting bars,<br />
connections may be made to<br />
the individual network sections<br />
using four conductors, one for<br />
each of the four terminals.<br />
For single-wire connection,<br />
leave the shorting bars in<br />
place and connect only a single<br />
set of speaker wires (two<br />
conductors) to the two upper<br />
terminals.<br />
High Frequency<br />
– +<br />
– +<br />
Low Frequency<br />
– +<br />
Amplifier<br />
Bi-Wire Connections<br />
MODELS: E30, EC35, E50<br />
The supplied self-adhesive<br />
rubber feet may be attached<br />
to the bottom corners of your<br />
speakers to protect your<br />
furniture.<br />
MODELS: E60, E80, E90,<br />
E100<br />
These models feature four<br />
rubber feet that enable them<br />
to be placed on a smoothsurfaced<br />
floor, such as tile or<br />
hardwood. Four metal spikes<br />
are supplied for use when the<br />
speaker is to be placed on a<br />
carpeted surface, to decouple<br />
the speaker from the floor and<br />
prevent unwanted damping. To<br />
insert the spikes, gently lay the<br />
speaker on its side (not its<br />
front or back) on a soft,<br />
nonabrasive surface. Each<br />
spike screws into the threaded<br />
insert in the center of each<br />
rubber foot. Make sure all<br />
four spikes are screwed in<br />
<strong>com</strong>pletely for stability.<br />
NEVER drag the speaker to<br />
move it, as this will damage<br />
the spikes, the feet and/or the<br />
wood cabinet itself. Always lift<br />
the speaker and carry it to its<br />
new location.<br />
CAUTION: Floorstanding<br />
(tower) loudspeakers have a<br />
high center of gravity and may<br />
be<strong>com</strong>e unstable and tip over<br />
during earthquakes, or if<br />
rocked, tipped or improperly<br />
positioned. If this is a concern,<br />
these speakers should be<br />
anchored to the wall behind<br />
them, using the same procedures<br />
and hardware customary<br />
for anchoring bookcases<br />
and wall units. The customer<br />
is responsible for proper installation<br />
and proper selection of<br />
hardware.
TROUBLESHOOTING<br />
If there is no sound from<br />
any of the speakers:<br />
• Check that receiver/amplifier<br />
is on and that a source is<br />
playing.<br />
• Review proper operation of<br />
your receiver/amplifier.<br />
If there is no sound <strong>com</strong>ing<br />
from one speaker:<br />
• Check the “Balance”<br />
control on your receiver/<br />
amplifier.<br />
• Check all wires and connections<br />
between receiver/<br />
amplifier and speakers.<br />
• Make sure no wires are<br />
touching other wires or<br />
terminals and creating a<br />
short circuit.<br />
• Make sure all wires are<br />
connected. Make sure none<br />
of the speaker wires are<br />
frayed, cut or punctured.<br />
• In Dolby* Digital or DTS ®<br />
modes, make sure that the<br />
receiver/processor is configured<br />
so that the speaker in<br />
question is enabled.<br />
• Turn off all electronics and<br />
switch the speaker in question<br />
with one of the other<br />
speakers that is working correctly.<br />
Turn everything back<br />
on, and determine whether<br />
the problem has followed the<br />
speakers, or has remained in<br />
the same channel. If the<br />
problem is in the same channel,<br />
the source of the problem<br />
is most likely with your<br />
receiver or amplifier, and you<br />
should consult the owner’s<br />
manual for that product for<br />
further information. If the<br />
problem has followed the<br />
speaker, consult your dealer<br />
for further assistance or, if<br />
that is not possible, visit<br />
www.jbl.<strong>com</strong> for further<br />
information.<br />
If the system plays at<br />
low volumes but shuts<br />
off as volume is<br />
increased:<br />
• Check all wires and connections<br />
between receiver/<br />
amplifier and speakers.<br />
• Make sure all wires are<br />
connected. Make sure none<br />
of the speaker wires are<br />
frayed, cut or punctured.<br />
• If more than one pair of<br />
main speakers is being used,<br />
check the minimum impedance<br />
requirements of your<br />
receiver/amplifier.<br />
If there is no (or low)<br />
bass output:<br />
• Make sure the polarities<br />
(+ and –) of the left and right<br />
“<strong>Speaker</strong> Inputs” are<br />
connected properly.<br />
• Consider adding a powered<br />
subwoofer to your system for<br />
use with digital “.1” surround<br />
formats.<br />
If there is no sound from<br />
the surround speakers:<br />
• Check all wires and connections<br />
between receiver/<br />
amplifier and speakers. Make<br />
sure all wires are connected.<br />
Make sure none of the<br />
speaker wires are frayed,<br />
cut or punctured.<br />
• Review proper operation of<br />
your receiver/amplifier and<br />
its surround sound features.<br />
• Make sure the movie or TV<br />
show you are watching is<br />
recorded in a surround sound<br />
mode. If it is not, check to<br />
see whether your receiver/<br />
amplifier has other surround<br />
modes you may use.<br />
• In Dolby Digital or DTS<br />
modes, make sure your<br />
receiver/processor is configured<br />
so that the surround<br />
speakers are enabled.<br />
• Review the operation of your<br />
DVD player and the jacket of<br />
your DVD to make sure that<br />
the DVD features the desired<br />
Dolby Digital or DTS mode,<br />
and that you have properly<br />
selected that mode using both<br />
the DVD player’s menu and the<br />
DVD disc’s menu.<br />
Declaration of Conformity<br />
We, Harman Consumer International<br />
2, route de Tours<br />
72500 Chateau-du-Loir<br />
France<br />
declare in own responsibility that the products<br />
described in this owner’s manual are in <strong>com</strong>pliance<br />
with technical standards:<br />
EN 50081-1:1992<br />
EN 50082-1:1997<br />
Gary Mardell<br />
Harman Consumer International<br />
Chateau-du-Loir, France 7/03
SPECIFICATIONS<br />
E30 E50 E60 E80 E90 E100 EC35<br />
Description Description Description Description Description Description Description<br />
2-Way 6" bookshelf 3-Way, 8" 3-Way 8" 3-Way dual 3-Way dual 3-Way dual 3-Way dual<br />
horizontal/vertical floorstanding 6" floorstanding 8" floorstanding 10" floorstanding 5" center<br />
mirror-image bookshelf<br />
Max. Re<strong>com</strong>mended Max. Re<strong>com</strong>mended Max. Re<strong>com</strong>mended Max. Re<strong>com</strong>mended Max. Re<strong>com</strong>mended Max. Re<strong>com</strong>mended Max. Re<strong>com</strong>mended<br />
Amplifier Power** Amplifier Power** Amplifier Power** Amplifier Power** Amplifier Power** Amplifier Power** Amplifier Power**<br />
125W 175W 175W 200W 225W 250W 150W<br />
Power Handling Power Handling Power Handling Power Handling Power Handling Power Handling Power Handling<br />
(Continuous/Peak) (Continuous/Peak) (Continuous/Peak) (Continuous/Peak) (Continuous/Peak) (Continuous/Peak) (Continuous/Peak)<br />
70W/280W 90W/360W 90W/360W 100W/400W 110W/440W 125W/500W 75W/300W<br />
Nominal Impedance Nominal Impedance Nominal Impedance Nominal Impedance Nominal Impedance Nominal Impedance Nominal Impedance<br />
8 Ohms 8 Ohms 8 Ohms 8 Ohms 8 Ohms 8 Ohms 8 Ohms<br />
Sensitivity (2.83V/1m) Sensitivity (2.83V/1m) Sensitivity (2.83V/1m) Sensitivity (2.83V/1m) Sensitivity (2.83V/1m) Sensitivity (2.83V/1m) Sensitivity (2.83V/1m)<br />
88dB 90dB 90dB 91dB 91dB 91dB 91dB<br />
Frequency Frequency Frequency Frequency Frequency Frequency Frequency<br />
Response (–3dB) Response (–3dB) Response (–3dB) Response (–3dB) Response (–3dB) Response (–3dB) Response (–3dB)<br />
50Hz – 20kHz 45Hz – 20kHz 40Hz – 20kHz 38Hz – 20kHz 36Hz – 20kHz 33Hz – 20kHz 75Hz – 20kHz<br />
Crossover Crossover Crossover Crossover Crossover Crossover Crossover<br />
Frequency Frequencies Frequencies Frequencies Frequencies Frequencies Frequencies<br />
4000Hz 800Hz, 3200Hz 1000Hz, 4000Hz 300Hz, 4000Hz 300Hz, 4000Hz 1000Hz, 5000Hz 800Hz, 3200Hz<br />
High-Frequency High-Frequency High-Frequency High-Frequency High-Frequency High-Frequency High-Frequency<br />
Transducer Transducer Transducer Transducer Transducer Transducer Transducer<br />
3/4" (19mm) Titanium- 3/4" (19mm) Titanium- 3/4" (19mm) Titanium- 3/4" (19mm) Titanium- 3/4" (19mm) Titanium- 3/4" (19mm) Titanium- 3/4" (19mm) Titaniumlaminate<br />
dome, shielded laminate dome, shielded laminate dome, shielded laminate dome, shielded laminate dome, shielded laminate dome, shielded laminate dome, shielded<br />
Midrange Transducer Midrange Transducer Midrange Transducer Midrange Transducer Midrange Transducer Midrange Transducer Midrange Transducer<br />
NA 4" (100mm) PolyPlas, 4" (100mm) PolyPlas, 4" (100mm) PolyPlas, 4" (100mm) PolyPlas, 4" (100mm) PolyPlas, 3" (75mm) PolyPlas, <br />
shielded shielded shielded shielded shielded shielded<br />
Low-Frequency Low-Frequency Low-Frequency Low-Frequency Low-Frequency Low-Frequency Low-Frequency<br />
Transducer Transducer Transducer Transducers Transducers Transducers Transducers<br />
6" (170mm) PolyPlas, 8" (200mm) PolyPlas, 8" (200mm) PolyPlas, Dual 6" (170mm) PolyPlas, Dual 8" (200mm) PolyPlas, Dual 10" (250mm) PolyPlas, Dual 5-1/4" (133mm) PolyPlas, <br />
shielded shielded shielded shielded shielded shielded shielded<br />
Baffle Baffle Baffle Baffle Baffle Baffle Baffle<br />
Low diffraction, IsoPower Low diffraction, IsoPower Low diffraction, IsoPower Low diffraction, IsoPower Low diffraction, IsoPower Low diffraction, IsoPower Low diffraction, IsoPower <br />
Port Ports Port Port Port Port Port<br />
FreeFlow flared Dual FreeFlow flared FreeFlow flared FreeFlow flared FreeFlow flared FreeFlow flared FreeFlow flared<br />
Network Network Network Network Network Network Network<br />
Straight-Line Straight-Line Straight-Line Straight-Line Straight-Line Straight-Line Straight-Line<br />
Signal Path (SSP) Signal Path (SSP) Signal Path (SSP) Signal Path (SSP) Signal Path (SSP) Signal Path (SSP) Signal Path (SSP)<br />
Terminals Terminals Terminals Terminals Terminals Terminals Terminals<br />
Gold-plated, 5-way Gold-plated, 5-way Gold-plated, 5-way Gold-plated, 5-way Gold-plated, 5-way Gold-plated, 5-way Gold-plated, 5-way<br />
binding posts, bi-wirable binding posts, bi-wirable binding posts, bi-wirable binding posts, bi-wirable binding posts, bi-wirable binding posts, bi-wirable binding posts, bi-wirable<br />
Dimensions (H x W x D) Dimensions (H x W x D) Dimensions (H x W x D) Dimensions (H x W x D) Dimensions (H x W x D) Dimensions (H x W x D) Dimensions (H x W x D)<br />
15" x 8-3/8" x 12" 11-1/2" x 17-1/2" x 12-1/4" 36-1/2" x 9-7/8" x 12" 36-1/2" x 8-3/8" x 13-1/2" 40-1/4" x 9-7/8" x 14-1/2" 42" x 12-1/4" x 14-1/2" 7-1/4" x 22" x 10-7/16"<br />
381mm x 213mm x 305mm 292mm x 445mm x 311mm 927mm x 251mm x 305mm 927mmx 213mm x 343mm 1022mm x 251mm x 368mm 1067mm x 311mm x 368mm 185mm x 558mm x 264mm<br />
Weight Per <strong>Speaker</strong> Weight Per <strong>Speaker</strong> Weight Per <strong>Speaker</strong> Weight Per <strong>Speaker</strong> Weight Per <strong>Speaker</strong> Weight Per <strong>Speaker</strong> Weight Per <strong>Speaker</strong><br />
16.3 lb/7.4kg 25 lb/11.4kg 35 lb/15.9kg 40 lb/18.2kg 48 lb/21.8kg 55 lb/25kg 22 lb/10kg<br />
PRO SOUND COMES HOME <br />
<strong>JBL</strong> Consumer Products, 250 Crossways Park Drive, Woodbury, NY 11797<br />
8500 Balboa Boulevard, Northridge, CA 91329<br />
2, route de Tours, 72500 Chateau-du-Loir, France<br />
516.255.4<strong>JBL</strong> (4525) www.jbl.<strong>com</strong><br />
© 2003 Harman International Industries, Incorporated<br />
<strong>JBL</strong> is a registered trademark of Harman International Industries, Incorporated.<br />
Part No.350038-002<br />
* Trademarks of Dolby Laboratories.<br />
DTS is a registered trademark of Digital Theater Systems, Inc.<br />
** The maximum re<strong>com</strong>mended amplifier power rating will ensure<br />
proper system headroom to allow for occasional peaks. We do not<br />
re<strong>com</strong>mend sustained operation at these maximum power levels.<br />
All features and specifications are subject to change without notice.<br />
All dimensions include grilles and feet, but not spikes.