3.5G plus WLAN Mobile Server Router - CNet
3.5G plus WLAN Mobile Server Router - CNet
3.5G plus WLAN Mobile Server Router - CNet

Create successful ePaper yourself
Turn your PDF publications into a flip-book with our unique Google optimized e-Paper software.
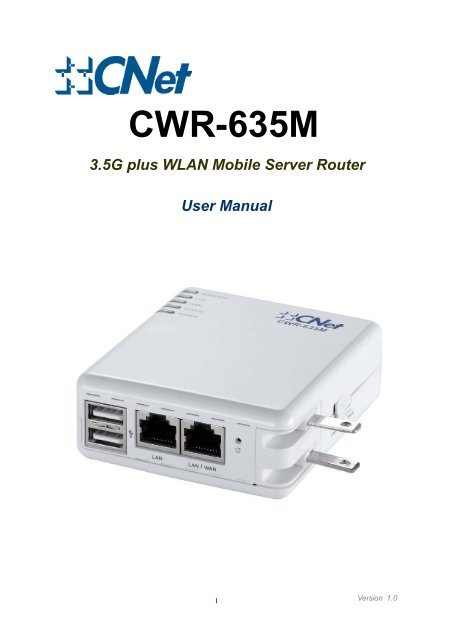
CWR-635M<br />
<strong>3.5G</strong> <strong>plus</strong> <strong>WLAN</strong> <strong>Mobile</strong> <strong>Server</strong> <strong>Router</strong><br />
User Manual<br />
1<br />
Version 1.0
Table of Content<br />
FCC CAUTION ..................................................................................................................................... 9<br />
SAFE SEATING GESTURES ............................................................................................................. 10<br />
CE STATEMENT OF CONFORMITY .................................................................................................. 10<br />
CHAPTER 1 INTRODUCTION ........................................................................................................... 11<br />
1.1 OVERVIEW ........................................................................................................................... 11<br />
1.2 FEATURES ........................................................................................................................... 12<br />
1.3 SPECIFICATIONS .................................................................................................................. 13<br />
1.3.1 SIX VIEWS OF PRODUCT APPEARANCE ......................................................................... 14<br />
1.4 SYSTEM REQUIREMENTS ...................................................................................................... 15<br />
1.5 GET YOUR IP AUTOMATICALLY & MANUALLY ......................................................................... 15<br />
1.5.1 Network Testing ....................................................................................................... 18<br />
1.5.1.1 Testing with Internet Browser ....................................................................................... 18<br />
1.5.1.2 Testing with DOS (Windows XP Platform) .................................................................... 19<br />
CHAPTER 2 HARDWARE INSTALLATION ....................................................................................... 21<br />
2.1 DIAGRAM OF CONNECTING HARDWARE TO <strong>3.5G</strong> PLUS <strong>WLAN</strong> MOBILE SERVER ROUTER ......... 21<br />
2.1.1 <strong>Router</strong> Mode Hardware Connection and Application ........................................... 21<br />
2.1.2 AP Mode Hardware Connection and Application ................................................. 22<br />
2.1.3 Client Mode Hardware Connection and Application ............................................ 22<br />
CHAPTER 3 ROUTER MODE ............................................................................................................ 23<br />
3.1 ADMINISTRATOR QUICK SETUP INSTRUCTION ......................................................................... 23<br />
3.2 QUICK SETUP ...................................................................................................................... 24<br />
3.2.1 WAN Setup (Internet Connection) .......................................................................... 26<br />
3.2.1.1 WAN Type – Static IP ..................................................................................................... 27<br />
3.2.1.2 WAN Type – Dynamic IP ................................................................................................ 28<br />
3.2.1.3 WAN Type – PPPoE ....................................................................................................... 29<br />
3.2.1.4 WAN Type – PPTP .......................................................................................................... 30<br />
3.2.1.5 HSDPA/UMTS ................................................................................................................. 32<br />
3.2.2 LAN Setup ................................................................................................................ 33<br />
3.2.3 Wireless Setup ......................................................................................................... 34<br />
3.2.4 Time <strong>Server</strong> Setup ................................................................................................... 35<br />
3.2.5 Password Setup ...................................................................................................... 36<br />
3.2.6 USB Disk Management Setup ................................................................................ 37<br />
3.2.7 User Account Management Setup ......................................................................... 37<br />
2<br />
Version 1.0
3.2.8 Firewall Setup .......................................................................................................... 38<br />
3.2.9 QoS Configuration Setup ....................................................................................... 39<br />
3.2.10 FTP <strong>Server</strong> Setup .................................................................................................... 40<br />
3.2.11 Printer <strong>Server</strong> Setup ................................................................................................ 40<br />
3.2.12 Web Camera <strong>Server</strong> Setup ...................................................................................... 41<br />
3.2.13 Samba <strong>Server</strong> Setup ............................................................................................... 41<br />
3.2.14 Quick Setup Finish .................................................................................................. 41<br />
3.3 IP CONFIGURATION .............................................................................................................. 42<br />
3.3.1 WAN .......................................................................................................................... 42<br />
3.3.2 LAN ........................................................................................................................... 52<br />
3.3.3 Wireless ................................................................................................................... 53<br />
3.3.4 DDNS ........................................................................................................................ 57<br />
3.4 ADVANCED .......................................................................................................................... 58<br />
3.4.1 NAT ........................................................................................................................... 59<br />
3.4.1.1 Virtual <strong>Server</strong> ................................................................................................................. 59<br />
3.4.1.2 Virtual DMZ .................................................................................................................... 60<br />
3.4.2 Firewall ..................................................................................................................... 61<br />
3.4.2.1 Firewall Configuration ................................................................................................... 61<br />
3.4.2.2 IP Filter ........................................................................................................................... 64<br />
3.4.2.3 MAC Filter ...................................................................................................................... 65<br />
3.4.2.4 URL Filter ....................................................................................................................... 66<br />
3.4.3 QoS ........................................................................................................................... 68<br />
3.5 SERVER ............................................................................................................................... 69<br />
3.5.1 Samba <strong>Server</strong> .......................................................................................................... 69<br />
3.5.1.1 How to Access File Sharing Directory .......................................................................... 70<br />
3.5.2 FTP <strong>Server</strong> ............................................................................................................... 72<br />
3.5.3 Web Camera <strong>Server</strong> ................................................................................................ 73<br />
3.5.3.1 Web Camera <strong>Server</strong> Basic Setup .................................................................................. 74<br />
3.5.3.2 Web Camera <strong>Server</strong> Advanced Configuration .............................................................. 74<br />
3.5.3.3 Application for Web Camera ......................................................................................... 75<br />
3.5.3.3.1 Web Camera Monitoring Application ....................................................................... 75<br />
3.5.3.3.1.1 Web Camera Monitoring via WAN connection ................................................. 76<br />
3.5.3.3.1.2 Web Camera Monitoring via WiFi <strong>Mobile</strong> Phone .............................................. 77<br />
3.5.3.3.2 Web Camera Recording ............................................................................................ 78<br />
3.5.3.3.2.1 Administrator Setup .......................................................................................... 78<br />
3.5.3.3.2.2 Personal Application ......................................................................................... 80<br />
3.5.4 Printer <strong>Server</strong> .......................................................................................................... 81<br />
3.5.4.1 Printer Setting on PC ..................................................................................................... 82<br />
3<br />
Version 1.0
3.6 SYSTEM MANAGEMENT ........................................................................................................ 89<br />
3.6.1 Reboot ...................................................................................................................... 89<br />
3.6.2 Change Password ................................................................................................... 89<br />
3.6.3 Firmware Upgrade ................................................................................................... 90<br />
3.6.4 Profile Sasve ............................................................................................................ 91<br />
3.6.5 Remote Management .............................................................................................. 92<br />
3.6.6 Time .......................................................................................................................... 94<br />
3.6.7 UPnP Setting ............................................................................................................ 95<br />
3.6.8 User Account Management .................................................................................... 95<br />
3.6.9 Folder Management ................................................................................................ 97<br />
3.6.10 Email Alert ................................................................................................................ 98<br />
3.7 LOG & STATUS .................................................................................................................. 100<br />
3.7.1 Network Configuration .......................................................................................... 100<br />
3.7.2 User Account List .................................................................................................. 101<br />
3.7.3 Event Log ............................................................................................................... 102<br />
3.8 LOGOUT ............................................................................................................................ 102<br />
3.9 PERSONAL CONFIGURATION ............................................................................................... 102<br />
3.9.1 Anonymous ........................................................................................................... 104<br />
3.9.2 My Document ......................................................................................................... 105<br />
3.9.3 My Webcam ............................................................................................................ 106<br />
3.9.4 My Status ............................................................................................................... 106<br />
3.10 SITE MAP .......................................................................................................................... 107<br />
CHAPTER 4 AP MODE .................................................................................................................... 108<br />
4.1 ADMINISTRATOR QUICK SETUP INSTRUCTION ....................................................................... 108<br />
4.2 QUICK SETUP .................................................................................................................... 109<br />
4.2.1 LAN Setup .............................................................................................................. 111<br />
4.2.2 Wireless Setup ....................................................................................................... 112<br />
4.2.3 Time <strong>Server</strong> Setup ................................................................................................. 114<br />
4.2.4 Password Setup .................................................................................................... 114<br />
4.2.5 USB Disk Management Setup .............................................................................. 115<br />
4.2.6 User Account Management Setup ....................................................................... 115<br />
4.2.7 FTP <strong>Server</strong> Setup .................................................................................................. 116<br />
4.2.8 Printer <strong>Server</strong> Setup .............................................................................................. 117<br />
4.2.9 Web Camera <strong>Server</strong> Setup .................................................................................... 117<br />
4.2.10 Samba <strong>Server</strong> Setup ............................................................................................. 117<br />
4.2.11 Quick Setup Finish ................................................................................................ 118<br />
4.3 IP CONFIGURATION ............................................................................................................ 118<br />
4<br />
Version 1.0
4.3.1 LAN ......................................................................................................................... 118<br />
4.3.2 Wireless ................................................................................................................. 120<br />
4.4 SERVER ............................................................................................................................. 124<br />
4.4.1 Samba <strong>Server</strong> ........................................................................................................ 125<br />
4.4.1.1 How to Access File Sharing Directory ........................................................................ 125<br />
4.4.2 FTP <strong>Server</strong> ............................................................................................................. 127<br />
4.4.3 Web Camera <strong>Server</strong> .............................................................................................. 128<br />
4.4.3.1 Web Camera <strong>Server</strong> Basic Setup ................................................................................ 129<br />
4.4.3.2 Web Camera <strong>Server</strong> Advanced Configuration ............................................................ 129<br />
4.4.3.3 Application for Web Camera ....................................................................................... 130<br />
4.4.3.3.1 Web Camera Monitoring Application ..................................................................... 130<br />
4.4.3.3.1.1 Web Camera Monitoring via WAN connection ............................................... 131<br />
4.4.3.3.2 Web Camera Recording .......................................................................................... 134<br />
4.4.3.3.2.1 Administrator Setup ........................................................................................ 134<br />
4.4.3.3.2.2 Personal Application ....................................................................................... 136<br />
4.4.4 Printer <strong>Server</strong> ........................................................................................................ 137<br />
4.4.4.1 Printer Setting on PC ................................................................................................... 137<br />
4.5 SYSTEM MANAGEMENT ...................................................................................................... 143<br />
4.5.1 Reboot .................................................................................................................... 143<br />
4.5.2 Change Password ................................................................................................. 143<br />
4.5.3 Firmware Upgrade ................................................................................................. 144<br />
4.5.4 Profile Save ............................................................................................................ 145<br />
4.5.5 Remote Management ............................................................................................ 146<br />
4.5.6 Time ........................................................................................................................ 147<br />
4.5.7 UPnP Setting .......................................................................................................... 147<br />
4.5.8 User Account Management .................................................................................. 148<br />
4.5.9 Folder Management .............................................................................................. 149<br />
4.5.10 Email Alert .............................................................................................................. 150<br />
4.6 LOG & STATUS .................................................................................................................. 152<br />
4.6.1 Network Configuration .......................................................................................... 152<br />
4.6.2 User Account List .................................................................................................. 153<br />
4.6.3 Event Log ............................................................................................................... 153<br />
4.7 LOGOUT ............................................................................................................................ 154<br />
4.8 PERSONAL CONFIGURATION ............................................................................................... 154<br />
4.8.1 Anonymous ........................................................................................................... 156<br />
4.8.2 My Document ......................................................................................................... 157<br />
4.8.3 My Webcam ............................................................................................................ 158<br />
4.8.4 My Status ............................................................................................................... 158<br />
5<br />
Version 1.0
4.9 SITE MAP .......................................................................................................................... 159<br />
CHAPTER 5 CLIENT MODE ............................................................................................................ 160<br />
5.1 ADMINISTRATOR QUICK SETUP ........................................................................................... 160<br />
5.2 QUICK SETUP .................................................................................................................... 161<br />
5.2.1 SITE SURVEY SETUP .................................................................................................. 162<br />
5.2.2 Wireless Setup ....................................................................................................... 163<br />
5.2.3 Time <strong>Server</strong> Setup ................................................................................................. 164<br />
5.2.4 Password Setup .................................................................................................... 164<br />
5.2.5 USB Disk Management Setup .............................................................................. 164<br />
5.2.6 User Account Management Setup ....................................................................... 165<br />
5.2.7 FTP <strong>Server</strong> Setup .................................................................................................. 166<br />
5.2.8 Web Camera <strong>Server</strong> Setup .................................................................................... 166<br />
5.2.9 Printer <strong>Server</strong> Setup .............................................................................................. 167<br />
5.2.10 Samba <strong>Server</strong> Setup ............................................................................................. 167<br />
5.2.11 Quick Setup Finish ................................................................................................ 167<br />
5.3 IP CONFIGURATION ............................................................................................................ 168<br />
5.3.1 LAN ......................................................................................................................... 168<br />
5.3.2 Site Survey ............................................................................................................. 169<br />
5.4 SERVER ............................................................................................................................. 171<br />
5.4.1 Samba <strong>Server</strong> ........................................................................................................ 171<br />
5.4.1.1 How to Access File Sharing Directory ........................................................................ 172<br />
5.4.2 FTP <strong>Server</strong> ............................................................................................................. 174<br />
5.4.3 Web Camera <strong>Server</strong> .............................................................................................. 175<br />
5.4.3.1 Web Camera <strong>Server</strong> Basic Setup ................................................................................ 175<br />
5.4.3.2 Web Camera <strong>Server</strong> Advanced Configuration ............................................................ 176<br />
5.4.3.3 Application for Web Camera ....................................................................................... 177<br />
5.4.3.3.1 Web Camera Monitoring Application ..................................................................... 177<br />
5.4.3.3.1.1 Web Camera Monitoring via WAN Connection .............................................. 177<br />
5.4.3.3.2 Web Camera Recording .......................................................................................... 180<br />
5.4.3.3.2.1 Administrator Setup ........................................................................................ 180<br />
5.4.3.3.2.2 Personal Application ....................................................................................... 182<br />
5.4.4 Printer <strong>Server</strong> ........................................................................................................ 183<br />
5.4.4.1 Printer Setting on PC ................................................................................................... 184<br />
5.5 SYSTEM MANAGEMENT ...................................................................................................... 190<br />
5.5.1 Reboot .................................................................................................................... 190<br />
5.5.2 Change Password ................................................................................................. 190<br />
5.5.3 Firmware Upgrade ................................................................................................. 191<br />
6<br />
Version 1.0
5.5.4 Profile Save ............................................................................................................ 192<br />
5.5.5 Remote Management ............................................................................................ 193<br />
5.5.6 Time ........................................................................................................................ 194<br />
5.5.7 UPnP Setting .......................................................................................................... 195<br />
5.5.8 User Account Management .................................................................................. 195<br />
5.5.9 Folder Management .............................................................................................. 197<br />
5.5.10 Email Alert .............................................................................................................. 198<br />
5.6 LOG & STATUS .................................................................................................................. 199<br />
5.6.1 Network Configuration .......................................................................................... 199<br />
5.6.2 User Account List .................................................................................................. 200<br />
5.6.3 Event Log ............................................................................................................... 200<br />
5.7 LOGOUT ............................................................................................................................ 201<br />
5.8 PERSONAL CONFIGURATION ............................................................................................... 201<br />
5.8.1 Anonymous ........................................................................................................... 203<br />
5.8.2 My Document ......................................................................................................... 204<br />
5.8.3 My Webcam ............................................................................................................ 205<br />
5.8.4 My Status ............................................................................................................... 205<br />
5.9 SITE MAP .......................................................................................................................... 206<br />
CHAPTER 6 DDNS SERVICE APPLICATION ................................................................................. 207<br />
CHAPTER 7 Q & A ........................................................................................................................... 211<br />
7.1 INSTALLATION ......................................................................................................................... 211<br />
7.2 LED ....................................................................................................................................... 211<br />
7.3 IP ADDRESS ........................................................................................................................... 212<br />
7.4 OS SETTING ........................................................................................................................... 213<br />
7.5 <strong>3.5G</strong> PLUS <strong>WLAN</strong> MOBILE SERVER ROUTER SETUP ................................................................ 214<br />
7.6 WIRELESS LAN ...................................................................................................................... 216<br />
7.7 SAMBA SERVER ...................................................................................................................... 219<br />
7.8 USB FTP SERVER .................................................................................................................. 219<br />
7.9 WEBCAM SERVER ................................................................................................................... 220<br />
7.10 PRINTER SERVER .................................................................................................................. 221<br />
7.11 SUPPORT .............................................................................................................................. 221<br />
7.12 OTHERS ............................................................................................................................... 222<br />
7.13 USB DEVICE ........................................................................................................................ 222<br />
CHAPTER 8 APPENDICES .............................................................................................................. 223<br />
8.1 PRINTER ............................................................................................................................ 223<br />
8.2 WEB CAMERA ................................................................................................................... 223<br />
7<br />
Version 1.0
8.3 USB DEVICES ................................................................................................................... 228<br />
8.4 OPERATING SYSTEMS ........................................................................................................ 229<br />
8.5 BROWSERS ....................................................................................................................... 229<br />
8.6 EASY SETUP ...................................................................................................................... 229<br />
8.7 COMMUNICATIONS REGULATION INFORMATION ..................................................................... 229<br />
8<br />
Version 1.0
FCC Caution<br />
The device complies with Part 15 of the FCC rules. Operation is subject to the following<br />
conditions:<br />
1. This device may not cause harmful interference, and this device must accept any<br />
interference received, including interference that may cause undesired operation.<br />
2. FCC RF Radiation Exposure Statement: The equipment complies with FCC RF<br />
radiation exposure limits set forth for an uncontrolled environment. This equipment<br />
should be installed and operated with a minimum distance of 20 centimeters between<br />
the radiator and your body.<br />
3. This Transmitter must not be co-located or operating in conjunction with any other<br />
antenna or transmitter.<br />
4. Changes or modifications to this unit not expressly approved by the party responsible<br />
for compliance could void the user authority to operate the equipment.<br />
9<br />
Version 1.0
Safe Seating Gestures<br />
You should follow the manufacturer’s instructions for adjusting the backrest to fit your body<br />
properly.<br />
An adjustable chair that provides firm, comfortable support is best.<br />
Adjust the height of the chair so your thighs are horizontal and your feet flat on the<br />
floor.<br />
The back of the chair should support your lower back (lumbar region).<br />
CE Statement of Conformity<br />
Our product has been tested in typical configuration by Ecom Sertech Corp and was found<br />
to comply with the essential requirement of “Council Directive on the Approximation of the<br />
Laws of the Member States relating to Electromagnetic Compatibility” (89/336/EEC;<br />
92/31/EEC; 93/68/EEC)<br />
10<br />
Version 1.0
Chapter 1 Introduction<br />
1.1 Overview<br />
<strong>3.5G</strong> <strong>plus</strong> <strong>WLAN</strong> <strong>Mobile</strong> <strong>Server</strong> <strong>Router</strong> might be small in size, but is huge in functionality,<br />
supporting multiple operation modes, including Access Point (AP) mode, <strong>Router</strong> mode, and<br />
Wireless Client mode. You can switch among these modes easily by using <strong>3.5G</strong> <strong>plus</strong> <strong>WLAN</strong><br />
<strong>Mobile</strong> <strong>Server</strong> <strong>Router</strong>'s 3-way configuration switch. In addition to, there are 2 USB ports<br />
available for connecting any devices which allow LAN users to utilize shared printer and<br />
samba server. Also, apply <strong>3.5G</strong> <strong>plus</strong> <strong>WLAN</strong> <strong>Mobile</strong> <strong>Server</strong> <strong>Router</strong> with a Webcam to monitor<br />
in real time, or with a USB-connected Flash/Drive to become a FTP server providing shared<br />
download service in the mean time.<br />
In other words, monitor your home with a Webcam by taking pictures via <strong>3.5G</strong> <strong>plus</strong> <strong>WLAN</strong><br />
<strong>Mobile</strong> <strong>Server</strong> <strong>Router</strong> and record all images into the USB HDD for reviewing. Often<br />
marketed as surveillance tools for home or office security, network Webcams are now being<br />
employed by early adopters for more personal matters, such as watching kids and<br />
monitoring pets. The Webcam can be remotely accessed and controlled via a browser.<br />
Moreover, while connectting <strong>3.5G</strong> <strong>plus</strong> <strong>WLAN</strong> <strong>Mobile</strong> <strong>Server</strong> <strong>Router</strong> with <strong>3.5G</strong> USB dongle<br />
to access Internet or work as connection backup, you can immediately speed up data<br />
transmission, as well as calling out and receiving phone calls via a cell phone.<br />
11<br />
Version 1.0
1.2 Features<br />
<strong>3.5G</strong> <strong>plus</strong> <strong>WLAN</strong> <strong>Mobile</strong> <strong>Server</strong> <strong>Router</strong>’s main functions, including Wireless Access, Printer<br />
<strong>Server</strong>, Webcam Monitor, Samba <strong>Server</strong>, FTP <strong>Server</strong> and IP Sharing etc. are shown as<br />
below. These features and their applying instructions specified in User Manual will not only<br />
fulfill your requirements, but also ease your inconvenience from the job.<br />
• Easy Setup<br />
Proprietary utility is designed to let users, even the beginners, complete their server setups<br />
easily and access Internet without any difficulty.<br />
• 3 Operation Modes<br />
The unit provides <strong>Router</strong>, AP and Client operation modes by sliding side switches first.<br />
• Web GUI<br />
Friendly user interface only requires supported web browser to start advanced setup.<br />
• Printer <strong>Server</strong><br />
<strong>3.5G</strong> <strong>plus</strong> <strong>WLAN</strong> <strong>Mobile</strong> <strong>Server</strong> <strong>Router</strong> supports LPR protocol, so users can use shared<br />
printer from both WAN and LAN.<br />
• Webcam <strong>Server</strong><br />
The product supports USB Web Camera, which provides easy and affordable solution for<br />
home security. It allows users monitoring home from anywhere via online webcam. Also,<br />
you might be alerted by an email with an intruder picture.<br />
• Samba <strong>Server</strong><br />
It is located on your network places to provide shared information and printer for LAN users.<br />
• FTP <strong>Server</strong><br />
<strong>3.5G</strong> <strong>plus</strong> <strong>WLAN</strong> <strong>Mobile</strong> <strong>Server</strong> <strong>Router</strong> supports FAT32/EXT3 file system format. Plug with<br />
USB hard drive or thumb drive, it will become a FTP server, and the users can share files on<br />
the Internet.<br />
• Security/Encryption<br />
The unit is equipped with encryption types of WEP, WPA, 802.1x and so on to give more<br />
security assurance.<br />
• Real-time Monitoring<br />
<strong>3.5G</strong> <strong>plus</strong> <strong>WLAN</strong> <strong>Mobile</strong> <strong>Server</strong> <strong>Router</strong> can save real-time images from connected<br />
webcamera for the purpose of home safety monitoring.<br />
• <strong>3.5G</strong> Internet Connection<br />
With a <strong>3.5G</strong> USB dongle, <strong>3.5G</strong> <strong>plus</strong> <strong>WLAN</strong> <strong>Mobile</strong> <strong>Server</strong> <strong>Router</strong> can upgrade its data<br />
transmission rate on the Internet.<br />
12<br />
Version 1.0
1.3 Specifications<br />
WAN Port<br />
1 x 10/100 Mbps RJ45, with auto MDI/MDIX<br />
Interface<br />
Function<br />
Application<br />
Management<br />
Others<br />
Application<br />
LAN Port<br />
USB2.0 Port<br />
Wireless<br />
Slide Switch<br />
Web-Base<br />
WAN Protocol<br />
<strong>WLAN</strong><br />
Routing<br />
NAT<br />
Firewall<br />
QoS<br />
Folder<br />
Management<br />
User account<br />
Management<br />
Webcam <strong>Server</strong><br />
Printer <strong>Server</strong><br />
Samba <strong>Server</strong><br />
FTP <strong>Server</strong><br />
Administrator<br />
Personal Panel<br />
Operation<br />
Requirement<br />
Peak Gain of the<br />
Antenna<br />
Transmitted<br />
Power (Typical)<br />
Receive<br />
Sensitivity (Typical)<br />
Dimension<br />
Power<br />
1 x 10/100 Mbps RJ45, with auto MDI/MDIX<br />
2 x Standard _A type—USB 2.0 for <strong>3.5G</strong> USB Dongle, USB Webcam,<br />
USB printer, USB Flash/HDD<br />
Ralink 2561 Mini_PCI<br />
<strong>Router</strong> / AP / Client mode exchange function.<br />
Windows IE / Linux Firefox / MAC Safari<br />
PPPoE / PPTP / Static IP/ Dynamic IP/ HSDPA/UMTS<br />
WDS / WEP Key / WPA / WPA-PSK / MAC Access Control /Hidden SSID<br />
UPnP / DHCP / DNS / WINS / DDNS<br />
Virtual <strong>Server</strong> / Virtual DMZ<br />
MAC Filter / URL Filter / SPI / DoS Protection / IP Packet Filter<br />
3-level priority for each application port<br />
Disk Format<br />
User account create and access control<br />
Webcam view via browser by internet real time<br />
Picture monitor from LAN/WAN PC<br />
Picture recording to FTP server or USB HDD<br />
Printer Via WAN/LAN PC<br />
Printer Sharing<br />
File Sharing<br />
Anonymous login / User Login<br />
Quick Setup Wizard / Site Map<br />
Setup wizard / General Setup<br />
My Document / My Webcam / My Status<br />
Operating Temp. 0°C~40°C (32°F~104°F)<br />
Storage Temp. -20°C~70°C (-14°F~158°F)<br />
Operating Humidity 10% to 85% Non-Condensing<br />
Storage Humidity 5% to 90% Non-Condensing<br />
2dBi @ 2.45GHz<br />
15dBm @ Normal Temp. Range<br />
Normal Temp. Range: 11Mbps: 10-5 BER @ -83 dBm<br />
91mm (L) x 80mm (W) x 29mm (H)<br />
Adapt AC 100 V ~ 240 V in / DC 12V 2.5A output<br />
Notice: USB devices with power more than 0.5 mAh are not supported.<br />
Notice: Firmware Upgrade available through download.<br />
13<br />
Version 1.0
1.3.1 Six Views of Product Appearance<br />
14<br />
Version 1.0
1.4 System Requirements<br />
To begin with <strong>3.5G</strong> <strong>plus</strong> <strong>WLAN</strong> <strong>Mobile</strong> <strong>Server</strong> <strong>Router</strong>, you must have the following minimum<br />
system requirements. If your system can’t correspond to the following requirements, you<br />
might get some unknown troubles on your system.<br />
• XDSL/Cable Modem and broadband Internet Account.<br />
• One Ethernet (10 BASE-T or 10/100 BASE-TX) network interface card.<br />
• TCP/IP and at least one web browser software installed (E.g.: Internet Explorer 5.0,<br />
Netscape Navigator 7.x, Apple Safari 2.03 or higher version).<br />
• At lease one 802.11g (54Mbps) or one 802.11b (11Mbps) wireless adapter for wireless<br />
mobile clients.<br />
• Recommended OS: Win2000 or WinXP / Linux.<br />
1.5 Get Your IP Automatically & Manually<br />
After <strong>3.5G</strong> <strong>plus</strong> <strong>WLAN</strong> <strong>Mobile</strong> <strong>Server</strong> <strong>Router</strong> connected with your computer, please make<br />
sure your IP is in the automatic IP position or you adjust it manually in order to activate the<br />
Internet network from home to Internet. If you don’t know how to enter the settings, please<br />
follow the steps as below.<br />
【Step 1】<br />
Go to Start>Settings> Network Connections and then select Local Area Connection.<br />
15<br />
Version 1.0
【Step 2】<br />
Click on Properties<br />
【Step 3】<br />
Double click on Internet Protocol (TCP/IP).<br />
16<br />
Version 1.0
【Step 4-1】<br />
For getting IP automatically if you are one of the users under <strong>3.5G</strong> <strong>plus</strong> <strong>WLAN</strong> <strong>Mobile</strong><br />
<strong>Server</strong> <strong>Router</strong>, please skip Use the following IP address and then select Obtain an IP<br />
address automatically and Obtain DNS server address automatically and then click on<br />
OK button.<br />
【Step 4-2】<br />
For getting IP manually in order to specify a Virtual <strong>Server</strong>, such as Print <strong>Server</strong>, FTP <strong>Server</strong><br />
and so on, please skip Obtain an IP address automatically and then select Use the<br />
following IP address. And the following default setting of <strong>3.5G</strong> <strong>plus</strong> <strong>WLAN</strong> <strong>Mobile</strong> <strong>Server</strong><br />
<strong>Router</strong> should be noted:<br />
• IP Address:192.168.1.10 (as your Print <strong>Server</strong> for example)<br />
• Subnet Mask:255.255.255.0<br />
• Default Gateway:192.168.1.1<br />
Notice: If you configure your computer’s IP Address manually, it needs to be on the same<br />
network segment.<br />
For example:<br />
• IP Address: 192.168.1.xxx (xxx can be any number between 2 and 253, but it can’t be<br />
repeated, we use 100 to be the example.)<br />
• Subnet Mask: 255.255.255.0<br />
• Gateway: 192.168.1.1 (this is the IP address of <strong>3.5G</strong> <strong>plus</strong> <strong>WLAN</strong> <strong>Mobile</strong> <strong>Server</strong> <strong>Router</strong><br />
in <strong>Router</strong> Mode)<br />
• DNS: 192.168.1.1 (use <strong>3.5G</strong> <strong>plus</strong> <strong>WLAN</strong> <strong>Mobile</strong> <strong>Server</strong> <strong>Router</strong>’s IP address or on your<br />
own choice)<br />
17<br />
Version 1.0
Notice: IP address and Default gateway cannot be the same.<br />
1.5.1 Network Testing<br />
There are two ways to test your Network whether it can work on Internet or not. They are<br />
“Testing with Internet Browser” and “Testing with Dos”.<br />
1.5.1.1 Testing with Internet Browser<br />
Open an Internet Browser, such as Internet Explore or Netscape. Input a valid web<br />
address you like, for example, http://www.yahoo.com in the web address blank and then<br />
press enter. If the website appears, that means your Internet is working under normal<br />
situation.<br />
18<br />
Version 1.0
1.5.1.2 Testing with DOS (Windows XP Platform)<br />
【Step 1】<br />
Go to start > Run.<br />
【Step 2】<br />
Input cmd in the blank, and then click OK button. The Command Prompt window appears.<br />
【Step 3】<br />
Input ipconfig in the flashing area then press enter. You will get an IP Address<br />
192.168.1.100, for example, and Default Gateway as 192.168.1.1.<br />
【Step 4】<br />
Ping a legal WAN Address such as 192.168.1.1. If Internet works, it will show Reply from<br />
192.168.1.1: bytes = 32 time = 3ms TTL =64, for example.<br />
19<br />
Version 1.0
If it can’t work, it will show Request timed out.<br />
20<br />
Version 1.0
Chapter 2 Hardware Installation<br />
2.1 Diagram of Connecting Hardware to <strong>3.5G</strong> <strong>plus</strong> <strong>WLAN</strong> <strong>Mobile</strong> <strong>Server</strong> <strong>Router</strong><br />
<strong>3.5G</strong> <strong>plus</strong> <strong>WLAN</strong> <strong>Mobile</strong> <strong>Server</strong> <strong>Router</strong> is a portable and convenient wireless solution for the<br />
traveling businessmen delivering 802.11g wireless connectivity with a maximum wireless<br />
signal rate of up to 54Mbps. Use it in conference rooms, hotel rooms, or even at hotspots.<br />
The Wireless Pocket <strong>Router</strong>/AP might be small in size, but is huge in functionality,<br />
supporting multiple operation modes, including Access Point (AP) mode, <strong>Router</strong> mode, and<br />
Wireless Client mode. You can switch among these modes easily by using <strong>3.5G</strong> <strong>plus</strong> <strong>WLAN</strong><br />
<strong>Mobile</strong> <strong>Server</strong> <strong>Router</strong>'s 3-way configuration slide switch. Moreover, there are 2 USB port<br />
support with <strong>3.5G</strong> <strong>plus</strong> <strong>WLAN</strong> <strong>Mobile</strong> <strong>Server</strong> <strong>Router</strong>; user can plug the USB devices,<br />
including Flash Disk, Web Camera, Printer and <strong>3.5G</strong> USB Dongle.<br />
Warning: Before sliding the switch modes, please power-off the router firstly. Moreover, please stay<br />
over 5 seconds between power-off / power-on condition.<br />
2.1.1 <strong>Router</strong> Mode Hardware Connection and Application<br />
When <strong>3.5G</strong> <strong>plus</strong> <strong>WLAN</strong> <strong>Mobile</strong> <strong>Server</strong> <strong>Router</strong> switches to <strong>Router</strong> Mode, there will be each<br />
WAN and LAN port existing, the administrator can do the Quick Setup including WAN Setup,<br />
LAN Setup, Wireless Setup, Time <strong>Server</strong> Setup, Password Setup, USB Disk Management<br />
Setup, User Account Management Setup, Firewall Setup, QoS Setup, FTP <strong>Server</strong> Setup,<br />
Web Camera Setup, Print <strong>Server</strong> Setup and Samba <strong>Server</strong> Setup.<br />
21 Version 1.0
2.1.2 AP Mode Hardware Connection and Application<br />
Under AP Mode, it supports 2 LAN ports as Bridge, and user can connect to <strong>3.5G</strong> <strong>plus</strong><br />
<strong>WLAN</strong> <strong>Mobile</strong> <strong>Server</strong> <strong>Router</strong> via LAN port or Wireless (WDS). The administrator can set up<br />
quickly, including LAN Setup, Wireless Setup, Time <strong>Server</strong> Setup, Password Setup, USB<br />
Disk Management Setup, User Account Management Setup, FTP <strong>Server</strong> Setup, Web<br />
Camera Setup, Printer <strong>Server</strong> Setup and Samba Setup.<br />
2.1.3 Client Mode Hardware Connection and Application<br />
As Client Mode, <strong>3.5G</strong> <strong>plus</strong> <strong>WLAN</strong> <strong>Mobile</strong> <strong>Server</strong> <strong>Router</strong> will be a Wireless Adapter, and<br />
users can plug cable to each 2 LAN ports and then connect Internet via Wireless.<br />
22 Version 1.0
Chapter 3 <strong>Router</strong> Mode<br />
3.1 Administrator Quick Setup Instruction<br />
Make sure to switch the mode into <strong>Router</strong> Mode, then open a Microsoft Internet Explorer,<br />
Mozilla Firefox or Apple Safari browser, and enter http://192.168.1.1 (Default Gateway)<br />
into browser’s blank.<br />
Notice: If the homepage doesn’t appear, please check if the TCP/IP configuration is obtaining IP address<br />
automatically or not. If you don’t know how to do it, please refer to “1.5 Get your IP Automatically<br />
& Manually”.<br />
Homepage<br />
Please click on Administrator button to log in setup at first time, also any settings can be<br />
changed in the future. Only the Administrator has the right to modify all settings.<br />
23 Version 1.0
User Name and Password<br />
The default values for User Name and Password are admin (all in lowercase letters). Click<br />
Login to enter.<br />
Notice: Only the password can be changed, please read setup “3.2.5 Password Setup” or “3.6.2 Change<br />
Password”. In order to protect your own settings, it’s strongly recommended to change the password<br />
before you finish the <strong>Router</strong> Basic Setup.<br />
3.2 Quick Setup<br />
Typical Configuration Manager Page consists of two separate frames. The left frame<br />
contains all the means available for device configuration. Menus are indicated by file icons,<br />
and related menus are grouped into categories, such as LAN, WAN and etc., and<br />
indicated by folder icon, depending on whether the group of menus are expanded or not.<br />
You can click on any of these to display a specific configuration page. And the right frame<br />
is designed as a site map.<br />
24 Version 1.0
The above diagram shows all PCs and devices connected to your <strong>3.5G</strong> <strong>plus</strong> <strong>WLAN</strong><br />
<strong>Mobile</strong> <strong>Server</strong> <strong>Router</strong> and their status. Click Quick Setup on the left of the main menu.<br />
Then you’ll see the full functionality selection screen appears and detailed settings for<br />
each item, including “Basic” and “Application” two parts.<br />
Note: The device models named of USB Device, Webcam and Printer will be shown under the picture of each<br />
device if the product supports.<br />
Quick Setup full function table list<br />
• Click Basic, you see 5 major items set in Quick Setup Selection. Please click Next<br />
button after confirmed.<br />
Initiated as default<br />
• Click Application, you see 8 major items set here, including USB Disk Management<br />
Setup, User Account Management Setup, Firewall Setup, QoS Setup, FTP <strong>Server</strong> Setup,<br />
Printer <strong>Server</strong> Setup, Web Camera Setup and Samba <strong>Server</strong> Setup. For the checked<br />
ones are recommended, all can be selected upon your demands.<br />
Initiated as default<br />
25 Version 1.0
Quick Setup Instruction<br />
• WAN Setup: Setup the connecting type provided by your ISP, 5 modes of WAN<br />
connection are supported by <strong>3.5G</strong> <strong>plus</strong> <strong>WLAN</strong> <strong>Mobile</strong> <strong>Server</strong> <strong>Router</strong>–Static IP,<br />
Dynamic IP, PPPoE, PPTP and HSDPA/UMTS.<br />
• LAN Setup: Setup the IP Address for LAN and Group. If you are using the <strong>Router</strong><br />
with multiple PCs on your LAN, you must connect the LAN via the Ethernet ports on<br />
the built-in Ethernet switch. You should also assign a unique IP address to each<br />
device residing on your LAN.<br />
• Wireless Setup: Define the Wireless Mode, ESSID, TxRate, Channel and other<br />
wireless settings.<br />
• Time <strong>Server</strong> Setup: Set time by NTP server or user defines.<br />
• Password Setup: To change administrator’s password.<br />
• USB Disk Management Setup: View the entire data folder inside each storage<br />
devices, also can do formatting and disk partition.<br />
• User Account Management Setup: Set maximum user number, account and right for<br />
using personal services of your <strong>3.5G</strong> <strong>plus</strong> <strong>WLAN</strong> <strong>Mobile</strong> <strong>Server</strong> <strong>Router</strong> for each user.<br />
• Firewall Setup: To enable Firewall and set security level.<br />
• QoS Setup: To enable/disable QoS setup.<br />
• FTP <strong>Server</strong> Setup: To enable FTP server and set controlling rules.<br />
• Printer <strong>Server</strong> Setup: To enable /disable server.<br />
• Web Camera Setup: To enable Web camera function and set image format.<br />
• Samba <strong>Server</strong> Setup: To enable Samba server for shared documents and printer.<br />
3.2.1 WAN Setup (Internet Connection)<br />
WAN is short for Wide Area Network. The WAN settings can be referred to as the Public<br />
setting. All IP information in the WAN settings is public IP addresses which are accessible<br />
on the Internet. <strong>3.5G</strong> <strong>plus</strong> <strong>WLAN</strong> <strong>Mobile</strong> <strong>Server</strong> <strong>Router</strong> supports 5 connection types to<br />
WAN. Select one of the WAN connection modes required by your ISP in the following<br />
Internet Connection Configuration page, the WAN setup pages will vary depending on<br />
what kind of WAN Type you select.<br />
26 Version 1.0
See 3.2.1.1<br />
See 3.2.1.2<br />
See 3.2.1.3<br />
See 3.2.1.4<br />
See 3.2.1.5<br />
Choose your WAN type as the above mentioned, and its associated settings will show up<br />
underneath at the same time.<br />
3.2.1.1 WAN Type – Static IP<br />
Choose Static IP Address if all WAN IP information is provided to you by your ISP. You will<br />
need to enter the IP address, IP Netmask and IP gateway as provided. Each entered fields<br />
must be in the appropriate IP form, which are four IP octets separated by a dot (x.x.x.x). The<br />
<strong>Router</strong> will not accept the IP address if it is not in this format. If ISP provides you DNS<br />
information, please select Specify DNS <strong>Server</strong> IP and fill in Primary field at least;<br />
otherwise, Domain Name can’t be used.<br />
In particular, here provides 3G or <strong>3.5G</strong> transmission rate when the device is plugged, either<br />
a <strong>3.5G</strong> USB Dongle or Card Bus; just check to apply for the backup. In other words, once<br />
Static IP connection is disconnected, the system automatically connects Internet via <strong>3.5G</strong><br />
adapter. If <strong>3.5G</strong> signal is not available, it starts to search downward for 3/2.75/2.5G signals<br />
until none existed. The default interval between the two connection detection is 3 minutes.<br />
The interval range is from 1 to 3 minutes.<br />
The <strong>3.5G</strong> feature is working as mutual backup for other 4 WAN Types, and the required<br />
information is listed as follows, such as user name, password and SIM PIN etc. That is,<br />
setting up the interval time to auto detect whether the Internet connection is lost or not. If<br />
yes, the system will immediately switches to <strong>3.5G</strong> Internet connection.<br />
27 Version 1.0
Please click on Next button to go on 3.2.2 LAN Setup.<br />
3.2.1.2 WAN Type – Dynamic IP<br />
Choose Dynamic IP to obtain IP address information automatically from your ISP. Select<br />
this option if your ISP does not give you any IP numbers to use. This option is commonly<br />
used for Cable modem services. If ISP provided you DNS information, please select<br />
Specify DNS <strong>Server</strong> IP; otherwise, select No Default DNS <strong>Server</strong>.<br />
In particular, here provides 3G or <strong>3.5G</strong> transmission rate when the device is plugged, either<br />
a <strong>3.5G</strong> USB Dongle or Card Bus; just check to apply for the backup. In other words, once<br />
Dynamic IP connection is disconnected, the system automatically connects Internet via<br />
<strong>3.5G</strong> adapter. If <strong>3.5G</strong> signal is not available, it starts to search downward for 3/2.75/2.5G<br />
signals until none existed. The default interval between the two connection detection is 3<br />
minutes. The interval range is from 1 to 3 minutes.<br />
The <strong>3.5G</strong> feature is working as mutual backup for other 4 WAN Types, and the required<br />
information is listed as follows, such as user name, password and SIM PIN etc. That is,<br />
setting up the interval time to auto detect whether the Internet connection is lost or not. If<br />
yes, the system will immediately switches to <strong>3.5G</strong> Internet connection.<br />
28 Version 1.0
Input it if requested by your ISP (Ex:<br />
Wireless <strong>Mobile</strong> <strong>Router</strong>)<br />
MAC address<br />
Click on Next button to go on 3.2.2 LAN Setup.<br />
3.2.1.3 WAN Type – PPPoE<br />
This option is typically used for DSL services. Choose PPPoE (Point to Point Protocol<br />
over Ethernet) if your ISP uses PPPoE connection. Your ISP will provide you with a<br />
username and password. MTU stands for Maximum Transmission Unit. For PPPoE<br />
connections, you may need to change the MTU setting in order to work correctly with your<br />
ISP. As Idle Time, it’s the amount of time of inactivity before disconnecting your PPPoE<br />
session. Enter an Idle Time (in minutes) to define and period of time for which the Internet<br />
connection is maintained during inactivity. If the Auto-reconnect enabled, the <strong>Router</strong> will<br />
automatically connect to your ISP after your system is restarted, or if the connection is<br />
dropped. If ISP provides you DNS information, please select Specify DNS <strong>Server</strong> IP;<br />
otherwise, select No Default DNS <strong>Server</strong>.<br />
In particular, here provides 3G or <strong>3.5G</strong> transmission rate when the device is plugged, either<br />
29 Version 1.0
a <strong>3.5G</strong> USB Dongle or Card Bus; just check to apply for the backup. In other words, once<br />
Dynamic IP connection is disconnected, the system automatically connects Internet via<br />
<strong>3.5G</strong> adapter. If <strong>3.5G</strong> signal is not available, it starts to search downward for 3/2.75/2.5G<br />
signals until none existed. The default interval between the two connection detection is 3<br />
minutes. The interval range is from 1 to 3 minutes.<br />
The <strong>3.5G</strong> feature is working as mutual backup for other 4 WAN Types, and the required<br />
information is listed as follows, such as user name, password and SIM PIN etc. That is,<br />
setting up the interval time to auto detect whether the Internet connection is lost or not. If<br />
yes, the system will immediately switches to <strong>3.5G</strong> Internet connection.<br />
Enter as provided.<br />
Enter as provided.<br />
Click on Next button to go on 3.2.2 LAN Setup.<br />
3.2.1.4 WAN Type – PPTP<br />
This option is typically used for DSL services. Some DSL service providers supply a<br />
30 Version 1.0
special DSL modem. This kind of modem only supports the PPTP tunnel to access the<br />
Internet, you should create a PPTP tunnel that carries a PPP session and terminates on<br />
the DSL model. Once the tunnel has been established, this kind of DSL modem will<br />
forward the PPP session to the ISP. As long as the PPP session is connected, all the local<br />
users will be able to share this PPP session to access to the Internet. If ISP provided you<br />
DNS information, please select Specify DNS <strong>Server</strong> IP; otherwise, select No Default<br />
DNS <strong>Server</strong>.<br />
In particular, here provides 3G or <strong>3.5G</strong> transmission rate when the device is plugged, either<br />
a <strong>3.5G</strong> USB Dongle or Card Bus; just check to apply for the backup. In other words, once<br />
Dynamic IP connection is disconnected, the system automatically connects Internet via<br />
<strong>3.5G</strong> adapter. If <strong>3.5G</strong> signal is not available, it starts to search downward for 3/2.75/2.5G<br />
signals until none existed. The default interval between the two connection detection is 3<br />
minutes. The interval range is from 1 to 3 minutes.<br />
The <strong>3.5G</strong> feature is working as mutual backup for other 4 WAN Types, and the required<br />
information is listed as follows, such as user name, password and SIM PIN etc. That is,<br />
setting up the interval time to auto detect whether the Internet connection is lost or not. If<br />
yes, the system will immediately switches to <strong>3.5G</strong> Internet connection.<br />
31 Version 1.0
PPTP <strong>Server</strong> IP, My WAN IP<br />
and My WAN Subnet Mask<br />
are all necessary inputs.<br />
The fields on the left are required.<br />
Please enter the account’s name and password which provided by your ISP, and then<br />
click on Next button to go on 3.2.2 LAN Setup.<br />
3.2.1.5 HSDPA/UMTS<br />
If you are using HSDPA/UMTS (<strong>3.5G</strong> connection) as the WAN Type, please check<br />
HSDPA/UMTS selection and fill in the required information as follows to directly access<br />
Internet via connected <strong>3.5G</strong> adapter. At this moment, Backup of Connection is not<br />
available, for it is in use as the preferred—Always, Dial on demand or Manual. When <strong>3.5G</strong><br />
signal cannot be reached, the system starts to search downward for 3/2.75/2.5G signals<br />
until none existed.<br />
32 Version 1.0
• Always: Stay connected all the time. After the Quick Setup is finished, the Internet<br />
connection is on automatically. If disconnection is detected, the system will carry on<br />
re-connection immediately in order to stay online.<br />
• Dial on Demand: Connect to the Internet when it is needed. After the Quick Setup is<br />
finished, the Internet connection is on automatically. When it is idled for the set-value<br />
(0~60 Minutes), the connection will be disconnected automatically. On the other hand,<br />
setting up the value as 0 or leaving it blank works the same as the above, Always.<br />
• Manual: Connect to the Internet by setting up each time. After the Quick Setup is<br />
finished, user has to go to Network Configuration page to manually set up the<br />
connection and disconnection.<br />
If ISP provided you DNS information, please select Specify DNS <strong>Server</strong> IP; otherwise,<br />
select No Default DNS <strong>Server</strong>.<br />
Click on Next button to go on 3.2.2 LAN Setup.<br />
3.2.2 LAN Setup<br />
If you are using <strong>3.5G</strong> <strong>plus</strong> <strong>WLAN</strong> <strong>Mobile</strong> <strong>Server</strong> <strong>Router</strong> with multiple PCs on your LAN,<br />
you must connect the LAN via the Ethernet ports on the built-in Ethernet switch. You must<br />
33 Version 1.0
assign a unique IP address to each device residing on your LAN. The LAN IP address<br />
identifies the router as a node on your network; that is, its IP address must be in the same<br />
subnet as the PCs on your LAN. The default LAN IP for the Internet Security <strong>Router</strong> is<br />
192.168.1.1.<br />
The setup of pre-assigned Gateway IP<br />
Address is suggested for good to use.<br />
Requested to be as complied as LAN IP.<br />
For Gateway IP Address, the IP address 192.168.1.xxx (xxx can be any number between<br />
1 and 254 that is not used by another device.) Please don’t change the default LAN IP<br />
settings at this section until you have completed the rest of the configurations and confirm<br />
that your Internet connection is working. And the DHCP <strong>Server</strong> will automatically allocate<br />
an unused IP address from the IP address pool to the requesting computer. You must<br />
specify the starting and ending address of the IP address pool.<br />
Click on Next button to proceed.<br />
3.2.3 Wireless Setup<br />
<strong>3.5G</strong> <strong>plus</strong> <strong>WLAN</strong> <strong>Mobile</strong> <strong>Server</strong> <strong>Router</strong> is based on industry standards to provide<br />
compatible high-speed wireless connectivity within your home, business or public access<br />
wireless networks. Strictly adhering to the IEEE standard, the router will allow you to<br />
access the data you want, when and where you want it. You will be able to enjoy the<br />
freedom that wireless networking delivers.<br />
34 Version 1.0
Select AP/Bridge or WDS from drop-down list.<br />
You can use the default ESSID unless<br />
more than one AP/<strong>Router</strong> is deployed<br />
in the same area. And it will show<br />
when searching the wireless signal.<br />
For selecting configuration utility in AP/Bridge wireless connection, the Channel 6 is the<br />
default channel; all devices on the network must be set to the same channel to<br />
communication on the network. The default TxPreamble setting is Long (if you use high<br />
traffic networks should use the shorter preamble type). Authentication is the security<br />
function to prevent the connection requests from unauthorized wireless clients. As the<br />
Encryption Type, select WEP or WPA can protect your data from eavesdroppers, if you<br />
do not need the encryption, select “None” to skip the following setting.<br />
For selecting configuration utility in WDS wireless connection, please refer to 3.3.3<br />
Wireless for detail setting.<br />
After checking each above blank and choose the suitable item as your demand, click on<br />
Next button to proceed to next setting.<br />
Notice: If use AP/Bridge as wireless connection to router, here suggests disabling the DHCP setup in LAN<br />
Setup, please refer to 3.2.2 LAN.<br />
3.2.4 Time <strong>Server</strong> Setup<br />
The section provides time alteration. The <strong>Router</strong> keeps a record of the current date and<br />
time, which is used to calculate and report various performance data, but changing the<br />
35 Version 1.0
outer’s date and time does not affect the date and time on your PCs.<br />
Select your time zone from<br />
the “Time Zone” drop-down<br />
list or you may set the time<br />
by manual.<br />
Select your time zone from the Time Zone drop-down list, or you may set the time manually;<br />
there is no real time clock inside the router, the system date and time are maintained by<br />
external network time server.<br />
3.2.5 Password Setup<br />
Here suggests changing the password for logging into the configuration manager in terms<br />
of security reason.<br />
The password may consist of A-Z, a-z, 0-9,<br />
underscores, and a single dot (.)<br />
For changing password, please fills the password information into above blanks, and then<br />
click on Next button.<br />
Notice 1:<br />
Notice 2:<br />
Only the password can be changed, the user name for administrator is admin and not to be changed.<br />
If you forget administrator’s password, please reset <strong>3.5G</strong> <strong>plus</strong> <strong>WLAN</strong> <strong>Mobile</strong> <strong>Server</strong> <strong>Router</strong> to default setting<br />
by pressing the “Reset” button on the rear panel over 5 seconds. And the password will return to admin.<br />
36 Version 1.0
3.2.6 USB Disk Management Setup<br />
Easy to check all the USB storage devices connected to your <strong>3.5G</strong> <strong>plus</strong> <strong>WLAN</strong> <strong>Mobile</strong><br />
<strong>Server</strong> <strong>Router</strong>, view the entire data folder inside each storage device, and you can<br />
manage the disk formatting/partitioning via click on the button of this page.<br />
Select the USB Disk and click on OK button for refreshing all disks before you execute disk<br />
partition, and the Unplug button will appear. To partition/format the disk, please select the<br />
disk and click on Format button. Moreover, if you want to view the data inside the disk,<br />
please go to 3.2.10 FTP Sever Setup to enable FTP server and then click on Disk Explorer<br />
to view all folders inside the device.<br />
Notice: You have to click on Unplug button before removing the USB devices from <strong>3.5G</strong> <strong>plus</strong> <strong>WLAN</strong> <strong>Mobile</strong><br />
<strong>Server</strong> <strong>Router</strong>.<br />
3.2.7 User Account Management Setup<br />
Personal users can use each individual application such as My Status, My Webcam and<br />
My Document. This section is to set the user’s right. Also, all the users’ rights will be<br />
showed in User Account List and can be edited or deleted by clicking the meaning text.<br />
37 Version 1.0
Input the User’s name and password, and then<br />
click on “Add”, and you will see the user<br />
information appear on the “User Account List”<br />
Set each user’s right and space arrangement, and then click on Add button for saving<br />
user’s account. Click on Next button after finished.<br />
3.2.8 Firewall Setup<br />
The Firewall rules of <strong>3.5G</strong> <strong>plus</strong> <strong>WLAN</strong> <strong>Mobile</strong> <strong>Server</strong> <strong>Router</strong> are an advance feature used<br />
to deny or allow traffic from passing through the router.<br />
38 Version 1.0
The default setting for Firewall Protection Level security is Low, which attacks Blocking<br />
Policy, allow all Inbound and Outbound IP Filter Policy, and allow all router service access<br />
policy from WAN. Please change it as your demand, and click on Next button to next step<br />
(see also 3.4.2.1 Firewall Configuration).<br />
3.2.9 QoS Configuration Setup<br />
QoS management helps to set and evaluate QoS policies and goals. It is the particular<br />
concern for the continuous transmission of high-bandwidth video and multimedia<br />
information. Transmitting this kind of content dependably is difficult in public networks<br />
using ordinary best effort protocols.<br />
Input the figures by demand to decide your<br />
priority order.<br />
Make sure your connecting bandwidth with ISP and set the priority percentage. Once setting<br />
the QoS service, the transmitting performance will be affected, so please ensure your<br />
connection setting before doing this setup. Click on Next button to next step after finishing<br />
the above.<br />
39 Version 1.0
3.2.10 FTP <strong>Server</strong> Setup<br />
<strong>3.5G</strong> <strong>plus</strong> <strong>WLAN</strong> <strong>Mobile</strong> <strong>Server</strong> <strong>Router</strong> can be the FTP <strong>Server</strong> providing users to transmit<br />
files, also for the guest to download the files from assigned website. Moreover, by<br />
connecting USB HDD, USB Flash to the router, user can easily set up a FTP <strong>Server</strong> to<br />
share or download files for local or remote users.<br />
If the USB device isn’t enabled first,<br />
you can’t enable FTP <strong>Server</strong>. (Not<br />
even click on “Enable”)<br />
Set the FTP <strong>Server</strong> and related setting. Disable the function as demand, and click on Next<br />
button to continue.<br />
3.2.11 Printer <strong>Server</strong> Setup<br />
<strong>3.5G</strong> <strong>plus</strong> <strong>WLAN</strong> <strong>Mobile</strong> <strong>Server</strong> <strong>Router</strong> supports LPR-protocol, as well as NetBIOS, and is<br />
convenient for sharing printer. In other words, it is an Internet access solution for your<br />
LAN/WAN, which provides you the shared web surfing, and supports USB interface printer.<br />
Any users in the same subnet of <strong>3.5G</strong> <strong>plus</strong> <strong>WLAN</strong> <strong>Mobile</strong> <strong>Server</strong> <strong>Router</strong> can print their<br />
document via the network printers.<br />
If the printer isn’t connected,<br />
you can’t choose “Enable”.<br />
Enable the printer and click on Next button to next setup.<br />
Notice: After above Printer <strong>Server</strong> in Quick Setup finished, the related printing settings on <strong>3.5G</strong> <strong>plus</strong> <strong>WLAN</strong><br />
<strong>Mobile</strong> <strong>Server</strong> <strong>Router</strong> and PC have to be set up, too. Please refer to 3.5.4 Printer <strong>Server</strong> to set the<br />
details.<br />
40 Version 1.0
3.2.12 Web Camera <strong>Server</strong> Setup<br />
If you plan to use <strong>3.5G</strong> <strong>plus</strong> <strong>WLAN</strong> <strong>Mobile</strong> <strong>Server</strong> <strong>Router</strong> as a Web Camera site, connect<br />
a supported USB Web Camera to the USB port of <strong>3.5G</strong> <strong>plus</strong> <strong>WLAN</strong> <strong>Mobile</strong> <strong>Server</strong> <strong>Router</strong>.<br />
Check to enable the server and WAN access by demand.<br />
Make sure the webcam already connected to <strong>3.5G</strong><br />
<strong>plus</strong> <strong>WLAN</strong> <strong>Mobile</strong> <strong>Server</strong> <strong>Router</strong>, and then select<br />
“Enable” under your demand and situation;<br />
moreover, you have to make sure the “image<br />
format” which you want to see on the screen.<br />
Click on Next button to next step.<br />
Notice: Before webcam server enabled, please make sure the webcam has connected to the product; otherwise,<br />
the “Enable” selection can’t be checked.<br />
3.2.13 Samba <strong>Server</strong> Setup<br />
<strong>3.5G</strong> <strong>plus</strong> <strong>WLAN</strong> <strong>Mobile</strong> <strong>Server</strong> <strong>Router</strong> supports NetBIOS protocol, providing network<br />
neighbors to share file folders or printer.<br />
Click on Next button to next setup.<br />
3.2.14 Quick Setup Finish<br />
41 Version 1.0
The Quick Setup has been completed successfully when you see this screen.<br />
To apply your new settings, please click on Finish button to reboot system automatically<br />
and go to the product’s diagram homepage. You may connect to Internet via wired or<br />
wireless at this moment according to above settings.<br />
3.3 IP Configuration<br />
This function allows you to add routing rules into <strong>3.5G</strong> <strong>plus</strong> <strong>WLAN</strong> <strong>Mobile</strong> <strong>Server</strong> <strong>Router</strong>. It<br />
is useful if you connect several computers behind <strong>3.5G</strong> <strong>plus</strong> <strong>WLAN</strong> <strong>Mobile</strong> <strong>Server</strong> <strong>Router</strong> to<br />
share the same connection to Internet.<br />
3.3.1 WAN<br />
Select WAN under the IP Config menu. <strong>3.5G</strong> <strong>plus</strong> <strong>WLAN</strong> <strong>Mobile</strong> <strong>Server</strong> <strong>Router</strong> supports<br />
four WAN connection types, i.e. Static IP Address, Dynamic IP Address, PPPoE, PPTP<br />
and HSDPA/UMTS. Follow the instructions below for each to set up accordingly.<br />
3.3.1.1 Static IP<br />
The WAN (Wide Area Network) page shows the settings that are used to connect to your<br />
ISP (Internet Service Provider). Please select the Static IP for your specific ISP.<br />
42 Version 1.0
If you applied for a Static IP connection type from ISP, please follow the steps to set up your<br />
WAN connection.<br />
1. IP Address<br />
Input your IP Address supplied by ISP. If you don’t know, please check with your ISP.<br />
2. Subnet Mask<br />
Input Subnet Mask, normally it is 255.255.255.0.<br />
3. ISP Gateway Address<br />
Input ISP Gateway Address. If you don’t know, please check with your ISP.<br />
4. HSDPA/UMTS Backup<br />
The default interval between the two connection detection is 3 minutes, and the range is<br />
from 1 to 3 minutes. Once Internet connection is disconnected, the system automatically<br />
connects Internet via <strong>3.5G</strong> adapter. If <strong>3.5G</strong> signal is not available, it starts to search<br />
downward for 3/2.75/2.5G signals until none existed. Please check to activate or not.<br />
5. <strong>3.5G</strong><br />
43 Version 1.0
This feature requires user to enter user name, password and SIM PIN etc.; also it is<br />
working as mutual backup for other 4 WAN Types. That is, setting up the interval time to<br />
auto detect whether the Internet connection is lost or not. If yes, the system will<br />
immediately switches to <strong>3.5G</strong> Internet connection until the original connection is back<br />
during the next detection.<br />
P.S.There is one way to get back to original Static IP connection when you are sure the<br />
Static IP connection is back<br />
a.) Please go through the above “WAN Configuration” process again and just click “APPLY”<br />
button.<br />
※ Please don’t use “Reset” function at this stage, otherwise, all your setting will be<br />
swept off and the system will go back to factory default.<br />
6. DNS<br />
If ISP provides you DNS information, please select Specify DNS <strong>Server</strong> IP and input<br />
the DNS information into the blank; otherwise, select No Default DNS <strong>Server</strong>.<br />
7. Apply & Cancel<br />
Click on Apply button to continue. Click on Cancel button to clear the settings on this<br />
page.<br />
3.3.1.2 Dynamic IP<br />
If you applied for a Dynamic IP connection type from ISP, please follow the steps to set up<br />
your WAN connection. Cable modem providers typically use dynamic assignment of IP<br />
Address.<br />
44 Version 1.0
1. Host Name<br />
The host name is optional; but if your ISP requires you to input a specific host name,<br />
please put it in, for example, <strong>3.5G</strong> <strong>plus</strong> <strong>WLAN</strong> <strong>Mobile</strong> <strong>Server</strong> <strong>Router</strong> applied from ISP.<br />
Generally, Cable Modem will provide the hostname information.<br />
2. MAC Address: Keep, Clone & Input MAC Address<br />
Select Keep or Clone MAC Address for copying the MAC address of your Ethernet<br />
adapter to the gateway, or input a group of MAC Address. Generally, your ISP will<br />
inform you.<br />
3. HSDPA/UMTS Backup<br />
The default interval between the two connection detection is 3 minutes, and the range is<br />
from 1 to 3 minutes. Once Internet connection is disconnected, the system automatically<br />
connects Internet via <strong>3.5G</strong> adapter. If <strong>3.5G</strong> signal is not available, it starts to search<br />
downward for 3/2.75/2.5G signals until none existed. Please check to activate or not.<br />
4. <strong>3.5G</strong><br />
45 Version 1.0
This feature requires user to enter user name, password and SIM PIN etc.; also it is<br />
working as mutual backup for other 4 WAN Types. That is, setting up the interval time to<br />
auto detect whether the Internet connection is lost or not. If yes, the system will<br />
immediately switches to <strong>3.5G</strong> Internet connection until the original connection is back<br />
during the next detection.<br />
P.S.There is one way to get back to original Dynamic IP connection when you are sure the<br />
Dynamic IP connection is back.<br />
a.) Please go through the above “WAN Configuration” process again and just click “APPLY”<br />
button.<br />
.<br />
※ Please don’t use “Reset” function at this stage, otherwise, all your setting will be<br />
swept off and the system will go back to factory default.<br />
5. DNS<br />
If ISP provides you DNS information, please select Specify DNS <strong>Server</strong> IP and input<br />
the DNS information into the blank; otherwise, select No Default DNS <strong>Server</strong>.<br />
6. Apply & Cancel<br />
Click on Apply button to continue. Click on Cancel button to clear the settings on this<br />
page.<br />
3.3.1.3 PPPoE<br />
If you applied for a PPPoE connection type from ISP, please follow the steps to set up your<br />
WAN connection.<br />
46 Version 1.0
1. User Name<br />
Input your user name supplied by ISP. If you don’t know, please check with your ISP.<br />
2. Password<br />
Input your Password supplied by ISP.<br />
3. MTU<br />
MTU stands for Maximum Transmission Unit. For PPPoE connection, you may need to<br />
set the MTU setting in order to work correctly with your ISP.<br />
4. Idle Time<br />
It is the time of inactivity before disconnecting your PPPoE session. Enter an Idle Time<br />
(in minutes) to define a maximum period of time for which the Internet connect is<br />
maintained during inactivity. If the connection is inactive for longer than the defined Idle<br />
Time, then the connection will be dropped. Either set this to zero or enable<br />
Auto-reconnect to disable this feature.<br />
5. Auto-reconnect<br />
If checked, the <strong>Router</strong> will automatically connect to your ISP after your system is<br />
47 Version 1.0
estarted or if the connection is dropped.<br />
6. HSDPA/UMTS Backup<br />
The default interval between the two connection detection is 3 minutes, and the range is<br />
from 1 to 3 minutes. Once Internet connection is disconnected, the system automatically<br />
connects Internet via <strong>3.5G</strong> adapter. If <strong>3.5G</strong> signal is not available, it starts to search<br />
downward for 3/2.75/2.5G signals until none existed. Please check to activate or not.<br />
7. <strong>3.5G</strong><br />
This feature requires user to enter user name, password and SIM PIN etc.; also it is<br />
working as mutual backup for other 4 WAN Types. That is, setting up the interval time to<br />
auto detect whether the Internet connection is lost or not. If yes, the system will<br />
immediately switches to <strong>3.5G</strong> Internet connection.<br />
P.S.There is one way to get back to original PPPoE connection when you are sure the<br />
PPPoE connection is back.<br />
a.) Please go through the above “WAN Configuration” process again and just click “APPLY”<br />
button.<br />
※ Please don’t use “Reset” function at this stage, otherwise, all your setting will be<br />
swept off and the system will go back to factory default.<br />
DNS<br />
If ISP provides you DNS information, please select Specify DNS <strong>Server</strong> IP and input<br />
the DNS information into the blank; otherwise, select No Default DNS <strong>Server</strong>.<br />
8. Apply & Cancel<br />
Click on Apply button to continue. Click on Cancel button to clear the settings on this<br />
page.<br />
3.3.1.4 PPTP<br />
If you have applied for a PPTP connection type from ISP, please follow the steps to set up<br />
your WAN connection.<br />
48 Version 1.0
1. PPTP<br />
Select connect to PPTP by Dial On Demand, Always Online or Manual connects.<br />
2. PPTP Account<br />
Input the PPTP Account supplied by ISP, <strong>3.5G</strong> <strong>plus</strong> <strong>WLAN</strong> <strong>Mobile</strong> <strong>Server</strong> <strong>Router</strong>, for<br />
example. If you don’t know, please check with your ISP.<br />
※ Notice: Don’t copy the mentioned example as yours.<br />
3. PPTP Password<br />
Input the Password supplied by ISP.<br />
4. Retype your Password<br />
Retype the password into this blank for confirming.<br />
49 Version 1.0
5. PPTP <strong>Server</strong> IP<br />
Input the <strong>Server</strong> IP supplied by ISP. If you don’t know, please check with your ISP.<br />
Input the WAN IP address provided by your ISP.<br />
6. My WAN Subnet Mask<br />
Input the WAN Subnet Mask supplied by your ISP. If you don’t know, please check with<br />
your ISP.<br />
7. MTU<br />
MTU stands for Maximum Transmission Unit. For PPTP connections, you may need to<br />
set the MTU setting in order to work correctly with your ISP.<br />
8. Maximum Idle Time<br />
It is the time of inactivity before disconnecting your PPTP session. Enter an Idle Time<br />
(in minutes) to define a maximum period of time for which the Internet connect is<br />
maintained during inactivity. If the connection is inactive for longer than the defined Idle<br />
Time, then the connection will be dropped. Either set this to zero or enable<br />
Auto-reconnect to disable this feature.<br />
9. HSDPA/UMTS Backup<br />
The default interval between the two connection detection is 3 minutes, and the range is<br />
from 1 to 3 minutes. Once Internet connection is disconnected, the system automatically<br />
connects Internet via <strong>3.5G</strong> adapter. If <strong>3.5G</strong> signal is not available, it starts to search<br />
downward for 3/2.75/2.5G signals until none existed. Please check to activate or not.<br />
9. <strong>3.5G</strong><br />
This feature requires user to enter user name, password and SIM PIN etc.; also it is<br />
working as mutual backup for other 4 WAN Types. That is, setting up the interval time to<br />
auto detect whether the Internet connection is lost or not. If yes, the system will<br />
immediately switches to <strong>3.5G</strong> Internet connection.<br />
P.S.There is one way to get back to original PPTP connection when you are sure the PPTP<br />
connection is back.<br />
a.) Please go through the above “WAN Configuration” process again and just click “APPLY”<br />
button.<br />
※ Please don’t use “Reset” function at this stage, otherwise, all your setting will be<br />
swept off and the system will go back to factory default.<br />
DNS<br />
If ISP provides you DNS information, please select Specify DNS <strong>Server</strong> IP and input<br />
the DNS information into the blank; otherwise, select No Default DNS <strong>Server</strong>.<br />
10. Apply & Cancel<br />
Click on Apply button to continue. Click on Cancel button to clean the setting on this<br />
page. If you don’t know how to do, please click on Help button.<br />
50 Version 1.0
3.3.1.5 HSDPA/UMTS<br />
If you have applied for a HSDPA/UMTS connection type from ISP, please follow the steps to<br />
set up your WAN connection. At this moment, Backup of Connection is not available.<br />
When <strong>3.5G</strong> signal cannot be reached, the system starts to search downward for<br />
3/2.75/2.5G signals until none existed.<br />
1. <strong>3.5G</strong><br />
This feature requires user to enter user name, password and SIM PIN etc<br />
Always<br />
Stay connected all the time. After the Setup is finished, the Internet connection is on<br />
automatically. If disconnection is detected, the system will carry on re-connection<br />
immediately in order to stay online.<br />
2. Dial on Demand<br />
Connect to the Internet when it is needed. After the Setup is finished, the Internet<br />
connection is on automatically. When it is idled for the set-value (0~60 Minutes), the<br />
connection will be disconnected automatically. On the other hand, setting up the value<br />
as 0 or leaving it blank works the same as the above, Always.<br />
3. Manual<br />
51 Version 1.0
Connect to the Internet by setting up each time. After the Setup is finished, user has to<br />
go to Network Configuration page to manually set up the connection and<br />
disconnection.<br />
4. DNS<br />
If ISP provides you DNS information, please select Specify DNS <strong>Server</strong> IP and input<br />
the DNS information into the blank; otherwise, select No Default DNS <strong>Server</strong>.<br />
5. Apply & Cancel<br />
Click on Apply button to continue. Click on Cancel button to clear the settings on this<br />
page.<br />
3.3.2 LAN<br />
Use this page to set up the local IP address and subnet mask for your router. Please select<br />
LAN under the IP Config menu and follow the instructions below to enter the LAN setting<br />
page to configure the settings you want.<br />
1. IP Address<br />
The default value of LAN IP address is 192.168.1.1 for this router.<br />
2. IP Netmask<br />
Input Subnet Mask, normally it is 255.255.255.0.<br />
3. DHCP<br />
Enable or disable DHCP services. The DHCP server will automatically allocate an<br />
unused IP address from the IP address pool to the requesting computer if enabled.<br />
4. Start IP<br />
This field specifies the first address in the pool to be assigned by the DHCP server in<br />
your local network. The default setting is 2.<br />
5. End IP<br />
This field specifies the last address in the pool to be assigned by the DHCP server in<br />
your local network. The default setting is 253.<br />
6. Advanced<br />
Enable the advance setting and then setup the <strong>Router</strong>, DNS and WINS value.<br />
7. <strong>Router</strong><br />
This field indicates the IP address of DNS to provide to clients that request IP Address<br />
from DHCP <strong>Server</strong>, the default setting is the same with LAN IP address.<br />
52 Version 1.0
8. DNS<br />
This field indicates the IP address of DNS to provide to clients that request IP Address<br />
from DHCP <strong>Server</strong>, the default setting is the same with LAN IP address.<br />
9. WINS<br />
The Windows Internet Naming Service manages interaction of each PC with the Internet.<br />
If you use a WINS server, enter IP Address of server here.<br />
10. Apply & Cancel<br />
Click on Apply button to continue. Click on Cancel button to clear the settings on this<br />
page.<br />
Besides, the DHCP information will be listed below, like DHCP Clients list, including IP<br />
Address and MAC address.<br />
3.3.3 Wireless<br />
<strong>3.5G</strong> <strong>plus</strong> <strong>WLAN</strong> <strong>Mobile</strong> <strong>Server</strong> <strong>Router</strong> enables fastest 54 Mbps IEEE802.11g wireless<br />
transmissions and keeps compatibility with existing IEEE 802.11b devices. <strong>3.5G</strong> <strong>plus</strong> <strong>WLAN</strong><br />
<strong>Mobile</strong> <strong>Server</strong> <strong>Router</strong> complies with IEEE 802.11b standard. Please select Wireless under<br />
the main menu. Follow the instructions to configure the Wireless settings.<br />
53 Version 1.0
1. Wireless<br />
Select AP/Bridge or WDS to allow or disallow the wireless operation.<br />
2. Wireless Mode<br />
This field indicates the 802.11g interface mode. “802.11G” prevents the 802.11b clients<br />
from accessing the router. “802.11B/G” allows both 802.11b and 802.11g clients to<br />
access the router. “802.11B” will enable the network as an 802.11b wireless network. By<br />
default, the mode is “802.11B/G”.<br />
3. ESSID<br />
You can use the default ESSID and radio channel unless more than one <strong>3.5G</strong> <strong>plus</strong><br />
<strong>WLAN</strong> <strong>Mobile</strong> <strong>Server</strong> <strong>Router</strong> or access point is deployed in the same area. Under this<br />
situation, it is advised that you should use a different ESSID and radio channel for each<br />
of <strong>3.5G</strong> <strong>plus</strong> <strong>WLAN</strong> <strong>Mobile</strong> <strong>Server</strong> <strong>Router</strong> or access point in order to distinguish from<br />
each other. All of <strong>3.5G</strong> <strong>plus</strong> <strong>WLAN</strong> <strong>Mobile</strong> <strong>Server</strong> <strong>Router</strong>s and your wireless LAN cards<br />
must have the same ESSID to allow a wireless mobile client roaming inbetween. By<br />
default, the ESSID is set to Wireless_<strong>Mobile</strong>_<strong>Router</strong>.<br />
4. TxRate<br />
54 Version 1.0
Select the transmission rate for the network. The default setting is Auto.<br />
5. Channel<br />
IEEE 802.11g and 802.11b devices are direct sequence spread spectrum devices that<br />
spread a radio signal over a range of frequencies. The range of frequencies used by a<br />
direct sequence device is called Channel.<br />
The 802.11g and 802.11b specification supports up to 14 overlapping Channels for radio<br />
communication. But only 11 Channels are supported in the United States and therefore<br />
built-in on <strong>3.5G</strong> <strong>plus</strong> <strong>WLAN</strong> <strong>Mobile</strong> <strong>Server</strong> <strong>Router</strong>. To minimize interference, configure<br />
each of <strong>3.5G</strong> <strong>plus</strong> <strong>WLAN</strong> <strong>Mobile</strong> <strong>Server</strong> <strong>Router</strong> to use Non-overlapping channels.<br />
Non-overlapping channels have 25 MHz separation beginning at the first allowed<br />
channel for the country (for the US and most of Europe, channel 1, 6 & 11 are used.)<br />
Make sure that <strong>3.5G</strong> <strong>plus</strong> <strong>WLAN</strong> <strong>Mobile</strong> <strong>Server</strong> <strong>Router</strong> sharing the same Channel (or<br />
Channels close in number) is as far away from each other as possible, based on the<br />
results of your site survey of the facility. You can find the site survey utility in <strong>3.5G</strong> <strong>plus</strong><br />
<strong>WLAN</strong> <strong>Mobile</strong> <strong>Server</strong> <strong>Router</strong>’s setup CD. By default, the channel is 6.<br />
6. Hide SSID<br />
This term is used to increase the security level. Check it to hide SSID information<br />
against the wireless clients that are sniffing radio. By default, this option is inactive.<br />
7. TxPreamble<br />
The default TxPreamble setting is Long (if you use high traffic networks should use the<br />
shorter preamble type)<br />
8. Beacon Interval<br />
Beacons are packets sent by an access point to synchronize a wireless network. Specify<br />
a beacon interval value. Default (100) is recommended.<br />
9. RTS Threshold<br />
This value should remain at its default setting of 2346. If you encounter inconsistent data<br />
flow, only minor modifications to the value range between 256 and 2346 are<br />
recommended<br />
10. Authentication Mode<br />
Four authentication methods are supported: Open and Shared. Select Open, your<br />
wireless network would be intruded by anonymous. Not only your network bandwidth<br />
would be shared; but also transmitting data might be intercepted. Select Shared<br />
function and it can be taken effect.<br />
11. Encrypt Type - WEP<br />
There are two types of encrypt type can be selected, including WEP and WPA.<br />
WEP Encryption: Enabling WEP can protect your data from eavesdroppers. If you do<br />
not need this feature, select “None” to skip the following setting. <strong>3.5G</strong> <strong>plus</strong> <strong>WLAN</strong> <strong>Mobile</strong><br />
<strong>Server</strong> <strong>Router</strong> supports both 64-bit and 128-bit encryption using the Wired Equivalent<br />
55 Version 1.0
Privacy (WEP) algorithm. Select the type of encryption you want to use (64 or 128 bit)<br />
and configure one to four WEP Keys. The “1280bit” method is more secure than the<br />
“64-bit”.<br />
Key Type: For 64bits WEP key, either 5 ASCII characters or 10 hexadecimal digitals<br />
leading by 0x can be entered. For 128bits WEP key, either 13 ASCII characters or 26<br />
hexadecimal digits leading by 0x can be entered.<br />
Note: 128 bits WEP is most secure, but has more encryption/decryption overhead. Note that all wireless<br />
devices must support the same WEP encryption bit size and have the same key. Four keys can be<br />
entered here, but only one key can be selected at a time. The keys can be entered in ASCII or<br />
Hexadecimal. Select the item from drop-down list you wish to use.<br />
Pass phrase: Automatically generate four WEP keys. A WEP key is either 10 or 26<br />
hexadecimal digits (0~9, a~f, and A~F) based on whether you select 64 bit or 128 bit in<br />
the WEP drop-down menu. Type a combination of up to 64 letters, numbers, or symbols<br />
in the blank, <strong>3.5G</strong> <strong>plus</strong> <strong>WLAN</strong> <strong>Mobile</strong> <strong>Server</strong> <strong>Router</strong> uses an algorithm to generate four<br />
WEP keys for encryption. If you want to type in the keys manually, leave this field blank.<br />
Note: This function eases users from having to remember their passwords. But this isn’t as secure as<br />
manual assignment.<br />
WEP Key: At most four keys can be set. A WEP key is either 10 or 26 hexadecimal<br />
digits (0~9, a~f, and A~F) based on whether you select 64 bit or 128 bit in the WEP<br />
drop-down list. <strong>3.5G</strong> <strong>plus</strong> <strong>WLAN</strong> <strong>Mobile</strong> <strong>Server</strong> <strong>Router</strong> must have at least the same<br />
default key.<br />
12. Encrypt Type - WPA<br />
The WPA encrypts each frame transmitted from the radio using the pre-shared key (PSK)<br />
which entered from this panel or a key got dynamically through 802.1x.<br />
WPA-PSK (TKSP): Allow the access from WPA clients simultaneously and the<br />
encryption keys are given from PSK respectively.<br />
WPA Rekey Timer: Allows for the session keys to be refreshed over time,<br />
minimizing the amount of data that is encrypted with the same session key.<br />
56 Version 1.0
ASKII: The 8~63 ASCII characters can be entered, for example,<br />
“0123456789ABCD….”<br />
Radius with 802.x: Check this circle to enable Radius client function.<br />
WPA Rekey Timer: Allows for the session keys to be refreshed over time,<br />
minimizing the amount of data that is encrypted with the same session key.<br />
RADIUS <strong>Server</strong> IP: The IP address of RADIUS server.<br />
RADIUS <strong>Server</strong> Port: The UDP port number that the RADIUS server is listed.<br />
The default value is 1812.<br />
Shared Secret: The RADIUS server and client share a secret that is used to<br />
authenticate the messages sent between them. You must configure both sides<br />
to sue the same shared secret.<br />
13. Apply & Cancel<br />
Click on Apply button to save the settings. If you want to clear the settings, please click<br />
on Cancel button. The functional button, Cancel can take effect after clicking on Apply<br />
button.<br />
3.3.4 DDNS<br />
Dynamic DNS allows you to make an assumed name as a dynamic IP address to a static<br />
hostname. Please configure the dynamic DNS below. Please select DDNS under the IP<br />
57 Version 1.0
Config menu, and follow the instructions below to enter the DDNS setting page to configure<br />
the settings you want.<br />
1. Service Provider<br />
Choose correct Service Provider from drop-down list, here including dyndns, dhs, ods<br />
and tzo embedded in <strong>3.5G</strong> <strong>plus</strong> <strong>WLAN</strong> <strong>Mobile</strong> <strong>Server</strong> <strong>Router</strong>.<br />
2. Enable / Disable DDNS<br />
Select enable to use DDNS function. Each time your IP address to WAN is changed,<br />
and the information will be updated to DDNS service provider automatically.<br />
3. Host Name<br />
This field represents the host name you register to Dynamic-DNS service and expect to<br />
export to the world.<br />
4. User Name<br />
User name is used as an identity to login Dynamic-DNS service.<br />
5. Password<br />
Password is applied to login Dynamic-DNS service.<br />
6. Apply & Cancel<br />
Click on Apply button to continue. Click on Cancel button to clear the setting on this<br />
page.<br />
3.4 Advanced<br />
There are NAT settings, Firewall setting and QoS setting included in advance setup. The<br />
58 Version 1.0
advanced setting is in <strong>Router</strong> Mode only.<br />
3.4.1 NAT<br />
NAT is a method of mapping one or more IP addresses and/or services ports into different<br />
specified services, where NAT stands for Network Address Translation. It allows the internal<br />
IP addresses of many computers on a Local Area Network (LAN) to be translated to one<br />
public address, saving users’ cost. It also plays a security role by obscuring the true IP<br />
addresses of important machines from potential hackers on the Internet. For convenience,<br />
we called a router having the NAT facility as a NAT-enabled router.<br />
3.4.1.1 Virtual <strong>Server</strong><br />
To offer services, like WWW, FTP, provided by a server in your local network accessible for<br />
outside users, you should specify a local IP address to the server. Then, add the IP address<br />
and network protocol type, port number, and name of the service in the following list. Based<br />
on the list, the gateway will forward service request from outside users to the corresponding<br />
local server.<br />
59 Version 1.0
1. Enable Virtual <strong>Server</strong>: Check Enable to apply all those rules in Virtual <strong>Server</strong> List<br />
into <strong>3.5G</strong> <strong>plus</strong> <strong>WLAN</strong> <strong>Mobile</strong> <strong>Server</strong> <strong>Router</strong>.<br />
2. Description: Enter the description of the virtual server, this field allows you to record<br />
what this rule is used for.<br />
3. Private IP: Specify the private IP address of the internal host offering the service.<br />
4. Protocol Type: Specify the transport layer protocol (TCP or UDP).<br />
5. Private Port: Specify the private port number of the service offered by the internal<br />
host.<br />
6. Public Port: Specify the private IP address of the internal host offering the service.<br />
7. Schedule: Set up the schedule for server.<br />
8. Add: Click on Add button to record this setting.<br />
9. Apply & Cancel<br />
Click on Apply button to add the settings into the list table. Click on Cancel button to<br />
clear the settings on this page.<br />
10. Virtual <strong>Server</strong> List<br />
Shows all IDs and relevant information on server for administrator to edit or delete.<br />
3.4.1.2 Virtual DMZ<br />
Virtual DMZ allows you to expose one computer to Internet, so that all inbound packets will<br />
be redirected to the computer you set. It is useful while you run some applications that use<br />
uncertain incoming ports. Please use it carefully.<br />
1. Enable/Disable Virtual DMZ: Check Enable to apply Virtual DMZ for the <strong>Router</strong>.<br />
2. IP Address: This field stands for the destination IP address that you like to redirect the<br />
matched packet to.<br />
3. Apply & Cancel<br />
Click on Apply button to continue. Click on Cancel button to clear the setting on this<br />
page.<br />
60 Version 1.0
3.4.2 Firewall<br />
The Firewall function helps to protect your local network against attacks from outside. It also<br />
provides a way of restricting users on the local network from accessing the Internet.<br />
Additionally, it can filter out specific packets to trigger the router to place an outgoing<br />
connection.<br />
3.4.2.1 Firewall Configuration<br />
<strong>3.5G</strong> <strong>plus</strong> <strong>WLAN</strong> <strong>Mobile</strong> <strong>Server</strong> <strong>Router</strong> provides built-in firewall functions, enabling you to<br />
protect the system against denial of service (DoS) attacks and other types of malicious<br />
accesses to your LAN while providing Internet access sharing at the same time. You can<br />
also specify how to monitor attempted attacks, and who should be automatically notified.<br />
61 Version 1.0
1. Firewall Protection Level: Select the level from the drop-down list, including High,<br />
Medium and Low. The below screen including SPI service and ICMP setting will<br />
change according to your level setup.<br />
2. Enable SPI Service: <strong>3.5G</strong> <strong>plus</strong> <strong>WLAN</strong> <strong>Mobile</strong> <strong>Server</strong> <strong>Router</strong> often monitor a wider<br />
range of activity, such as patterns of traffic and the type of application sending traffic.<br />
With SPI, the router looks at individual packets for patterns similar to known hacker<br />
techniques, such as Denial of Service (DoS) attacks, Ping of Death (illegal ping<br />
packet sizes or excessive ICMP messages), SYN Flood, LAND Attack, and IP<br />
Spoofing. Enable it if you need.<br />
3. Blocking ICMP Ping from WAN side: The purpose of ICMP is to provide feedback<br />
regarding the network and datagram, it is not to make IP a reliable transport<br />
mechanism. ICMP messages use a basic IP datagram header with the IP data being<br />
the ICMP message. The IP source address is that of the host or gateway sending the<br />
ICMP message with the destination IP address being that of the original source IP<br />
address. You can enable ICMP Ping from WAN side or not.<br />
4. DoS Attacks Blocking Settings<br />
Enable DoS Attacks Blocking: The following sections will explain in more detail<br />
about DoS Defense setup by using the web configuration. There are a total 8 kinds of<br />
defense function for the DoS Defense Setup. By default, the DoS Defense<br />
functionality is disabled. Further, once the DoS Defense functionality is enabled, the<br />
default values for the threshold and timeout values existing in some functions are set<br />
to 300 packets per second and 10 seconds, respectively. A brief description for each<br />
item in the DoS defense function is shown below.<br />
SYN Flooding: Check or uncheck this option to enable or disable protection against<br />
SYN Flood attacks. This attack involves sending connection requests to a server, but<br />
never fully completing the connections. This will cause some computers to get into a<br />
“suck state” where they cannot accept connections from legitimate users. (“SYN” is<br />
short for SYNchronize”; this is the first step in opening an Internet connection). You<br />
can select this box if you wish to protect the network from TCP SYN flooding.<br />
WinNuke: Check or un-check this option to enable or disable protection against<br />
WinNuke attacks. Some older versions of the Microsoft Windows OS are vulnerable to<br />
this attack. If the computers in the LAN are not updated with recent versions/patches,<br />
you are advised to enable this protection by checking this check box.<br />
MIME Flood: Check or un-check this option to enable or disable protection against<br />
MIME attacks. You can select this box to protect the mail server in your network<br />
against MIME flooding.<br />
FTP Bounce: Check or un-check this option to enable or disable protection against<br />
FTP bounce attack. In its simplest terms, the attack is based on the misuse of the<br />
62 Version 1.0
PORT command in the FTP protocol. An attacker can establish a connection between<br />
the FTP server machine and an arbitrary port on another system. This connection may<br />
be used to bypass access controls that would otherwise apply.<br />
IP Unaligned Time-Stamp: Check or un-check this option to enable or disable<br />
protection against unaligned IP time stamp attack. Certain operating systems will<br />
crash if they receive a frame with the IP timestamp option that isn’t aligned on a 32-bit<br />
boundary.<br />
Sequence Number Prediction Check: For TCP packets, sequence number is used<br />
to guard against accidental receipt of unintended data and malicious use by the<br />
attackers if the ISN (Initial Sequence Number) is generated randomly. Forged packets<br />
with valid sequence numbers can be used to gain trust from the receiving host.<br />
Attackers can then gain access to the compromised system. Note that this attack<br />
affects only the TCP packets originated or terminated at the Internet Security <strong>Router</strong>.<br />
Sequence Number Out of Range Check: Protect against TCP out of range<br />
sequence number attacks. An attacker can send a TCP packet to cause an intrusion<br />
detection system (IDS) to become unsynchronized with the data in a connection.<br />
Subsequent frames sent in that connection may then be ignored by the IDS. This may<br />
indicate an unsuccessful attempt to hijack a TCP session.<br />
ICMP Verbose: Check or un-check this option to enable or disable protection against<br />
ICMP error message attacks. ICMP messages can be used to fold your network with<br />
undesired traffic.<br />
Max IP Fragment Count: Enter the maximum number of fragments the Firewall<br />
should allow for every IP packet. This option is required if your connection to the ISP is<br />
through PPPoE. This data is used during transmission or reception of IP fragments.<br />
When large sized packets are sent via <strong>3.5G</strong> <strong>plus</strong> <strong>WLAN</strong> <strong>Mobile</strong> <strong>Server</strong> <strong>Router</strong>, the<br />
packets are chopped into fragments as large as MTU (Maximum Transmission Unit).<br />
By default, this number is set to 45. If MTU of the interface is 1500(default for<br />
Ethernet), then there can be a maximum of 45 fragments per IP packet. If the MTU is<br />
less, then there can be more number of fragments and this number should be<br />
increased.<br />
Minimum IP Fragment Size: Enter the Minimum size of IP fragments to be allowed<br />
through Firewall. This limit will not be enforced on the last fragment of the packet. If<br />
the Internet traffic is such that it generates many small sized fragments, this value can<br />
be decreased. This can be found if there are lots of packet losses, degradation in<br />
speed and if the flowing log message is generated very often: “fragment of size less<br />
than configured minimum fragment size detected”.<br />
5. Apply & Cancel<br />
Click on Apply button to continue. Click on Cancel button to clear the settings on this<br />
63 Version 1.0
page.<br />
6. DoS Attacks Blocking List<br />
The list shows all the DoS attacks blocking items.<br />
3.4.2.2 IP Filter<br />
Use IP Filter to deny LAN IP addresses from accessing the Internet. You can deny specific<br />
port numbers or all ports for the specific IP address.<br />
64 Version 1.0
1. Enable IP Filter: Check enable or disable to apply IP Filter function.<br />
2. Enable Log: All packets between WAN and LAN will be logged.<br />
3. Source: To specify the appropriate IP address / mask and enter the source port<br />
number.<br />
4. Destination: Allows you to set the destination address / mask to which this rule<br />
should apply and enter the source port number.<br />
5. In/Out: Select inbound or outbound ACL (Access Control List) rules, you can control<br />
(allow or deny) incoming or external network access to computers on your LAN.<br />
6. Protocol: This option allows you to select protocol type. Available settings are TCP,<br />
UDP and ICMP.<br />
7. Listen: To check if a computer is on the Internet. It sends ping packets and listens for<br />
replies from the specific host.<br />
8. Time Ranges: Apply IP filter by setting time ranges.<br />
9. Action: Select Deny, the IP filter will deny for above time range, otherwise, to allow IP<br />
filter in above time.<br />
10. Side: Set the IP filter from LAN or WAN, or you may select both side.<br />
11. Add, Apply & Cancel:<br />
After finish the above, click Add button to create the new ACL rule and add the<br />
settings into the list table. Click on Apply button to save and Cancel button to clear<br />
the settings on this page.<br />
12. IP Filter List<br />
Shows all filtered IP information for administrator to edit or delete.<br />
3.4.2.3 MAC Filter<br />
Use MAC filters to deny LAN computers by their MAC addresses from accessing the<br />
Internet. You can manually add a MAC address that is currently connected to <strong>3.5G</strong> <strong>plus</strong><br />
<strong>WLAN</strong> <strong>Mobile</strong> <strong>Server</strong> <strong>Router</strong>.<br />
65 Version 1.0
1. MAC Filter Action: To deny or allow all MAC filter action.<br />
2. Enable MAC Filter: Check enable or disable to apply MAC Filter function.<br />
3. Enable Log: All packets between WAN and LAN will be logged.<br />
4. Description: Enter the filter description into this blank.<br />
5. MAC Address: Enter the MAC address manually that you want to filter.<br />
6. Time Ranges: Apply MAC filter by setting time ranges.<br />
7. Add, Apply & Cancel<br />
After finish the above, click Add button to create the MAC configuration rule and add<br />
the settings into the list table. Click on Apply button to save and Cancel button to<br />
clear the settings on this page.<br />
8. MAC filter list<br />
Shows all filtered MAC information for administrator to edit or delete.<br />
3.4.2.4 URL Filter<br />
Keyword based URL (Uniform Resource Locator) filtering allows you to define one or<br />
more keywords that should not appear in URL’s. Any URL containing one or more of these<br />
keywords will be blocked. This is a policy independent feature i.e. it cannot be associated<br />
to ACL rules. This feature can be independently enabled / disabled, but works only if<br />
firewall is enabled.<br />
66 Version 1.0
1. Enable URL Filter: Check enable or disable to apply URL filter function.<br />
2. Enable log: All packets between WAN and LAN will be logged.<br />
3. Description: Enter the filter description into this blank.<br />
4. URL keyword: Enter the URL words into this blank to apply filter blocking, example:<br />
“www.yahoo”, then it’ll block all the websites from www.yahoo range.<br />
5. Time Ranges: Apply URL filter by setting time ranges.<br />
6. Add, Apply & Cancel<br />
After finish the above, click Add button to create the URL rule and add the settings into<br />
the list table. Click on Apply button to save and Cancel button to clear the settings on<br />
this page.<br />
7. URL Filter List<br />
Shows all filtered URL information for administrator to edit or delete.<br />
67 Version 1.0
3.4.3 QoS<br />
Quality of Service (QoS) refers to the capability of a network to provide better service to<br />
selected network traffic over various technologies, including Frame Relay, Asynchronous<br />
Transfer Mode (ATM), Ethernet and 802.1x networks, and IP-routed networks that may<br />
use any or all of these underlying technologies. The primary goal of QoS is to provide<br />
priority including dedicated bandwidth, controlled jitter and latency (required by some<br />
real-time and interactive traffic), and improved loss characteristics. Also important is<br />
making sure that providing priority for one or more flows does not make other flows fail.<br />
QoS technologies provide the elemental building blocks that will be used for future<br />
business applications in campus, WAN and service provider networks. This chapter<br />
provides each setting of QoS.<br />
68 Version 1.0
1. Enable QoS Service: One checkbox appears to activate the QoS control function or<br />
not. Click it to force the router to perform QoS control over traffic flows. By default, it’s<br />
enabled.<br />
2. Current Upstream Bandwidth: Allows you to set the upper bound of the port<br />
forwarding rate. It will be of great value to minimize the impact on other users from one<br />
user who would otherwise monopolize the network transmission bandwidth (e.g.<br />
playing games or downloading large files).<br />
3. Priority: To limit the bandwidth consumed over a backbone link by FTP transfers or<br />
give priority to an important database access. And the following applications can be<br />
selected individually and distribute the priority level.<br />
4. Application: Including FTP, HTTP, E-mail, Telnet, Voice, Games, IM and Video<br />
priority setting.<br />
5. Apply & Cancel<br />
Click on Apply button to save the setting or Cancel button to clear the settings on this<br />
page.<br />
3.5 <strong>Server</strong><br />
<strong>3.5G</strong> <strong>plus</strong> <strong>WLAN</strong> <strong>Mobile</strong> <strong>Server</strong> <strong>Router</strong> provides FTP <strong>Server</strong>, Web Camera <strong>Server</strong>, Printer<br />
<strong>Server</strong> and Samba <strong>Server</strong> applications.<br />
3.5.1 Samba <strong>Server</strong><br />
By supporting NetBIOS Protocol, <strong>3.5G</strong> <strong>plus</strong> <strong>WLAN</strong> <strong>Mobile</strong> <strong>Server</strong> <strong>Router</strong> provides LAN<br />
users to share files or printer via My Network Places. Click Samba <strong>Server</strong> to proceed.<br />
69 Version 1.0
1. Enable Samba <strong>Server</strong><br />
Check to Enable/Disable while connecting.<br />
2. Workgroup Name<br />
Fill in the name, and the default is Workgroup.<br />
3. <strong>Server</strong> Name<br />
Name your server.<br />
4. <strong>Server</strong> Description<br />
Describe your server by demand, and the default is Wireless <strong>Mobile</strong> <strong>Router</strong>.<br />
5. Printer Model<br />
Printer model appears when connected.<br />
6. Apply & Cancel<br />
Click Apply to save or Cancel to clear settings.<br />
3.5.1.1 How to Access File Sharing Directory<br />
Please follow the steps below.<br />
【Step 1】<br />
Go to Start and click My Computer.<br />
70 Version 1.0
【Step 2】<br />
Fill in blank address field with \\192.168.1.1.<br />
【Step 3】<br />
A window pops up asking for user name and password. If log in as an administrator,<br />
please enter admin for both fields; otherwise, fill in with personal account and password.<br />
Click OK after finished.<br />
【Step 4】<br />
As the window below appears, login user has entered file sharing directory, and the<br />
folders underneath are all available for sharing locally.<br />
71 Version 1.0
Note: Only 2 icons show up at most.<br />
1. If a USB flash drive/hard disk is connected and enabled, the samba folder shows up.<br />
2. If a USB printer is connected and enabled, the printer icon shows up.<br />
3.5.2 FTP <strong>Server</strong><br />
By directly connecting USB storage devices to any USB port, FTP server can be created<br />
with simple configuration. FTP <strong>Server</strong> utility allows both local and remote users to upload<br />
or download files, pictures or music files from the same storage device in most easy and<br />
timely fashion. It is also cost effective where users do not need to purchase a dedicated<br />
PC to set up a 24 hours FTP service.<br />
Before configuring FTP <strong>Server</strong>, please make sure the storage device is properly plugged<br />
into any USB port on the router and make sure this USB storage device is detected by the<br />
router.<br />
72 Version 1.0
While USB storage device is<br />
plugged,FTP <strong>Server</strong> can be<br />
checked as enabled.<br />
1. Enable FTP <strong>Server</strong>: Enabling selection for FTP <strong>Server</strong> only can be checked when<br />
USB storage device is plugged.<br />
2. Enable Anonymous to Login: Allow anonymous to log in after check on enable.<br />
3. Enable FTP Access from WAN: Allow FTP access from WAN side by checking on<br />
enable for this item.<br />
4. FTP <strong>Server</strong> Port: Define the FTP command transfer service port. If you want to<br />
change this port number, also remember to change the service port setting of your<br />
FTP client.<br />
5. Idle connection Time-Out: When a specific time value is added, FTP <strong>Server</strong> will be<br />
de-activated if it has no activity within the time limit.<br />
6. Apply & Cancel<br />
Click on Apply button to continue. Click on Cancel button to clear the settings on this<br />
page.<br />
7. User Account List<br />
A list shows all user names, staus and directory/file opened.<br />
Notice: FTP server is compatible with FAT32 or EXT3 format USB storage device. In case you need to format<br />
your USB storage device. Please always make sure the device is formatted with FAT32 or EXT3<br />
standard.<br />
3.5.3 Web Camera <strong>Server</strong><br />
<strong>3.5G</strong> <strong>plus</strong> <strong>WLAN</strong> <strong>Mobile</strong> <strong>Server</strong> <strong>Router</strong> has built-in Web Cam <strong>Server</strong>. By connecting web<br />
camera to the router, it allows user to monitor their home or office from remote locations.<br />
Motion Detection function has also been built-in and allows user to use webcam to detect<br />
any movements in their houses or offices and send email alert with captured images.<br />
73 Version 1.0
3.5.3.1 Web Camera <strong>Server</strong> Basic Setup<br />
1. Enable Webcam <strong>Server</strong>: Allow using this function by checking on enable.<br />
2. Access from WAN: Allow webcam can access from WAN side by checking on enable<br />
for this item.<br />
3. Image format: The default is 320x240 pixels.<br />
4. Preview: Click on this button, you can preview the image from webcam.<br />
5. Record Setting: Please see the detail advance setting in 3.5.3.2 Web Camera<br />
<strong>Server</strong> Advanced Configuration.<br />
6. Apply & Cancel<br />
Click on Apply button to continue. Click on Cancel button to clear the settings on this<br />
page.<br />
3.5.3.2 Web Camera <strong>Server</strong> Advanced Configuration<br />
Click on Record Setting button, and the screen will appear as below.<br />
1. Enable save image: If you want to save the image from webcam, please check on<br />
enable.<br />
2. Save image interval: For saving image, you can set the save interval time, the default<br />
value is 5 seconds.<br />
3. Save Location: Set the save location for webcam image, you may save into USB<br />
74 Version 1.0
HDD or remote FTP; if select save to remote FTP, please continue follow-up remote<br />
FTP setting.<br />
4. USB HDD Directory: The section provides option of which folder should be used for<br />
saving webcam image.<br />
5. Remote FTP URL: Input the FTP URL for saving webcam image.<br />
6. Remote FTP port: Input the FTP port number under URL to save image.<br />
7. Remote FTP user: Enter the user’s name you like and it will be used to save the<br />
webcam image into the FTP server.<br />
8. Remote FTP password: Put in a password for validation while accessing.<br />
9. Remote FTP Directory: To provide option of which folder should be used for saving<br />
webcam image.<br />
10. Back: Click on Back button for returning to Webcam Basic Setup screen.<br />
11. Apply & Cancel<br />
Click on Apply button to continue. Click on Cancel button to clear the settings on this<br />
page.<br />
3.5.3.3 Application for Web Camera<br />
3.5.3.3.1 Web Camera Monitoring Application<br />
Monitor your home or take pictures with a Webcam via <strong>3.5G</strong> <strong>plus</strong> <strong>WLAN</strong> <strong>Mobile</strong> <strong>Server</strong><br />
75 Version 1.0
<strong>Router</strong>; one can set up the monitoring or recording of all images into the USB HDD for<br />
reviewing. Often marketed as surveillance tools for home or office security; network<br />
Webcams are now being employed by early adopters for more personal matters, such as<br />
watching kids and monitoring pets. The Webcam can be remotely accessed and<br />
controlled via a browser. In addition, record and monitor live actions with USB webcam;<br />
then view the image through Internet browsers or WiFi mobile phones.<br />
3.5.3.3.1.1 Web Camera Monitoring via WAN connection<br />
The illustration below is an example for watching the webcam image via WAN connection.<br />
• How to check your WAN IP address<br />
To monitor the webcam image from outside, you need to know the WAN IP address.<br />
Select Network Configuration under Log & Status on main Menu after connected, and<br />
you will see the WAN IP Address used to connect to webcam monitor screen. Here uses<br />
210.168.117.96 as an example.<br />
• Monitor the webcam image via WAN<br />
76 Version 1.0
Input the WAN IP Address (as you see on above screen) into browser blanks. You will see<br />
the personal account login screen appear, and then input your own user account and<br />
password. After logging in as a user, your will see the personal control panel screen as<br />
below, please click on My Webcam.<br />
There will pop-up screen shows the image from web camera as example below.<br />
3.5.3.3.1.2 Web Camera Monitoring via WiFi <strong>Mobile</strong> Phone<br />
You may view the monitor live action through WiFi mobile phones.<br />
77 Version 1.0
Please fill the WAN IP address <strong>plus</strong> “/webcam.html” (e.g. http://210.64.134.25/webcam.html)<br />
into the mobile phone’s browser blank and you will see the webcam user login screen<br />
appear as below.<br />
After logging in with your own account, you will see the monitor image from web camera via<br />
WiFi mobile phone.<br />
3.5.3.3.2 Web Camera Recording<br />
3.5.3.3.2.1 Administrator Setup<br />
78 Version 1.0
<strong>3.5G</strong> <strong>plus</strong> <strong>WLAN</strong> <strong>Mobile</strong> <strong>Server</strong> <strong>Router</strong> also can record the pictures from Webcam; only<br />
Administrator can activate the settings. Select Web Camera <strong>Server</strong> from main Menu and<br />
enable this function, click on Record Setting button for further setting.<br />
To set up the Webcam Advanced Configuration for each text field, the image from webcam<br />
will be recorded into your USB HDD or Remote FTP. Click on Apply after setup finished.<br />
For administrator, you may view all the images from webcam recording, please select<br />
Folder Management and click on Disk Explorer to view entire folder inside the disk<br />
including webcam record files.<br />
79 Version 1.0
After click on Disk Explorer, you will see the folder screen appear including all the folders<br />
inside <strong>3.5G</strong> <strong>plus</strong> <strong>WLAN</strong> <strong>Mobile</strong> <strong>Server</strong> <strong>Router</strong>. (Below is the example.)<br />
For getting the images from web camera or any files inside router, you may copy the files<br />
into your own HDDs directly. In addition, all image files are stored in<br />
webcam_recorded_files folder, click to examine the content inside.<br />
3.5.3.3.2.2 Personal Application<br />
All the users under administrator’s setting can view entire webcam recording images from<br />
My Document. Please log in with your own personal account. For viewing your own folder,<br />
please click on “My Document”.<br />
80 Version 1.0
After click on My Document, you will see folder screen appear as the example below.<br />
Notice: If you can’t open the folder, please check with administrator to set up your FTP access right.<br />
3.5.4 Printer <strong>Server</strong><br />
81 Version 1.0
<strong>3.5G</strong> <strong>plus</strong> <strong>WLAN</strong> <strong>Mobile</strong> <strong>Server</strong> <strong>Router</strong> has two USB ports for connecting with printers to<br />
be shared on the local area network. Follow the steps to set up your PC to connect to a<br />
printer server.<br />
1. Enable Printer <strong>Server</strong>: Check enable for applying printer server.<br />
2. Enable Printer Access From WAN: Allow printer can access from WAN side by<br />
checking on enable for this item.<br />
3. Printer Model: The printer model will be shown when the USB printer is plugged.<br />
4. Printer Name: Enter the name you like.<br />
5. Printer Description: Enter your description by demand.<br />
6. Apply & Cancel<br />
Click on Apply button to continue. Click on Cancel button to clear the settings on this<br />
page.<br />
Besides the above is finished, the printer setting on PC also needs to be set as follows.<br />
3.5.4.1 Printer Setting on PC<br />
After enabling Printer <strong>Server</strong> in Quick Setup and Printer <strong>Server</strong> Configuration, please<br />
follow the steps to set the detail LPR settings on your PC. (The example below is for<br />
Windows XP platform.)<br />
82 Version 1.0
【Step 1】<br />
After setting USB printer on <strong>3.5G</strong> <strong>plus</strong> <strong>WLAN</strong> <strong>Mobile</strong> <strong>Server</strong> <strong>Router</strong>’s setup page, please<br />
go to<br />
Start > Printers and Faxes to add a printer.<br />
【Step 2】<br />
Click on Add a printer item.<br />
【Step 3】<br />
Click on Next button.<br />
83 Version 1.0
【Step 4】<br />
Select Local printer attached to this computer, and click Next.<br />
【Step 5】<br />
Select Create a new port and choose Standard TCP/IP Port from drop-down list, then<br />
click Next.<br />
84 Version 1.0
【Step 6】<br />
Click Next.<br />
【Step 7】<br />
Put in <strong>3.5G</strong> <strong>plus</strong> <strong>WLAN</strong> <strong>Mobile</strong> <strong>Server</strong> <strong>Router</strong>’s address: 192.168.1.1 and click Next.<br />
85 Version 1.0
【Step 8】<br />
Select Custom and click on Settings… button to set the detail setting.<br />
【Step 9】<br />
Select LPR and give it the same Queue Name as USB Printer Name has shown, and<br />
mark LPR Byte Counting Enabled. Finally, click on Next button.<br />
86 Version 1.0
It has to be the same with the Printer<br />
Name as shown in section 3.5.4 Printer<br />
<strong>Server</strong> Configuration.<br />
【Step 10】<br />
Click Finish on the next screen after the aforesaid settings, you have to install the printer<br />
driver as well.<br />
【Step 11】<br />
Select the Manufacturer and Printers. If your printer is not listed in the table, please<br />
87 Version 1.0
insert its driver CD and then click on Have Disk… button for installation. Or click on Next<br />
button to finish the setting.<br />
You can name your printer, set it as default printer and share your printer as the next<br />
screen shown, the Printer <strong>Server</strong> setting is getting completed.<br />
【Step 12】<br />
It shows you the printer settings that you have specified, and then click Finish.<br />
88 Version 1.0
3.6 System Management<br />
<strong>3.5G</strong> <strong>plus</strong> <strong>WLAN</strong> <strong>Mobile</strong> <strong>Server</strong> <strong>Router</strong> provides system management including password<br />
changing, firmware upgrade, time setting, user’s account setting and other detail settings.<br />
Following is detail explanation for each.<br />
3.6.1 Reboot<br />
If you had entered the wrong configuration while setting up your router or other utilities,<br />
you can always reboot your <strong>3.5G</strong> <strong>plus</strong> <strong>WLAN</strong> <strong>Mobile</strong> <strong>Server</strong> <strong>Router</strong> by this setting.<br />
It’s necessary to reboot the router if it begins working improperly, please click on Reboot<br />
button to reboot the router.<br />
3.6.2 Change Password<br />
At this section, the administrator can change the system password. Only the password<br />
can be changed, the user name for administrator is admin and can’t be changed.<br />
89 Version 1.0
1. Old Password: Enter the original password you set.<br />
2. New Password: Enter the new password you want to change.<br />
3. New Password (Confirm): Enter the new password again for confirming.<br />
4. Apply & Cancel<br />
Click Apply to continue or Cancel to clear the settings on this page.<br />
3.6.3 Firmware Upgrade<br />
There is certain risk while upgrading firmware. Upgrading firmware is not recommended<br />
unless the significant faulty is found. You can upgrade the firmware of <strong>3.5G</strong> <strong>plus</strong> <strong>WLAN</strong><br />
<strong>Mobile</strong> <strong>Server</strong> <strong>Router</strong> on this page. Make sure the firmware you want to use is on the local<br />
hard drive of the computer. Click Firmware Upgrade to proceed.<br />
90 Version 1.0
1. Update Firmware: Click on Browse… button to search your local hard drive and<br />
locate the firmware to be used for update.<br />
2. OK & Cancel<br />
Click OK to confirm or click Cancel to clear the setting on this page.<br />
Notice: Before using a whole new disk, please format it on your PC first, so that it can be formatted on <strong>3.5G</strong><br />
<strong>plus</strong> <strong>WLAN</strong> <strong>Mobile</strong> <strong>Server</strong> <strong>Router</strong>.<br />
3.6.4 Profile Sasve<br />
To back up the current configuration setting or load the backup data, also you can restore<br />
<strong>3.5G</strong> <strong>plus</strong> <strong>WLAN</strong> <strong>Mobile</strong> <strong>Server</strong> <strong>Router</strong> to default setting by this function.<br />
91 Version 1.0
1. Save Settings To PC: Click on Save button for saving the configuration setting into<br />
assigned location.<br />
2. Load Settings From PC: Click on “Browse…” button for searching the saving<br />
configuration from hard drive, and then click on Load button to load all the settings<br />
into the router.<br />
3. Restore To Factory Default Settings: After you have tried other methods for<br />
troubleshooting your network, you may choose to restore <strong>3.5G</strong> <strong>plus</strong> <strong>WLAN</strong> <strong>Mobile</strong><br />
<strong>Server</strong> <strong>Router</strong> to the factory default settings.<br />
4. Apply<br />
Click on Apply button to save the settings.<br />
3.6.5 Remote Management<br />
Remote Management allows <strong>3.5G</strong> <strong>plus</strong> <strong>WLAN</strong> <strong>Mobile</strong> <strong>Server</strong> <strong>Router</strong> to be configured from<br />
the Internet by a web browser. In general, only a member of your network can browse the<br />
built-in web pages to perform “Administrator” tasks. This feature enables you to perform<br />
the tasks from the remote (Internet) host.<br />
92 Version 1.0
1. HTTP Connection Port: The port number used to access the router.<br />
2. Remote Management: You can allow any Internet IP address to access the router, or<br />
set up deny rule according to IP setting.<br />
3. IP Address: Internet IP address of the computer that has access to the router.<br />
4. Description: Enter the description for the remote configuration.<br />
5. Add, Apply & Cancel<br />
Click on Add button to add the remote list, click on Apply button to activate, or click on<br />
Cancel button to clear the settings on this page.<br />
6. Remote Management IP List<br />
Display, edit or delete IDs, description and IP address of allowed remote list.<br />
93 Version 1.0
3.6.6 Time<br />
The System time is the time used by <strong>3.5G</strong> <strong>plus</strong> <strong>WLAN</strong> <strong>Mobile</strong> <strong>Server</strong> <strong>Router</strong> for<br />
scheduling services. You can manually set the time or connect to a NTP (Network Time<br />
Protocol) server. If a NTP server is set, you will only need to set the time zone. If you<br />
manually set the time, you may also set Daylight Saving dates and the system time will<br />
automatically adjust on those dates.<br />
1. Local Time: The default time within.<br />
2. Default NTP <strong>Server</strong>: Select the NTP <strong>Server</strong> from the drop-down list.<br />
3. Time Zone: Select your time zone location from the drop-down list.<br />
4. Daylight saving time: If you are in daylight saving time area, please enable this item.<br />
5. Set the Time: Select this item to set up time by manual, select the date and time from<br />
each drop-down list.<br />
6. Set Time: Select User Setup and click Set Time to set local PC time on router.<br />
94 Version 1.0
7. Apply & Cancel<br />
Click on Apply button to activate, or Cancel button to clear the settings.<br />
3.6.7 UPnP Setting<br />
UPnP (Univsersal Plug and Play) allows users to connect their UPnP-enabled broadband<br />
router, printer server and other devices right to the network with zero-configuration,<br />
meaning easier setup for installing the device on the network. The automatic discovery<br />
feature enables the device to obtain an IP address, present and describe itself to other<br />
devices and PCs on the network without having to install drivers, but to configure and use<br />
those devices.<br />
1. Enable/Disable UPnP: Select to enable or disable this service.<br />
2. Apply, Cancel<br />
Click on Apply button to activate this function or Cancel button to clear the setting.<br />
3.6.8 User Account Management<br />
Personal users can use each individual application such as My Status, My Webcam and<br />
My Document. This section is to set the user’s right. Also, all the users’ rights will be<br />
showed in User Account List and allowed to edit or delete by clicking the linking text.<br />
95 Version 1.0
1. Max Login User: Set up the maximum users to log in at the same time, select the<br />
number from drop-down list. If you want to change the maximum login users only<br />
without changing user’s information, please click on OK button after select login user’s<br />
number.<br />
2. User Name: Create the user name in this blank.<br />
96 Version 1.0
3. Password: Set up the user’s password.<br />
4. User Right: Check to allow set-user accessing Samba folder, monitoring from<br />
webcam or using FTP server.<br />
5. Activated: Click On to allow the user’s right to be applied immediately.<br />
6. Add, Apply & Cancel<br />
After finishing the above, click Add button to create user account. Click on Apply button<br />
to add set-user into the account list or Cancel button to clear the settings on this page.<br />
7. User Account List<br />
The list shows all users’ names, passwords, status and rights.<br />
3.6.9 Folder Management<br />
Easy to check all the USB storage devices connected to <strong>3.5G</strong> <strong>plus</strong> <strong>WLAN</strong> <strong>Mobile</strong> <strong>Server</strong><br />
<strong>Router</strong>, view the entire data folder inside each storage devices, and you can manage the<br />
disk formatting / partition via clicking the button on this page.<br />
1. Select the USB Disk and click OK for refreshing all disks before you perform disk<br />
partition, and the Unplug button appears afterwards.<br />
2. To partition/format the disk, please select the disk and click on Format button.<br />
3. Moreover, if you want to view the data inside the disk, please go to 3.2.10 FTP Sever<br />
Setup to enable FTP server and then click on Disk Explorer to view all the folders<br />
inside the device.<br />
97 Version 1.0
Notice: You have to click on Unplug button before removing the USB device from <strong>3.5G</strong> <strong>plus</strong> <strong>WLAN</strong> <strong>Mobile</strong><br />
<strong>Server</strong> <strong>Router</strong>.<br />
3.6.10 Email Alert<br />
To monitor router activity, you can run on a local PC or a remote one elsewhere on the<br />
Internet. And <strong>3.5G</strong> <strong>plus</strong> <strong>WLAN</strong> <strong>Mobile</strong> <strong>Server</strong> <strong>Router</strong> provides the email alert facility so that<br />
the log messages can be packed as an e-mail for someone who wants to receive these<br />
messages by scheduled time. In the following, here explains how to set up the email alert<br />
function.<br />
98 Version 1.0
1. Email Alert: Check the enable box to activate the email alert service.<br />
2. SMTP <strong>Server</strong>: Specify an IP address of the SMTP server which can send mails from<br />
your <strong>3.5G</strong> <strong>plus</strong> <strong>WLAN</strong> <strong>Mobile</strong> <strong>Server</strong> <strong>Router</strong> to the recipients’ mailboxes directly.<br />
3. Your Mail (from): Enter the email address indicated the sending location.<br />
4. SMTP Auth: If the email alert needs to be sent via SMTP authentication, please check<br />
this item, and then enter the required account and password.<br />
5. Account: Enter the email account from which you want to send the alert.<br />
6. Password: Enter the email account password to validate.<br />
7. Email Address (To): Enter the email address where to receive the alert.<br />
8. Schedule: Arrange to send the alert when event happens or by regular time.<br />
9. Add, Apply & Cancel<br />
After finishing the above, click Add to set up the rule into email alert list. Then, click<br />
Apply to save or Cancel to clear the settings on this page.<br />
10. Email Alert List<br />
Display, edit or delete a list of relative information in regarding to the above mentioned.<br />
99 Version 1.0
11. Refresh & Delete<br />
Click on Refresh to renew the login data and other system status information, or click<br />
on Delete to clear these logs.<br />
3.7 Log & Status<br />
<strong>3.5G</strong> <strong>plus</strong> <strong>WLAN</strong> <strong>Mobile</strong> <strong>Server</strong> <strong>Router</strong> provides the log list, connection status and user’s<br />
account.<br />
3.7.1 Network Configuration<br />
Network Configuration shows all connection status of LAN, WAN, Wireless and plugged<br />
USB devices.<br />
Each block shows configuration status, you may click Refresh to update the screen list. If<br />
WAN connection is in dynamic, click Release to free the used IP or Renew to get a new<br />
one.<br />
100 Version 1.0
3.7.2 User Account List<br />
This section shows all users’ information.<br />
Check the user name, status and opened directory/file on screen.<br />
101 Version 1.0
3.7.3 Event Log<br />
<strong>3.5G</strong> <strong>plus</strong> <strong>WLAN</strong> <strong>Mobile</strong> <strong>Server</strong> <strong>Router</strong> provides system logs for review.<br />
The system status log shows logging time, type and detail information as below. Click<br />
Refresh to update.<br />
3.8 Logout<br />
Click Logout on the bottom menu to exit and go back to GUI login home page as<br />
illustrated on page 23.<br />
3.9 Personal Configuration<br />
Open a Microsoft Internet Explorer, Mozilla Firefox or Apple Safari browser, and<br />
enter http://192.168.1.1 (Default Gateway) into browser’s blank field.<br />
102 Version 1.0
Notice: If the homepage doesn’t appear, please check whether the TCP/IP configuration is obtaining IP<br />
address automatically or not. If you don’t know how to do this, please refer to 1.5 Get your IP<br />
Automatically & Manually.<br />
Homepage<br />
Click Personal Panel and log in with your own user account. (If you can’t access your<br />
personal account, please check with administrator for validation.)<br />
Personal Panel<br />
Screen below shows every login user’s access rights, including Anonymous, My<br />
103 Version 1.0
Document, My Webcam and My Status.<br />
<strong>3.5G</strong> <strong>plus</strong> <strong>WLAN</strong> <strong>Mobile</strong> <strong>Server</strong> <strong>Router</strong> provides personal control panel for every login<br />
user’s entrance to each application screen, please click on each icon for various<br />
applications. The icons appearing in gray color can’t be clicked if the user doesn’t have<br />
the right to use that function; even though there is none to be set, the user can still apply<br />
My Status.<br />
Notice: The available access rights are depended on administrator’s authorization in 3.6.8 User Account<br />
Management.<br />
3.9.1 Anonymous<br />
“Anonymous” shows all the files stored in USB HDD by<br />
administrator and allows any login user to check the<br />
folder and copy files to the HD via Internet. The following<br />
is the detail description.<br />
Click Anonymous to access the shared folder created by administrator and freely<br />
download those files underneath to personal hard drives.<br />
104 Version 1.0
Notice: If you can’t access Anonymous folder, please check with administrator to enable your FTP server<br />
rights. Files under this directory are only for downloading, but not for uploading, deleting, or edting.<br />
3.9.2 My Document<br />
“My Document” shows all the files in USB HDD under each<br />
user’s account. Login user can also create the folder or copy<br />
files into the HD directly via Internet. The illustrated below is<br />
the detail description of folder inside.<br />
Click My Document and opens another web page to show all the files in your own folder.<br />
Notice: If you can’t access this folder, please check with administrator to enable your FTP server rights.<br />
105 Version 1.0
3.9.3 My Webcam<br />
“My Webcam” application allows you to view the real time<br />
image when the web camera is on.<br />
Click My Webcam, and the system pops up a new window to display real time image as the<br />
example below shows.<br />
Notice: If you can’t view the real-time image, the cause may be the setting of Internet Security and needs to be<br />
adjusted, or to install the Java program.<br />
3.9.4 My Status<br />
“My Status” shows all the login information for your<br />
personal account.<br />
Click Main Menu on the left to go back main control panel and other applications.<br />
106 Version 1.0
Notice: All above usage information is based on administrator’s setup.<br />
3.10 Site Map<br />
<strong>3.5G</strong> <strong>plus</strong> <strong>WLAN</strong> <strong>Mobile</strong> <strong>Server</strong> <strong>Router</strong> provides site map clicking for each icon to carry out<br />
the easy setup from the home page.<br />
107 Version 1.0
Chapter 4 AP Mode<br />
4.1 Administrator Quick Setup Instruction<br />
Make sure to switch the mode into AP Mode, then open a Microsoft Internet Explorer,<br />
Mozilla Firefox or Apple Safari browser, and enter http://192.168.1.254 (Default Gateway)<br />
into browser’s blank field.<br />
Notice: If the homepage doesn’t appear, please check whether the TCP/IP configuration is obtaining IP<br />
address automatically or not. If you don’t know how to do this, please refer to section 1.5 Get your<br />
IP Automatically & Manually.<br />
Homepage<br />
Please click Administrator to log in setup menu.<br />
108 Version 1.0
User Name and Password<br />
The default values for User Name and Password are admin (all in lowercase letters). Click<br />
Login to enter.<br />
Notice: Only the password can be changed, please read setup 4.2.4 Password Setup or 4.5.2 Change<br />
Password. In order to protect your own settings, it’s strongly recommended to change the password<br />
before you finish the <strong>Router</strong> Basic Setup.<br />
4.2 Quick Setup<br />
Typical Configuration Manager Page consists of two separate frames. The left frame<br />
contains all the means available for device configuration. Menus are indicated by file icons,<br />
and related menus are grouped into categories, such as LAN, WAN and etc., and<br />
indicated by folder icon, depending on whether the group of menus are expanded or not.<br />
You can click on any of these to display a specific configuration page. And the right frame<br />
is designed as a site map.<br />
109 Version 1.0
The above diagram shows all PCs and devices connected to your <strong>3.5G</strong> <strong>plus</strong> <strong>WLAN</strong><br />
<strong>Mobile</strong> <strong>Server</strong> <strong>Router</strong> and their status. Click Quick Setup on the left of the main menu.<br />
Then you’ll see the full functionality selection screen appears and detailed settings for<br />
each item, including “Basic” and “Application” two parts.<br />
Note: The device models named of USB Device, Webcam and Printer will be shown under the picture of each<br />
device if the product supports.<br />
Quick Setup full function table list<br />
• Click Basic, you see 4 major items set in Quick Setup Selection. Please click Next<br />
button after confirmed.<br />
Initiated as default<br />
• Click Application, you see 6 major items set here, including USB Disk Management<br />
Setup, User Account Management Setup, FTP <strong>Server</strong> Setup, Printer <strong>Server</strong> Setup, Web<br />
Camera Setup and Samba <strong>Server</strong> Setup. For the checked ones are recommended, all<br />
can be selected upon your demands.<br />
Initiated as default<br />
Quick Setup Instruction<br />
110 Version 1.0
• LAN Setup: Setup the IP Address for LAN and Group. If you are using the <strong>Router</strong><br />
with multiple PCs on your LAN, you must connect the LAN via the Ethernet ports on<br />
the built-in Ethernet switch. You should also assign a unique IP address to each<br />
device residing on your LAN.<br />
• Wireless Setup: Define the Wireless Mode, ESSID, TxRate, Channel and other<br />
wireless settings.<br />
• Time <strong>Server</strong> Setup: Set time by NTP server or user define.<br />
• Password Setup: To change administrator’s password.<br />
• USB Disk Management Setup: View the entire data folder inside each storage<br />
devices, also can do formatting and disk partition.<br />
• User Account Management Setup: Set maximum user number, account and right for<br />
using personal services of your <strong>3.5G</strong> <strong>plus</strong> <strong>WLAN</strong> <strong>Mobile</strong> <strong>Server</strong> <strong>Router</strong> for each user.<br />
• FTP <strong>Server</strong> Setup: To enable FTP server and set controlling rules.<br />
• Printer <strong>Server</strong> Setup: To enable /disable server.<br />
• Web Camera Setup: To enable Web camera function.<br />
• Samba <strong>Server</strong> Setup: To enable Samba server for shared documents and printer.<br />
4.2.1 LAN Setup<br />
If you are using <strong>3.5G</strong> <strong>plus</strong> <strong>WLAN</strong> <strong>Mobile</strong> <strong>Server</strong> <strong>Router</strong> with multiple PCs on your LAN,<br />
you must connect the LAN via the Ethernet ports on the built-in Ethernet switch. You must<br />
assign a unique IP address to each device residing on your LAN. The LAN IP address<br />
identifies the router as a node on your network; that is, its IP address must be in the same<br />
subnet as the PCs on your LAN. The default LAN IP for the Internet Security <strong>Router</strong> is<br />
192.168.1.254.<br />
The default IP address<br />
111 Version 1.0
For Gateway IP Address, the IP address 192.168.1.xxx (xxx can be any number between<br />
1 and 253 that is not used by another device.) Please don’t change the default LAN IP<br />
settings at this section until after you have completed the rest of the configurations and<br />
confirm that your Internet connection is working. And the DHCP <strong>Server</strong> will automatically<br />
allocate an unused IP address from the IP address pool to the requesting computer; which<br />
means you must specify the starting and ending address of the IP address pool, and the<br />
DHCP <strong>Router</strong>’s address must be identical to the LAN IP’s IP address.<br />
Click on Next button to proceed.<br />
4.2.2 Wireless Setup<br />
There are 2 ways of hardware connection via Wired upper link and Wireless upper link.<br />
First step is to name your ESSID, and the default value is Wireless_<strong>Mobile</strong>_<strong>Router</strong>.<br />
Please follow the illustrations below to proceed.<br />
Select AP/Bridge from the drop-down list.<br />
You can use the default ESSID<br />
unless more than one AP/<strong>Router</strong><br />
is deployed in the same area.<br />
And it will show while searching<br />
the wireless signal.<br />
For selecting AP/Bridge wireless connection, the Channel 6 is the default channel; all<br />
devices on the network must be set to the same channel to communication on the network.<br />
The default TxPreamble setting is Long (if you use high traffic networks should use the<br />
112 Version 1.0
shorter preamble type). Authentication is the security function to prevent the connection<br />
requests from unauthorized wireless clients. As the Encryption Type, select WEP or WPA<br />
can protect your data from eavesdroppers, if you do not need the encryption, select<br />
“None” to skip the following setting.<br />
After checking each above and choose the suitable item by demand, click Next to<br />
proceed.<br />
Notice: If uses AP/Bridge to wirelessly connect to the router, here suggests disabling the DHCP in LAN Setup.<br />
Please refer to 4.2.1 LAN Setup.<br />
Select WDS from drop-down list.<br />
6 is the default channel. Both 2<br />
APs must share the same channel.<br />
(The wireless adapters will<br />
automatically scan and match the<br />
wireless setting.)<br />
Optional.<br />
The MAC address should be<br />
associated with another<br />
wireless device setting.<br />
113 Version 1.0
Moreover, WDS (Wireless Distribution System) is a Wireless Access Point mode that<br />
enables wireless bridging in which WDS APs communicate with each other only (without<br />
allowing for wireless clients or stations to access them), and/or wireless repeating in which<br />
APs communicate both with each other and with wireless stations (at the expense of half<br />
the throughput), please input the other party’s MAC address into the WDS column.<br />
4.2.3 Time <strong>Server</strong> Setup<br />
<strong>3.5G</strong> <strong>plus</strong> <strong>WLAN</strong> <strong>Mobile</strong> <strong>Server</strong> <strong>Router</strong> shows local date and time; however, the time still<br />
can be changed manually by selecting from the drop-down list, which won’t effect the<br />
original time setting on your PC.<br />
After completed, click Next to proceed.<br />
4.2.4 Password Setup<br />
Here suggests changing the password for logging into the configuration manager in terms<br />
of security reason.<br />
The password may consist of A-Z, a-z, 0-9,<br />
underscores, and a single dot (.)<br />
For changing password, please fills the password information into blank fields, and then<br />
click Next.<br />
Notice 1:<br />
Notice 2:<br />
Only the password can be changed, the user name for administrator is “admin” and not to be changed.<br />
If you forget administrator’s password, please reset <strong>3.5G</strong> <strong>plus</strong> <strong>WLAN</strong> <strong>Mobile</strong> <strong>Server</strong> <strong>Router</strong> to default<br />
setting by pressing the “Reset” button on the rear panel over 5 seconds. And the password will return to<br />
“admin”.<br />
114 Version 1.0
4.2.5 USB Disk Management Setup<br />
Easy to check all the USB storage devices connected to your <strong>3.5G</strong> <strong>plus</strong> <strong>WLAN</strong> <strong>Mobile</strong><br />
<strong>Server</strong> <strong>Router</strong>, view the entire data folder inside each storage device, and you can<br />
manage the disk formatting/partitioning via click on the button of this page.<br />
Select the USB Disk and click OK for refreshing all disks before you do disk partition, and<br />
the Unplug button will appear. To partition/format the disk, please select the disk and click<br />
Format. Moreover, if you want to view the data inside the disk, please go to 4.2.7 FTP<br />
Sever Setup to enable FTP server and then click Disk Explorer to view all folders inside<br />
the device.<br />
Notice: You have to click on Unplug button before removing USB devices from <strong>3.5G</strong> <strong>plus</strong> <strong>WLAN</strong> <strong>Mobile</strong> <strong>Server</strong><br />
<strong>Router</strong>.<br />
4.2.6 User Account Management Setup<br />
Personal users can use each individual application such as My Status, My Webcam and<br />
My Document. This section is to set the user’s right. Also, all the users’ rights will be<br />
showed in User Account List and can be edited or deleted by clicking the meaning text.<br />
115 Version 1.0
Input the User’s name and password,<br />
and then click on “Add”, and you will<br />
see the user information appear on the<br />
“User Account List”<br />
Set each user’s right and space arrangement, and then click on Add button for saving<br />
user’s account. Click on Next button after finished.<br />
4.2.7 FTP <strong>Server</strong> Setup<br />
<strong>3.5G</strong> <strong>plus</strong> <strong>WLAN</strong> <strong>Mobile</strong> <strong>Server</strong> <strong>Router</strong> can be the FTP <strong>Server</strong> providing users to transmit<br />
files, also for the guest to download the files from assigned website. Moreover, by<br />
connecting USB HDD, USB Flash to the router, user can easily set up a FTP <strong>Server</strong> to<br />
share or download files for local or remote users.<br />
If the USB device isn’t connected<br />
first, you can’t enable FTP <strong>Server</strong>.<br />
(Not even click on “Enable”)<br />
Set the FTP <strong>Server</strong> and related setting. Disable the function as demand, and click Next to<br />
continue.<br />
116 Version 1.0
4.2.8 Printer <strong>Server</strong> Setup<br />
<strong>3.5G</strong> <strong>plus</strong> <strong>WLAN</strong> <strong>Mobile</strong> <strong>Server</strong> <strong>Router</strong> supports LPR-protocol, as well as NetBIOS, and is<br />
convenient for sharing printer. In other words, it is an Internet access solution for your<br />
LAN/WAN, which provides you the shared web surfing, and supports USB interface printer.<br />
Any users in the same subnet of <strong>3.5G</strong> <strong>plus</strong> <strong>WLAN</strong> <strong>Mobile</strong> <strong>Server</strong> <strong>Router</strong> can print their<br />
document via the network printers.<br />
If the printer isn’t connected,<br />
you can’t choose “Enable”.<br />
Enable the printer and click on Next button to next setup.<br />
Notice: After above Printer <strong>Server</strong> in Quick Setup finished, the related printing settings on <strong>3.5G</strong> <strong>plus</strong> <strong>WLAN</strong><br />
<strong>Mobile</strong> <strong>Server</strong> <strong>Router</strong> and PC have to be set up, too. Please refer to 4.4.4 Printer <strong>Server</strong> to set the<br />
details.<br />
4.2.9 Web Camera <strong>Server</strong> Setup<br />
If you plan to use <strong>3.5G</strong> <strong>plus</strong> <strong>WLAN</strong> <strong>Mobile</strong> <strong>Server</strong> <strong>Router</strong> as a Web Camera site, just<br />
connect a supported USB Web Camera to its USB port. Then check Enable for both<br />
Enable webcam server and Access from WAN to activate.<br />
Click on Next button to next step.<br />
Notice: Before webcam server enabled, please make sure the webcam has connected to the product; otherwise,<br />
the “Enable” selection can’t be checked.<br />
4.2.10 Samba <strong>Server</strong> Setup<br />
<strong>3.5G</strong> <strong>plus</strong> <strong>WLAN</strong> <strong>Mobile</strong> <strong>Server</strong> <strong>Router</strong> supports NetBIOS protocol, providing network<br />
neighbors to share file folders or printer.<br />
117 Version 1.0
Click on Next button to next setup.<br />
4.2.11 Quick Setup Finish<br />
The Quick Setup has been completed successfully when you see this screen.<br />
To apply your new settings, please click on Finish button to reboot system automatically<br />
and go to the product’s diagram homepage. You may connect to Internet via wired or<br />
wireless at this moment according to above settings.<br />
4.3 IP Configuration<br />
This function allows you to add routing rules into <strong>3.5G</strong> <strong>plus</strong> <strong>WLAN</strong> <strong>Mobile</strong> <strong>Server</strong> <strong>Router</strong>. It<br />
doesn’t provide functions of WAN and DDNS in AP mode, though.<br />
4.3.1 LAN<br />
Use this page to set up the local IP address and subnet mask for your router. Please select<br />
LAN under IP Config directory and follow the instructions below to enter the LAN setting<br />
page to configure the settings you want.<br />
118 Version 1.0
1. IP Address<br />
The default value of LAN IP address is 192.168.1.254 for this router.<br />
2. IP Netmask<br />
Fill in Subnet Mask, normally it is 255.255.255.0.<br />
3. IP Gateway<br />
Fill in with the default gateway address. If you don’t know, please check your ISP.<br />
4. DHCP<br />
Enable or disable DHCP services. DHCP server will automatically allocate an unused IP<br />
address from the IP address pool to the requesting computer if enabled.<br />
5. Start IP<br />
This field specifies the first address in the pool to be assigned by DHCP server in your<br />
local network. The default setting is 2.<br />
6. End IP<br />
This field specifies the last address in the pool to be assigned by the DHCP server in<br />
your local network. The default setting is 253.<br />
119 Version 1.0
7. Advanced<br />
Enable the advance setting and then set up the <strong>Router</strong>, DNS and WINS value.<br />
8. <strong>Router</strong><br />
This field indicates the IP address of DNS to provide to clients that request IP Address<br />
from DHCP <strong>Server</strong>, the default setting is the same with LAN IP address.<br />
9. DNS<br />
This field indicates the IP address of DNS to provide to clients that request IP Address<br />
from DHCP <strong>Server</strong>, the default setting is the same with LAN IP address.<br />
10. WINS<br />
Windows Internet Naming Service manages interaction of each PC on the Internet. If<br />
you use a WINS server, enter IP Address of server here.<br />
11. Apply & Cancel<br />
Click Apply to continue or Cancel to clear the settings on this page.<br />
12. DHCP Clients List<br />
The list shows all clients’ IP and MAC addresses.<br />
4.3.2 Wireless<br />
<strong>3.5G</strong> <strong>plus</strong> <strong>WLAN</strong> <strong>Mobile</strong> <strong>Server</strong> <strong>Router</strong> enables fastest 54 Mbps IEEE802.11g wireless<br />
transmissions and keeps compatibility with existing IEEE 802.11b devices. <strong>3.5G</strong> <strong>plus</strong> <strong>WLAN</strong><br />
<strong>Mobile</strong> <strong>Server</strong> <strong>Router</strong> complies with IEEE 802.11b standard. Please select Wireless under<br />
the main menu. Follow the instructions to configure the Wireless settings.<br />
120 Version 1.0
1. Wireless<br />
Select AP/Bridge or WDS to allow or disallow the wireless operation.<br />
2. Wireless Mode<br />
This field indicates the 802.11g interface mode. “802.11G” prevents the 802.11b clients<br />
from accessing the router. “802.11B/G” allows both 802.11b and 802.11g clients to<br />
access the router. “802.11B” will enable the network as an 802.11b wireless network. By<br />
default, the mode is “802.11B/G”.<br />
3. ESSID<br />
You can use the default ESSID and radio channel unless more than one <strong>3.5G</strong> <strong>plus</strong><br />
<strong>WLAN</strong> <strong>Mobile</strong> <strong>Server</strong> <strong>Router</strong> or access point is deployed in the same area. Under this<br />
situation, it is advised that you should use a different ESSID and radio channel for each<br />
of <strong>3.5G</strong> <strong>plus</strong> <strong>WLAN</strong> <strong>Mobile</strong> <strong>Server</strong> <strong>Router</strong> or access point in order to distinguish from<br />
each other. All of <strong>3.5G</strong> <strong>plus</strong> <strong>WLAN</strong> <strong>Mobile</strong> <strong>Server</strong> <strong>Router</strong>s and your wireless LAN cards<br />
must have the same ESSID to allow a wireless mobile client roaming inbetween. By<br />
default, the ESSID is set to Wireless_<strong>Mobile</strong>_<strong>Router</strong>.<br />
4. TxRate<br />
Select the transmission rate for the network. The default setting is Auto.<br />
5. Channel<br />
IEEE 802.11g and 802.11b devices are direct sequence spread spectrum devices that<br />
spread a radio signal over a range of frequencies. The range of frequencies used by a<br />
121 Version 1.0
direct sequence device is called Channel.<br />
The 802.11g and 802.11b specification supports up to 14 overlapping Channels for radio<br />
communication. But only 11 Channels are supported in the United States and therefore<br />
built-in on <strong>3.5G</strong> <strong>plus</strong> <strong>WLAN</strong> <strong>Mobile</strong> <strong>Server</strong> <strong>Router</strong>. To minimize interference, configure<br />
each of <strong>3.5G</strong> <strong>plus</strong> <strong>WLAN</strong> <strong>Mobile</strong> <strong>Server</strong> <strong>Router</strong> to use Non-overlapping channels.<br />
Non-overlapping channels have 25 MHz separation beginning at the first allowed<br />
channel for the country (for the US and most of Europe, channel 1, 6 & 11 are used.)<br />
Make sure that <strong>3.5G</strong> <strong>plus</strong> <strong>WLAN</strong> <strong>Mobile</strong> <strong>Server</strong> <strong>Router</strong> sharing the same Channel (or<br />
Channels close in number) is as far away from each other as possible, based on the<br />
results of your site survey of the facility. You can find the site survey utility in <strong>3.5G</strong> <strong>plus</strong><br />
<strong>WLAN</strong> <strong>Mobile</strong> <strong>Server</strong> <strong>Router</strong>’s setup CD. By default, the channel is 6.<br />
6. Hide SSID<br />
This term is used to increase the security level. Check it to hide SSID information<br />
against the wireless clients that are sniffing radio. By default, this option is inactive.<br />
7. TxPreamble<br />
The default TxPreamble setting is Long (if you use high traffic networks should use the<br />
shorter preamble type)<br />
8. Beacon Interval<br />
Beacons are packets sent by an access point to synchronize a wireless network. Specify<br />
a beacon interval value. Default (100) is recommended.<br />
9. RTS Threshold<br />
This value should remain at its default setting of 2346. If you encounter inconsistent data<br />
flow, only minor modifications to the value range between 256 and 2346 are<br />
recommended<br />
10. Authentication Mode<br />
Four authentication methods are supported: Open and Shared. Select Open, your<br />
wireless network would be intruded by anonymous. Not only your network bandwidth<br />
would be shared; but also transmitting data might be intercepted. Select Shared<br />
function and it can be taken effect.<br />
11. Encrypt Type - WEP<br />
There are two types of encrypt type can be selected, including WEP and WPA.<br />
WEP Encryption: Enabling WEP can protect your data from eavesdroppers. If you do<br />
not need this feature, select “None” to skip the following setting. <strong>3.5G</strong> <strong>plus</strong> <strong>WLAN</strong> <strong>Mobile</strong><br />
<strong>Server</strong> <strong>Router</strong> supports both 64-bit and 128-bit encryption using the Wired Equivalent<br />
Privacy (WEP) algorithm. Select the type of encryption you want to use (64 or 128 bit)<br />
and configure one to four WEP Keys. The “1280bit” method is more secure than the<br />
“64-bit”.<br />
Key Type: For 64bits WEP key, either 5 ASCII characters or 10 hexadecimal digitals<br />
122 Version 1.0
leading by 0x can be entered. For 128bits WEP key, either 13 ASCII characters or 26<br />
hexadecimal digits leading by 0x can be entered.<br />
Note: 128 bits WEP is most secure, but has more encryption/decryption overhead. Note that all wireless<br />
devices must support the same WEP encryption bit size and have the same key. Four keys can be<br />
entered here, but only one key can be selected at a time. The keys can be entered in ASCII or<br />
Hexadecimal. Select the item from drop-down list you wish to use.<br />
Pass phrase: Automatically generate four WEP keys. A WEP key is either 10 or 26<br />
hexadecimal digits (0~9, a~f, and A~F) based on whether you select 64 bit or 128 bit in<br />
the WEP drop-down menu. Type a combination of up to 64 letters, numbers, or symbols<br />
in the blank, <strong>3.5G</strong> <strong>plus</strong> <strong>WLAN</strong> <strong>Mobile</strong> <strong>Server</strong> <strong>Router</strong> uses an algorithm to generate four<br />
WEP keys for encryption. If you want to type in the keys manually, leave this field blank.<br />
Note: This function eases users from having to remember their passwords. But this isn’t as secure as<br />
manual assignment.<br />
WEP Key: At most four keys can be set. A WEP key is either 10 or 26 hexadecimal<br />
digits (0~9, a~f, and A~F) based on whether you select 64 bit or 128 bit in the WEP<br />
drop-down list. <strong>3.5G</strong> <strong>plus</strong> <strong>WLAN</strong> <strong>Mobile</strong> <strong>Server</strong> <strong>Router</strong> must have at least the same<br />
default key.<br />
12. Encrypt Type - WPA<br />
The WPA encrypts each frame transmitted from the radio using the pre-shared key (PSK)<br />
which entered from this panel or a key got dynamically through 802.1x.<br />
WPA-PSK (TKSP): Allow the access from WPA clients simultaneously and the<br />
encryption keys are given from PSK respectively.<br />
WPA Rekey Timer: Allows for the session keys to be refreshed over time,<br />
minimizing the amount of data that is encrypted with the same session key.<br />
ASKII: The 8~63 ASCII characters can be entered, for example,<br />
“0123456789ABCD….”<br />
123 Version 1.0
Radius with 802.x: Check this circle to enable Radius client function.<br />
WPA Rekey Timer: Allows for the session keys to be refreshed over time,<br />
minimizing the amount of data that is encrypted with the same session key.<br />
RADIUS <strong>Server</strong> IP: The IP address of RADIUS server.<br />
RADIUS <strong>Server</strong> Port: The UDP port number that the RADIUS server is listed.<br />
The default value is 1812.<br />
Shared Secret: The RADIUS server and client share a secret that is used to<br />
authenticate the messages sent between them. You must configure both sides<br />
to sue the same shared secret.<br />
13. Apply & Cancel<br />
Click Apply to save or Cancel to clear the settings. The functional button, Cancel, can<br />
take effect after clicking on Apply button.<br />
4.4 <strong>Server</strong><br />
<strong>3.5G</strong> <strong>plus</strong> <strong>WLAN</strong> <strong>Mobile</strong> <strong>Server</strong> <strong>Router</strong> provides 4 server setups, including FTP <strong>Server</strong>,<br />
Web Camera <strong>Server</strong>, Printer <strong>Server</strong> and Samba <strong>Server</strong>.<br />
124 Version 1.0
4.4.1 Samba <strong>Server</strong><br />
By supporting NetBIOS Protocol, <strong>3.5G</strong> <strong>plus</strong> <strong>WLAN</strong> <strong>Mobile</strong> <strong>Server</strong> <strong>Router</strong> provides LAN<br />
users to share files or printer via My Network Places. Click Samba <strong>Server</strong> to proceed.<br />
1. Enable Samba <strong>Server</strong><br />
Check to Enable/Disable while connecting.<br />
2. Workgroup Name<br />
Fill in the name, and the default is Workgroup.<br />
3. <strong>Server</strong> Name<br />
Name your server.<br />
4. <strong>Server</strong> Description<br />
Describe your server by demand, and the default is Wireless <strong>Mobile</strong> <strong>Router</strong>.<br />
5. Printer Model<br />
Printer model appears when connected.<br />
6. Apply & Cancel<br />
Click Apply to save or Cancel to clear settings.<br />
4.4.1.1 How to Access File Sharing Directory<br />
125 Version 1.0
Please follow the steps below.<br />
【Step 1】<br />
Go to Start and click My Computer.<br />
【Step 2】<br />
Fill in blank address field with \\192.168.1.254.<br />
【Step 3】<br />
A window pops up asking for user name and password. If log in as an administrator,<br />
please enter admin for both fields; otherwise, fill in with personal account and password.<br />
Click OK after finished.<br />
126 Version 1.0
【Step 4】<br />
As the window below appears, login user has entered file sharing directory, and the<br />
folders underneath are all available for sharing locally.<br />
Note: Only 2 icons show up at most.<br />
1. If a USB flash drive/hard disk is connected and enabled, the samba folder shows up.<br />
2. If a USB printer is connected and enabled, the printer icon shows up.<br />
4.4.2 FTP <strong>Server</strong><br />
By directly connecting USB storage devices to any USB port, FTP server can be created<br />
with simple configuration. FTP <strong>Server</strong> utility allows both local and remote users to upload<br />
or download files, pictures or MP3 music from the same storage device in most easy and<br />
timely fashion. It is also cost effective where users do not need to purchase a dedicated<br />
PC to set up a 24 hours FTP service.<br />
Before configuring FTP <strong>Server</strong>, please make sure the storage device is properly plugged<br />
into any USB port on the router and make sure this USB storage device is detected by the<br />
router.<br />
127 Version 1.0
Only when USB storage device<br />
is plugged, FTP <strong>Server</strong> can be<br />
checked as enabled.<br />
1. Enable FTP <strong>Server</strong>: The Enable for FTP <strong>Server</strong> only can be selected when USB<br />
storage device plugged.<br />
2. Enable Anonymous to Login: Allow anonymous to login after check on enable.<br />
3. Enable FTP Access from WAN: Allow FTP access from WAN side by checking on<br />
Enable for this item.<br />
4. FTP <strong>Server</strong> Port: Define the FTP command transfer service port. If you want to<br />
change this port number, also remember to change the service port setting of your<br />
FTP client.<br />
5. Idle connection Time-Out: When a specific time value is added, FTP <strong>Server</strong> will be<br />
de-activated if it has no activity within the time limit.<br />
6. Apply & Cancel<br />
Click Apply to continue or Cancel to clear the settings on this page.<br />
7. User Account List<br />
The list shows all user names, status and opened directory/files.<br />
Notice: FTP server is compatible with FAT32 or EXT3 format USB storage device. In case you need to format<br />
your USB storage device. Please always make sure the device is formatted with FAT32 or EXT3<br />
standard.<br />
4.4.3 Web Camera <strong>Server</strong><br />
<strong>3.5G</strong> <strong>plus</strong> <strong>WLAN</strong> <strong>Mobile</strong> <strong>Server</strong> <strong>Router</strong> has built-in Web Cam <strong>Server</strong>. By connecting web<br />
camera to the router, it allows user to monitor their home or office from remote locations.<br />
Motion Detection function has also been built-in and allows user to use webcam to detect<br />
128 Version 1.0
any movements in their houses or offices and send email alert with captured images.<br />
4.4.3.1 Web Camera <strong>Server</strong> Basic Setup<br />
1. Enable Webcam <strong>Server</strong>: Allow using this function by checking on enable.<br />
2. Access from WAN: Allow webcam can access from WAN side by checking on enable<br />
for this item.<br />
3. Image format: The default is 320 x 240 pixels.<br />
4. Preview: Click on this button, you can preview the image from webcam.<br />
5. Record Setting: Please see the detail advance setting in 4.4.3.2 Web Camera<br />
<strong>Server</strong> Advanced Configuration.<br />
6. Apply & Cancel<br />
Click Apply to continue or Cancel to clear the settings on this page.<br />
4.4.3.2 Web Camera <strong>Server</strong> Advanced Configuration<br />
Click Record Setting, and the screen below appears.<br />
1. Enable save image: If you want to save the image from webcam, please check on<br />
enable.<br />
2. Save image interval: For saving image, you can set the save interval time, the default<br />
value is 5 seconds.<br />
3. Save Location: Set the save location for webcam image, you may save into USB<br />
129 Version 1.0
HDD or remote FTP; if select save to remote FTP, please continue following remote<br />
FTP setting.<br />
4. USB HDD Directory: The section provides option of which folder should be used for<br />
saving webcam image.<br />
5. Remote FTP URL: Input the FTP URL for saving webcam image.<br />
6. Remote FTP port: Input the FTP port number under URL to save image.<br />
7. Remote FTP user: Enter the user’s name you like and it will be used to save the<br />
webcam image into the FTP server.<br />
8. Remote FTP password: Put in a password for validation while accessing.<br />
9. Remote FTP Directory: To provide option of which folder should be used for saving<br />
webcam image.<br />
10. Back: Click on Back button for returning to Webcam Basic Setup screen.<br />
11. Apply & Cancel<br />
Click Apply to continue or Cancel to clear the settings on this page.<br />
4.4.3.3 Application for Web Camera<br />
4.4.3.3.1 Web Camera Monitoring Application<br />
Monitor your home or take pictures with a Webcam via <strong>3.5G</strong> <strong>plus</strong> <strong>WLAN</strong> <strong>Mobile</strong> <strong>Server</strong><br />
<strong>Router</strong>; one can set up the monitoring or recording of all images into the USB HDD for<br />
130 Version 1.0
eviewing. Often marketed as surveillance tools for home or office security; network<br />
Webcams are now being employed by early adopters for more personal matters, such as<br />
watching kids and monitoring pets. The Webcam can be remotely accessed and<br />
controlled via a browser. In addition, record and monitor live actions with USB webcam;<br />
then view the image through Internet browsers or WiFi mobile phones, such as 3G<br />
mobiles.<br />
4.4.3.3.1.1 Web Camera Monitoring via WAN connection<br />
For viewing the image via WAN connection, see the diagram below.<br />
Follow instructions below to set up WAN IP address.<br />
【Step 1】<br />
Plug your internet wire into the LAN port and put 192.168.1.254 in web browser’s address<br />
field to enter <strong>3.5G</strong> <strong>plus</strong> <strong>WLAN</strong> <strong>Mobile</strong> <strong>Server</strong> <strong>Router</strong>’s home page. Then click<br />
Administrator.<br />
131 Version 1.0
【Step 2】<br />
Enter the default value, admin, for both administrator’s name and password and log in the<br />
product’s main menu page.<br />
【Step 3】<br />
Click LAN under IP Config folder on the left side menu. Then set IP Address in the same<br />
subnet with upper-layer device, for example, 192.168.2.49; 192.168.2.1 for IP Gateway.<br />
After that, disable DHCP function and click Apply to save the settings.<br />
132 Version 1.0
【Step 4】<br />
Click Remote Management under System Management directory and change HTTP<br />
Connection Port into 800. Click Apply to save the settings.<br />
【Step 5】<br />
Plug another internet wire into the WAN port and apply IP Release & Renew commands via<br />
command prompt window in order to obtain new IP address. Afterwards, open your web<br />
browser and fill in http://192.168.2.49:800/webcam.html into address field, so the login<br />
webpage shows up as below.<br />
【Step 6】<br />
After entering user name and password, the following monitor image shows up.<br />
133 Version 1.0
4.4.3.3.2 Web Camera Recording<br />
4.4.3.3.2.1 Administrator Setup<br />
<strong>3.5G</strong> <strong>plus</strong> <strong>WLAN</strong> <strong>Mobile</strong> <strong>Server</strong> <strong>Router</strong> also can record the pictures from Webcam; only<br />
Administrator can activate the settings. Select Web Camera <strong>Server</strong> from main Menu and<br />
enable this function, click on Record Setting button for further setting.<br />
To set up the Webcam Advanced Configuration for each text box, the image from webcam<br />
will be recorded into your USB HDD or Remote FTP. Click on Apply after setup finished.<br />
For administrator, you may view all the images from webcam recording, please select<br />
Folder Management and click on Disk Explorer to view entire folder inside the disk<br />
including webcam record files.<br />
134 Version 1.0
After click on Disk Explorer, you will see the folder screen appear including all the folders<br />
inside <strong>3.5G</strong> <strong>plus</strong> <strong>WLAN</strong> <strong>Mobile</strong> <strong>Server</strong> <strong>Router</strong>. (Below is the example.)<br />
For getting the images from web camera or any files inside router, you may copy the files<br />
into your own HDDs directly. In addition, all image files are stored in<br />
webcam_recorded_files folder, click to examine the content inside.<br />
135 Version 1.0
4.4.3.3.2.2 Personal Application<br />
All the users under administrator’s setting can view webcam real-time images from My<br />
Webcam. Please log in with your own personal account. For viewing your own folder,<br />
please click “My Document”.<br />
After click on My Document, you will see folder screen appear as the example below. You<br />
can store files here, too.<br />
Notice: If you can’t open the folder, please check with administrator to set up your FTP access right.<br />
136 Version 1.0
4.4.4 Printer <strong>Server</strong><br />
Follow the illustrations below to set up your <strong>3.5G</strong> <strong>plus</strong> <strong>WLAN</strong> <strong>Mobile</strong> <strong>Server</strong> <strong>Router</strong> and<br />
USB-connected printer.<br />
1. Enable Printer <strong>Server</strong>: Check enable for applying printer server.<br />
2. Enable Printer Access From WAN: Allow printer can access from WAN side by<br />
checking enable for this item.<br />
3. Printer Model: The printer model shows up while plugging a USB printer.<br />
4. Printer Name: Enter the preferred name of your printer.<br />
5. Printer Description: Enter the description of printer as your demand.<br />
6. Apply & Cancel<br />
Click Apply to continue or Cancel to clear the settings on this page.<br />
Besides finishing the above, the printer setting on PC also needs to be set as follows.<br />
4.4.4.1 Printer Setting on PC<br />
After enabling Printer <strong>Server</strong> in Quick Setup and Printer <strong>Server</strong> Configuration, please<br />
follow the steps to set the detail LPR settings on your PC. (The example below is for<br />
Windows XP platform.)<br />
137 Version 1.0
【Step 1】<br />
After setting USB printer on <strong>3.5G</strong> <strong>plus</strong> <strong>WLAN</strong> <strong>Mobile</strong> <strong>Server</strong> <strong>Router</strong>’s setup page, please<br />
go to<br />
Start > Printers and Faxes to add a printer.<br />
【Step 2】<br />
Click on Add a printer item.<br />
【Step 3】<br />
Click on Next button.<br />
【Step 4】<br />
138 Version 1.0
Select Local printer attached to this computer, and click Next.<br />
【Step 5】<br />
Select Create a new port and choose Standard TCP/IP Port from drop-down list, then<br />
click Next.<br />
【Step 6】<br />
Click Next.<br />
139 Version 1.0
【Step 7】<br />
Put in <strong>3.5G</strong> <strong>plus</strong> <strong>WLAN</strong> <strong>Mobile</strong> <strong>Server</strong> <strong>Router</strong>’s address: 192.168.1.254 and click Next.<br />
【Step 8】<br />
Select Custom and click on Settings… button to set the detail setting.<br />
【Step 9】<br />
Select LPR and give it the same Queue Name as USB Printer Name has shown, and<br />
mark LPR Byte Counting Enabled. Finally, click on Next button.<br />
140 Version 1.0
It has to be the same with the<br />
Printer Name as shown in section<br />
4.4.4 Printer <strong>Server</strong> Configuration.<br />
【Step 10】<br />
Click Finish on the next screen after the aforesaid settings, you have to install the printer<br />
driver as well.<br />
141 Version 1.0
【Step 11】<br />
Select the Manufacturer and Printers. If your printer is not listed in the table, please<br />
insert its driver CD and then click on Have Disk… button for installation. Or click on Next<br />
button to finish the setting.<br />
You can name your printer, set it as default printer and share your printer as the next<br />
screen shown, the Printer <strong>Server</strong> setting is getting completed.<br />
【Step 12】<br />
It shows you the printer settings that you have specified, and then click Finish.<br />
142 Version 1.0
4.5 System Management<br />
<strong>3.5G</strong> <strong>plus</strong> <strong>WLAN</strong> <strong>Mobile</strong> <strong>Server</strong> <strong>Router</strong> provides system management including password<br />
changing, firmware upgrade, time setting, user’s account setting and other detail settings.<br />
Following is detail explanation for each.<br />
4.5.1 Reboot<br />
If you had entered the wrong configuration while setting up your router or other utilities,<br />
you can always reboot your <strong>3.5G</strong> <strong>plus</strong> <strong>WLAN</strong> <strong>Mobile</strong> <strong>Server</strong> <strong>Router</strong> by this setting.<br />
It’s necessary to reboot the router if it begins working improperly, please click on Reboot<br />
button to reboot the router.<br />
4.5.2 Change Password<br />
At this section, the administrator can change the system password. Only the password<br />
can be changed, the user name for administrator is admin and can’t be changed.<br />
143 Version 1.0
1. Old Password: Enter the original password you set.<br />
2. New Password: Enter the new password you want to change.<br />
3. New Password (Confirm): Enter the new password again for confirming.<br />
4. Apply & Cancel<br />
Click Apply to continue or Cancel to clear the settings on this page.<br />
4.5.3 Firmware Upgrade<br />
There is certain risk while upgrading firmware. Upgrading firmware is not recommended<br />
unless the significant faulty is found. You can upgrade the firmware of <strong>3.5G</strong> <strong>plus</strong> <strong>WLAN</strong><br />
<strong>Mobile</strong> <strong>Server</strong> <strong>Router</strong> on this page. Make sure the firmware you want to use is on the local<br />
hard drive of the computer. Click Firmware Upgrade to proceed.<br />
144 Version 1.0
1. Update Firmware: Click Browse to search your local hard drive and locate the firmware<br />
used for update.<br />
2. OK & Cancel<br />
Click OK to confirm or Cancel to clear the setting on this page.<br />
Notice: Before using a whole new disk, please format it on your PC first, so that it can be formatted on <strong>3.5G</strong><br />
<strong>plus</strong> <strong>WLAN</strong> <strong>Mobile</strong> <strong>Server</strong> <strong>Router</strong>.<br />
4.5.4 Profile Save<br />
To back up the current configuration setting or load the backup data, also you can restore<br />
<strong>3.5G</strong> <strong>plus</strong> <strong>WLAN</strong> <strong>Mobile</strong> <strong>Server</strong> <strong>Router</strong> to default setting by this function.<br />
1. Save Settings To PC: Click on Save button for saving the configuration setting into<br />
assigned location.<br />
2. Load Settings From PC: Click on “Browse…” button for searching the saving<br />
configuration from hard drive, and then click on Load button to load all the settings<br />
into the router.<br />
3. Restore To Factory Default Settings: After you have tried other methods for<br />
troubleshooting your network, you may choose to restore <strong>3.5G</strong> <strong>plus</strong> <strong>WLAN</strong> <strong>Mobile</strong><br />
<strong>Server</strong> <strong>Router</strong> to the factory default settings.<br />
4. Apply<br />
Click on Apply button to save the settings.<br />
145 Version 1.0
4.5.5 Remote Management<br />
Remote Management allows <strong>3.5G</strong> <strong>plus</strong> <strong>WLAN</strong> <strong>Mobile</strong> <strong>Server</strong> <strong>Router</strong> to be configured from<br />
the Internet by a web browser. In general, only a member of your network can browse the<br />
built-in web pages to perform “Administrator” tasks. This feature enables you to perform<br />
the tasks from the remote (Internet) host.<br />
1. HTTP Connection Port: The port number used to access the router.<br />
2. Remote Management: You can allow any Internet IP address to access the router, or<br />
set up deny rule according to IP setting.<br />
3. IP Address: Internet IP address of the computer that has access to the router.<br />
4. Description: Enter the description for the remote configuration.<br />
5. Add, Apply & Cancel<br />
Click Add to add the remote list, and click Apply to activate, or Cancel to clear the<br />
settings on this page.<br />
6. Remote Management IP List<br />
Display, edit or delete IDs, description and IP address of allowed remote list.<br />
146 Version 1.0
4.5.6 Time<br />
The system automatically shows the local time and time on PC. You can set the date and<br />
time manually so that it can be adjusted on router accordingly.<br />
1. Local Time: The default time within.<br />
2. Set the Time: Select this item to set up time by manual, select the date and time from<br />
each drop-down list.<br />
3. Set Time: Click Set Time to set local PC time on router.<br />
4. Apply & Cancel<br />
Click Apply to activate or Cancel to clear the settings.<br />
4.5.7 UPnP Setting<br />
UPnP (Univsersal Plug and Play) allows all devices on the network to connect by<br />
node-to-node via TCP/IP protocol.<br />
147 Version 1.0
1. Enable/Disable UPnP: Select to enable or disable this service.<br />
2. Apply, Cancel<br />
Click Apply to activate this function or Cancel to clear the setting.<br />
4.5.8 User Account Management<br />
Personal users can use each individual application such as My Status, My Webcam and<br />
My Document. This section is to set the user’s right. Also, all the users’ rights will be<br />
showed in User Account List and allowed to edit or delete by clicking the linking text.<br />
148 Version 1.0
1. Max Login User: Set up the maximum users to log in at the same time, select the<br />
number from drop-down list. If you want to change the maximum login users only<br />
without changing user’s information, please click on OK button after select login user’s<br />
number.<br />
2. User Name: Create the user name in this blank.<br />
3. Password: Set up the user’s password.<br />
4. User Right: Check to allow the user accessing Samba folder, monitoring from<br />
webcam or using FTP server.<br />
5. Activated: Click On to allow the user’s right to be applied immediately.<br />
6. Add, Apply & Cancel<br />
After finishing the above, click Add button to create user account. Click on Apply button<br />
to add set-user into the account list or Cancel button to clear the settings on this page.<br />
7. User Account List<br />
The list shows all users’ names, passwords, status and rights.<br />
4.5.9 Folder Management<br />
Easy to check all the USB storage devices connected to <strong>3.5G</strong> <strong>plus</strong> <strong>WLAN</strong> <strong>Mobile</strong> <strong>Server</strong><br />
<strong>Router</strong>, view the entire data folder inside each storage devices, and you can manage the<br />
disk formatting / partition via clicking the button on this page.<br />
149 Version 1.0
1. Select the USB Disk and click OK for refreshing all disks before you perform disk<br />
partition, and the Unplug button appears afterwards.<br />
2. To partition/format the disk, please select the disk and click on Format button.<br />
3. Moreover, if you want to view the data inside the disk, please go to 4.2.7 FTP Sever<br />
Setup to enable FTP server and then click on Disk Explorer to view all the folders<br />
inside the device.<br />
Notice: You have to click on Unplug button before removing the USB device from <strong>3.5G</strong> <strong>plus</strong> <strong>WLAN</strong> <strong>Mobile</strong><br />
<strong>Server</strong> <strong>Router</strong>.<br />
4.5.10 Email Alert<br />
To monitor router activity, you can run on a local PC or a remote one elsewhere on the<br />
Internet. And <strong>3.5G</strong> <strong>plus</strong> <strong>WLAN</strong> <strong>Mobile</strong> <strong>Server</strong> <strong>Router</strong> provides the email alert facility so that<br />
the log messages can be packed as an e-mail for someone who wants to receive these<br />
messages by scheduled time. In the following, here explains how to set up the email alert<br />
function.<br />
150 Version 1.0
1. Email Alert: Check the enable box to activate the email alert service.<br />
2. SMTP <strong>Server</strong>: Specify an IP address of the SMTP server which can send mails from<br />
your <strong>3.5G</strong> <strong>plus</strong> <strong>WLAN</strong> <strong>Mobile</strong> <strong>Server</strong> <strong>Router</strong> to the recipients’ mailboxes directly.<br />
3. Your Mail (from): Enter the email address indicated the sending location.<br />
4. SMTP Auth: If the email alert needs to be sent via SMTP authentication, please check<br />
this item, and then enter the required account and password.<br />
5. Account: Enter the email account from which you want to send the alert.<br />
6. Password: Enter the email account password to validate.<br />
151 Version 1.0
7. Email Address (To): Enter the email address where to receive the alert.<br />
8. Schedule: Arrange to send the alert when event happens or by regular time.<br />
9. Add, Apply & Cancel<br />
After finishing the above, click Add to set up the rule into email alert list. Then, click<br />
Apply to save or Cancel to clear the settings on this page.<br />
10. Email Alert List<br />
Display, edit or delete a list of relative information in regarding to the above mentioned.<br />
11. Refresh & Delete<br />
Click on Refresh to renew the login data and other system status information, or click<br />
on Delete to clear these logs.<br />
4.6 Log & Status<br />
<strong>3.5G</strong> <strong>plus</strong> <strong>WLAN</strong> <strong>Mobile</strong> <strong>Server</strong> <strong>Router</strong> provides the log list, connection status and user’s<br />
account.<br />
4.6.1 Network Configuration<br />
Network Configuration shows all connection status of LAN, Wireless and plugged USB<br />
devices.<br />
Each block shows configuration status, you may click Refresh to update the screen list.<br />
152 Version 1.0
4.6.2 User Account List<br />
This section shows all users’ information.<br />
Check the user name, status and opened directory/file on screen.<br />
4.6.3 Event Log<br />
<strong>3.5G</strong> <strong>plus</strong> <strong>WLAN</strong> <strong>Mobile</strong> <strong>Server</strong> <strong>Router</strong> provides system logs for review.<br />
153 Version 1.0
The system status log shows logging time, type and detail information as below. Click<br />
Refresh to update.<br />
4.7 Logout<br />
Click Logout on the bottom menu to exit and go back to GUI login home page.<br />
4.8 Personal Configuration<br />
Open a Microsoft Internet Explorer, Mozilla Firefox or Apple Safari browser, and<br />
enter http://192.168.1.254 (Default Gateway) into browser’s blank field.<br />
Notice: If the homepage doesn’t appear, please check whether the TCP/IP configuration is obtaining IP<br />
address automatically or not. If you don’t know how to do this, please refer to 1.5 Get your IP<br />
Automatically & Manually.<br />
Homepage<br />
154 Version 1.0
Click Personal Panel and log in with your own user account. (If you can’t access your<br />
personal account, please check with administrator for validation.)<br />
Personal Panel<br />
Screen below shows every login user’s access rights, including Anonymous, My<br />
Document, My Webcam and My Status.<br />
155 Version 1.0
<strong>3.5G</strong> <strong>plus</strong> <strong>WLAN</strong> <strong>Mobile</strong> <strong>Server</strong> <strong>Router</strong> provides personal control panel for every login<br />
user’s entrance to each application screen, please click on each icon for application. The<br />
icons appear in gray color can’t be clicked if the user doesn’t have the right to use that<br />
function; even though there is none to be set, the user can still apply My Status.<br />
Notice: The available access rights are depended on administrator’s authorization in 4.5.8 User Account<br />
Management.<br />
4.8.1 Anonymous<br />
“Anonymous” shows all the files stored in USB HDD by<br />
administrator and allows any login user to check the<br />
folder and copy files to the HD via Internet. The following<br />
is the detail description.<br />
Click Anonymous to access the shared folder created by administrator and freely<br />
download those files underneath to personal hard drives.<br />
156 Version 1.0
Notice: If you can’t access Anonymous folder, please check with administrator to enable your FTP server<br />
rights. Files under this directory are only for downloading, but not for uploading, deleting, or edting.<br />
4.8.2 My Document<br />
“My Document” shows all the files in USB HDD under each<br />
user’s account. Login user can also create the folder or copy<br />
files into the HD directly via Internet. The illustrated below is<br />
the detail description of folder inside.<br />
Click My Document and opens another web page to show all the files in your own folder.<br />
Notice: If you can’t access this folder, please check with administrator to enable your FTP server rights.<br />
157 Version 1.0
4.8.3 My Webcam<br />
“My Webcam” application allows you to view the real time<br />
image when the web camera is on.<br />
Click My Webcam, and the system pops up a new window to display real time image as the<br />
example below shows.<br />
Notice: If the image from webcam can’t be viewed, it may be caused by Internet security setting and needs to<br />
be corrected or installed with the Java program.<br />
4.8.4 My Status<br />
“My Status” shows all the login information for your<br />
personal account.<br />
Click Main Menu on the left to go back main control panel and other applications.<br />
158 Version 1.0
Notice: All above usage information is based on administrator’s setup.<br />
4.9 Site Map<br />
<strong>3.5G</strong> <strong>plus</strong> <strong>WLAN</strong> <strong>Mobile</strong> <strong>Server</strong> <strong>Router</strong> provides site map clicking for each icon to carry out<br />
the easy setup from the home page.<br />
159 Version 1.0
Chapter 5 Client Mode<br />
5.1 Administrator Quick Setup<br />
Make sure to switch the mode into Client Mode, then open a Microsoft Internet Explorer,<br />
Mozilla Firefox or Apple Safari browser, and enter http://10.64.64.64 (Default Gateway)<br />
into browser’s blank field.<br />
Notice: If the homepage doesn’t appear, please check whether the TCP/IP configuration is obtaining IP<br />
address automatically or not. If you don’t know how to do this, please refer to section 1.5 Get your<br />
IP Automatically & Manually.<br />
Homepage<br />
Please click Administrator to log in setup menu.<br />
160 Version 1.0
User Name and Password<br />
The default values for User Name and Password are admin (all in lowercase letters). Click<br />
Login to enter.<br />
Notice: Only the password can be changed, please read setup 5.2.4 Password Setup or 5.5.2 Change<br />
Password. In order to protect your own settings, it’s strongly recommended to change the password<br />
before you finish the <strong>Router</strong> Basic Setup.<br />
5.2 Quick Setup<br />
Typical Configuration Manager Page consists of two separate frames. The left frame<br />
contains all the means available for device configuration. Menus are indicated by file icons,<br />
and related menus are grouped into categories, such as LAN, WAN and etc., and<br />
indicated by folder icon, depending on whether the group of menus are expanded or not.<br />
You can click on any of these to display a specific configuration page. And the right frame<br />
is designed as a site map.<br />
161 Version 1.0
The above diagram shows all PCs and devices connected to your <strong>3.5G</strong> <strong>plus</strong> <strong>WLAN</strong><br />
<strong>Mobile</strong> <strong>Server</strong> <strong>Router</strong> and their status. Click Quick Setup on the left of the main menu.<br />
Then you’ll see the full functionality selection screen appears and detailed settings for<br />
each item, including “Basic” and “Application” two parts.<br />
Note: The device models named of USB Device, Webcam and Printer will be shown under the picture of each<br />
device if the product supports.<br />
Quick Setup full function table list<br />
• Click Basic, you see 4 major items set in Quick Setup Selection. Please click Next<br />
to continue.<br />
Initiated as default<br />
• Click Application, you see 6 major items set here, including USB Disk Management<br />
Setup, User Account Management Setup, FTP <strong>Server</strong> Setup, Printer <strong>Server</strong> Setup, Web<br />
Camera Setup and Samba <strong>Server</strong> Setup. For the checked ones are recommended, all<br />
can be selected upon your demands.<br />
Initiated as default<br />
5.2.1 Site Survey Setup<br />
Search for available wireless APs to access Internet. Click Rescan to show the information.<br />
162 Version 1.0
Select the preferred AP for connection, for example, Storage_Fax_<strong>Server</strong>_<strong>Router</strong> as the<br />
above, and click Next to continue.<br />
5.2.2 Wireless Setup<br />
Display connected wireless AP information.<br />
After setup completed, click Next.<br />
163 Version 1.0
5.2.3 Time <strong>Server</strong> Setup<br />
<strong>3.5G</strong> <strong>plus</strong> <strong>WLAN</strong> <strong>Mobile</strong> <strong>Server</strong> <strong>Router</strong> shows local date and time; however, the time still<br />
can be changed manually by selecting from the drop-down list, which won’t effect the<br />
original time setting on your PC.<br />
After completed, click Next to proceed.<br />
5.2.4 Password Setup<br />
Here suggests changing the password for logging into the configuration manager in terms<br />
of security reason.<br />
The password may consist of A-Z, a-z, 0-9,<br />
underscores, and a single dot (.)<br />
For changing password, please fills the password information into above blanks, and then<br />
click Next.<br />
Notice 1:<br />
Notice 2:<br />
Only the password can be changed, the user name for administrator is “admin” and not to be changed.<br />
If you forget administrator’s password, please reset <strong>3.5G</strong> <strong>plus</strong> <strong>WLAN</strong> <strong>Mobile</strong> <strong>Server</strong> <strong>Router</strong> to default<br />
setting by pushing the “Reset” button on the rear panel for 5 seconds. And the password will return to<br />
“admin”.<br />
5.2.5 USB Disk Management Setup<br />
164 Version 1.0
Easy to check all the USB storage devices connected to your <strong>3.5G</strong> <strong>plus</strong> <strong>WLAN</strong> <strong>Mobile</strong><br />
<strong>Server</strong> <strong>Router</strong>, view the entire data folder inside each storage device, and you can<br />
manage the disk formatting/partitioning via click on the button of this page.<br />
Select the USB Disk and click OK for refreshing all disks before you do disk partition, and<br />
the Unplug button will appear. To partition/format the disk, please select the disk and click<br />
Format. Moreover, if you want to view the data inside the disk, please go to 5.2.7 FTP<br />
Sever Setup to enable FTP server and then click Disk Explorer to view all folders inside<br />
the device.<br />
Notice: You have to click on Unplug button before removing the USB devices from <strong>3.5G</strong> <strong>plus</strong> <strong>WLAN</strong> <strong>Mobile</strong><br />
<strong>Server</strong> <strong>Router</strong>.<br />
5.2.6 User Account Management Setup<br />
Personal users can use each individual application such as My Status, My Webcam and<br />
My Document. This section is to set the user’s right. Also, all the users’ rights will be<br />
showed in User Account List and can be edited or deleted by clicking the meaning text.<br />
Input the User’s name and<br />
password, and then click on<br />
“Add”, and you will see the<br />
user information appear on<br />
the “User Account List”<br />
165 Version 1.0
Set each user’s right and space arrangement, and then click on Add button for saving<br />
user’s account. Click on Next button after finished.<br />
5.2.7 FTP <strong>Server</strong> Setup<br />
<strong>3.5G</strong> <strong>plus</strong> <strong>WLAN</strong> <strong>Mobile</strong> <strong>Server</strong> <strong>Router</strong> can be the FTP <strong>Server</strong> providing users to transmit<br />
files, also for the guest to download the files from assigned website. Moreover, by<br />
connecting USB HDD, USB Flash to the router, user can easily set up a FTP <strong>Server</strong> to<br />
share or download files for local or remote users.<br />
If the USB device isn’t enabled first,<br />
you can’t enable FTP <strong>Server</strong>. (Not<br />
even click on “Enable”)<br />
Set the FTP <strong>Server</strong> and related setting. Disable the function as demand, and click Next to<br />
continue.<br />
5.2.8 Web Camera <strong>Server</strong> Setup<br />
If you plan to use <strong>3.5G</strong> <strong>plus</strong> <strong>WLAN</strong> <strong>Mobile</strong> <strong>Server</strong> <strong>Router</strong> as a Web Camera site, connect<br />
a supported USB Web Camera to the USB port of <strong>3.5G</strong> <strong>plus</strong> <strong>WLAN</strong> <strong>Mobile</strong> <strong>Server</strong> <strong>Router</strong>.<br />
Check both Enable webcam server and Access from WAN as Enable to activate.<br />
Click on Next button to next step.<br />
Notice: Before webcam server enabled, please make sure the webcam has connected to the product; otherwise,<br />
the “Enable” selection can’t be checked.<br />
166 Version 1.0
5.2.9 Printer <strong>Server</strong> Setup<br />
<strong>3.5G</strong> <strong>plus</strong> <strong>WLAN</strong> <strong>Mobile</strong> <strong>Server</strong> <strong>Router</strong> supports LPR-protocol, as well as NetBIOS, and is<br />
convenient for sharing printer. In other words, it is an Internet access solution for your<br />
LAN/WAN, which provides you the shared web surfing, and supports USB interface printer.<br />
Any users in the same subnet of <strong>3.5G</strong> <strong>plus</strong> <strong>WLAN</strong> <strong>Mobile</strong> <strong>Server</strong> <strong>Router</strong> can print their<br />
document via the network printers.<br />
If the printer isn’t connected,<br />
you can’t choose “Enable”.<br />
Enable the printer and click Next to continue.<br />
Notice: After above Printer <strong>Server</strong> in Quick Setup finished, the related printing settings on <strong>3.5G</strong> <strong>plus</strong> <strong>WLAN</strong><br />
<strong>Mobile</strong> <strong>Server</strong> <strong>Router</strong> and PC have to be set up, too. Please refer to 5.4.4 Printer <strong>Server</strong> to set the<br />
details.<br />
5.2.10 Samba <strong>Server</strong> Setup<br />
<strong>3.5G</strong> <strong>plus</strong> <strong>WLAN</strong> <strong>Mobile</strong> <strong>Server</strong> <strong>Router</strong> supports NetBIOS protocol, providing network<br />
neighbors to share file folders or printer.<br />
Click on Next button to next setup.<br />
5.2.11 Quick Setup Finish<br />
The Quick Setup has been completed successfully when you see this screen.<br />
167 Version 1.0
To apply your new settings, please click on Finish button to reboot system automatically<br />
and go to the product’s diagram homepage. You may connect to Internet wirelessly at this<br />
moment according to above settings.<br />
5.3 IP Configuration<br />
This function allows you to add routing rules into <strong>3.5G</strong> <strong>plus</strong> <strong>WLAN</strong> <strong>Mobile</strong> <strong>Server</strong> <strong>Router</strong>,<br />
including LAN and Site Survey.<br />
5.3.1 LAN<br />
Use this page to set up the local IP address and subnet mask for your router. Please select<br />
LAN under the IP Config menu and follow the instructions below to enter the LAN setting<br />
page to configure the settings you want.<br />
1. IP Address<br />
The default value of LAN IP address is 10.64.64.64 for this router.<br />
168 Version 1.0
2. IP Netmask<br />
Fill in Subnet Mask, normally it is 255.255.255.0.<br />
3. Start IP<br />
This field specifies the first address in the pool to be assigned by the DHCP server in<br />
your local network. The default setting is 65.<br />
4. End IP<br />
This field specifies the last address in the pool to be assigned by the DHCP server in<br />
your local network. The default setting is 75.<br />
5. DHCP Clients List<br />
The list shows all clients’ IP and MAC addresses.<br />
5.3.2 Site Survey<br />
Click Site Survey under IP Config directory.<br />
1. Link Mode<br />
Select Infrastructure/Ad_hoc to enable wireless.<br />
2. RTS Threshold<br />
This value should remain at its default setting of 2347. If you encounter inconsistent<br />
169 Version 1.0
data flow, only minor modifications of the value range between 256 and 2347 are<br />
recommended<br />
3. Frag Threshold<br />
To identify the maximum length of packet, the overflow packet length wil be<br />
fragmentized. The allowed range is from 256 to 2346, and default length is 2346 bytes.<br />
Only minor modifications of the value range are recommended here.<br />
4. SSID<br />
Name your wireless network, and the default is previously selected wireless AP.<br />
5. bg Mode<br />
This field indicates the 802.11g interface mode. 802.11g prevents the 802.11b clients<br />
from accessing the router; 802.11b provides 802.11b standard wireless network. By<br />
default, the value is bg Mixed, which allows both 802.11b and 802.11g clients to<br />
access the router.<br />
6. Rate<br />
Select the transmission rate up to 54Mbps for the network. The default setting is Auto.<br />
7. Channel<br />
<strong>3.5G</strong> <strong>plus</strong> <strong>WLAN</strong> <strong>Mobile</strong> <strong>Server</strong> <strong>Router</strong> supports up to 14 overlapping channels for<br />
radio communication (For the US and most of Europe, channel 1, 6 & 11 are used.) By<br />
default, the channel is Auto.<br />
8. Obtain IP Automatically<br />
Check to allow system automatically obtaining IP.<br />
9. Specify an IP<br />
Put in the required information as specified upon your demand.<br />
10. Encryption<br />
Include 4 options of Open System, Shared Key, TKIP and AES.<br />
Open System & Shared Key<br />
WEP Encryption<br />
<strong>3.5G</strong> <strong>plus</strong> <strong>WLAN</strong> <strong>Mobile</strong> <strong>Server</strong> <strong>Router</strong> supports both 64-bit and 128-bit encryption<br />
using the Wired Equivalent Privacy (WEP) algorithm. Select the type of encryption you<br />
want to use (64 or 128 bit) and configure one to four WEP Keys. The “1280bit” method<br />
is more secure than the “64-bit”.<br />
Key Type: For 64bits WEP key, either 5 ASCII characters or 10 hexadecimal digitals<br />
leading by 0x can be entered. For 128bits WEP key, either 13 ASCII characters or 26<br />
hexadecimal digits leading by 0x can be entered.<br />
Note: 128 bits WEP is most secure, but has more encryption/decryption overhead. Note that all wireless<br />
devices must support the same WEP encryption bit size and have the same key. Four keys can be<br />
entered here, but only one key can be selected at a time. The keys can be entered in ASCII or<br />
Hexadecimal. Select the item from drop-down list you wish to use.<br />
170 Version 1.0
TKIP & AES<br />
PSK Key<br />
The applied algorithm is like WPA. However, WPA-PSK is using a simple code to<br />
generate the key, and the key length is 64 characters of Hex (0~9, a~f and A~F).<br />
11. Apply & Cancel<br />
Click Apply to save or Cancel to clear the settings on this page.<br />
5.4 <strong>Server</strong><br />
<strong>3.5G</strong> <strong>plus</strong> <strong>WLAN</strong> <strong>Mobile</strong> <strong>Server</strong> <strong>Router</strong> provides 4 server setups, including Samba <strong>Server</strong>,<br />
FTP <strong>Server</strong>, Web Camera <strong>Server</strong> and Printer <strong>Server</strong>.<br />
5.4.1 Samba <strong>Server</strong><br />
By supporting NetBIOS Protocol, <strong>3.5G</strong> <strong>plus</strong> <strong>WLAN</strong> <strong>Mobile</strong> <strong>Server</strong> <strong>Router</strong> provides LAN<br />
users to share files or printer via My Network Places. Click Samba <strong>Server</strong> to proceed.<br />
171 Version 1.0
1. Enable Samba <strong>Server</strong><br />
Check to Enable/Disable while connecting.<br />
2. Workgroup Name<br />
Fill in the name, and the default is Workgroup.<br />
3. <strong>Server</strong> Name<br />
Name your server.<br />
4. <strong>Server</strong> Description<br />
Describe your server by demand, and the default is Wireless <strong>Mobile</strong> <strong>Router</strong>.<br />
5. Printer Model<br />
Printer model appears when connected.<br />
6. Apply & Cancel<br />
Click Apply to save or Cancel to clear settings.<br />
5.4.1.1 How to Access File Sharing Directory<br />
Please follow the steps below.<br />
【Step 1】<br />
Go to Start and click My Computer.<br />
172 Version 1.0
【Step 2】<br />
Fill in blank address field with \\10.64.64.64.<br />
【Step 3】<br />
A window pops up asking for user name and password. If log in as an administrator,<br />
please enter admin for both fields; otherwise, fill in with personal account and password.<br />
Click OK after finished.<br />
【Step 4】<br />
As the window below appears, login user has entered file sharing directory, and the<br />
folders underneath are all available for sharing locally.<br />
173 Version 1.0
Note: Only 2 icons show up at most.<br />
1. If a USB flash drive/hard disk is connected and enabled, the samba folder shows up.<br />
2. If a USB printer is connected and enabled, the printer icon shows up.<br />
5.4.2 FTP <strong>Server</strong><br />
FTP <strong>Server</strong> utility allows both local and remote users to upload or download files, pictures<br />
or MP3 music from the same storage device in most easy and timely fashion. Before<br />
configuring FTP <strong>Server</strong>, please make sure the storage device is properly plugged into any<br />
USB port on the router and make sure this USB storage device is detected by the router.<br />
Only when USB storage device<br />
is plugged,FTP <strong>Server</strong> can be<br />
checked as enabled.<br />
1. Enable FTP <strong>Server</strong>: The Enable for FTP <strong>Server</strong> only can be selected when USB<br />
storage device plugged.<br />
2. Enable Anonymous to Login: Allow anonymous to login after check on enable.<br />
174 Version 1.0
3. Enable FTP Access from WAN: Allow FTP access from WAN side by checking on<br />
Enable for this item.<br />
4. FTP <strong>Server</strong> Port: Define the FTP command transfer service port. If you want to<br />
change this port number, also remember to change the service port setting of your<br />
FTP client.<br />
5. Idle connection Time-Out: When a specific time value is added, FTP <strong>Server</strong> will be<br />
de-activated if it has no activity within the time limit.<br />
6. Apply & Cancel<br />
Click Apply to continue or Cancel to clear the settings on this page.<br />
7. User Account List<br />
The list shows all user names, status and opened directory/files.<br />
Notice: FTP server is compatible with FAT32 or EXT3 format USB storage device. In case you need to format<br />
your USB storage device. Please always make sure the device is formatted with FAT32 or EXT3<br />
standard.<br />
5.4.3 Web Camera <strong>Server</strong><br />
<strong>3.5G</strong> <strong>plus</strong> <strong>WLAN</strong> <strong>Mobile</strong> <strong>Server</strong> <strong>Router</strong> has built-in Web Cam <strong>Server</strong>. By connecting web<br />
camera to the router, it allows user to monitor their home or office from remote locations.<br />
Motion Detection function has also been built-in and allows user to use webcam to detect<br />
any movements in their houses or offices and send email alert with captured images.<br />
5.4.3.1 Web Camera <strong>Server</strong> Basic Setup<br />
1. Enable Webcam <strong>Server</strong>: Allow using this function by checking on enable.<br />
2. Access from WAN: Allow webcam can access from WAN side by checking on enable<br />
for this item.<br />
3. Image format: The default is 320x424 pixels.<br />
4. Preview: Click on this button, you can preview the image from webcam.<br />
5. Record Setting: Please see the detail advance setting in 5.4.2.2 Web Camera<br />
<strong>Server</strong> Advanced Configuration.<br />
6. Apply & Cancel<br />
Click Apply to continue or Cancel to clear the settings on this page.<br />
175 Version 1.0
5.4.3.2 Web Camera <strong>Server</strong> Advanced Configuration<br />
Click Record Setting, and the screen below appears.<br />
1. Enable save image: If you want to save the image from webcam, please check on<br />
enable.<br />
2. Save image interval: For saving image, you can set the save interval time, the default<br />
value is 5 seconds.<br />
3. Save Location: Set the save location for webcam image, you may save into USB<br />
HDD or remote FTP; if select save to remote FTP, please continue following remote<br />
FTP setting.<br />
4. USB HDD Directory: The section provides option of which folder should be used for<br />
saving webcam image.<br />
5. Remote FTP URL: Input the FTP URL for saving webcam image.<br />
6. Remote FTP port: Input the FTP port number under URL to save image.<br />
7. Remote FTP user: Enter the user’s name you like and it will be used to save the<br />
webcam image into the FTP server.<br />
8. Remote FTP password: Put in a password for validation while accessing.<br />
9. Remote FTP Directory: To provide option of which folder should be used for saving<br />
webcam image.<br />
10. Back: Click on Back button for returning to Webcam Basic Setup screen.<br />
11. Apply & Cancel<br />
Click Apply to continue or Cancel to clear the settings on this page.<br />
176 Version 1.0
5.4.3.3 Application for Web Camera<br />
5.4.3.3.1 Web Camera Monitoring Application<br />
Monitor your home or take pictures with a Webcam via <strong>3.5G</strong> <strong>plus</strong> <strong>WLAN</strong> <strong>Mobile</strong> <strong>Server</strong><br />
<strong>Router</strong>; one can set up the monitoring or recording of all images into the USB HDD for<br />
reviewing. Often marketed as surveillance tools for home or office security; network<br />
Webcams are now being employed by early adopters for more personal matters, such as<br />
watching kids and monitoring pets. The Webcam can be remotely accessed and<br />
controlled via a browser. In addition, record and monitor live actions with USB webcam;<br />
then view the image through Internet browsers or WiFi mobile phones, such as 3G<br />
mobiles.<br />
5.4.3.3.1.1 Web Camera Monitoring via WAN Connection<br />
For viewing the image via WAN connection, see the diagram below.<br />
177 Version 1.0
Follow instructions below to set up WAN IP address.<br />
【Step 1】<br />
Click Network Configuration under the directory of Log & Status to check the selected<br />
wireless IP address, for example, 192.168.1.2 as below.<br />
【Step 2】<br />
Open web browser and fill http://192.168.1.1 into address field. The homepage of<br />
connected router with <strong>3.5G</strong> <strong>plus</strong> <strong>WLAN</strong> <strong>Mobile</strong> <strong>Server</strong> <strong>Router</strong> shows up. Click Network<br />
Configuration under the directory of Log & Status to check its IP address, such as the<br />
example below.<br />
178 Version 1.0
【Step 3】<br />
Click Virtual <strong>Server</strong> under the directory of NAT in Advance setup. Then check Enable and<br />
put 192.168.1.2 in Private IP field. Fill in 80 for both Private Port and Public Port, and then<br />
click Add. After completed, click Apply to save the setting.<br />
【Step 4】<br />
179 Version 1.0
Plug internet wire into the WAN port and connect to your PC. Then open your web browser<br />
and fill in http://192.168.1.2/webcam.html into address field, so the login webpage shows up<br />
as below.<br />
【Step 5】<br />
After entering user name and password, the following monitor image shows up.<br />
5.4.3.3.2 Web Camera Recording<br />
5.4.3.3.2.1 Administrator Setup<br />
<strong>3.5G</strong> <strong>plus</strong> <strong>WLAN</strong> <strong>Mobile</strong> <strong>Server</strong> <strong>Router</strong> also can record the pictures from Webcam; only<br />
Administrator can activate the settings. Select Web Camera <strong>Server</strong> from main Menu and<br />
enable this function, click on Record Setting button for further setting.<br />
180 Version 1.0
To set up the Webcam Advanced Configuration for each text box, the image from webcam<br />
will be recorded into your USB HDD or Remote FTP. Click on Apply after setup finished.<br />
For administrator, you may view all the images from webcam recording, please select<br />
Folder Management and click on Disk Explorer to view entire folder inside the disk<br />
including webcam record files.<br />
After click on Disk Explorer, you will see the folder screen appear including all the folders<br />
inside <strong>3.5G</strong> <strong>plus</strong> <strong>WLAN</strong> <strong>Mobile</strong> <strong>Server</strong> <strong>Router</strong>. (Below is the example.)<br />
181 Version 1.0
For getting the images from web camera or any files inside router, you may copy the files<br />
into your own HDDs directly. In addition, all image files are stored in<br />
webcam_recorded_files folder, click to examine the content inside.<br />
5.4.3.3.2.2 Personal Application<br />
All the users under administrator’s setting can view entire webcam real-time images from<br />
My Webcam. Please log in with your own personal account. For viewing your own folder,<br />
please click “My Document”.<br />
182 Version 1.0
After click on My Document, you will see folder screen appear as the example below. You<br />
can store files here, too.<br />
Notice: If you can’t open the folder, please check with administrator to set up your FTP access right.<br />
5.4.4 Printer <strong>Server</strong><br />
183 Version 1.0
Follow the illustrations below to set up your <strong>3.5G</strong> <strong>plus</strong> <strong>WLAN</strong> <strong>Mobile</strong> <strong>Server</strong> <strong>Router</strong> and<br />
USB-connected printer.<br />
1. Enable Printer <strong>Server</strong>: Check enable for applying printer server.<br />
2. Enable Printer Access From WAN: Allow printer can access from WAN side by<br />
checking enable for this item.<br />
3. Printer Model: The printer model shows up while plugging a USB printer.<br />
4. Printer Name: Enter the preferred name of your printer.<br />
5. Printer Description: Enter the description of printer as your demand.<br />
6. Apply & Cancel<br />
Click Apply to continue or Cancel to clear the settings on this page.<br />
Besides finishing the above, the printer setting on PC also needs to be set as follows.<br />
5.4.4.1 Printer Setting on PC<br />
After enabling Printer <strong>Server</strong> in Quick Setup and Printer <strong>Server</strong> Configuration, please<br />
follow the steps to set the detail LPR settings on your PC. (The example below is for<br />
Windows XP platform.)<br />
【Step 1】<br />
After setting USB printer on <strong>3.5G</strong> <strong>plus</strong> <strong>WLAN</strong> <strong>Mobile</strong> <strong>Server</strong> <strong>Router</strong>’s setup page, please<br />
go to<br />
Start > Printers and Faxes to add a printer.<br />
184 Version 1.0
【Step 2】<br />
Click on Add a printer item.<br />
【Step 3】<br />
Click on Next button.<br />
【Step 4】<br />
Select Local printer attached to this computer, and click Next.<br />
185 Version 1.0
【Step 5】<br />
Select Create a new port and choose Standard TCP/IP Port from drop-down list, then<br />
click Next.<br />
【Step 6】<br />
Click Next.<br />
186 Version 1.0
【Step 7】<br />
Put in <strong>3.5G</strong> <strong>plus</strong> <strong>WLAN</strong> <strong>Mobile</strong> <strong>Server</strong> <strong>Router</strong>’s address: 10.64.64.64 (as in Client Mode)<br />
and click Next.<br />
【Step 8】<br />
Select Custom and click on Settings… button to set the detail setting.<br />
【Step 9】<br />
Select LPR and give it the same Queue Name as USB Printer Name has shown, and<br />
mark LPR Byte Counting Enabled. Finally, click on Next button.<br />
187 Version 1.0
It has to be the same with the Printer<br />
Name as shown in section 5.4.4 Printer<br />
<strong>Server</strong> Configuration.<br />
【Step 10】<br />
Click Finish on the next screen after the aforesaid settings, you have to install the printer<br />
driver as well.<br />
【Step 11】<br />
Select the Manufacturer and Printers. If your printer is not listed in the table, please<br />
insert its driver CD and then click on Have Disk… button for installation. Or click on Next<br />
button to finish the setting.<br />
188 Version 1.0
You can name your printer, set it as default printer and share your printer as the next<br />
screen shown, the Printer <strong>Server</strong> setting is getting completed.<br />
【Step 12】<br />
It shows you the printer settings that you have specified, and then click Finish.<br />
189 Version 1.0
5.5 System Management<br />
<strong>3.5G</strong> <strong>plus</strong> <strong>WLAN</strong> <strong>Mobile</strong> <strong>Server</strong> <strong>Router</strong> provides system management including password<br />
changing, firmware upgrade, time setting, user’s account setting and other detail settings.<br />
Following is detail explanation for each.<br />
5.5.1 Reboot<br />
If you had entered the wrong configuration while setting up your router or other utilities,<br />
you can always reboot your <strong>3.5G</strong> <strong>plus</strong> <strong>WLAN</strong> <strong>Mobile</strong> <strong>Server</strong> <strong>Router</strong> by this setting.<br />
It’s necessary to reboot the router if it begins working improperly, please click on Reboot<br />
button to reboot the router.<br />
5.5.2 Change Password<br />
At this section, the administrator can change the system password. Only the password<br />
can be changed, the user name for administrator is admin and can’t be changed.<br />
190 Version 1.0
1. Old Password: Enter the original password you set.<br />
2. New Password: Enter the new password you want to change.<br />
3. New Password (Confirm): Enter the new password again for confirming.<br />
4. Apply & Cancel<br />
Click Apply to continue or Cancel to clear the settings on this page.<br />
5.5.3 Firmware Upgrade<br />
There is certain risk while upgrading firmware. Upgrading firmware is not recommended<br />
unless the significant faulty is found. You can upgrade the firmware of <strong>3.5G</strong> <strong>plus</strong> <strong>WLAN</strong><br />
<strong>Mobile</strong> <strong>Server</strong> <strong>Router</strong> on this page. Make sure the firmware you want to use is on the local<br />
hard drive of the computer. Click Firmware Upgrade to proceed.<br />
191 Version 1.0
1. Update Firmware: Click Browse to browse the local hard drive and locate the<br />
firmware used for update.<br />
2. OK & Cancel<br />
Click OK to confirm or Cancel to clear the setting on this page.<br />
Notice: Before using a whole new disk, please format it on your PC first, so that it can be formatted on <strong>3.5G</strong><br />
<strong>plus</strong> <strong>WLAN</strong> <strong>Mobile</strong> <strong>Server</strong> <strong>Router</strong>.<br />
5.5.4 Profile Save<br />
To back up the current configuration setting or load the backup data, also you can restore<br />
<strong>3.5G</strong> <strong>plus</strong> <strong>WLAN</strong> <strong>Mobile</strong> <strong>Server</strong> <strong>Router</strong> to default setting by this function.<br />
1. Save Settings To PC: Click on Save button for saving the configuration setting into<br />
assigned location.<br />
192 Version 1.0
2. Load Settings From PC: Click on “Browse…” button for searching the saving<br />
configuration from hard drive, and then click on Load button to load all the settings<br />
into the router.<br />
3. Restore To Factory Default Settings: After you have tried other methods for<br />
troubleshooting your network, you may choose to restore <strong>3.5G</strong> <strong>plus</strong> <strong>WLAN</strong> <strong>Mobile</strong><br />
<strong>Server</strong> <strong>Router</strong> to the factory default settings.<br />
4. Apply<br />
Click on Apply button to save the settings.<br />
5.5.5 Remote Management<br />
Remote Management allows <strong>3.5G</strong> <strong>plus</strong> <strong>WLAN</strong> <strong>Mobile</strong> <strong>Server</strong> <strong>Router</strong> to be configured from<br />
the Internet by a web browser. In general, only a member of your network can browse the<br />
built-in web pages to perform “Administrator” tasks. This feature enables you to perform<br />
the tasks from the remote (Internet) host.<br />
193 Version 1.0
1. HTTP Connection Port: The port number used to access the router.<br />
2. Remote Management: You can allow any Internet IP address to access the router, or<br />
set up deny rule according to IP setting.<br />
3. IP Address: Internet IP address of the computer that has access to the router.<br />
4. Description: Enter the description for the remote configuration.<br />
5. Add, Apply & Cancel<br />
Click Add to add the remote list, and click Apply to activate, or Cancel to clear the<br />
settings on this page.<br />
6. Remote Management IP List<br />
Display, edit or delete IDs, description and IP address of allowed remote list.<br />
5.5.6 Time<br />
The system automatically shows the local time and time on PC. You can set the time and<br />
date manually so that it can be adjusted on router accordingly.<br />
194 Version 1.0
1. Local Time: The default time within.<br />
2. Set the Time: Select this item to set up time by manual, select the date and time from<br />
each drop-down list.<br />
3. Set Time: Click Set Time to set local PC time on router.<br />
4. Apply & Cancel<br />
Click Apply to activate or Cancel to clear the settings.<br />
5.5.7 UPnP Setting<br />
UPnP (Univsersal Plug and Play) allows all devices on the network to connect by<br />
node-to-node via TCP/IP protocol.<br />
1. Enable/Disable UPnP: Select to enable or disable this service.<br />
2. Apply, Cancel<br />
Click Apply to activate this function or Cancel to clear the setting.<br />
5.5.8 User Account Management<br />
Personal users can use each individual application such as My Status, My Webcam and<br />
My Document. This section is to set the user’s right. Also, all the users’ rights will be<br />
showed in User Account List and allowed to edit or delete by clicking the linking text.<br />
195 Version 1.0
1. Max Login User: Set up the maximum users to log in at the same time, select the<br />
number from drop-down list. If you want to change the maximum login users only<br />
without changing user’s information, please click on OK button after select login user’s<br />
number.<br />
2. User Name: Create the user name in this blank.<br />
3. Password: Set up the user’s password.<br />
4. User Right: Check to allow set-user accessing Samba folder, monitoring from<br />
webcam or using FTP server.<br />
5. Activated: Click On to allow the user’s right to be applied immediately.<br />
6. Add, Apply & Cancel<br />
After finishing the above, click Add to create user account. Click Apply to add set-user<br />
into the account list or Cancel to clear the settings on this page.<br />
196 Version 1.0
7. User Account List<br />
The list shows all users’ names, passwords, status and rights.<br />
5.5.9 Folder Management<br />
Easy to check all the USB storage devices connected to <strong>3.5G</strong> <strong>plus</strong> <strong>WLAN</strong> <strong>Mobile</strong> <strong>Server</strong><br />
<strong>Router</strong>, view the entire data folder inside each storage devices, and you can manage the<br />
disk formatting / partition via clicking the button on this page.<br />
1. Select the USB Disk and click OK for refreshing all disks before you perform disk<br />
partition, and the Unplug button appears afterwards.<br />
2. To partition/format the disk, please select the disk and click on Format button.<br />
3. Moreover, if you want to view the data inside the disk, please go to 5.2.7 FTP Sever<br />
Setup to enable FTP server and then click on Disk Explorer to view all the folders<br />
inside the device.<br />
Notice: You have to click on Unplug button before removing the USB device from <strong>3.5G</strong> <strong>plus</strong> <strong>WLAN</strong> <strong>Mobile</strong><br />
<strong>Server</strong> <strong>Router</strong>.<br />
197 Version 1.0
5.5.10 Email Alert<br />
To monitor router activity, you can run on a local PC or a remote one elsewhere on the<br />
Internet. And <strong>3.5G</strong> <strong>plus</strong> <strong>WLAN</strong> <strong>Mobile</strong> <strong>Server</strong> <strong>Router</strong> provides the email alert facility so that<br />
the log messages can be packed as an e-mail for someone who wants to receive these<br />
messages by scheduled time. In the following, here explains how to set up the email alert<br />
function.<br />
198 Version 1.0
1. Email Alert: Check the enable box to activate the email alert service.<br />
2. SMTP <strong>Server</strong>: Specify an IP address of the SMTP server which can send mails from<br />
your <strong>3.5G</strong> <strong>plus</strong> <strong>WLAN</strong> <strong>Mobile</strong> <strong>Server</strong> <strong>Router</strong> to the recipients’ mailboxes directly.<br />
3. Your Mail (from): Enter the email address indicated the sending location.<br />
4. SMTP Auth: If the email alert needs to be sent via SMTP authentication, please check<br />
this item, and then enter the required account and password.<br />
5. Account: Enter the email account from which you want to send the alert.<br />
6. Password: Enter the email account password to validate.<br />
7. Email Address (To): Enter the email address where to receive the alert.<br />
8. Schedule: Arrange to send the alert when event happens or by regular time.<br />
9. Add, Apply & Cancel<br />
After finishing the above, click Add to set up the rule into email alert list. Then, click<br />
Apply to save or Cancel to clear the settings on this page.<br />
10. Email Alert List<br />
Display, edit or delete a list of relative information in regarding to the above mentioned.<br />
11. Refresh & Delete<br />
Click on Refresh to renew the login data and other system status information, or click<br />
on Delete to clear these logs.<br />
5.6 Log & Status<br />
<strong>3.5G</strong> <strong>plus</strong> <strong>WLAN</strong> <strong>Mobile</strong> <strong>Server</strong> <strong>Router</strong> provides the log list, connection status and user’s<br />
account.<br />
5.6.1 Network Configuration<br />
Network Configuration shows current status of wireless connection and plugged USB<br />
devices.<br />
Click Refresh if you wish to update the screen list.<br />
199 Version 1.0
5.6.2 User Account List<br />
This section shows all users’ information.<br />
Check the user name, status and opened directory/file on screen.<br />
5.6.3 Event Log<br />
<strong>3.5G</strong> <strong>plus</strong> <strong>WLAN</strong> <strong>Mobile</strong> <strong>Server</strong> <strong>Router</strong> provides system logs for review.<br />
200 Version 1.0
The system status log shows logging time, type and detail information as below. Click<br />
Refresh to update.<br />
5.7 Logout<br />
Click Logout on the bottom menu to exit and go back to login home page.<br />
5.8 Personal Configuration<br />
Open a Microsoft Internet Explorer, Mozilla Firefox or Apple Safari browser, and<br />
enter http://10.64.64.64 (Default Gateway) into browser’s blank field.<br />
Notice: If the homepage doesn’t appear, please check whether the TCP/IP configuration is obtaining IP<br />
address automatically or not. If you don’t know how to do this, please refer to 1.5 Get your IP<br />
Automatically & Manually.<br />
201 Version 1.0
Homepage<br />
Click Personal Panel and log in with your own user account. (If you can’t access your<br />
personal account, please check with administrator for validation.)<br />
Personal Panel<br />
Screen below shows every login user’s access rights, including Anonymous, My<br />
Document, My Webcam and My Status.<br />
202 Version 1.0
<strong>3.5G</strong> <strong>plus</strong> <strong>WLAN</strong> <strong>Mobile</strong> <strong>Server</strong> <strong>Router</strong> provides personal control panel for every login<br />
user’s entrance to each application screen, please click on each icon for application. The<br />
icons appear in gray color can’t be clicked if the user doesn’t have the right to use that<br />
function; even though there is none to be set, the user can still apply My Status.<br />
Notice: The available access rights are depended on administrator’s authorization in 5.5.8 User Account<br />
Management.<br />
5.8.1 Anonymous<br />
“Anonymous” shows all the files stored in USB HDD by<br />
administrator and allows any login user to check the<br />
folder and copy files to the HD via Internet. The following<br />
is the detail description.<br />
Click Anonymous to access the shared folder created by administrator and freely<br />
download those files underneath to personal hard drives.<br />
203 Version 1.0
Notice: If you can’t access Anonymous folder, please check with administrator to enable your FTP server<br />
rights. Files under this directory are only for downloading, but not for uploading, deleting, or edting.<br />
5.8.2 My Document<br />
“My Document” shows all the files in USB HDD under each<br />
user’s account. Login user can also create the folder or copy<br />
files into the HD directly via Internet. The illustrated below is<br />
the detail description of folder inside.<br />
Click My Document and opens another web page to show all the files in your own folder.<br />
Notice: If you can’t access this folder, please check with administrator to enable your FTP server rights.<br />
204 Version 1.0
5.8.3 My Webcam<br />
“My Webcam” application allows you to view the real time<br />
image when the web camera is on.<br />
Click My Webcam, and the system pops up a new window to display real time image as the<br />
example below shows.<br />
Notice: If the image from webcam can’t be viewed, it may be caused by Internet security setting and needs to<br />
be corrected or installed with the Java program.<br />
5.8.4 My Status<br />
“My Status” shows all the login information for your<br />
personal account.<br />
Click Main Menu on the left to go back main control panel and other applications.<br />
205 Version 1.0
Notice: All above usage information is based on administrator’s setup.<br />
5.9 Site Map<br />
<strong>3.5G</strong> <strong>plus</strong> <strong>WLAN</strong> <strong>Mobile</strong> <strong>Server</strong> <strong>Router</strong> provides site map clicking for each icon to carry out<br />
the easy setup from the home page.<br />
206 Version 1.0
Chapter 6 DDNS Service Application<br />
DDNS is a service changes the dynamic IP to the static IP. The settings of DDNS can solve<br />
the problem of being given the different IP by router every time. After setting the <strong>Router</strong>,<br />
your host name would correspond to your dynamic IP. Moreover, via the host name<br />
application, it could be easier for you to use FTP, Webcam and Printer remotely.<br />
Dynamic DNS allows you to make an assumed name as a dynamic IP address to a static<br />
host name. Please configure the dynamic DNS below. Please select Dynamic DNS under<br />
the IP Config folder, and follow the instructions below to enter the Dynamic DNS page to<br />
configure the settings you want.<br />
If you don’t have a DDNS account, please follow the steps to complete your DDNS with<br />
Dynamic IP settings.<br />
【Step 1】<br />
First access the Internet and fill http://www.dyndns.com/ into the address field of your web<br />
browser, then click Create Account.<br />
【Step 2】<br />
Fill in the form as required, and then click on Create Account button.<br />
207 Version 1.0
208 Version 1.0
【Step 3】<br />
When you got this account created message, close it, and check your mailbox. You would<br />
get a mail from DynDNS website.<br />
【Step 4】<br />
Click on the indicated address within your mail to confirm.<br />
【Step 5】<br />
Click on login.<br />
【Step 6】<br />
Click My Services after logging in.<br />
209 Version 1.0
【Step 7】<br />
Click Add New Hostname.<br />
【Step 8】<br />
Put in your favorite hostname and service type, and then click Create Host after finished.<br />
210 Version 1.0
【Step 9】<br />
Your hostname has been created when you see the following page.<br />
Chapter 7 Q & A<br />
7.1 Installation<br />
1. Q: Where is the XDSL <strong>Router</strong> installed on the network?<br />
A: In a typical environment, the <strong>Router</strong> is installed between the XDSL line and the LAN.<br />
Plug the XDSL <strong>Router</strong> into the XDSL line on the wall and Ethernet port on the Hub<br />
(switch or computer).<br />
2. Q: Why does the throughput seem slow?<br />
A: To achieve maximum throughput, verify that your cable doesn’t exceed 100 meter. If<br />
you have to do so, we advise you to purchase a bridge to place it in the middle of the<br />
route in order to keep the quality of transmitting signal. Out of this condition you<br />
would better test something else.<br />
• Verify network traffic does not exceed 37% of bandwidth.<br />
• Check to see that the network does not exceed 10 broadcast messages per<br />
second.<br />
• Verify network topology and configuration.<br />
7.2 LED<br />
1. Q: Why doesn’t <strong>3.5G</strong> <strong>plus</strong> <strong>WLAN</strong> <strong>Mobile</strong> <strong>Server</strong> <strong>Router</strong> power up?<br />
A: Check if the output voltage is suitable, or check if the power supply is out of order.<br />
211 Version 1.0
2. Q: The Internet browser still cannot find or connect to <strong>3.5G</strong> <strong>plus</strong> <strong>WLAN</strong> <strong>Mobile</strong><br />
<strong>Server</strong> <strong>Router</strong> after verifying the IP address and LAN cable, the changes<br />
cannot be made, or password is lost.<br />
A: In case <strong>3.5G</strong> <strong>plus</strong> <strong>WLAN</strong> <strong>Mobile</strong> <strong>Server</strong> <strong>Router</strong> is inaccessible, you can try to restore<br />
its factory default settings. Please press the “Reset” button and keep it pressed for<br />
over 7 seconds and the light of STATUS will vanish. The LEDs will flash again when<br />
reset is successful.<br />
3. Q: Why does <strong>3.5G</strong> <strong>plus</strong> <strong>WLAN</strong> <strong>Mobile</strong> <strong>Server</strong> <strong>Router</strong> shut down unexpectedly?<br />
A: Re-plug your power adapter. Then, check the STATUS indicator; if it is off, the<br />
internal flash memory is damaged. For more help, please contact with your provider.<br />
7.3 IP Address<br />
1. Q: What is the default IP address of the router for LAN port?<br />
A: The default IP address is 192.168.1.1 with subnet mask 255.255.255.0<br />
2. Q: I don't know my WAN IP.<br />
A: There are two ways to know.<br />
Way 1: Check with your Internet Service Provider.<br />
Way 2: Check the setting screen of <strong>3.5G</strong> <strong>plus</strong> <strong>WLAN</strong> <strong>Mobile</strong> <strong>Server</strong> <strong>Router</strong>. Click<br />
on Status & Log item to select Network Configuration on the Main Menu.<br />
WAN IP is shown on the WAN interface.<br />
3. Q: How can I check whether I have static WAN IP Address?<br />
A: Consult your ISP to confirm the information, or check Network Configuration in<br />
<strong>3.5G</strong> <strong>plus</strong> <strong>WLAN</strong> <strong>Mobile</strong> <strong>Server</strong> <strong>Router</strong>’s Main Menu.<br />
4. Q: Will the <strong>Router</strong> allow me to use my own public IPs and Domain, or do I have to<br />
use the IPs provided by the <strong>Router</strong>?<br />
A: Yes, the <strong>Router</strong> mode allows for customization of your public IPs and Domain.<br />
212 Version 1.0
7.4 OS Setting<br />
1. Q: Why can’t my computer work online after connecting to <strong>3.5G</strong> <strong>plus</strong> <strong>WLAN</strong><br />
<strong>Mobile</strong> <strong>Server</strong> <strong>Server</strong> <strong>Router</strong>?<br />
A: It’s possible that your Internet protocol (TCP/IP) was set to use the following IP<br />
address. Please do as the following steps. (Windows 2000 & XP) Start>Settings><br />
Network and Dial-up Connections>double click on Internet Protocol(TCP/IP)><br />
select obtain IP address automatically> Click on OK button. Then, open Internet<br />
browser for testing. If you still can’t go online, please test something else below.<br />
• Verify network configuration by ensuring that there are no duplicate IP addresses.<br />
• Power down the device in question and ping the assigned IP address of the<br />
device. Ensure no other device responds to that address.<br />
• Check that the cables and connectors or use another LAN cable.<br />
2. Q: Why can't I connect to the router's configuration utility?<br />
A: Possible Solution 1: Make sure that your Ethernet connect properly and securely.<br />
Make sure that you've plugged in the power cord.<br />
Possible Solution 2: Make sure that your PC is using an IP address within the range<br />
of 192.168.1.2 to 192.168.1.254. Make sure that the address of the subnet mask is<br />
255.255.255.0. If necessary, the Default Gateway data should be at 192.168.1.1. To<br />
verify these settings, perform the following steps:<br />
Windows 95, 98, or My Users:<br />
1. Click on Windows Start > click on Run > input winipcfg > click on OK button.<br />
2. Check the IP Address, Subnet Mask, Default Gateway data. Is this data<br />
correct? If the data isn't correct, click on Release All. Then click on Renew All.<br />
Windows NT, 2000, or XP Users:<br />
1. Click on Windows Start > click on Run > input cmd > click on OK button.<br />
2. At the DOS prompt, type ipconfig/all.<br />
3. Check the IP Address, Subnet Mask, Default Gateway data. Is this data<br />
correct? If the data isn't correct. Please input ipconfig/release > press Enter ><br />
input ipconfig/renew > press Enter.<br />
213 Version 1.0
Possible Solution 3: Verify the connection setting of your Web browser and verify<br />
that the HTTP Proxy feature of your Web browser is disabled. Make these<br />
verifications so that your Web browser can read configuration pages inside your<br />
router. Launch your Web browser. Internet Explorer Users:<br />
1. Click on Tools > Internet Options > Connections tab.<br />
2. Select never dial a connection, click on Apply button, and then click on OK<br />
button.<br />
3. Click on Tools and then click on Internet Options.<br />
4. Click on Connections and then click on LAN Settings.<br />
5. Make sure none of the check boxes are selected and click on OK button.<br />
6. Click on OK button.<br />
Netscape Navigator Users:<br />
1. Click on Edit > Preferences > double-click Advanced in the Category window.<br />
2. Click on Proxies > select Direct connection to the Internet > click on OK<br />
button.<br />
3. Click on Edit again and then click on Preferences.<br />
4. Under category, double-click on Advanced and then click on Proxies.<br />
5. Select Direct connection to the Internet and click on OK button.<br />
6. Click on OK button.<br />
3. Q: Web page hangs, corrupt downloads, or nothing but junk characters is being<br />
displayed on the screen. What do I need to do?<br />
A: Force your NIC to 10Mbps or half duplex mode, and turn off the "Auto-negotiate"<br />
feature of your NIC as a temporary measure. (Please look at the Network Control<br />
Panel, in your Ethernet Adapter's Advanced Properties tab.)<br />
4. Q: Why can't I connect to the Web Configuration?<br />
A: you can remove the proxy server settings in your web browser.<br />
7.5 <strong>3.5G</strong> <strong>plus</strong> <strong>WLAN</strong> <strong>Mobile</strong> <strong>Server</strong> <strong>Router</strong> Setup<br />
1. Q: Why does <strong>3.5G</strong> <strong>plus</strong> <strong>WLAN</strong> <strong>Mobile</strong> <strong>Server</strong> <strong>Router</strong>’s setup page shut down<br />
unexpectedly?<br />
214 Version 1.0
A: If one of the pages appears incompletely in <strong>3.5G</strong> <strong>plus</strong> <strong>WLAN</strong> <strong>Mobile</strong> <strong>Server</strong> <strong>Router</strong>’s<br />
setup pages, please click on Logout item on the Main Menu before shutting it down.<br />
Don’t keep it working. Then, close Internet browser and open it again for going back<br />
to the previous page.<br />
2. Q: Why can’t my USB devices and LAN ports work properly after setting the<br />
DHCP?<br />
A: There are two rules over here.<br />
Rule1: After connecting USB devices, please reboot your <strong>Router</strong>.<br />
Rule2: Before finishing the DHCP setup, please don’t connect any computer to LAN<br />
ports, because the conflict of having the same IP may occur and cause some<br />
computers a lot of trouble.<br />
※Notice: Make sure that you always click on the Apply button after<br />
configuring each setting. And in order to let other LAN ports work properly,<br />
please reboot your PC.<br />
3. Q: I don’t know how to configure DHCP.<br />
A: DHCP is commonly used in the large local network. It allows you to manage and<br />
distribute IP addresses from 2 to 254 throughout your local network via <strong>3.5G</strong> <strong>plus</strong><br />
<strong>WLAN</strong> <strong>Mobile</strong> <strong>Server</strong> <strong>Router</strong>. Without DHCP, you would have to configure each<br />
computer separately. It’s very troublesome. Please Open Internet browser > Input<br />
192.168.1.1 in the website blank field > Select DHCP <strong>Server</strong> under the IP Config<br />
Menu. For more information, please refer to 3.3.2 (<strong>Router</strong> Mode) or 4.3.1 (AP<br />
Mode).<br />
4. Q: How do I upgrade the firmware of <strong>3.5G</strong> <strong>plus</strong> <strong>WLAN</strong> <strong>Mobile</strong> <strong>Server</strong> <strong>Router</strong>?<br />
A: Periodically, a new Flash Code is available for <strong>3.5G</strong> <strong>plus</strong> <strong>WLAN</strong> <strong>Mobile</strong> <strong>Server</strong><br />
<strong>Router</strong> on your product supplier’s website. Ideally, you should update <strong>3.5G</strong> <strong>plus</strong><br />
<strong>WLAN</strong> <strong>Mobile</strong> <strong>Server</strong> <strong>Router</strong>’s Flash Code using Firmware Upgrade on the System<br />
Management menu of <strong>3.5G</strong> <strong>plus</strong> <strong>WLAN</strong> <strong>Mobile</strong> <strong>Server</strong> <strong>Router</strong> Settings.<br />
5. Q: My <strong>3.5G</strong> <strong>plus</strong> <strong>WLAN</strong> <strong>Mobile</strong> <strong>Server</strong> <strong>Router</strong> cannot connect to the ISP?<br />
A: There are three possible solutions.<br />
1. Check the Cable/XDSL modem is power on.<br />
2. Check the Cable/XDSL link light is on to verify a good physical connection.<br />
215 Version 1.0
3. Check the WAN port LED to verify if the Cable/XDSL modem is connected to the<br />
router:<br />
If your ISP Login method is following, please make sure the username and<br />
password are correct or not.<br />
If your ISP is using dynamic IP addressing (DHCP) then the DHCP protocol does not<br />
have the authentication feature. Some Cable service providers often use the<br />
following to determine user’s identification.<br />
6. Q: Why is that I can ping to outside hosts, but cannot access Internet websites?<br />
A: Check the DNS server settings on your PC. You should get the DNS servers<br />
settings from your ISP. If your PC is running a DHCP client, remove any DNS IP<br />
address setting. As the router assign the DNS settings to the DHCP-client-enabled<br />
PC.<br />
7. Q: <strong>3.5G</strong> <strong>plus</strong> <strong>WLAN</strong> <strong>Mobile</strong> <strong>Server</strong> <strong>Router</strong> couldn’t save the setting after click on<br />
Apply button?<br />
A: <strong>3.5G</strong> <strong>plus</strong> <strong>WLAN</strong> <strong>Mobile</strong> <strong>Server</strong> <strong>Router</strong> will start to run after the setting finished<br />
applying, but the setting isn’t written into memory. Here we suggest if you want to<br />
make sure the setting would be written into memory, please reboot the device via<br />
Reboot under System Management directory.<br />
7.6 Wireless LAN<br />
1. Q: Why couldn’t my wireless notebook work on-line after checking?<br />
A: Generally, Wireless networks can sometimes be very complicated to set up,<br />
particularly if you're dealing with encryption and products from different vendors.<br />
Any number of variables can keep your workstations from talking to each other.<br />
Let's go over some of more common ones.<br />
For starters, verify that your router and your workstation are using the same SSID<br />
descriptions. SSID acts as a password when a mobile device tries to connect to the<br />
wireless network. The SSID also differentiates one <strong>WLAN</strong> from another, so all<br />
access points and all devices attempting to connect to a specific <strong>WLAN</strong> must use<br />
the same SSID. A workstation will not be permitted to connect to the network unless<br />
216 Version 1.0
it can provide this unique identifier. This is similar to the function of your network's<br />
Workgroup or Domain name.<br />
When you're experiencing conductivity problems, it is always best to keep things<br />
simple. So next you are going to do is that, please disable any WEP encryption you<br />
might have configured.<br />
Successful implementation of encryption also includes the use of a shared key. A<br />
HEX key is the most common, but other formats are also used. This key identifies<br />
the workstation to the router as a trusted member of this network. Different<br />
manufacturers can implement this key technology in ways that might prevent them<br />
from working correctly with another vendor's products. So pay attention to detail is<br />
going to be the key to a successful installation.<br />
Next make sure the router and the NIC are configured to use the same<br />
communications channel. There are normally 11 of them, and the default channel<br />
can also vary from vendor to vendor. You might also want to confirm that the router<br />
has DHCP services enabled and an address pool configured. If not, the NIC won't<br />
be able to pick up an IP address. I have run across a few access points that offer<br />
DHCP services but do not assign all of the needed IP information to the NIC. As a<br />
result, I was able to connect to the network, but could not browse the web. The point<br />
is, don't assume anything. Verify for yourself that all of the required settings are<br />
being received by the workstation.<br />
Finally, you might want to keep the system you're trying to configure in the same<br />
room as the router, at least during the initial configuration, in order to minimize<br />
potential interference from concrete walls or steel beams.<br />
2. Q: My PC can’t locate the Wireless Access Point.<br />
A: Check the following:<br />
• Your PC is set to Infrastructure Mode. (Access Points are always in<br />
Infrastructure Mode.)<br />
• The SSID on your PC and the Wireless Access Point are the same. Remember<br />
that the SSID is case-sensitive. So, for example “Workgroup” does NOT match<br />
“workgroup”.<br />
• Both your PC and the Wireless Access Point must have the same setting for<br />
WEP. The default setting for the Wireless <strong>Router</strong> is disabled, so your wireless<br />
station should also have WEP disabled.<br />
217 Version 1.0
• If WEP is enabled on the Wireless <strong>Router</strong>, your PC must have WEP enabled,<br />
and the key must match.<br />
• If the Wireless <strong>Router</strong>’s Wireless screen is set to Allow LAN access to selected<br />
Wireless Stations only, then each of your Wireless stations must have been<br />
selected, or access will be blocked.<br />
• To see if radio interference is causing a problem, see if connection is possible<br />
when close to the Wireless Access Point. Remember that the connection range<br />
can be as little as 100 feet in poor environments.<br />
3. Q: Wireless connection speed is very slow.<br />
A: The wireless system will connect at highest possible speed, depending on the<br />
distance and the environment. To obtain the highest possible connection speed, you<br />
can experiment with following:<br />
• Access Point location: Try adjusting the location and orientation of the Access<br />
Point.<br />
• Wireless Channel: If interference is the problem, changing to another channel<br />
may show a marked improvement.<br />
• Radio Interference: Other devices may be causing interference. You can<br />
experiment by switching other devices off, and see if this helps. Any “noisy”<br />
devices should be shielded or relocated.<br />
• RF Shielding: Your environment may tend to block transmission between the<br />
wireless stations. This will mean high access speed is only possible when close<br />
to the Access Point.<br />
4. Q: Some applications do not run properly when using the Wireless <strong>Router</strong>.<br />
A: The Wireless <strong>Router</strong> processes the data passing through it, so it is not transparent.<br />
Use the Special Application feature to allow the use of Internet applications which do<br />
not function correctly. If this does solve the problem, you can use the DMZ function.<br />
This should work with almost every application, but:<br />
• It is a security risk, since the firewall is disabled.<br />
• Only one (1) PC can use this feature.<br />
5. Q: I can’t connect to the Wireless <strong>Router</strong> to configure it.<br />
A: Check the following:<br />
218 Version 1.0
• The Wireless <strong>Router</strong> is properly installed, LAN connections are OK, and it is<br />
powered ON.<br />
• Make sure that your PC and the Wireless <strong>Router</strong> are on the same network<br />
segment.<br />
• If your PC is set to “Obtain an IP Address automatically” (DHCP client), restart it.<br />
• If your PC uses a Fixed (Static) IP address, make sure that it is using an IP<br />
Address within the range 192.168.1.129 to 192.168.1.253 and thus compatible<br />
with the Wireless <strong>Router</strong>’s default IP Address of 192.168.1.254. Also, the Network<br />
Mask should be set to 255.255.255.0 to match the Wireless <strong>Router</strong>. In Windows,<br />
you can check these settings by using Control Panel ~ Network to check the<br />
Properties for the TCP/IP protocol.<br />
6. Q: The WinXP wireless interface couldn’t communicate the WEP with <strong>3.5G</strong> <strong>plus</strong><br />
<strong>WLAN</strong> <strong>Mobile</strong> <strong>Server</strong> <strong>Router</strong>’s wireless interface.<br />
A: The default WEP of WinXP is Authentication Open System - WEP, but the WEP of<br />
<strong>3.5G</strong> <strong>plus</strong> <strong>WLAN</strong> <strong>Mobile</strong> <strong>Server</strong> <strong>Router</strong> is only for Shared Key - WEP, it caused both<br />
sides couldn’t communicate. Please select the WEP of WinXP from Authentication<br />
Open System to Pre-shared Key - WEP, and then the WEP wireless interface<br />
between WinXP and <strong>3.5G</strong> <strong>plus</strong> <strong>WLAN</strong> <strong>Mobile</strong> <strong>Server</strong> <strong>Router</strong> would be communicated.<br />
7.7 Samba <strong>Server</strong><br />
1. Q: Why can’t I access the Samba Folder via my network places while connecting<br />
to <strong>3.5G</strong> <strong>plus</strong> <strong>WLAN</strong> <strong>Mobile</strong> <strong>Server</strong> <strong>Router</strong>?<br />
A: First, you should check if you have connected assigned storage device properly.<br />
Then enable Samba <strong>Server</strong> afterwards, so that it can be accessed.<br />
7.8 USB FTP <strong>Server</strong><br />
1. Q: How does <strong>3.5G</strong> <strong>plus</strong> <strong>WLAN</strong> <strong>Mobile</strong> <strong>Server</strong> <strong>Router</strong> assign numbers for the Hard Disk?<br />
A: The USB FTP operation of <strong>3.5G</strong> <strong>plus</strong> <strong>WLAN</strong> <strong>Mobile</strong> <strong>Server</strong> <strong>Router</strong> is to assign the<br />
numbers as a, b, c, d when catch different HDs, if there are 2 or more main partitions<br />
in the same HD, then the assign number will <strong>plus</strong> 1,2,3,4 (e.g. a1, a2, a3, a4); and<br />
the logic partition will be assigned number from 5 (e.g. a5, a6, a7……).<br />
Example: There are 2 hard disks, one of them has 1 main partition and 2 logic<br />
partitions, and the other one has 2 main partitions. Both these 2 hard disks connect<br />
219 Version 1.0
to <strong>3.5G</strong> <strong>plus</strong> <strong>WLAN</strong> <strong>Mobile</strong> <strong>Server</strong> <strong>Router</strong>’s USB port, and the screen will show the<br />
router’s data folder as a1, a5, a6, b1, b2 when log in FTP.<br />
※ Notice: To authorize the right to each user who uses <strong>3.5G</strong> <strong>plus</strong> <strong>WLAN</strong> <strong>Mobile</strong><br />
<strong>Server</strong> <strong>Router</strong> FTP function, please go to the router’s data folder to set up.<br />
3. Q: How to Add Account under USB FTP <strong>Server</strong>?<br />
A: To add a new Account, Username and Password are not allowed to leave with blank<br />
space, and the password should be 1 to 8 letters. When input the words, the<br />
character will always show hexed (6) “*” form for the security scruple. For adding the<br />
new users, please click on Add button to add the name into User Account List, and<br />
then the user can start to use the function of <strong>3.5G</strong> <strong>plus</strong> <strong>WLAN</strong> <strong>Mobile</strong> <strong>Server</strong> <strong>Router</strong>.<br />
4. Q: How to remove or revise the files on FTP server?<br />
A: If there is any file needing to be revised, here suggests downloading the file to the<br />
HDD of PC and modifying it locally. Then upload to FTP server again after revised.<br />
7.9 Webcam <strong>Server</strong><br />
1. Q: I cannot view Webcam’s video screen from WAN.<br />
A: Please follow the steps below.<br />
Step1. Open Internet browser and enter http://192.168.1.1 in the address field.<br />
Step2. Enter admin in both "User Name" and "Password" fields. Then, click on<br />
Login button.<br />
Step3. Click on Web Camera <strong>Server</strong> under <strong>Server</strong> directory of the Main Menu.<br />
Step4. Then, select Enable to turn on Webcam Access from WAN.<br />
2. Q: Why is that the image from Webcam is so vague?<br />
A: Please adjust the circular-frame around the Webcam’s Len, until the image from<br />
Webcam showed on PC’s screen is clear.<br />
3. Q: Can I use two Webcams at the same time?<br />
A: No, <strong>3.5G</strong> <strong>plus</strong> <strong>WLAN</strong> <strong>Mobile</strong> <strong>Server</strong> <strong>Router</strong> supports only one Webcam to monitor.<br />
220 Version 1.0
4. Q: Can I use any digital camera which supports webcam function to connect to<br />
<strong>3.5G</strong> <strong>plus</strong> <strong>WLAN</strong> <strong>Mobile</strong> <strong>Server</strong> <strong>Router</strong>?<br />
A: No, <strong>3.5G</strong> <strong>plus</strong> <strong>WLAN</strong> <strong>Mobile</strong> <strong>Server</strong> <strong>Router</strong> doesn’t support digital camera.<br />
5. Q: Does <strong>3.5G</strong> <strong>plus</strong> <strong>WLAN</strong> <strong>Mobile</strong> <strong>Server</strong> <strong>Router</strong> support all Webcam models?<br />
A: No, <strong>3.5G</strong> <strong>plus</strong> <strong>WLAN</strong> <strong>Mobile</strong> <strong>Server</strong> <strong>Router</strong> only supports the Webcams possessing<br />
OV511, OV511+, SAA8115HL, Sonix PcCam, Sonix PcCam+, Sonix sn9c102P<br />
Hv7131R, Sonix sn9c120 OV7648, Generic spca536a, Z-star Vimicro 0301p, Z-star<br />
Vimicro Zc0302 or SAA8116HL chipsets.<br />
6. Q: Why couldn’t the image of USB Webcam be seen from WAN?<br />
A: Besides making sure to enable the USB Webcam Access from WAN, the Remote<br />
Management should be enabled as well, so that the image of USB Webcam could be<br />
seen from WAN.<br />
7.10 Printer <strong>Server</strong><br />
1. Q: Why can’t my printer work?<br />
A: For more details, please refer to Chapter 3.5.5 Print <strong>Server</strong> in the USB Application.<br />
Maybe <strong>3.5G</strong> <strong>plus</strong> <strong>WLAN</strong> <strong>Mobile</strong> <strong>Server</strong> <strong>Router</strong> doesn’t support your printer. You can<br />
contact with us to get more updated information about printer driver support.<br />
2. Q: Printer is beginning printing, but it prints slowly and with unidentified words<br />
or codes. How could it happen?<br />
A: Your printer’s driver is lost or incompatible with your router. Please set up the printer’s<br />
driver again. If you don’t have the appropriate driver or want to get a compatible one,<br />
please contact with your printer supplier.<br />
7.11 Support<br />
1. Q: Why can’t the NTFS hard disk be used with <strong>3.5G</strong> <strong>plus</strong> <strong>WLAN</strong> <strong>Mobile</strong> <strong>Server</strong><br />
<strong>Router</strong>?<br />
A: <strong>3.5G</strong> <strong>plus</strong> <strong>WLAN</strong> <strong>Mobile</strong> <strong>Server</strong> <strong>Router</strong> doesn’t support the NTFS hard disk. It only<br />
supports EXT3 and FAT32 file systems.<br />
221 Version 1.0
2. Q: Why can’t my USB devices work on <strong>3.5G</strong> <strong>plus</strong> <strong>WLAN</strong> <strong>Mobile</strong> <strong>Server</strong> <strong>Router</strong>?<br />
A: Maybe your USB devices and <strong>3.5G</strong> <strong>plus</strong> <strong>WLAN</strong> <strong>Mobile</strong> <strong>Server</strong> <strong>Router</strong> are not<br />
compatible. So if you want to know whether your inserted device such as USB Web<br />
Camera, USB Printer or USB HDD corresponds with <strong>3.5G</strong> <strong>plus</strong> <strong>WLAN</strong> <strong>Mobile</strong> <strong>Server</strong><br />
<strong>Router</strong>, please check with your product supplier.<br />
3. Q: What is the maximum number of IP addresses that the XDSL <strong>Router</strong> will<br />
support?<br />
A: The <strong>Router</strong> will support to 253 IP addresses with NAT mode.<br />
5. Q: Is the <strong>Router</strong> cross-platform compatible?<br />
A: Any platform that supports Ethernet and TCP/IP is compatible with the <strong>Router</strong>.<br />
7.12 Others<br />
1. Q: Why can’t I receive corrupted FTP downloads?<br />
A: If you are experiencing corrupted files when you download a file with your FTP client,<br />
try using another FTP program.<br />
2. Q: Why does the router dial out for PPPoE mode very often?<br />
A: Normally some of game, music or anti-virus program will send out packets that trigger<br />
the router to dial out, you can close these programs. Or you can set the idle time to 0,<br />
then control to dial out manually.<br />
3. Q: What can I do if there is already a DHCP server in LAN?<br />
A: If there are two DHCP servers existing on the same network, it may cause conflict<br />
and generate trouble. In this situation, we suggest to disable DHCP server in router<br />
and configure your PC manually.<br />
7.13 USB Device<br />
1. Q: How many USB devices can be connected to the Product?<br />
A: <strong>3.5G</strong> <strong>plus</strong> <strong>WLAN</strong> <strong>Mobile</strong> <strong>Server</strong> <strong>Router</strong> supports maximum of 2 USB ports.<br />
222 Version 1.0
Chapter 8 Appendices<br />
<strong>3.5G</strong> <strong>plus</strong> <strong>WLAN</strong> <strong>Mobile</strong> <strong>Server</strong> <strong>Router</strong> supports the listed USB devices as follows.<br />
8.1 Printer<br />
<strong>3.5G</strong> <strong>plus</strong> <strong>WLAN</strong> <strong>Mobile</strong> <strong>Server</strong> <strong>Router</strong> supports LPR protocol, while the printer drivers can<br />
be installed on Windows 98/2000/XP platforms, the connected printer works for the unit as<br />
well.<br />
• If you need more information of supported models, please check the following websites.<br />
http://www.sane-project.org/sane-mfgs.html<br />
http://hplip.sourceforge.net/<br />
8.2 Web Camera<br />
<strong>3.5G</strong> <strong>plus</strong> <strong>WLAN</strong> <strong>Mobile</strong> <strong>Server</strong> <strong>Router</strong> supports OV511, OV511+, OV518, OV518+,<br />
SAA8115HL and SAA8116HL chipsets; besides, adding spca5xx/LE driver into firmware as<br />
the table below shows.<br />
Vendor Name Product Name Chipset<br />
Aiptek HyperVcam <strong>Mobile</strong> OV511+<br />
Aiptek HyperVcam Fun OV511+<br />
Aiptek HyperVcam Home OV511+<br />
Askey VC010 SAA8115HL<br />
Alpha Vision Tech. AlphaCam SE (model AC-520) OV511<br />
Avaks AvCam USB-600 OV511<br />
AverMedia Intercam Elite OV511<br />
BestBuy EasyCam U OV511<br />
Creative Labs<br />
WebCam<br />
(model PD1001, alternate version)<br />
OV518<br />
Creative Labs WebCam 3 OV511<br />
Creative Labs WebCam 5 (PID=400c) SAA8116HL<br />
Creative Labs WebCam Plus (Model CT6840) OV511+<br />
Creative Labs<br />
WebCam Plus<br />
("WebCam Mini"; model PD0040)<br />
OV518<br />
Creative Labs WebCam Pro (model PD1030) OV511+<br />
Creative Labs Webcam Pro Ex OV511<br />
D-Link DSB-C100 OV511+<br />
223 Version 1.0
D-Link DSB-C310 OV518 +<br />
D-Link DU-C300 OV511<br />
Elecom UCAM-C1C30 OV511+<br />
Elta WEBCam 8211 PCC OV511/OV511+<br />
Ezonics EZPhone Cam OV518+<br />
Ezonics EZ USB Cam II OV511+<br />
Genius VideoCam Express OV511+<br />
Hawking Tech. PD-300 OV511<br />
Hawking Tech. UC-110 OV511+<br />
Hawking Tech. UC-300 OV511<br />
Hawking Tech. UC-310 OV511<br />
I-View NetView NV300M OV511<br />
Intel Me2Cam OV511+<br />
LG Electronics LPC-UM10 OV511+<br />
LG Electronics LPC-UM15 OV511+<br />
Lifeview USB CapView OV511+<br />
Lifeview RoboCam OV511<br />
Lifetec LT 9388 OV511<br />
Logitech QuickCam 3000 Pro SAA8116HL<br />
Logitech QuickCam 4000 Pro SAA8116HL<br />
Logitech QuickCam Orbit/Sphere SAA8116<br />
Maitech AWK-300 OV511+<br />
Maxxtro CAM22U OV511<br />
Maxell Maxcam (MPCC-1) OV511<br />
Medion MD9388 OV511+<br />
MediaForte MV300 OV511<br />
MediaForte PC Vision 300 OV511<br />
Mustek WCam 3X OV511<br />
Mtekvision Zeca MV402 OV511+<br />
OmniVision OV7110 Eval Board OV511<br />
OmniVision OV511+/OV7120 Eval Board OV511+<br />
OmniVision OV511+/OV7620 Eval Board OV511+<br />
Pretec PCC-600 OV511<br />
Prochips PCA-3100 OV511+<br />
Puretek PT-6007 OV511<br />
Philips PCVC675K "Vesta" SAA8115HL<br />
Philips PCVC680K "Vesta Pro" SAA8115HL<br />
Philips PCVC690K "Vesta Scan" SAA8115HL<br />
Philips PCVC720K/40 "ToUCam XS" OV511<br />
Philips PCVC730K "ToUCam Fun" SAA8116HL<br />
224 Version 1.0
Philips PCVC740K "ToUCam Pro" SAA8116HL<br />
Philips PCVC750K "ToUCam Scan" SAA8116HL<br />
Sotec Sotec Afine Eye SAA8115HL<br />
Suma EON OV511+<br />
Samsung MPC-C10 SAA8115HL<br />
Samsung MPC-C30 SAA8115HL<br />
Samsung Anycam MPC-M10 OV511+<br />
TRENDNet TV-PC100 OV511+<br />
TRENDNet TV-PC300 OV511+<br />
TRENDNet TV-PC301 OV511+<br />
Trust Sp@ceC@m USB OV511<br />
Trust Sp@ceC@m 150 OV511+<br />
Trust Sp@ceC@m 200 OV511+<br />
Trust Sp@ceC@m 300 OV511+<br />
Typhoon WebShot 350 OV518+<br />
TEVion MD9308 OV511+<br />
TCE NetCam 310u OV511<br />
Terratec TerraCam PRO OV511+<br />
Terratec TerraCam USB PRO OV511+<br />
Waytech I-Pac VIC-30 OV511+<br />
Webeye 2000B OV511+<br />
Vendor Name<br />
Product Name<br />
Driver<br />
Spca5xx/LE<br />
Aiptek Aiptek PocketDVII1.3 MPixels spca533a<br />
Aiptek Mini PenCam 2M spca504b<br />
Aiptek PenCam SD 2M spca504b<br />
Aiptek Pocket DV3100 spca533a<br />
Aiptek Pocket DV3500 spca536a<br />
Aiptek Pocket DV5100 spca536a<br />
Aiptek Pocket DV5300 spca536a<br />
Aiptek PocketCam 2M spca504b<br />
Aiptek PocketCam 3M spca504b<br />
Aiptek PocketCam 4M spca533<br />
Aiptek Slim3200 spca533a<br />
Aiptek/Sun<strong>plus</strong> Mini Pencam 1.3 spca504b<br />
Benq DC 1300 spca504b<br />
Benq DC 1500 spca533a<br />
Benq DC 3410 spca533a<br />
225 Version 1.0
Concord Concord 3045 spca536a<br />
Creative Creative Instant Zc0301<br />
Creative Creative Instant Zc0301<br />
Creative Creative Live! Zc0301P<br />
Creative Creative Live!Cam VideoIM Vc301p<br />
Creative Creative notebook pd1171 --<br />
Creative Creative NX Zc0301<br />
Creative Creative NX Pro Zc0301P<br />
Creative Creative NX Pro2 Zc0301P<br />
Creative Creative WebCam Live! Vc301p<br />
Creative Live! Cam Optia --<br />
Creative Live! Cam Optia AF --<br />
Creative Live! Cam Voice --<br />
Creative PC Cam 350 spca504c<br />
Creative PC Cam 600 spca504c<br />
Creative PC Cam 750 spca504b<br />
Creative WebCam Live! Motion --<br />
Creative WebCam Live! Ultra --<br />
Creative WebCam Live! Ultra for Notebooks --<br />
Creative Webcam <strong>Mobile</strong> Zc0301P<br />
Creative Webcam NoteBook Zc0301P<br />
Digital Dream Enigma 1.3 spca504b<br />
Digital Dream Epsilon 1.3 spca533a<br />
Generic Generic vimicro 303b --<br />
Generic Generic Zc0305b --<br />
Genius Dsc-1.3M Smart spca504b-P3<br />
Genius Eye 310 --<br />
Genius Genius eye 311Q sn9c120<br />
Genius Look 1320 --<br />
Genius Look 313 Media --<br />
Genius Look 316 --<br />
Genius Look 320S --<br />
Genius Slim 310NB --<br />
Genius Slim 322 --<br />
Genius Video CAM EYE --<br />
Genius VideoCam Express V2 spca561a<br />
Genius VideoCam GE111 Pac207<br />
226 Version 1.0
Genius VideoCAM Look --<br />
Genius VideoCAM Messenger --<br />
Genius VideoCAM Trek --<br />
Genius VideoCamV2 Zc0301P<br />
Genius VideoCamV3 Zc0301P<br />
jenoptik JDC 21 LCD spca533<br />
JVC GC-A50 spca504b<br />
Kowa Bs-888e spca536<br />
Labtec NoteBooks Zc0302<br />
Labtec Webcam Pro Zc0302<br />
LG Lic-300 sn9c105<br />
Logitech Clicksmart 420 spca504b<br />
Logitech Clicksmart 820 spca533a<br />
Logitech Communicate STX Zc0302<br />
Logitech Communicate STX Vc0302<br />
Logitech NoteBook Deluxe Zc0302<br />
Logitech QuickCam Chat zc030x<br />
Logitech QuickCam IM zc030x<br />
Logitech QuickCam IM zc030x<br />
Logitech QuickCam IM zc030x<br />
Logitech QuickCam IM/Connect zc030x<br />
Logitech QuickCam IM+Sound zc030x<br />
Logitech QuickCam tor Notebook zc030x<br />
Megapix Megapix V4 spca533a<br />
Mercury Cyberpix S550V --<br />
Mercury Peripherals Inc. --<br />
MercuryDigital Mercury Digital Pro 3.1 Mp spca533<br />
Micro Innovation WebCam320 zc030x<br />
Mustek DV 3000 spca533a<br />
Mustek DV4000 spca536a<br />
Mustek Gsmart D30 spca533a<br />
Mustek Gsmart LCD2 spca533a<br />
Mustek Gsmart LCD3 spca533a<br />
Mustek Gsmart mini2 spca504a<br />
Mustek Gsmart mini3 spca504a<br />
Mustek MDC 4000 spca533a<br />
Mustek MDC 5500z spca533a<br />
227 Version 1.0
Mustek Mustek Wcam 300A 2 --<br />
Mustek Mustek WCam300AN --<br />
Mustek WCam300A Zc0301P<br />
Polaroid Ion 80 spca504b<br />
Polaroid PDC2030 spca504b<br />
Polaroid PDC3070 spca533a<br />
Terratec TeraCam2 move1.3 spca504b<br />
8.3 USB Devices<br />
<strong>3.5G</strong> <strong>plus</strong> <strong>WLAN</strong> <strong>Mobile</strong> <strong>Server</strong> <strong>Router</strong> supports FAT16, FAT32 and EXT3 file systems.<br />
1. Flash Drive<br />
Vendor Name Product Name Note<br />
Panram MEMORY BLOCK USB2.0<br />
A-DATA Lover USB2.0<br />
A-DATA My Flash PD1 (512MB) USB2.0<br />
Zynet PD-A2 USB 2.0<br />
Maxtor DiamondMax Plus8 USB 2.0<br />
Kingston Data Traveler 2.0<br />
Shuttle<br />
SFD-0128<br />
Apacer<br />
HandyDrive<br />
PQI<br />
I-Ststick 32MB<br />
Apacer Handy Steno 64MB USB 1.1<br />
ASUS<br />
AI-flash 2 64MB<br />
ASUS<br />
32MB<br />
GENUINE<br />
32MB<br />
NEXS<br />
SD card<br />
Transcend JetFlash 128 MB USB 2.0<br />
SanDisk Curzer Mini Flash 256MB USB 2.0<br />
PQI Cool Drive(U339) 128 MB USB 2.0<br />
KingMax 128MB USB 1.0<br />
Kinggaroo SONA 128MB USB 2.0<br />
2. External Hard Drive<br />
Vendor Name Model No. Chipset Note Tested<br />
Ali m5621 al<br />
√<br />
228 Version 1.0
Ali m5637 al<br />
√<br />
Hi-Speed HD-D14-U2 Ali m5642 a1 FUJI 60G (5400rpm) √<br />
GL811E<br />
√<br />
GL811USB<br />
√<br />
MySon Century CS88186_107 √<br />
Cypress CY7C68300-56PVC √<br />
8.4 Operating Systems<br />
1. MicroSoft: Windows 2000, XP (Chinese/English), Vista<br />
2. Apple: Mac OS X 10.4.7<br />
8.5 Browsers<br />
1. Internet Explorer ver. 6 and 7<br />
2. Firefox ver. 2.0.0.4<br />
3. Safari ver. 2.0.4 or higher version<br />
8.6 Easy Setup<br />
MicroSoft: Windows 2000, XP, Vista<br />
8.7 Communications Regulation Information<br />
Should any consumers need to learn more information, services and supports, please<br />
contact the supplier of your product directly.<br />
229 Version 1.0